Ultimaker
Quick links: Usage • Troubleshooting • Maintenance
| Nickname | Make | Model | Where | Manual | Issue Tracker | Status |
|---|---|---|---|---|---|---|
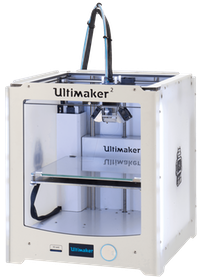
| "Felicity" | Ultimaker B.V. | 2 | Workshop | online | Tool: 3D Printer - Ultimaker 2 | TBC |
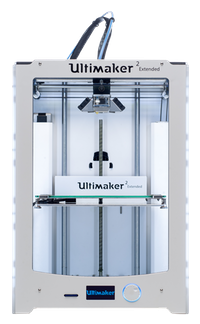
| "Prints Adam" | Ultimaker B.V. | 2 Extended + | Workshop | online | Tool: 3D Printer - Ultimaker 2 Extended + | TBC |
| "Eddie" | Ultimaker B.V. | 2+ | Workshop | online | Tool: 3D Printer - Ultimaker 2+ | TBC |

See full safety information below
These machines print physical 3D objects, making them ideal for prototyping product designs.
The machines are good at replicating a design, but printing can take a long time. If you need high volume, consider using resin or injection moulding instead (you can use a 3D-printed object to cast the moulds).
You design an object using 3D modelling software, then load it in to Cura and export it as a G-code file. The G-code file is then transferred to the 3D printer via an SD card. You select the file (on SD card) to print using the controls on the printer, and then it start printing the physical 3D object. It does this by heating filament (plastic thread) until it melts, then spits tiny blobs (like plastic pixels) iteratively, layer by layer, to build up the 3-dimensional object.
You might need to control the print speed, temperature and several other factors to get the best results.
-
Build volume:
- Ultimaker 2: 22.3 cm (W) × 22.3 cm (H) × 20.5 cm (D)
- Ultimaker 2+ Extended: 22.3 cm (W) × 22.3 cm (H) × 30.5 cm (D)
- Layer resolution: Up to 20 microns
- Print speed: 30 - 300 mm/s
- Travel speed: 30 - 350 mm/s
- Filament diameter: 2.85 mm recommended
- Nozzle diameter: 0.4 mm swappable
- Operating nozzle temperature: 180°C - 260°C
- Operating heated bed temperature: 50°C – 100°C
- Printing technology: Fused Filament Fabrication (FFF)
Note: Prints Adam now has the 2+ Upgrade kit so will need a different profile for slicing. (Using a profile for the 2 series printer will cause the extruder to run backwards!) There are additional nozzles (0.25, 0.6, 0.8mm) in the 3DP supplies cupboard. Instructions for changing the nozzle are here: https://ultimaker.com/en/resources/50623-change-the-nozzle, although it is expected that people will probably carry on using the 0.4mm nozzle as a default.
To use this machine, you'll need to:
- Follow safety precautions
- Design 3D object
- Convert to G-Code
- Set printer filament
- Print the object
Let's get started...
This is a consumer-oriented machine, so it's very safe to use. Just be careful of the "hot end" that does the printing, it gets... hot.
- We recommend you create this using Cura, which is developed by Ultimaker
- It can import most of the common 3D file formats fairly reliably
See Materials: 3D Printer Filament - you'll need 2.85mm PLA, ABS, etc.
- Load Cura and open (STL file) or import your 3D model
- Get the SD card from the front slot in the Ultimaker, and put it in your computer
- If your computer doesn't have an SD card slot, use one of the computers in the workshop
- From the menu:
File>Print- This creates the G-code file
- Save it to the SD card
- Put the SD card back in the front slot of the Ultimaker
- Use the dial on the front select your file, then press
GO.
- Here's an online troubleshooting guide for the most common 3D printing problems.
- Filament can come on a coil, rather than a roll, so you will need to roll it up on one of the empty spools before you can use it. Take care not to get everything tangled by looping the coil on a broomstick, and wind it as tightly as you can. Recommended also to stand the spool on a heated bed of the printer for ten-twenty minutes to adapt it the tighter curvature so it doesn't spring loose when you feed it into the machine.
- Cura: You can adjust various setting in Cura (such as the layer height) as well as load multiple STL files into the same build
- Unloading/reloading filament: Follow the instructions on the machine. Make sure you don't put the wrong filament in. It should be 2.85mm thick PLA.
Because ABS has a higher melting point than PLA, any that is left in the printer head won't extrude well at PLA temperatures and is likely to cause blockages.
- Check whether you actually need to change the filament at all - could you use ABS, or is there another printer you could use which already has PLA
- Follow the usual procedure to change filament, and reverse out the ABS
- When asked what filament you're changing to, choose ABS, as otherwise the remaining ABS won't extrude (it might be worth experimenting with setting up another option with an even higher temperature)
- Let the filament feed through as normal
- If the filament doesn't extrude through the nozzle, or if the extruded filament is narrower than it should be, then turn up the temperature to around 250C and see if that helps
- If not, then with the temperature at 250C, choose 'Move Material' and turn the dial to extrude more material
- If that doesn't work then remove the tube from the collet at the hot end, use 'Move Material' to feed through about 6cm of filament, then try to push it through the nozzle manually. If this fails then you'll have to try the 'cold pull' procedure
- Reassemble anything you've had to take apart
- Feed through enough material to get rid of any remaining ABS, then reset the material type to PLA
- Reduce: Does a solid object need to be solid inside? Often it doesn't - a hollow object will use up less filament, so consider reducing the infill (side effect: reduces rigidity of object).
- Recycle: Depending on the plastic used, it can go in the recycling bins near the kitchen.
- Disposal: If all else fails, put waste in the workshop bin
It would be nice if we could create a Precious Plastic recycling system.
If the advice below doesn't solve the problem, try Ultimaker troubleshooting. If all else fails, please create a new issue to let us know.
If your doesn't stick to the printer base panel, usually because it has a small contact area, you can you can spread a dash of pritstick on to help stick it down
You can adjust the speed and temperature of the plastic extrusion while it is running, if you are getting too much threading or the material is too thin.
- If the machine is broken or needs maintenance, create an issue in the issue tracker (link in Troubleshooting above)
- Label the issue:
Tool: 3D Printer - Ultimaker 2orTool: 3D Printer - Ultimaker 2 Extendedas applicable - If broken, add
Brokenlabel (this triggers various systems to flag the machine unavailable) - If maintenance required, add
Maintenancelabel (the machine is working, but needs TLC) - If parts need purchasing, add
Shoppinglabel
- Label the issue:
- Spare parts are kept in a box in the 3D printer supplies cupboard underneath the printers.
- iMakr sell spare parts
- Consumables: Materials: 3D Printer Filament
- We've been recommended to upgrade to an Olsen Block for the UM2; it allows removing the nozzle (for changing or cleaning) without having to remove the entire heater block.
- Wikipedia: 3D Printing
- Tool: 3D Printer - RepRap
- Tool: 3D Printer - UP3 (Rose)
- Tool: 3D Printer - UP3 (Violet)
- Tool: CNC Mill - Proxxon
- Tool: CNC Mill - Arcitype