RolandVinylCutter
Quick links: Usage • Troubleshooting • Maintenance
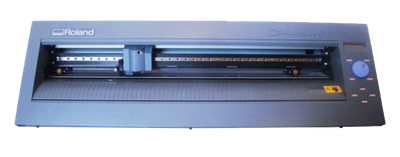
| Nickname | Make | Model | Where | Manual | Issue Tracker | Status |
|---|---|---|---|---|---|---|
| "Roland Rat" | Roland DG Corporation | CAMM-1 CX-24 | Workshop | Tool: Vinyl Cutter & Plotter (Roland Rat) | TBC |

See full safety information below
This machine is used to create vinyl transfers, which can then be applied to (usually flat) surfaces. It can also be used for plotting on paper (using a special pen).
You create your design using vector image editing software, and then "print" that design on to the vinyl using the cutter. Vinyl cutting works by cutting through just the vinyl layer, while leaving the backing untouched. This is accomplished by very precise blade positioning prior to starting your print job.
After printing (cutting your shapes in the vinyl), you remove any unwanted vinyl, leaving just your image, before applying application tape to the non-sticky side, removing the backing paper and sticking the whole thing to some surface. Very carefully you then remove the backing tape, leaving each individual shape on the surface.
As you might imagine this can be very delicate, and you’ll want to think carefully about the sections of your design and how you will apply it. Bigger and simpler shapes are much easier to work with than smaller, more intricate, shapes.

Jackie 30/01/2017 - Currently experimenting with pen plotting - see page 38 of the user manual. Set force to around 60 (should be around 150 for cutting). Set offset to 0 (Pen) - was set to 0.25. There is an option to select "Piece" instead of "Roll", which seems to be good for sheets of paper.
To use this machine, you'll need to:
- Follow safety precautions
- Design your shape
- Obtain materials
- Place vinyl in cutter
- Test the blade force
- Scale and print the vector
- Apply your vinyl to a surface
Let's get started...
The machine is generally safe to use, but there is a risk of injury if your fingers get near the cutting blade.
A vector image is used to instruct the cutter where to cut:
- We recommend designing this on your own computer before visiting DoES
- For best results, use Enhanced Windows Metafile (
.emf) file format from Inkscape.- If you can't save as that, SVG file format works well to transfer over to the Vinyl Cutter PC (where you can use Inkscape to save it as an
.emffile) - If you run through that step, closing Inkscape, then restarting it and opening the
.emffile seems to work best for ensuring that Inkscape hasn't remembered any oddities from the previous file format that interfere with it cutting well
- If you can't save as that, SVG file format works well to transfer over to the Vinyl Cutter PC (where you can use Inkscape to save it as an
- We use Inkscape, a free vector drawing app for Windows, Mac and Linux.
- There are lots of tutorials on their website showing how to use it.
- You can import many file formats and save them as SVG.
- Importing to Inkscape can change vector dimensions and cause other issues, so we highly recommend that you download Inkscape yourself and ensure your vector is correct in Inkscape before you come to DoES.
- Your vector must be stroke only (not fill, or it will cut each line twice and ruin your cut).
- Avoid text with a height less than 30mm; it causes the plotter to jam or yields vinyl that's difficult to work with. Small Cyrillic or italic text is particularly troublesome.
- If cutting t-shirt vinyl you will need to mirror your design horizontally.
- Once your vector is ready, copy it to a USB drive or the DoES Network Drive (Samba Share) so you can access it from the computer in the workshop.
- We have some scraps of Vinyl lying around, which you are free to use and test with, however we suggest you buy your own for any extensive work
- MDP supplies on the Wirral stock it - they do quick delivery, or you can collect directly from their shop
- We recommend 610mm width, in any length you require; if in doubt, contact us before buying
- Turn the vinyl cutter machine on via the switch on the left.
- Push down the roller lever at the very back right of the machine to release the rollers.
- If you look inside the front of the machine, you will see the rollers lift.
- If you look at the rollers, you'll see some areas of the machine directly above them are shaded in blocks of white or silver:
- The white areas are where you can position the rollers depending on the size of your vinyl sheet/roll.
- You can only position these when the rollers are lifted.
- The large block of white on the left must have a roller under it.
- You can position the other under any block you like.
- The machine will only cut between the two rollers.
- Put your roll of Vinyl into the machine from behind, and position it under the rollers.
- T-shirt vinyl should be placed in the machine coloured side down. Vinyl to be applied to surfaces will be placed in coloured side up.
- Pull the lever up to lower the rollers.
- Click the
Enterbutton; the machine will scan the width of the vinyl.- It will display a number like
140mmor400mm - It's approximately the width between the rollers; the cutter is unable to pull and cut outside the region where the material is held down.
- The vinyl width determines the
page heightin Step 5: Scale and print the vector.
- It will display a number like
Different materials will require different force from the blade in order to cut properly, so you should do some testing to get the best results:
- Use the
arrow keyson the front panel to position the vinyl and the plotter head - Hold the
TESTbutton for half a second and a small circle will be cut in your vinyl- You should be able to peel off the circle easily, leaving a square.
- If it works as expected, proceed to Step 5: Scale and print the vector
If you need to change the blade force...
- With the material loaded, rotate the dial until the left hand of the display reads
FORCE(try both directions) - Press
MENU/PARAMto move the cursor to the right hand side of the display. - Rotate the dial to amend the grams of force:
- Cutting too deep? Decrease the force.
- Cutting too shallow? Increase the force.
- Press
ENTERto apply the force selected, the cursor will move back to the right (MENU/PARAMwill cancel your change) - Hold the
TESTfor half a second to see the results - Repeat above process as necessary
If you find the cuts are still not quite right, the blades might need replacing; ask someone for help.
The vinyl cutter is controlled by the does-vinylcutter PC which is next to the cutter:
- Wake the system up by pressing any key on the keyboard
- Plug in your USB drive or find your file via the
open-sharefolder on the desktop:
- Plug in the USB Stick

- Click the notification

- Or use the file manager to navigate to it

- Find your file on the network drive

- Load Inkcut, inside open your file

- From the menu at the top of Inkcut, select
Device>Sent to deviceor pressCtrl + Pon the keyboard

When you hit start, the machine will feed through the roll, back and forth, positioning itself to cut, and then begin to cut your shape.
First, you need to prepare it:
- Give yourself plenty of clean workspace
- Remove the vinyl from the cutter, and cut across the width of the sheet to remove unused remainder of vinyl sheet or roll
- Using a fresh blade or a scalpel, carefully peel and remove the negative parts (bits you don't want) from the sheet
- Do one a section at a time
- Use the scalpel lightly; cut the vinyl but not the backing
- Don’t lift up the part you want by mistake; it will stick to the negative parts and be irretrievable!
- Take the low tack transparent roll of application tape and roll evenly onto the prepared vinyl and its backing: there is a knack to this; use a cardboard roll
Now you can apply it to a surface:
- When applying to your surface make sure it’s clean then CAREFULLY peel off the vinyl from its backing using the transparent low tack application tape & ensure you don’t lose any items. Use your finger or a plastic squeedgy (near the machine) to make sure it adheres to the application tape
- Lightly place on surface; don't fully commit until you sure it’s in the right spot then press vinyl to surface through tape FIRMLY
- You can press down smaller sections of vinyl using the back of a spoon, or appropriate object
- Finally, gently remove the application tape
Vinyl, and the transfer paper used to affix it, costs £3 per metre. You can pay for this either by putting cash into the honesty box next to the sublimation printer, paying directly to an organiser, or by asking to be invoiced.
The cutter can be quite wasteful in terms of where it prints, so you can hack it, slightly, to get better use of the material.
The cut will start from the very highest point of your vector on the computer screen, regardless of whether that highest part of the shape is on the left or the right. Because of the 90 degree rotate, on the cutter machine this highest point is now the left-most point of your cut. The cut will start from the exact highest point, and move left or right, depending on your shape. For example, if the highest point is at the centre of your image, it will need space to move both sides. If your highest point is on the left of the image, it will only move right from the starting point. Try and visualise your image rotated on the vinyl.
- As soon as you’ve hit print, once the vinyl starts being moved around, press the
Enterkey; this will pause the cutter once it’s done positioning so you can see where it is planning to start cutting. - You can now use the lever to lift the rollers, and reposition your Vinyl to a better position.
- Ensure that the light sensor is still covered and that you’ve left enough room for your full cut (bearing in mind the explanation above).
- Drop the rollers back onto the vinyl and press
Enteragain to resume printing.
Another trick is to use SVGnest - it takes the SVG shapes and crams them in to smallest are possible by rotating and rearranging them. Same shapes, less space.
If you end up with any large unwanted pieces of unused vinyl, please leave them in the workshop for others to use.
For small offcuts that are unusable, please dispose of them in the workshop bin.
If the advice below doesn't solve the problem, please create a new issue to let us know. Also check out the existing open issues in case someone has already had the problem and documented it there.
To reset the cutting head to its original position:
- Press the button to the left of
Enter - Then press the
Enterbutton, twice
There is a small light sensor on the left front of the machine, which must be covered by the vinyl, in order for the cutter to function. On very bright days, the sun may shine through light coloured vinyl resulting in the machine reporting as no roll present. To counter this you can create a shadow by standing in the right place, or stick something over the light sensor.
Try reseating the parallel cable between the PC and the vinyl cutter.
This is normal, it means it's run out of numbers (defined by your vector image) to print; printing is complete.
- If the machine is broken or needs maintenance, create an issue in the issue tracker (link in Troubleshooting above)
- Label the issue:
Tool: Vinyl Cutter & Plotter (Roland Rat) - If broken, add
Brokenlabel (this triggers various systems to flag the machine unavailable) - If maintenance required, add
Maintenancelabel (the machine is working, but needs TLC) - If parts or consumables need purchasing, add
Shoppinglabel
- Label the issue:
- MDP supplies on the Wirral stock vinyl
- Nottinghack have the smaller version of our cutter, and are using it with an HP JetDirect 300 network print server. Find out more on their wiki page
This info purely for archival purposes and can probably be deleted...
- The vinyl cutter was previously controlled by a small silver "Advent" laptop to the right of the machine. If you wish to continue using this fire it up and log on with user "OFFCUT". Not recommended as the screen sometimes disconnects and fails to display.
- If the laptop screen doesn’t display, you’ll need to angle it at about 30 degrees, and reboot to get it working.