-
Notifications
You must be signed in to change notification settings - Fork 0
Importing the character with the Character Assembler Tool
Now that we have the unzipped folder containing the information about the character, we'll use the ZG SWTOR Tools Add-on's Character Assembler to automatically fill it with the requisite assets and import it.
Check its installation's instructions. The most important part is setting in its preferences the path to the 'resources' folder that was the result of using ExtracTOR on SWTOR's game assets. The rest of the options you can explore later on.
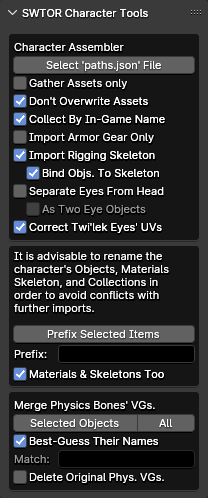
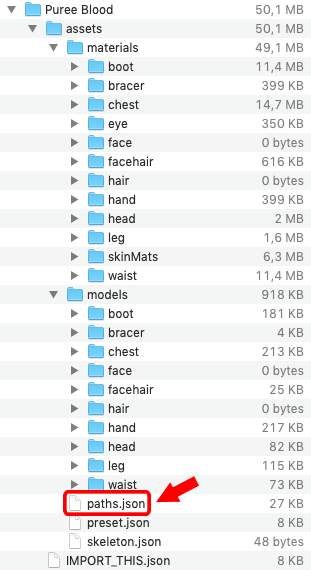
To import our character, we just click on the Select 'paths.json' File button and do just that. Remember: don't select the IMPORT_THIS.json file: that one is for loading a character back into TORCommunity.com's Character Designer to let us keep on tinkering with it.
Processing the character is a matter of a few seconds.
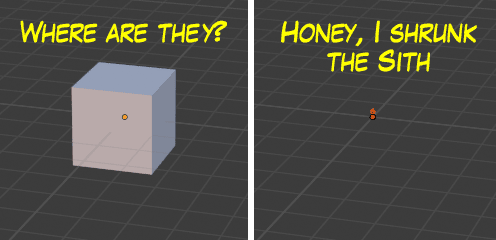
Something to take into account: with the .gr2 Importer Add-on (which works for the Character Assembler, under the hood) at its default settings, SWTOR objects are all scaled down to a 10% of their real world counterparts. If you happen not to have deleted Blender's default cube, your character might have ended up inside it.
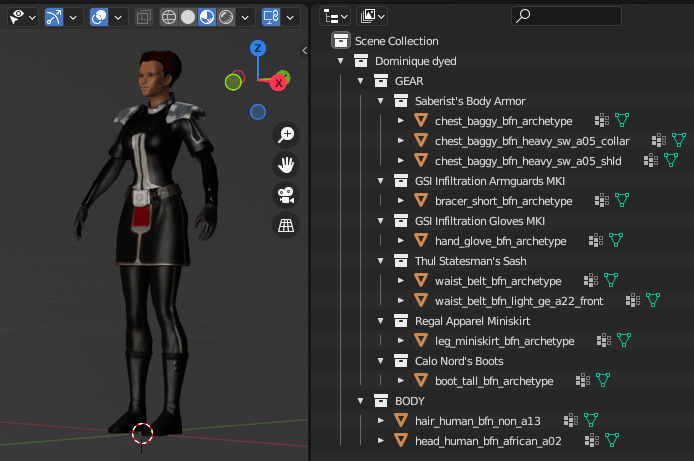
In Blender's Outliner, with the default options, things should show up fairly tidy, with a main Collection named after the character's folder name as saved from TORC's Character Designer, and with each armor piece's objects collected by in-game name, plus a BODY Collection holding any non-armored bodypart.
-
If no "resources" folder was set in the add-on's preferences, it will attempt to work in its absence, but that shifts the responsibility of having all the assets of a character in its folder to us: if a single one is missing, the importing will fail. It shouldn't typically happen, though.
-
It's better to avoid doing multiple character imports in a same Blender project. SWTOR recycles lots of objects and materials, which means that the chance of importing new elements that have the same names as previous ones is almost assured, messing things up.
To keep that from happening, the Add-on comes with an Items Prefixer: it lets us add a prefix to any item selected in the 3D View or the Outliner including any Collections (it's important to rename them, too). What's more, it's smart enough to prefix any selected object's materials without needing to explicitly select them, too, plus any skeleton's internal data-block. Doing this to the results of a character import lets us make all those names unique enough to be able to import several characters to the same Blender project (for example, different sets of armor) without making an utter mess of their materials.
(If our renaming needs are more complex than that, then it's Blender's own Batch Renaming tool's turn. Just remember that it is crucial that the Materials are renamed, too, not just the objects)
In general, do one Blender project per character, and be careful to give unique names to everything. When creating scenes combining several characters, just append or link them from those individual projects: if any naming conflict happens at that stage, Blender will do its usual .001, .002., etc.-suffixing dance and everything will be okay.
This Add-on reports its progress and errors through Blender's Console. If anything goes wrong, we can use Window > Toggle System Console to be able to retry and check for any error message: the Add-on lists all the files it detects and copies, letting us see if any entry in the paths.file is malformed or leads to an inexistent file.
-
Gather Assets Only: it only locates and copies the asset files to the character folder, without importing them and assembling the character.
-
Don't Overwrite Assets: if an asset already exists in the folder, it preserves it instead of overwriting it. Useful if the files in the folder have been modified in some manner, such as manually retouching a texture, without changing the name (you should change the name when doing something like that, though, to avoid the risk of an accidental overwrite).
The tool will never delete existing files if they don't concern it, though.
-
Collect By In-Game Name: it places each armor part's objects inside a Collection named after the armor's in-game name (say, "Canderous Ordo's Vest"). It does that by finding a
presets.jsonfile alongside thepaths.jsonone, inside the character's folder. If unchecked, it just places all the objects in a common Collection. -
Import Armor Gear Only: discards the non armored body parts, expediting the creation of multiple sets of armor for a same character (take into account that there is armor that includes skin materials to simulate areas where the skin is exposed: those are considered armor gear, too, and that includes the default underwear).
If attempting to collect multiple sets in a same Blender project, please pay attention to the need to rename the assets to avoid making an absolute mess 😅.
-
Import Rigging Skeleton: imports the character's armature ("skeleton"), without binding the character's objects to it unless we tick the next option:
-
Bind Objects To Skeleton: binds the character's objects to the imported skeleton.
-
Separate Eyes From Head: it separates both eyes from the head as a single object that still works with SWTOR's skeletons. This feature is meant to make them easier to use with other rigging systems, such as the popular Auto-Rig Pro, that require the eyes to be a separate object to be able to pick them.
-
As Two Eye Objects: it also separates each eye into its own object, again keeping them usable with SWTOR skeletons, and with other rigging systems that might like them this way. The main advantage is that we can rorate them manually beyond what the rig's eye bones dictate. As the way SWTOR does it induces too much distortion in both the eyes and their orbits, we can do a bit via the bones and the rest via rotations and get a more natural look.
This option translates the separate eye objects' origins to the correct pivoting position (SWTOR's eyes aren't full spheres but truncated ones, possibly for polygon economy reasons).
-
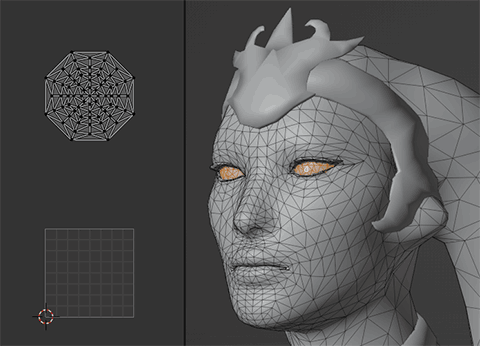
Correct Twi'lek Eyes' UVs: for some reason, Twi'lek eyes have their UVs beyond the UV space's 0,0 to 1,1 coordinates region, lying between the 0,2 to 1,3 ones instead. This has no noticeable effect during normal use, but it seems to break the baking of the eye material when prepping the model for exporting to other apps and engines. This option moves the coordinates back to the 0,0 to 1,1 region.
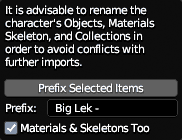
Blender, when combining assets with matching names (via appending, linking, or its Asset Library equivalents), uses ".00x" suffixes to avoid conflicts. Of course, the result of that is rather untidy, so, it's still convenient to rename things.
This tool adds a prefix to any item selected in the 3D View or in the Outliner (where we can select and prefix Collections, too). What's more, it's smart enough to prefix any selected object's materials and skeletons' inner data-blocks without needing to explicitly select them.
Don't forget that Collections must be renamed too.
(If our renaming needs are more complex than simple prefixing, then it's Blender's own Batch Renaming tool's turn)
At this point, we have our character done. Further steps are marginally more complex: using the rigging skeleton to pose the character manually or by applying game animations is suprisingly super-easy, but there are little nagging issues, such as dealing with objects that are driven by SWTOR's physics engine (capes, skirts, long hair…), some animation types that don't work at the moment, importing weapons which are a fully manual process for the time being…
Check the guides following this one in the sidebar's Table of Contents: you'll find there further information on how to proceed about those.
We do not condone the usage of our tools for malicious intent, including: exploits, harassment of others, or anything else that may violate EA/Bioware's EULA, TOS, DSA, Privacy Policy Copyrights, Trademarks, or anything else illegal. We will not be held accountable for your actions, and will act against you if nessesary.
- Home.
- State of Play February 2025
- Getting Help:
IMPORTING SWTOR MODELS INTO BLENDER: A BRIEF OVERVIEW.
Check this intro first. Afterwards, you can jump directly to the guides on extracting PCs, NPCs and others.
Downloadable Tools (All Links Page):
-
(NEW) ExtracTOR Windows app.
(Replaces the old Slicers GUI app) -
Blender 3D Windows/Mac/Linux app.
-
SWTOR .gr2 Objects Importer Blender Add-on.
Required by other add-ons. -
ZG SWTOR Tools Blender Add-on:
-
SWTOR Terrain Extractor Windows Command Line Tool.
-
TORCommunity.com:
(runs VERY slowly)- SWTOR Database (with NPC Exporters).
- Character Designer.
- EasyMYP Windows app.
- Noesis Windows app.
READ THE BROAD STROKES FIRST: YOU'LL SEE IT'S EASIER THAN YOU THINK!
-
The steps:
- Extracting SWTOR's game assets with ExtracTOR (WIP).
-
Using TORCommunity's Character Designer to export Player Characters.
- IF ARMOR SELECTION SEARCH IS DOWN: workaround to manually specify Armor Sets.
- Using TORCommunity's NPCs Database to export Non Playable Characters.
- Using our Blender add-ons to auto-assemble the model.
- Rigging the character for posing and animation
- Applying SWTOR animations to the character.
-
Extra steps that require manual work and some knowledge of SWTOR's assets:
-
Making capes and hair work, manually and through Cloth Simulation.
-
Attaching weapons and other objects to a character with a SWTOR rig.
-
Attaching weapons and other objects to a character with a custom rig.
-
Baking the models' textures and exporting to other apps:
- Baking with Legacy SWTOR materials and modern ones.
- Baking the multiple materials of an object into a single one.
- Exporting to VRChat.
- Exporting to Star Wars Battlefront II.
- Exporting to Unreal Engine.
- Exporting to Garry's Mod.
- Exporting to Tabletop Simulator.
-
3D Printing:
-
- Locating armor parts' assets
- Locating weapons' assets.
- Assigning materials and textures to environmental and architectural elements, furniture, props, ships, vehicles and weapons.
- Assembling multi-part assets (Decorations, Rooms, etc).
- Generic guide to importing objects and assigning materials (Legacy Add-on-based. Needs updating).
- Snippets.
- Improving and customizing our SWTOR models and materials.
- Other Extracting Strategies (needs updating).
- SWTOR Materials recipes:
Modding isn't working since SWTOR moved to 64-bit codebase. Unless a new coder takes charge, it'll stay so indefinitely.
- Alternative techniques:
- Modding SWTOR textures with Special K (USE CAUTION).
Basically, use Jedipedia.net's tools and check our Discord. We'll see about adding new material, but this is very involved stuff.
- File Formats:
(32-bit. Needs updating to 64-bit): - A look at SWTOR's Materials and Texture Files.