-
Notifications
You must be signed in to change notification settings - Fork 0
Attaching weapons and other objects to a character with custom rigs
By Sultana
This is a quick guide on how to attach items to rigs so that they move with the model. For example, weapons holding/holstering/sheathing, etc. SWTOR's skeletons and models include specific bones and naming conventions for such things, as shown in the previous guide. When using non-SWTOR armatures, no matter whether created by add-ons or manually, we have to solve this ourselves.
We do that by using a constrained Empty. The constraint allows for easy on/off toggling of attachment.
(This was something I really wanted to do when utilizing my Halo: Infinite models because I got sick and tired of having to re-posture the weapons between drawn/holstered positions)
Please make sure that you have already prepared your models for use; it is best if both the character model and the item model have skeletons!
This guide was written while working on Blender 4.1.1, but it ought to be viable on previous versions of the app. Its pipeline may change with future updates, though.
-
Open Blender and have both models ready to go.
-
You will want to start by adding an Empty. This can be done by clicking the
Add menu(SHIFT+A), hovering overEmpty, and clicking onPlain Axes.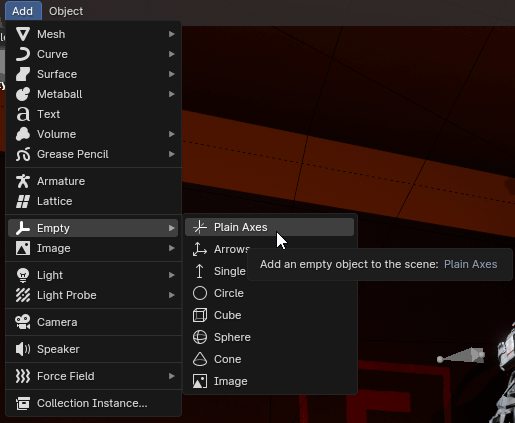
-
Next, you will want to add some constraints to the Empty you have created. Click on the Empty in your viewport or in the Outliner, then click on the
Constraints iconin the contextual menu.-
Add an Armature constraint. This can be done by clicking
Add Object Constraint. ClickAdd Target Bone. A new menu should come up, allowing you to select which skeleton to attach to, as well as the bone. Make sure the bone of choice is the bone you want the item to be attached to. -
Add a Child Of constraint. This can be done by clicking
Add Object Constraint. ClickTarget and Boneto select which skeleton to attach to, as well as the bone. Make sure the bone of choice is the bone you want the item to be attached to. For Location, Rotation, and Scale, every box should be unchecked and grey, and there may be some times you will need to clickSet Inverse. Make sure that Influence is set to 1.000.
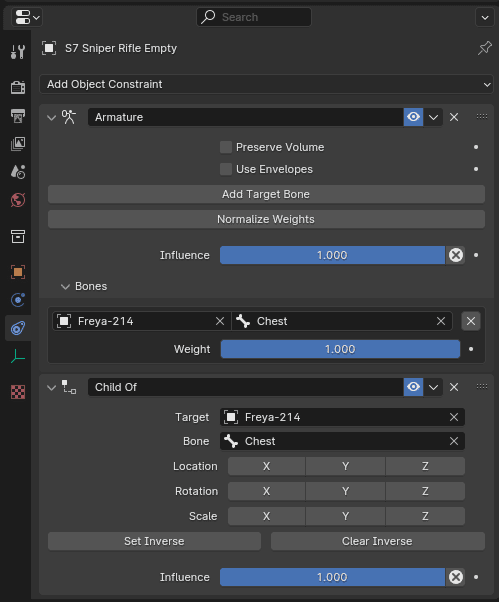
-
-
You now need to ensure that the rig for item that is being attached currently has a Location and Rotation of 0,0,0. Click on the rig in your viewport or in the outliner, then click on the
Constraints Iconin the contextual menu. You can do this by clicking theObject Properties taband right-clicking the values and choosingReset All to Default Values(BACKSPACE).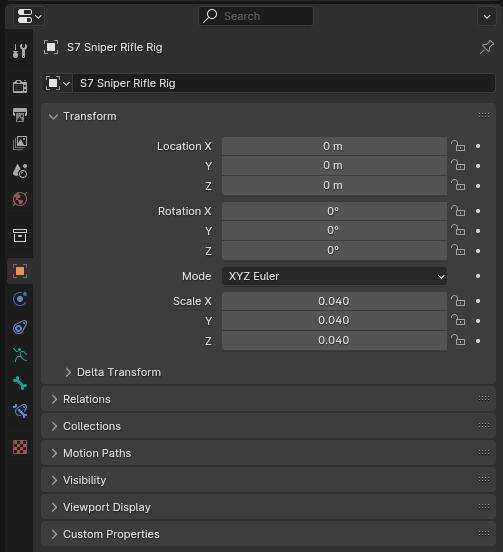
-
Finally, you are ready to attach the item's rig to the rig of the model you are looking to attach it to. Click on the rig in your viewport or in the Outliner, then click on the
Constraints Iconin the context menu. Add aChild Of constraint. ClickTargetand choose the Empty. For Location, Rotation, and Scale, every box excluding the last row should be checked and blue, and there may be some times you will need to click Set Inverse. Make sure that Influence is set to 1.000.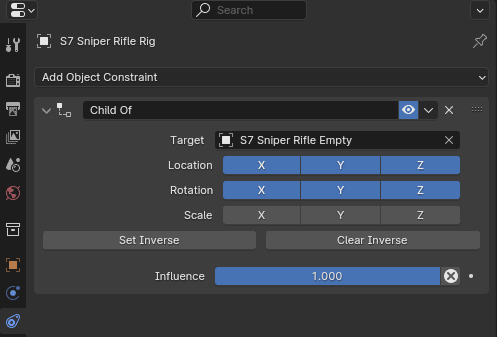
You may now position the Empty to wherever it is you are looking to attach it to the model!
It should always move whenever that bone is moved and this will apply to both the location and rotation.
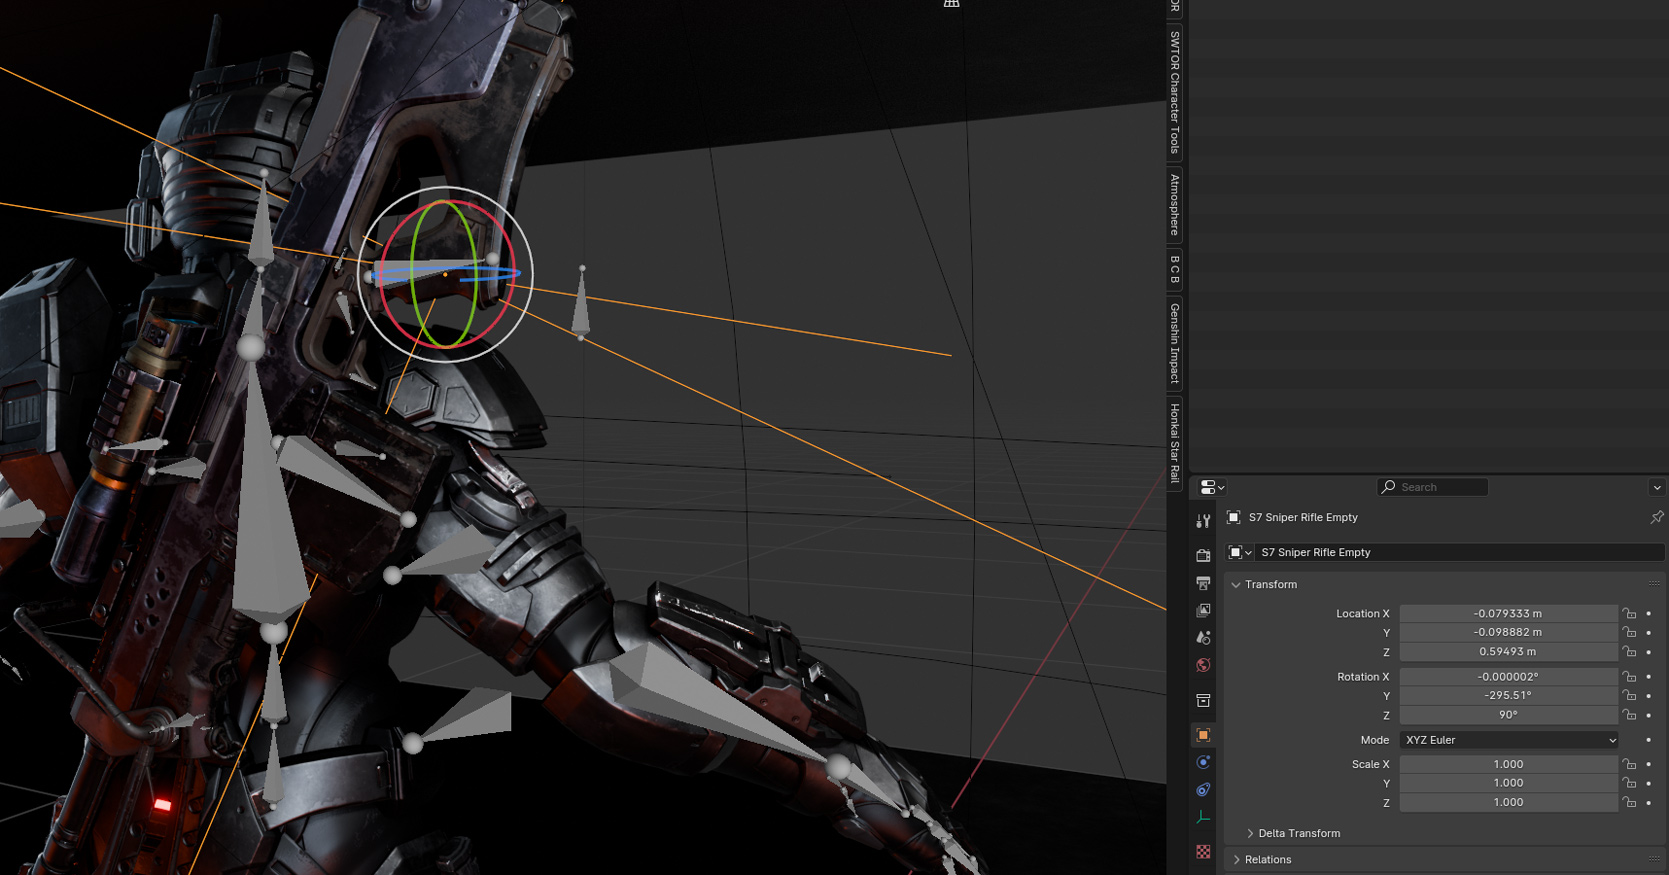
Click on the item's rig in your viewport or in the Outliner, then click on the Constraints icon in the contextual menu. Click the eyeball icon to show/hide the constraint. Whenever you are ready to turn it back on, make sure you also reset the Location and Rotation values of the rig to 0,0,0.
We do not condone the usage of our tools for malicious intent, including: exploits, harassment of others, or anything else that may violate EA/Bioware's EULA, TOS, DSA, Privacy Policy Copyrights, Trademarks, or anything else illegal. We will not be held accountable for your actions, and will act against you if nessesary.
- Home.
- State of Play February 2025
- Getting Help:
IMPORTING SWTOR MODELS INTO BLENDER: A BRIEF OVERVIEW.
Check this intro first. Afterwards, you can jump directly to the guides on extracting PCs, NPCs and others.
Downloadable Tools (All Links Page):
-
(NEW) ExtracTOR Windows app.
(Replaces the old Slicers GUI app) -
Blender 3D Windows/Mac/Linux app.
-
SWTOR .gr2 Objects Importer Blender Add-on.
Required by other add-ons. -
ZG SWTOR Tools Blender Add-on:
-
SWTOR Terrain Extractor Windows Command Line Tool.
-
TORCommunity.com:
(runs VERY slowly)- SWTOR Database (with NPC Exporters).
- Character Designer.
- EasyMYP Windows app.
- Noesis Windows app.
READ THE BROAD STROKES FIRST: YOU'LL SEE IT'S EASIER THAN YOU THINK!
-
The steps:
- Extracting SWTOR's game assets with ExtracTOR (WIP).
-
Using TORCommunity's Character Designer to export Player Characters.
- IF ARMOR SELECTION SEARCH IS DOWN: workaround to manually specify Armor Sets.
- Using TORCommunity's NPCs Database to export Non Playable Characters.
- Using our Blender add-ons to auto-assemble the model.
- Rigging the character for posing and animation
- Applying SWTOR animations to the character.
-
Extra steps that require manual work and some knowledge of SWTOR's assets:
-
Making capes and hair work, manually and through Cloth Simulation.
-
Attaching weapons and other objects to a character with a SWTOR rig.
-
Attaching weapons and other objects to a character with a custom rig.
-
Baking the models' textures and exporting to other apps:
- Baking with Legacy SWTOR materials and modern ones.
- Baking the multiple materials of an object into a single one.
- Exporting to VRChat.
- Exporting to Star Wars Battlefront II.
- Exporting to Unreal Engine.
- Exporting to Garry's Mod.
- Exporting to Tabletop Simulator.
-
3D Printing:
-
- Locating armor parts' assets
- Locating weapons' assets.
- Assigning materials and textures to environmental and architectural elements, furniture, props, ships, vehicles and weapons.
- Assembling multi-part assets (Decorations, Rooms, etc).
- Generic guide to importing objects and assigning materials (Legacy Add-on-based. Needs updating).
- Snippets.
- Improving and customizing our SWTOR models and materials.
- Other Extracting Strategies (needs updating).
- SWTOR Materials recipes:
Modding isn't working since SWTOR moved to 64-bit codebase. Unless a new coder takes charge, it'll stay so indefinitely.
- Alternative techniques:
- Modding SWTOR textures with Special K (USE CAUTION).
Basically, use Jedipedia.net's tools and check our Discord. We'll see about adding new material, but this is very involved stuff.
- File Formats:
(32-bit. Needs updating to 64-bit): - A look at SWTOR's Materials and Texture Files.