-
Notifications
You must be signed in to change notification settings - Fork 15
Policy based access control for OIDC OP
tsujiguchi edited this page Dec 10, 2019
·
2 revisions
This page describes how to protect OIDC OP with policies.
This function is disabled by default. Follow the steps below to enable it.
- Display the administrator console.
- Move to
Target realm->Agents->OAuth 2.0/OpenID Connect Clienttab ->Target client. - Check
Policy Based Endpoint Protectionand click theSavebutton.

- Display the administrator console.
- Move to
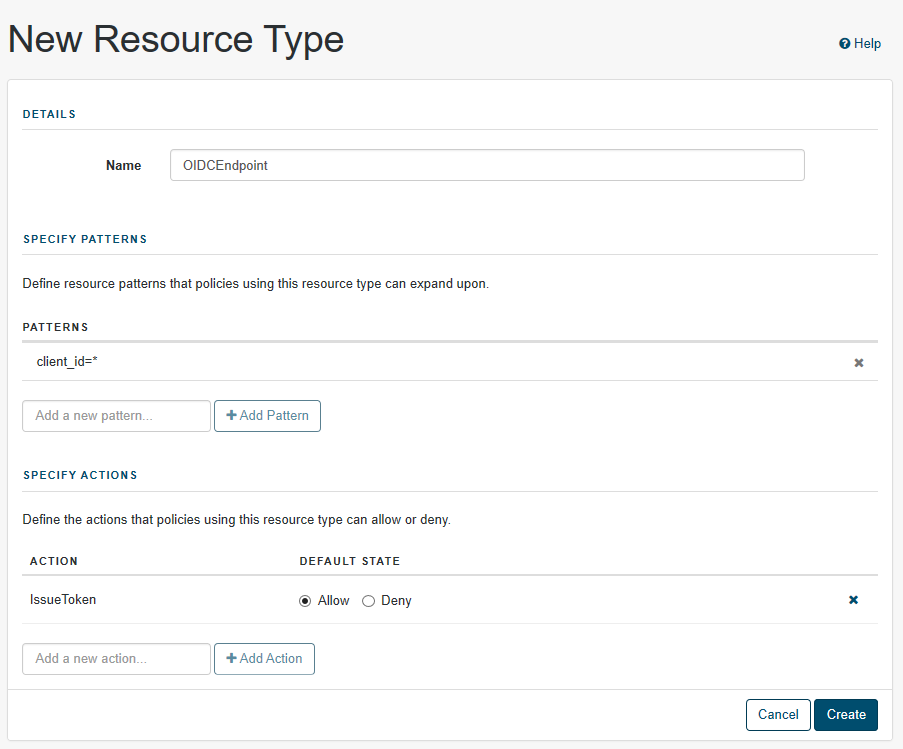
Target realm->Authorization->Resource Types. - Enter each parameter and click the
Createbutton. You can set any name for theName(other items are fixed).
| Item | Setting |
|---|---|
| Name | (any) |
| Pattern | client_id=* |
| Action | IssueToken |

- Display the administrator console.
- Move to
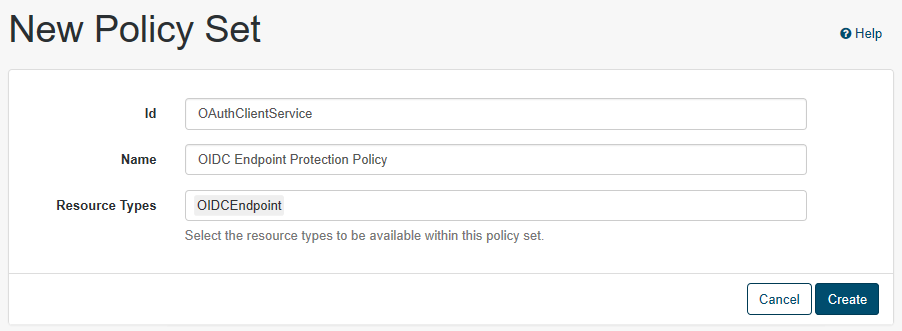
Target realm->Authorization->Policy Sets. - Click the
New Provider Policy Setbutton.

- Enter each parameter and click the
Createbutton.
| Item | Setting |
|---|---|
| Id | OAuthClientService |
| Name | (any) |
| Resource Types | (The name of the resource type you created) |

- Display
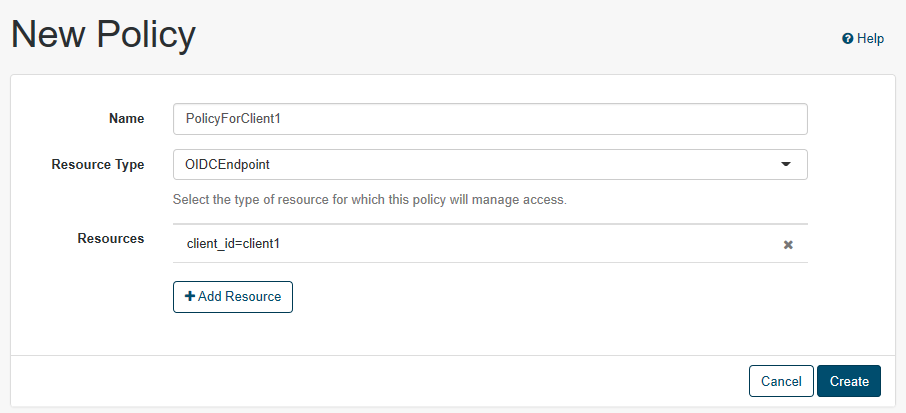
OAuthClientServicecreated in step of Defining a new policy set. - Click the
New Policybutton. - Enter each parameter and click the
Createbutton.
| Item | Setting |
|---|---|
| Name | (any) |
| Resource Types | (The name of the resource type you created) |
| Resources | (Client ID of target RP) |

- Set
Actions,Subjects, andEnvironmentsfor the created policy.