- MCU Product ID:
- NEO: {"P":"SmFKLTOcGHbPQvmh","v":"1.1.0"}
- Merkury: {"p":"takznrbe72k4pomq","v":"1.0.0"}
- Wifi 8266ex

Basically the sensor works like this: The MCU (U3) is powered by the battery through Q2 which acts like a diode (with a low drop-off voltage) protecting it from reverse polarity. This micro-controller takes care of:
- water leak tips reading p1.0
- battery low reading p1.2.
- push button K1 reading p0.2. For WiFi pairing.
- Buzzer B2 writing p0.6. Sound alarm.
- LED D1 writing p0.7. WiFi and visual alarm.
- Reset ESP (EXT_RSTB) writing p1.5.
- ESP power writing p1.7. Power control to save battery.
- GPIO5 linked to p0.0.
In order to save power, ESP (U1) is powered through Q3 which is normally closed (VM0=0).
The event sequence is as follows:
When an event shows, water over the terminals, MCU powers on ESP by opening Q3.
ESP gets the event type (water leak and battery status) using Tuya protocol, connects to WiFi, establish the communication with the cloud and sends info to the cloud.
After that, MCU cuts down ESP power and looks for the next event.
All that takes like 3-5 seconds.
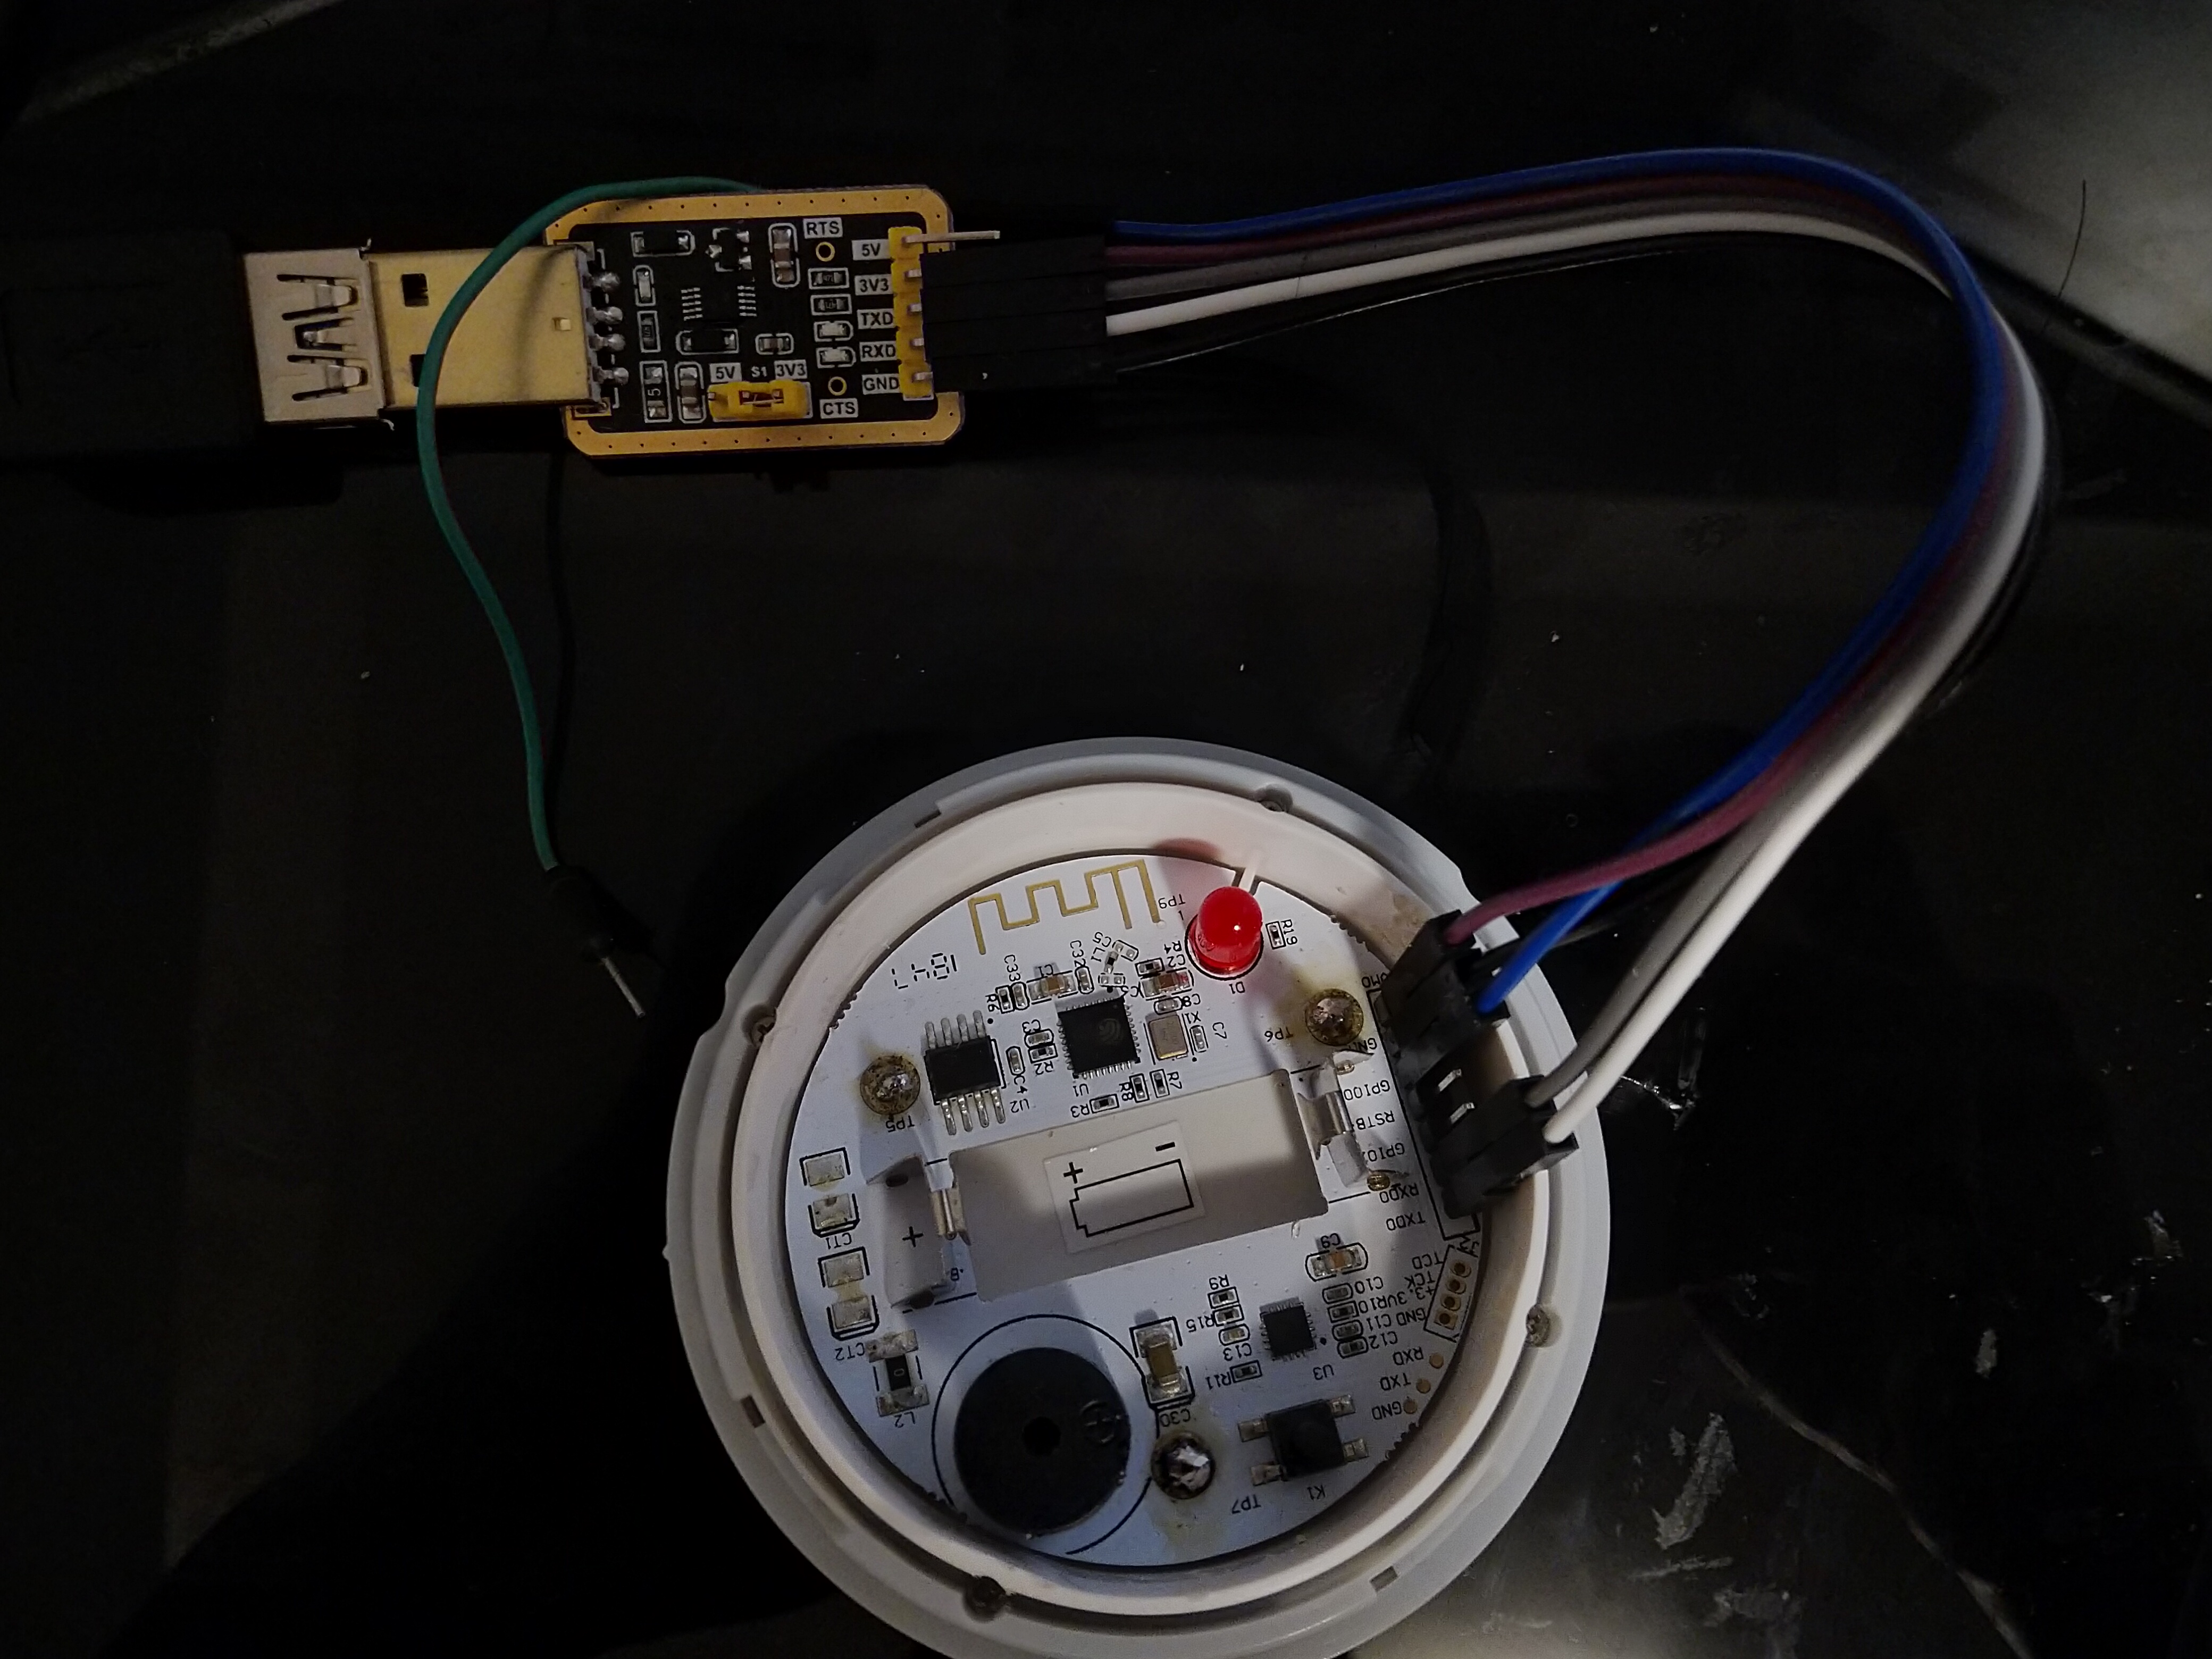
Use Tx Rx GND VMO(+3V) and GPIO0 to GND to flash Tasmota. This can be done by temporally pushing header pins to the connectors on the PCB as shown in the photo below:
From now on, every single change in Tasmota should be done by quickly, with your fingers wet, touch the water leak tips. Or pull VM0 to 3v to prevent the MCU cutting ESP power.
I assume you have worked before with Tasmota.
The following programming sequence is:
Tuya CmndData:
65010001006604000101
That translates to:
First 10 (Rule1):
6501000101 ON (Wet)
6501000100 OFF (Dry)
Last 10 (Rule2):
6604000101 Battery High
6604000102 Battery Medium
6604000103 Battery Low
TuyaMCU sends sensor and battery data separately
- 6501000101 ON (Wet)
- 6501000100 OFF (Dry)
{"TuyaReceived":{"Data":"55AA00050005660400010175","Cmnd":5,"CmndData":"6604000101"}}
Battery has 4 states:
- 6604000100 Full (3v)
- 6604000101 High (~2.8v)
- 6604000102 Medium
- 6604000103 Low (~2.5v)
Rule1 ON TuyaReceived#Data$|6501000101 DO publish2 stat/%topic%/STATUS ON ENDON ON TuyaReceived#Data$|6501000100 DO publish2 stat/%topic%/STATUS OFF ENDON
Rule2 ON TuyaReceived#Data$|6604000100 DO publish2 stat/%topic%/BATT Full ENDON ON TuyaReceived#Data$|6604000101 DO publish2 stat/%topic%/BATT High ENDON ON TuyaReceived#Data$|6604000102 DO publish2 stat/%topic%/BATT Medium ENDON ON TuyaReceived#Data$|6604000103 DO publish2 stat/%topic%/BATT Low ENDON
The next rule creates a device in Home Assistant: