-
Notifications
You must be signed in to change notification settings - Fork 29
Prometheus 와 Grafana 적용기
By metrics, we specifically mean the class of information that allows you to reason about the performance of a system in the aggregate (across different components of a single app, instances of an in a cluster, clusters operating in different environments or regions, etc.).
- 로깅과 다르게 숫자로 말할 수 있고 통계를 낼 수 있다.
- 단순한 count 정보 뿐만이 아니라 다양한 정보를 얻을 수 있다.
- 서비스를 확장하기 위한 근거를 마련할 수 있다.
- 자동화에 기본 정보가 되기도 한다.
- 장애를 감지하기 위한 기준이 될 수 있다.
Metric 을 만들어내기 위해 Spring Actuator 를 대표적으로 사용한다. Http 와 JMX 로 metric 을 수집할 수 있다. 중요한 건, Spring Actuator는 직접적으로 metric 을 만들어내는 것이 아닌 metric 을 만들 수 있는 어플리케이션인 Micrometer 를 자동으로 설정하게끔 하는 것이다. 즉, Spring Actuator 는 micrometer 를 사용한다.
gradle : implementation 'org.springframework.boot:spring-boot-starter-actuator'
결국, micrometer 의 활용법만 안다면 많은 커스터마이징이 가능하다. 관련 예제는 역시 micrometer 깃허브 쳐들어가는게 최고인 것 같다. 너무나도 고맙게 많은 샘플코드를 제공한다. https://github.com/micrometer-metrics/micrometer/tree/main/samples/micrometer-samples-core/src/main/java/io/micrometer/core/samples
프로메테우스의 가장 큰 특징은 메트릭 정보를 직접 poll을 한다는 것이다. (대부분의 메트릭 시스템은 Client 가 push 하는 방식이다.) 그리고 또한, 메트릭 연산 담당도 메트릭 수집 서버에서 수행한다는 것이 가장 큰 특징이다. (Client 를 경량화 할 수 있다.)
측정하는 값을 meter 라 칭하고 그 meter 를 저장하는 것을 MetricRegistry 라고 칭한다. (이 부분은 코드레벨에서도 계속 나오기에 알고 있는 것이 좋다.)
먼저, 어플리케이션에 prometheus registry 관련 의존성을 추가한다.
gradle : implementation 'io.micrometer:micrometer-registry-prometheus'
도커 실행 방법 : docker run -p 9090:9090 prom/prometheus
이제 localhost:9090 으로 접속하면 prometheus 페이지를 확인할 수 있는데 여기서 configuration 을 들어가보자.

이 configuration은 도커에서 /etc/prometheus/prometheus.yml 에 설정되어 있는 것이다. 여기에 메트릭을 가져올 서버를 적으면 된다. (설정을 유지할 수 있도록 volume 으로 만들자.)
prometheus.yml
global:
  scrape_interval: 15s
  scrape_timeout: 10s
  evaluation_interval: 15s
alerting:
  alertmanagers:
  - follow_redirects: true
    scheme: http
    timeout: 10s
    api_version: v2
    static_configs:
    - targets: []
scrape_configs:
- job_name: prometheus
  honor_timestamps: true
  scrape_interval: 15s
  scrape_timeout: 10s
  metrics_path: /metrics
  scheme: http
  follow_redirects: true
  static_configs:
  - targets:
    - localhost:9090
- job_name: [app 이름]
  honor_timestamps: true
  scrape_interval: 15s
  scrape_timeout: 10s
  metrics_path: /actuator/prometheus
  scheme: http
  follow_redirects: true
  static_configs:
  - targets:
    - ['dev-api.prolog.techcourse.co.kr:80']  -> 만약에 localhost를 테스트하고 싶다면 host.docker.internal:port 라는 예약어를 사용하자.
이제 볼륨 설정하는 명령어이다.
docker run -d -p 9090:9090 주소/prometheus.yml:/etc/prometheus/prometheus.yml prom/prometheus
metric 수집되어 있는 것을 이쁘게 보여주는 역할을 맡고있다.
도커 명령어 : docker run -d -p 3000:3000 grafana/grafana
처음 아이디와 패스워드는 admin 이다. 입력하고 들어가자.

DataSource 를 클릭해 Prometheus 를 추가해야한다.
또한, 아래처럼 대시보드 또한 추가할 수 있다.

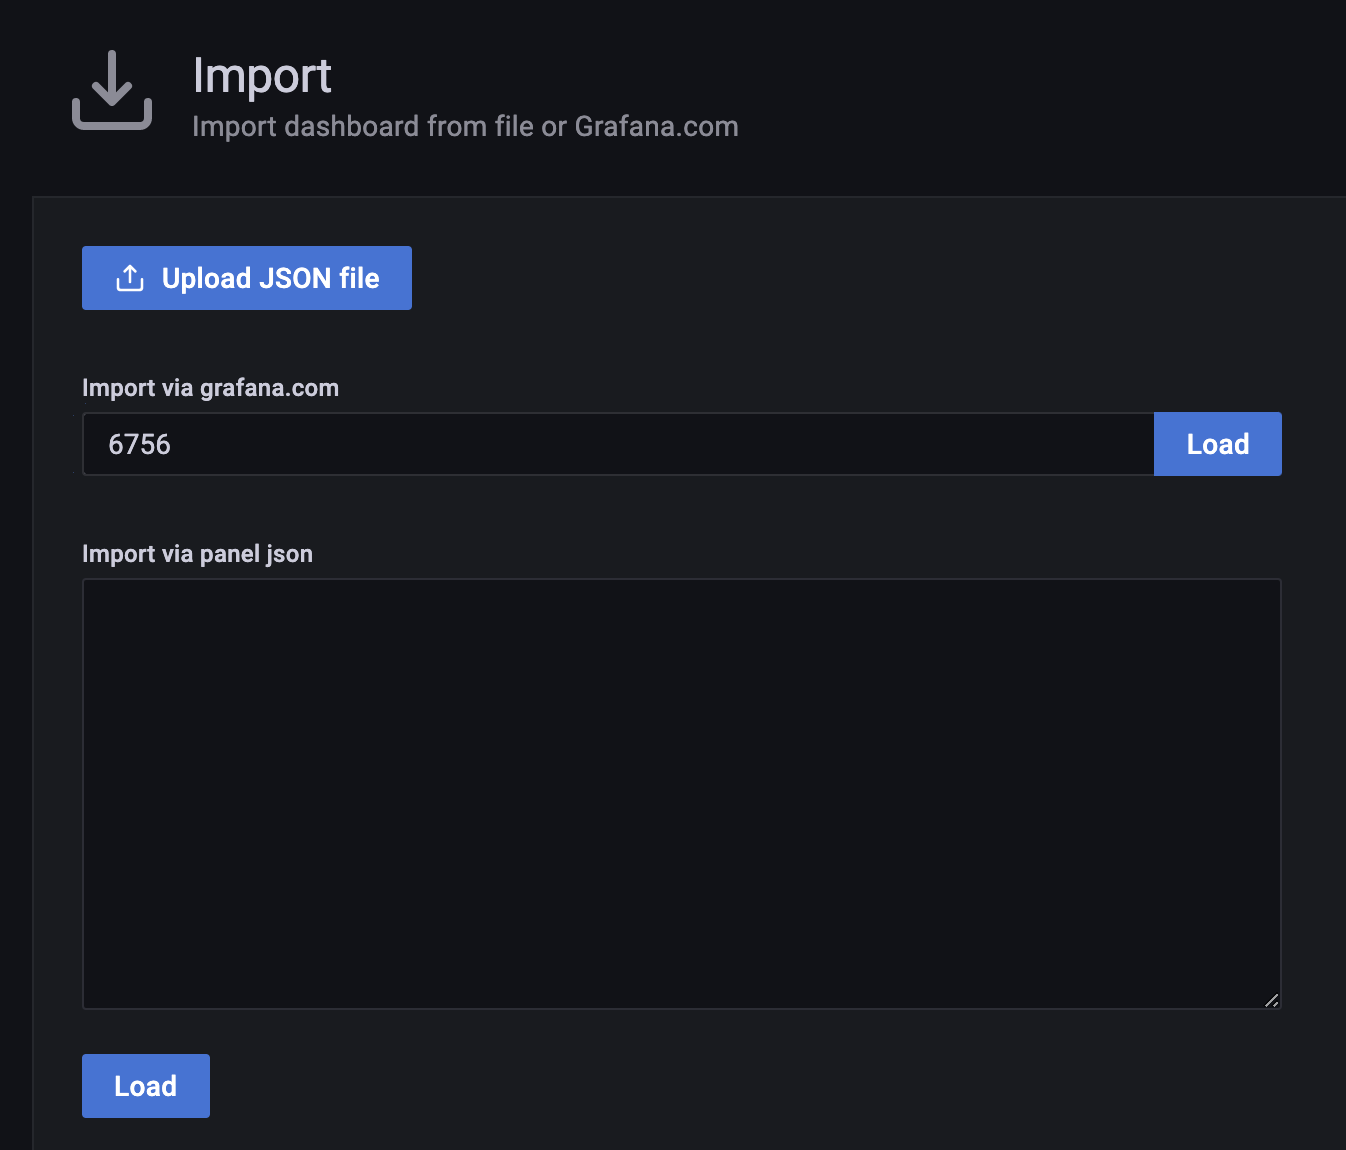
만일 템플릿을 import 하고싶다면 import 를 클릭하면 된다. 이후 원하는 템플릿 숫자를 입력하면 된다. 현재 적용된 템플릿 번호는 6756 번이다.
대시보드 템플릿은 https://grafana.com/grafana/dashboards/ 여기를 참고하면 된다.

(클립보드를 복사해 그 클립보드만 load 에 쓰면 된다.)
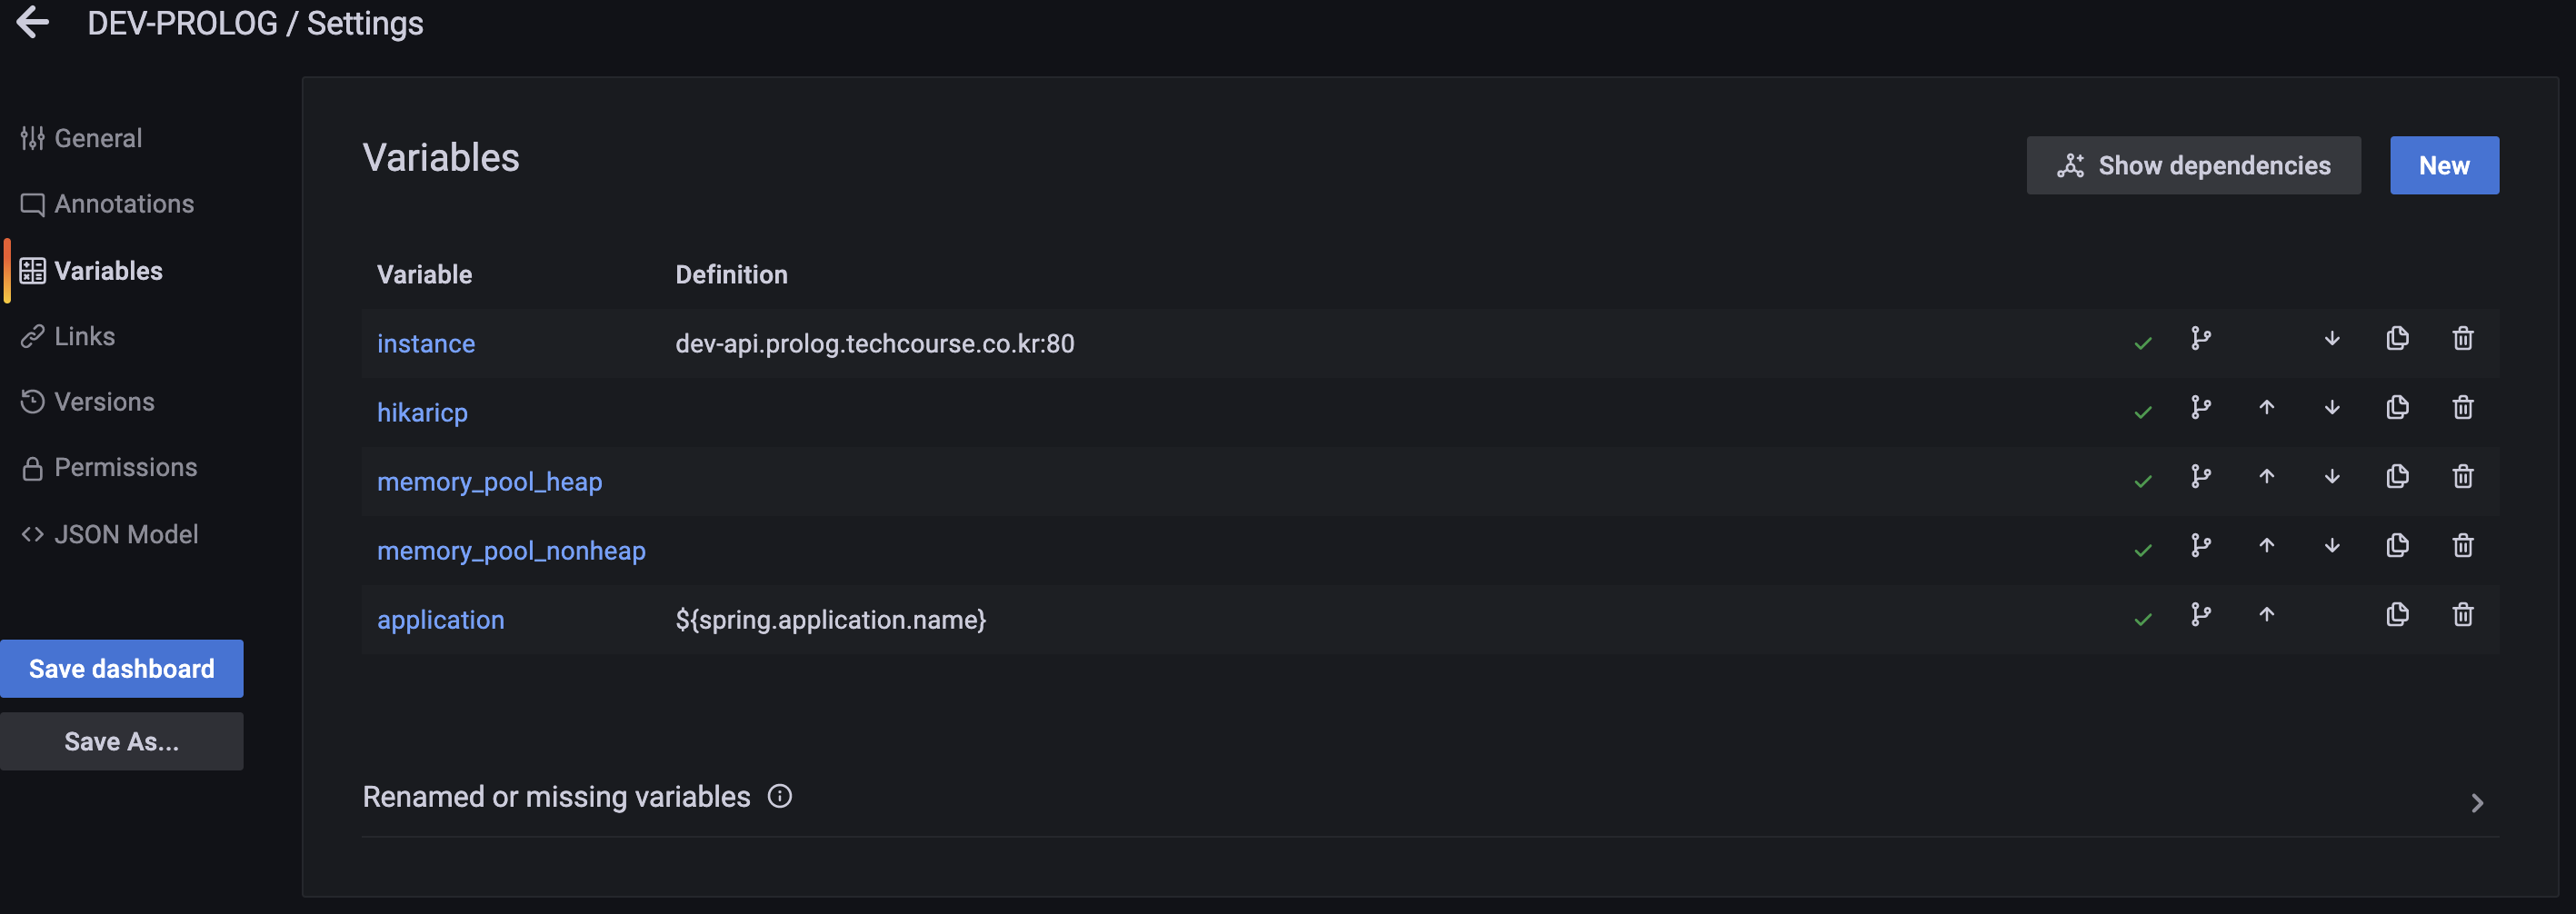
이후, 대시보드 세팅에 들어가 원하는 서버의 변수를 다음과 같이 선언해주면 된다.

또한 알람도 설정이 가능하다. 관련 내용은 https://grafana.com/docs/grafana/latest/alerting/old-alerting/notifications/#slack 참고!