RapidLayout:Fast Hard Block Placement of FPGA-optimized Systolic Arrays using Evolutionary Algorithms
This is the code repository of our paper RapidLayout: Fast Hard Block Placement of FPGA-optimized Systolic Arrays using Evolutionary Algorithms.
If you find this project helpful, please cite our paper:
@inproceedings{zhang2020rapidlayout,
  title={RapidLayout: Fast Hard Block Placement of FPGA-optimized Systolic Arrays using Evolutionary Algorithms},
  author={Zhang, Niansong and Chen, Xiang and Kapre, Nachiket},
  booktitle={2020 30th International Conference on Field-Programmable Logic and Applications (FPL)},
  pages={145-152},
  year={2020}
}
The original git repository: git.uwaterloo.ca/watcag-public/rapidlayout.
We provide an end-to-end hard block placement and routing flow for for systolic accelerators on FPGA, RapidLayout. RapidLayout is built on top of RapidWright, an implementation framework by Xilinx, Opt4J, a Java meta-heuristic optimization tool, and Apache Commons Math library for CMA-ES.
RapidLayout is written in Java, accompanied with a set of python scripts for placement visualization.
-
First thing we need is Java. To compile and run Java programs, we need Java Development Kit (JDK) 1.8 or later, which can be downloaded here. Also make sure to add
$(YOUR_JDK_INSTALL_LOCATION)/jdk1.x.x_x/binpath toPATHenvironment variable. -
To make life easier we use Gradle build system, to build our Java program. Installation instruction can be found here. Also make sure to add
$(GRADLE_FOLDER/gradle-x.x/bin)toPATHvarible. -
Clone the repo, and download
dataandjarsfrom OneDrive or Google Drive. Put these two folders inside RapidLayout project folder, like this:
   RapidLayout   # root folder
     ├── data	  # RapidWright device data
     ├── jars    # Dependent packages
     ├── result  # Placement Optimization results: .xdc files & other output files
     ├── src     # Source Folder
     ├── tcl     # Tcl scripts, including those generated during runtime
     ├── visual  # Placement visualizations
└── config.properties # Configuration file-
Then, we set up few other environment variables:
- Configure RapidWright Path:
export RAPIDWRIGHT_PATH=<THE_REPO_PATH> - Configure Vivado Path:
export VIVADO_PATH=PATH_TO_VIVADO/bine.g.export VIVADO_PATH=/Vivado/2018.3/bin - Add compiled Java files and jars to
CLASSPATHvariable:
export CLASSPATH=$RAPIDWRIGHT_PATH/bin:$(echo $RAPIDWRIGHT_PATH/jars/*.jar | tr ' ' ':') - Configure RapidWright Path:
We build the Java project with gradle build:
gradle build -p $RAPIDWRIGHT_PATHRapidLayout's work flow is configured with config.properties file in the project
root folder. The parameters are illustrated as follows.
| Options | Value | Illustration |
|---|---|---|
device |
vu3p, vu5p, vu7p, vu9p, vu11p, vu13p |
Supported FPGA devices |
method |
CMA, EA, EA-reduced, SA, GA |
Optimization methods: CMA-ES, NSGA-II, NSGA-II with reduced genotype, Simulated Annealing, and Genetic Algorithm |
optimization |
true or false |
If enabled, RapidLayout will run placement optimizaiton. Else, it uses the xdc placement file specified by placement |
placement |
String | e.g. \home\name\RapidLayout\result\vu11p.xdc |
opt_visual |
true or false |
If enabled, a real-time graph of the objective functions will be displayed during optimization |
rapidSynth |
true or false |
If enabled, only 1 conv unit will be synthesized by Vivado and the rest will be replicated |
autoPipeline |
true or false |
If enabled, pipelineDepth will be ignored, and pipeline depth will be determined by the tool |
pipelineDepth |
Integer, e.g. 4 |
The number of pipelining registers |
vivado_verbose |
true or false |
Whether to print Vivado outputs |
genarate_gif |
true or false |
Whether to generate a GIF of the placement |
transfer |
true of false |
If enabled, initial_xdc must be specifed |
initial_xdc |
String | e.g. \home\name\RapidLayout\result\vu3p.xdc |
RapidLayout uses the above configuration file to control its end-to-end workflow. No additional input is necessary, no manual command input is needed, everything is automatic. If you need to run a different experiment, just modify the configuration and start the program, no re-compilation is needed.
The main workflow proceeds as follows:
-
Automatically determine the minimal replicating rectangle for placement according to the target device and the proportion of hard blocks in one convolutional building block.
For example, if
vu11pis specified as the target device, RapidLayout would automatically know that the minimal placement area is the bottom half of SLR0, which will accommodate 80 convolutional units. Then the placement in that minimal rectangular area is replicated to the entire device. In this example, the 80-block placement would be replicated 6 times, and fill the 3 SLRs of thevu11pdevice. -
Synthesis.
RapidLayout calls Vivado to synthesize the logical netlist. In
RapidSynthmode it calls Vivado to synthesize only 1 convolutional unit, which is then used for logical netlist replication to generate the complete design. Otherwise, it calls Vivado to synthesize the entire design. -
Evolutionary Hard Block Placement
Search for placement solution in the minimal rectangular area determined in step 1. The optimization algorithm is configurable through configuration file.
-
Hard Block Placement & Site-routing
RapidWright places hard blocks and connect site wires.
-
Post-Placement Pipelining
Inserting pipelinig registers to break critical paths and improve timing performance.
-
Detail Placement & Finish Routing
Vivado takes over the design, and completes routing. This step often costs the most time. If SLR replication is enabled, it will only finish the implementation in one SLR (e.g. 160 ConvUnits). Otherwise, it will complete the design for the entire device. (e.g. 480 ConvUnits)
-
SLR Replication (Optional)
The fully implemented design in one SLR is copy-pasted to other SLRs to get a complete implementation.
-
Timing.
To run the complete workflow, go to project root folder, then run:
$ java -Xmx80G main.AutoPlacement 2>&1 | tee log.txt
  ==================Runtime Parameters====================
  Using Device: vu11p
  Hard Block Optimization Algorithm: SA
  Optimization Process Visualization: false
  Draw Final Placement Result with Matplotlib? false
  Proceed Optimization? false
  Use RapidWright Synthesis (RapidSynth)? true
  Use SLR Replication? true
  Use automatic pipeline? false
  Pipeline Depth: 4 (if auto-pipeline is enabled, this will be ignored)
  Vivado verbose: true
  Collect data to make evolution gif? false
  Collect convergence data? false
  ========================================================
  All Available Hard Blocks on FPGA:
  DSP: 32 x 288
  BRAM: 14 x 288
  URAM: 5 x 192
  max number of block = 480
  Searching for Placement Solution ...
Running main.AutoPlacement will start the main workflow, and runtime parameters controlling RapidLayout's behahviour will be printed out. Also, we can see the available hard block resources and how many convolutional blocks we can map to the device.
The
-Xmxflag is to specify Java stack size. It is not necessary to include the parameter unless a stack size error is encountered. Right nowSLRCopystill takes a significant amount of memory (about 80G) so we advise to manually specify the stack size with-Xmx80G.
After 30s ~ 5 min of placement searching (determined by which method is used), the result information is printed:
Optimization terminated.
Number of Blocks = 80
WireLengthPerBock = 8102.775
Size = 2879.0
------------------------
Spread = 2879.0
product = 1.8902063761509937E11
unifWireLength = 6.5654962700624995E7
>>>-----------------------------------------------
Search for Placement Solution: 232.947243338 s, which is 3.882454055633333 min
>>>-----------------------------------------------
Found Placement Strategy for 80 blocks of convolution units
------- Replicate Placement 2 times --------
replication finished
Synthesis will be performed if no corresponding synthesized DCP file in checkpoint directory is presented. After synthesis, RapidLayout places hard blocks according the placement solution:
One SLR synthesis finished.
Placement Start...
[Placing] DSP Cell: name[0].dut/conv2/dsp_chain0[0].dsp_inst	-->	DSP48E2_X1Y20
[Placing] DSP Cell: name[0].dut/conv2/dsp_chain0[1].dsp_inst	-->	DSP48E2_X1Y21
[Placing] DSP Cell: name[0].dut/conv2/dsp_chain0[2].dsp_inst	-->	DSP48E2_X1Y22
[Placing] DSP Cell: name[0].dut/conv2/dsp_chain1[0].dsp_inst	-->	DSP48E2_X1Y23
[Placing] DSP Cell: name[0].dut/conv2/dsp_chain1[1].dsp_inst	-->	DSP48E2_X1Y24
[Placing] DSP Cell: name[0].dut/conv2/dsp_chain1[2].dsp_inst	-->	DSP48E2_X1Y25
[Placing] DSP Cell: name[0].dut/conv2/dsp_chain2[0].dsp_inst	-->	DSP48E2_X1Y26
[Placing] DSP Cell: name[0].dut/conv2/dsp_chain2[1].dsp_inst	-->	DSP48E2_X1Y27
[Placing] DSP Cell: name[0].dut/conv2/dsp_inst8	-->	DSP48E2_X1Y28
...
After hard block placement, the design is written out as a DCP checkpoint file. The checkpoint is imported to Vivado automatically to complete the implementation. You will see lots of Vivado's output information is vivado_verbose is set to true. Then, a timing information is presented:
INFO: [Common 17-206] Exiting Vivado at Mon Feb 10 19:25:11 2020...
>>>-----------------------------------------------
  Vivado Implementation time = 58.69850945838334 min
>>>-----------------------------------------------
If SLR replication is enabled, you'll also see outputs like this:
SLR Replication: start...
SLR Replication: placing SLR 0
SLR Replication: placing SLR 1
SLR Replication: placing SLR 2
SLR Replication: done
>>>-----------------------------------------------
SLR Replication time = 346.156643894 s, which is 5.769277398233333 min
>>>-----------------------------------------------
Finally, the timing information is reported, and the final implemented design is written as the checkpoint.
==============================================================================
== Writing DCP: full-chip_vu11p.dcp ==
==============================================================================
Write EDIF: 9.225s
Writing XDEF Header: 23.430s
Writing XDEF Placement: 63.989s
Writing XDEF Routing: 26.279s
Writing XDEF Finalizing: 8.369s
Writing XDC: 0.001s
------------------------------------------------------------------------------
[No GC] *Total*: 131.293s
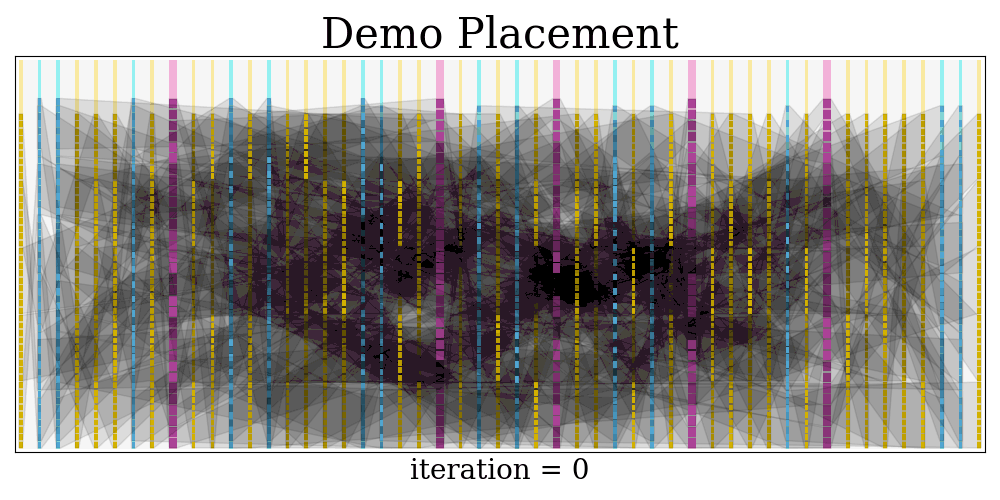
$$$$ frequency = 664.4518272425249 MHz At last, a visualization of the placement evolution process is rendered as a GIF.
The GIF is saved at visual/demo.gif
Python dependencies:
imageio                  2.6.1
pygifsicle               1.0.1
matplotlib               3.0.2
numpy                    1.17.4
We compare RapidLayout's placer with RapidWright's default Simulated Annealing BlockPlacer to see the differences. They both re-use pre-implemented modules to achieve high design efficiency. However, RapidWright's block placer area-constrains each module (in our case, a single convolution block), while RapidLayout takes a more fine-grained approach to place each hard block.
To run the RapidWright's BlockPlacer experiment, call
$ java Experiment.RapidWrightBaseline

...
...
number of hard macros: 480
==============================================================================
==          com.xilinx.rapidwright.placer.blockplacer.BlockPlacer           ==
==============================================================================
Initialization Time: 339.928 secs
 Initial Cost: 0.0
0.0 0.0 0.0 0.12123835549565654
0.0 0.0 0.0 0.8886272882972941
...
The BlockPlacer is unable to give a legal placement for the design because it cannot accustom to the irregular column distribution of hard block resources. RapidWright's BlockPlacer first discovers all available placements for each module, then finds the best placement with annealing.
So, We designed another experiment to observe all available placements found by RapidWright. The results are visualized as follows:
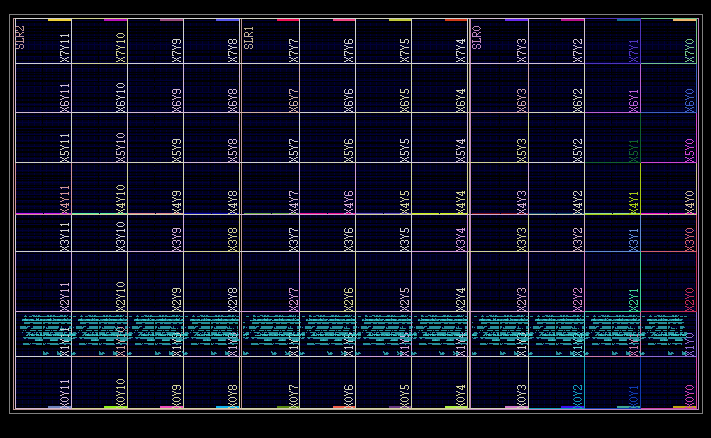
RapidWright only found available placements in the same columns, which are not enough to place all of the modules. Therefore, RapidWright's default placer could not find a viable placement solution because it cannot map modules to irregular hard block columns.

First, build the project with gradle build -p $RAPIDWRIGHT_PATH at the project root directory. Then, just run
$ java Experiment.CompareMethods 2>&1 | tee log.txtIt will run optimization for 100 times, collect model performace data and also the convergence data, and plot the runtime performances of each method.
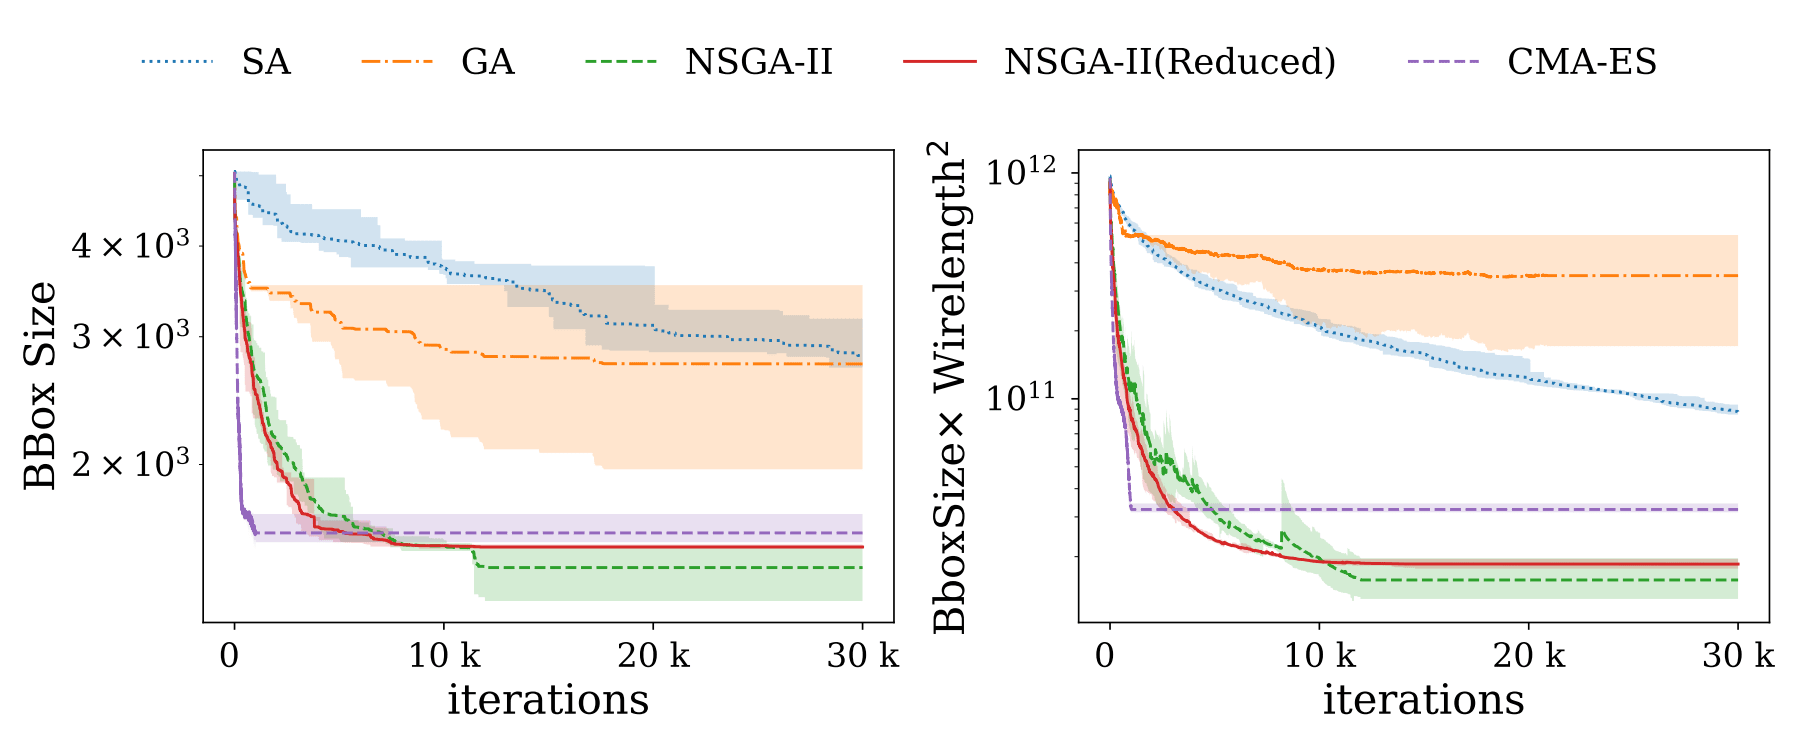
To plot convergence for each method, we have to run java Experiment.CompareMethods first to collect convergence data. After that, just run:
$ java Experiment.Convergence 2>&1 | tee log.txtThe convergence plot will be save in the visual directory.
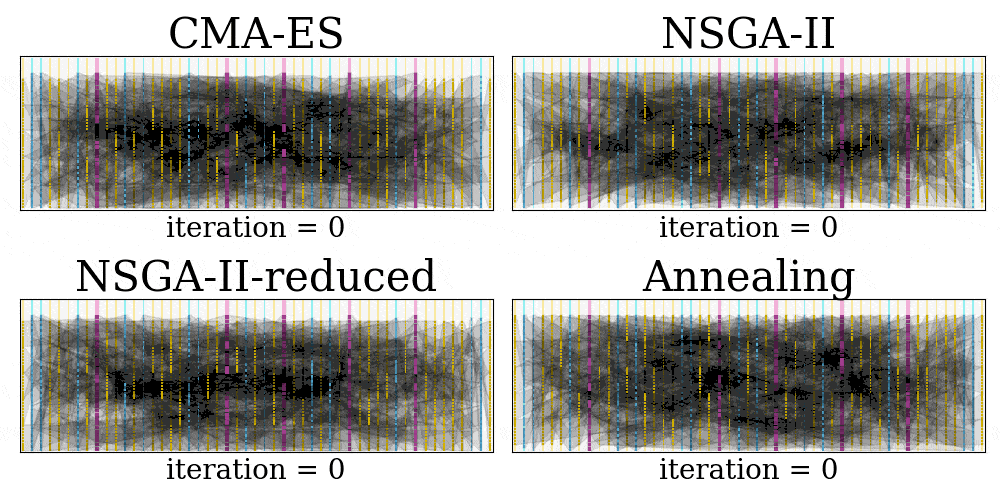
Finally, we can produce GIFs of the placement searching process for each method, and this can be done in a single line of command:
$ java Experiment.GenerateGIFThe result GIF will be saved in the visual folder.
This tool is distributed under MIT license.
Copyright (c) 2020 Niansong Zhang, Nachiket Kapre