Releases: thomwolf/Magic-Sand
Magic-Sand-with-Games-v1.5.4.1
Release v1.5.4.1 of the Magic-Sand with games.
Based on the source in the branch called "Magic-Sand-with-Games"
Windows 10, Windows 8, Windows 7
You need to download
- the Visual C++ run-time components ,
- the Free USB Driver tool: Zadig and
- the Magic Sand software it-self
Mac OS X
Just download the Magic Sand software and extract it where you want.
Mac OS X 10.8+ (not tested on Sierra yet):
Linux
Currently there is no pre-built binary for Linux but it is possible to build it using the provided (experimental) makefiles.
There is a known issue with multiple displays on Linux. It has proven possible to run it on Linux by only using a projector and no main screen. This means that the GUI is also shown on the sand.
Quick start
Download and unzip the files wherever you want.
Mac OSX
Plug your kinect & projector and run "Magic Sand.app" (mac)
Windows
- Update your video drivers.
- Install the Visual C++ run-time components (in particular the x86 component even if you run on a 64bits Windows).
- Install the kinect drivers with the Free USB Driver tool Zadig:
Select your Xbox Camera, Xbox Audio and Xbox Motor in the drop down and then select the libusb-win32( v1.2.6.0) driver from the driver menu (click on the up/down arrows) and click install.
You need to do this operation two to three times: once for the camera, once for motor and once for the audio.
See the freenect github and ofxKinect github for more informations.
If there is a problem with the detection of the kinect, you can install the Kinect V1 (SDK 1.0) and run again Zadig.
Setting up the system
Connect and turn on the projector and the kinect and start the Magic-Sand software.
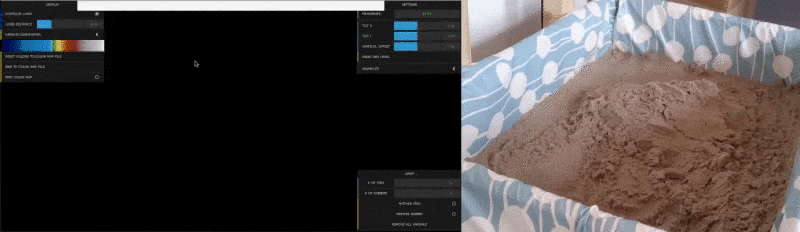
By default the software starts in a setup mode where the depth or color image from the Kinect can be seen in the user interface and the projector projects a completely white image. This way it is easy to check if the Kinect is running (on Windows 10 machines it can be necessary to plug and unplug the Kinect several times before it starts) and if the projector is working. The status of the kinect and the projector can be seen in the status window to the lower left in the user interface.
In setup mode the physical positions of the Kinect and projector can be optimised.
Calibration
To calibrate the system so the kinect and the projector is in correspondence a few steps are needed:
- Flatten the sand in the sand box.
- Make sure that you see either the depth image or the color image from the Kinect (click advanced|Display Kinect Depth View)
- Press Calibration|Manually Draw Sand Region
- Define the sand region by drawing a rectangle with the mouse on the Kinect Depth or Color view
- Press Automatically Calibrate Kinect & Projector - a series of Chessboard patterns are now projected on the sand.
- When a prompt appears cover the sand box with a light piece of cardboard or similar
- Press ok - a series of Chessboard patterns are now projected on the cardboard/plate.
If the calibration is succesful the status window should be updated showing that all is ok.
Debug mode for calibration
If the calibration was not succesful a debug mode can be enabled that will place debug files in the data\DebugFiles folder. These might point you in the direction of why the calibration failed. Do this by enabling advanced|Dump Debug and run the calibration routine again.
Tips for a nice calibration:
- Turn off the light in the room for the calibration, depending on the lighting, it may take several tries to get it to complete the calibration sometimes.
- Make sure you have a perfectly flat cover for the second part of the calibration. If its not flat, it may not calibrate properly. Also, make sure the cover has a matte surface otherwise the kinect may have problem to detect the depth.
Starting the Application
If the calibration was succesful or if a calibration was done before, the application can be started by pressing space or pushing the Run button.
Now a colored map with iso-lines should appear on the sand. The framerate should be close to 60 FPS for modern PCs.
Changelog
1.5.4.1 - 10-10-2017
Bug fix release
Added Mac OSX binaries
Bug fixes
- The calibration procedure was broken in 1.5.4 - it did not show the checkerboard. Now fixed.
Added
- Linux make files (experimental)
[1.5.4 - 23-09-2017]
Minor release of Magic-Sand-with-Games
Added
- Kinect FPS counter for received frames
- XCode build files
- Full frame filter option
- Simple InPainting option for removing outliers in the depth map
- Better scaling of GUI
- Debug feature: Kinect ROI can be seen on projector
- Debug feature: Left mouse click in Kinect depth view will print depth coordinates on console
- ChangeLog to the README
Changed
- Animals in animal game is now flipped depending on Kinect-projector matrix - so hopefully no more backwards swimming
- GUI update for animal game. Now updates animal numbers
- Adjusted game constants for animal game.
- Added beginner/novice/normal/expert game mode. Press 1, 2, 3 or 4 to start the different modes.
Bug fixes
- Spatial filter now correctly filters the ROI
[1.5.0] - 08-08-2017
Initial release of Magic-Sand with Games
Magic-Sand-with-Games-v1.5.4
Release v1.5.4 of the Magic-Sand with games.
Based on the source in the branch called "Magic-Sand-with-Games"
Windows 10, Windows 8, Windows 7
You need to download
- the Visual C++ run-time components ,
- the Free USB Driver tool: Zadig and
- the Magic Sand software it-self
Mac OS X
We are working on a Mac OS X build
Quick start
Download and unzip the files wherever you want.
Windows
- Update your video drivers.
- Install the Visual C++ run-time components (in particular the x86 component even if you run on a 64bits Windows).
- Install the kinect drivers with the Free USB Driver tool Zadig:
Select your Xbox Camera, Xbox Audio and Xbox Motor in the drop down and then select the libusb-win32( v1.2.6.0) driver from the driver menu (click on the up/down arrows) and click install.
You need to do this operation two to three times: once for the camera, once for motor and once for the audio.
See the freenect github and ofxKinect github for more informations.
If there is a problem with the detection of the kinect, you can install the Kinect V1 (SDK 1.0) and run again Zadig.
Setting up the system
Connect and turn on the projector and the kinect and start the Magic-Sand software.
By default the software starts in a setup mode where the depth or color image from the Kinect can be seen in the user interface and the projector projects a completely white image. This way it is easy to check if the Kinect is running (on Windows 10 machines it can be necessary to plug and unplug the Kinect several times before it starts) and if the projector is working. The status of the kinect and the projector can be seen in the status window to the lower left in the user interface.
In setup mode the physical positions of the Kinect and projector can be optimised.
Calibration
To calibrate the system so the kinect and the projector is in correspondence a few steps are needed:
- Flatten the sand in the sand box.
- Make sure that you see either the depth image or the color image from the Kinect (click advanced|Display Kinect Depth View)
- Press Calibration|Manually Draw Sand Region
- Define the sand region by drawing a rectangle with the mouse on the Kinect Depth or Color view
- Press Automatically Calibrate Kinect & Projector - a series of Chessboard patterns are now projected on the sand.
- When a prompt appears cover the sand box with a light piece of cardboard or similar
- Press ok - a series of Chessboard patterns are now projected on the cardboard/plate.
If the calibration is succesful the status window should be updated showing that all is ok.
Debug mode for calibration
If the calibration was not succesful a debug mode can be enabled that will place debug files in the data\DebugFiles folder. These might point you in the direction of why the calibration failed. Do this by enabling advanced|Dump Debug and run the calibration routine again.
Tips for a nice calibration:
- Turn off the light in the room for the calibration, depending on the lighting, it may take several tries to get it to complete the calibration sometimes.
- Make sure you have a perfectly flat cover for the second part of the calibration. If its not flat, it may not calibrate properly. Also, make sure the cover has a matte surface otherwise the kinect may have problem to detect the depth.
Starting the Application
If the calibration was succesful or if a calibration was done before, the application can be started by pressing space or pushing the Run button.
Now a colored map with iso-lines should appear on the sand. The framerate should be close to 60 FPS for modern PCs.
Changelog
[1.5.4 - 23-09-2017]
Minor release of Magic-Sand-with-Games
Added
- Kinect FPS counter for received frames
- XCode build files
- Full frame filter option
- Simple InPainting option for removing outliers in the depth map
- Better scaling of GUI
- Debug feature: Kinect ROI can be seen on projector
- Debug feature: Left mouse click in Kinect depth view will print depth coordinates on console
- ChangeLog to the README
Changed
- Animals in animal game is now flipped depending on Kinect-projector matrix - so hopefully no more backwards swimming
- GUI update for animal game. Now updates animal numbers
- Adjusted game constants for animal game.
- Added beginner/novice/normal/expert game mode. Press 1, 2, 3 or 4 to start the different modes.
Bug fixes
- Spatial filter now correctly filters the ROI
[1.5.0] - 08-08-2017
Initial release of Magic-Sand with Games
Magic-Sand-with-Games-v1.5
Release v1.5 of the Magic-Sand with games.
Based on the source in the branch called "Magic-Sand-with-Games"
Windows 10, Windows 8, Windows 7
You need to download
- the Visual C++ run-time components ,
- the Free USB Driver tool: Zadig and
- the Magic Sand software it-self
Mac OS X
We are working on a Mac OS X build
Quick start
Download and unzip the files wherever you want.
Windows
- Update your video drivers.
- Install the Visual C++ run-time components (in particular the x86 component even if you run on a 64bits Windows).
- Install the kinect drivers with the Free USB Driver tool Zadig:
Select your Xbox Camera, Xbox Audio and Xbox Motor in the drop down and then select the libusb-win32( v1.2.6.0) driver from the driver menu (click on the up/down arrows) and click install.
You need to do this operation two to three times: once for the camera, once for motor and once for the audio.
See the freenect github and ofxKinect github for more informations.
If there is a problem with the detection of the kinect, you can install the Kinect V1 (SDK 1.0) and run again Zadig.
Setting up the system
Connect and turn on the projector and the kinect and start the Magic-Sand software.
By default the software starts in a setup mode where the depth or color image from the Kinect can be seen in the user interface and the projector projects a completely white image. This way it is easy to check if the Kinect is running (on Windows 10 machines it can be necessary to plug and unplug the Kinect several times before it starts) and if the projector is working. The status of the kinect and the projector can be seen in the status window to the lower left in the user interface.
In setup mode the physical positions of the Kinect and projector can be optimised.
Calibration
To calibrate the system so the kinect and the projector is in correspondence a few steps are needed:
- Flatten the sand in the sand box.
- Make sure that you see either the depth image or the color image from the Kinect (click advanced|Display Kinect Depth View)
- Press Calibration|Manually Draw Sand Region
- Define the sand region by drawing a rectangle with the mouse on the Kinect Depth or Color view
- Press Automatically Calibrate Kinect & Projector - a series of Chessboard patterns are now projected on the sand.
- When a prompt appears cover the sand box with a light piece of cardboard or similar
- Press ok - a series of Chessboard patterns are now projected on the cardboard/plate.
If the calibration is succesful the status window should be updated showing that all is ok.
Debug mode for calibration
If the calibration was not succesful a debug mode can be enabled that will place debug files in the data\DebugFiles folder. These might point you in the direction of why the calibration failed. Do this by enabling advanced|Dump Debug and run the calibration routine again.
Tips for a nice calibration:
- Turn off the light in the room for the calibration, depending on the lighting, it may take several tries to get it to complete the calibration sometimes.
- Make sure you have a perfectly flat cover for the second part of the calibration. If its not flat, it may not calibrate properly. Also, make sure the cover has a matte surface otherwise the kinect may have problem to detect the depth.
Starting the Application
If the calibration was succesful or if a calibration was done before, the application can be started by pressing space or pushing the Run button.
Now a colored map with iso-lines should appear on the sand. The framerate should be close to 60 FPS for modern PCs.
Current release
First release of Magic-Sand (updated with GPL licence).
Windows 10, Windows 8, Windows 7, Vista, XP (currently doesn't work on Microsoft Surface):
You need to download
- the Visual C++ run-time components ,
- the Free USB Driver tool: Zadig and
- the Magic Sand software it-self : magic-sand-win32-v1.0.zip
Mac OS X 10.8+ (currently doesn't work on Sierra):
Just download the Magic Sand software magic-sand-osx-v1.0.zip
Quick start
Download and unzip the files wherever you want.
Mac OSX
Plug your kinect & projector and run "Magic Sand.app" (mac)
Windows
- Update your video drivers.
- Install the Visual C++ run-time components (in particular the x86 component even if you run on a 64bits Windows).
- Install the kinect drivers with the Free USB Driver tool Zadig:
Select your Xbox Camera, Xbox Audio and Xbox Motor in the drop down and then select the libusb-win32( v1.2.6.0) driver from the driver menu (click on the up/down arrows) and click install.
You need to do this operation three times: once for the camera, once for motor and once for the audio.
See the freenect github and ofxKinect github for more informations.
If there is a problem with the detection of the kinect, you can install the Kinect V1 (SDK 1.0) and run again Zadig. - Then plug your kinect & projector and run "Magic Sand.exe" (win).
Use
The first time you run the software it will start a self-calibration process (you will be asked to flatten the sand and put a flat cover over the sandbox).
Tips for a nice self-calibration:
- The kinect sensor needs to be able to detect the closed wall surrounding the sandbox. Be careful about the location of your kinect (not too close to the sandbox). You can use the "advanced feature" in the software to see the field of view of the kinect and make sure the kinect is pointed at the box properly and can see all 4 sides.
- Turn off the light in the room for the calibration, depending on the lighting, it may take several tries to get it to complete the calibration sometimes.
- Make sure you have a perfectly flat cover for the second part of the calibration. If its not flat, it may not calibrate properly. Also, make sure the cover has a matte surface otherwise the kinect may have problem to detect the depth.
- Also, please make sure the settings of the projector looks fine for a good image (sharp image, right angle, etc...)
The software is ready to be used. Here are some details on the UI:

The ColorMap files can be find in the Magic Sand folder in "data/colorMaps/".
Magic Sand v1.0
First release of Magic-Sand.
Windows 10, Windows 8, Windows 7, Vista, XP:
magic-sand-win32-v1.0.zip
Mac OS X 10.8+:
magic-sand-osx-v1.0.zip
##Quick start
Download and unzip the files wherever you want.
Plug your kinect & projector and run "Magic Sand.app" (mac) or "Magic Sand.exe" (win).
The first time you run the software it will start an auto-calibration process (you will be asked to flatten the sand and put a board over the sandbox):
Then to software is ready to be used. The interface is very easy to use. Here are some details:
The ColorMap files can be find in the Magic Sand folder in "data/colorMaps/".