Releases: schoolpost/CinePI
CinePI V2 | 0.0.1-alpha
Release Notes for CinePI V2 | v0.0.1-alpha
Date: Oct. 9, 2023
This release is based on "alpha" code that has been running on my CinePI V2 from earlier this year. As such it is not running the latest version of either Libcamera / libcamera-apps. Efforts to transition to the newest releases will be coming in the future. However this build is mostly functional and the exact software that was running on my CinePI V2 when I filmed my short film: TIMEKEEPER.
Highlights:
- Initial Pre-Production Release: This is the first alpha release of CinePI. It's primarily intended for debugging, testing, extended development, and gathering feedback.
New Features:
- Disk Image: A zipped disk image is provided with this release. Users can flash this image onto an SD card to test the software.
How to Flash MicroSD:
- Download the attached zipped disk image from the release assets.
- Extract the zipped file to get the disk image.
- Use your preferred flashing tool (e.g., BalenaEtcher, Win32 Disk Imager) to flash the image onto an SD card.
- Insert the MicroSD card into your device and boot from it.
- Your Raspberry Pi will boot up for the first time and immediately restart itself. This is expected behaviour for the first boot and should not happen in subsequent use.
- For debugging / development purposes you can access the system via SSH:
- Username: pi
- Password: cinemapi
Notes:
- As this is an alpha release, it may contain bugs or unfinished features. Please provide feedback or report any issues you encounter.
- Ensure you back up any important data on your SD card before flashing the disk image.
Feedback:
We appreciate your feedback and suggestions for improvements. Please report any issues or provide feedback through [link to your GitHub issues page or other feedback mechanism].
Hardware & Assembly
The core components required to build a CinePI V2:
- Raspberry Pi 4B 2/4/8GB ( We recommend having 4GB or more memory )
- Raspberry Pi High Quality Camera Module ( There is no support for other camera modules in this build. )
- Pimoroni Hyperpixel Square display with touch
⚠️ Note: THIS DISPLAY IS REQUIRED FOR ALL CINE PI V2 BUILDS, AS THE UI AS BEEN SPECIFICALLY DESIGNED FOR IT'S ASPECT RATIO AND RESOLUTION. IT WILL NOT WORK WITH OTHER DISPLAYS OR HDMI MONITORS.
To use the CinePI V2 you will also need:
- Lens with C/CS-mount
- USB 3.0 Capable SSD ( or other USB 3.0 storage capable of at least 100MB/s )
- 5V/3A USB-C Power Supply ( or using a powered HAT )
For extended functionality, we also recommend these optional parts:
- DS3231 RTC Module
- PCF8574 GPIO Expander Module
- An LED button
- Dupont cables
-
⚠️ Note: More information about how to use these optional parts will be detailed at a later time.

Watch "How To" Assembly Video Here:
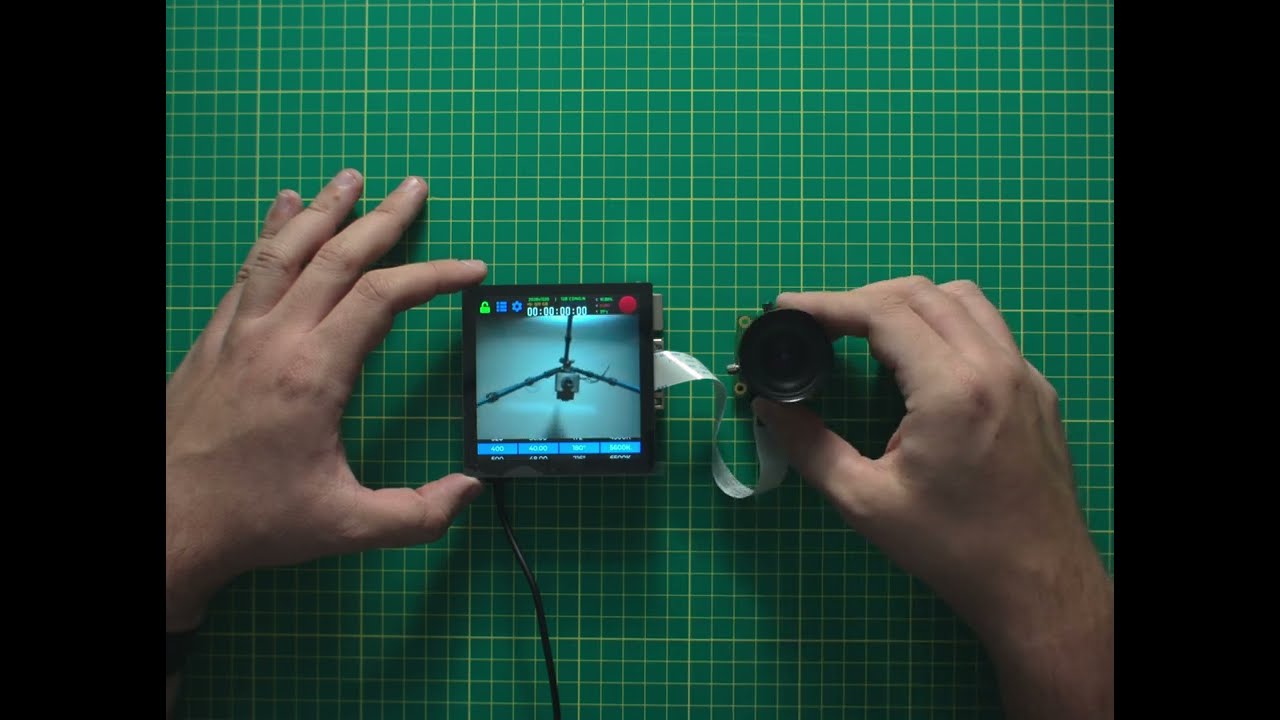
User Interface Overview:
Liveview

EXPOSURE
Used to help determine exposure levels/channel clipping from the RAW sensor data. Based on RED exposure tool.
DISK INFO
When a disk is successful detected/mounted, indicates the amount of storage remaining.
RESOLUTION
Resolution of the current sensor mode.
FORMAT
Describes the bit-depth, codec and compression level currently selected. 12B = 12-bit , CDNG = CinemaDNG, N = No Compression
RECORD
Record button to start/stop recording.
STATS
Displays real-time stats of the system:
- C: CPU % utilization.
- V: System voltage.
⚠️ Note: This will read 0.0 volts if you are using USB-C to power your Pi. This is normal.
- T: CPU Temperature
⚠️ Note: If your temperature is averaging in the 70-80's, please consider adding a fan/heatsink or both. This build applies an overclock to the CPU.
TIMECODE
Displays real-time timecode. Tap on the label to switch between current clip / global timecode. label will change to red when recording.
ISO
Change the sensor sensitivity, higher values = higher analog gain.
FPS
Change frame-rate of the sensor.
⚠️ Note: CinePI UI does not restrict the frame rates you can select based on your sensor mode, so please be aware you can choose a frame rate this is not possible at your selected resolution. Please refer to the sensor frame rate table to see what resolutions offer what frame-rates.

SHUTTER
Change the exposure time of the sensor. ( values in are shutter angle. )
WB
Change the liveview / recorded white balance.

Swipe left/right in the upper left corner to alternate between the exposure assist or the actions menu.
Examples of the 'traffic light' exposure assist are shown on the right.
Settings Page
Eject or format your attached media. Adjust sensor resolution and compression mode. Shutdown the camera.
⚠️ Note: only use lossless compression with 2028x1080 resolution. Further performance tuning required for other resolutions.
⚠️ Note: in this release, only the 2028 width resolutions are recommended for use. The other resolutions are either not fully implemented or have performance issues.

Clip Browser
Basic clip browser to list the clips recorded onto the media, each clip also displays the number of frames recorded.
