


Python library for Inky pHAT, Inky wHAT and Inky Impression e-paper displays for Raspberry Pi.
Inky pHAT is a 250x122 pixel e-paper display, available in red/black/white, yellow/black/white and black/white. It's great for nametags and displaying very low frequency information such as a daily calendar or weather overview.
Inky wHAT is a 400x300 pixel e-paper display available in red/black/white, yellow/black/white and black/white. It's got tons of resolution for detailed daily to-do lists, multi-day weather forecasts, bus timetables and more.
Inky Impression is our line of glorious 7 colour eInk displays, available in 4" (640 x 400 pixel) 5.7" (600 x 448 pixel) and 7.3" (800 x 480 pixel) flavours. They're packed with strong colours and perfect for displaying striking graphics or lots of data.
We'd recommend using this library with Raspberry Pi OS Bookworm or later. It requires Python ≥3.7.
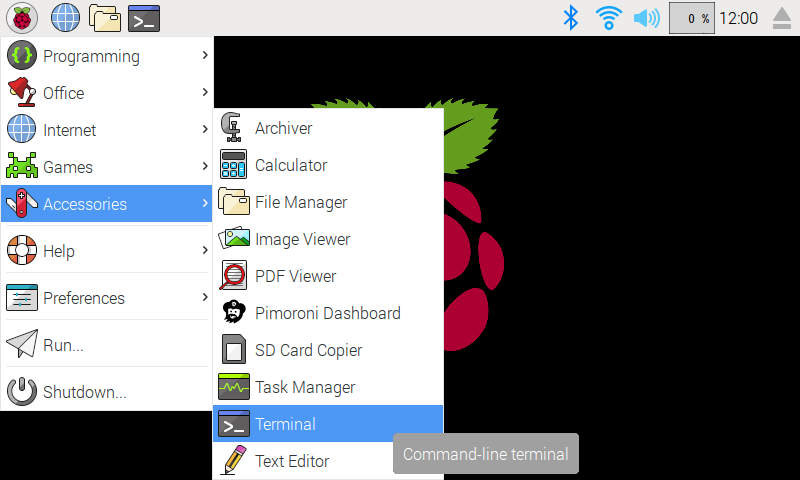
We've created an easy installation script that will install all pre-requisites and get you up and running with minimal efforts. To run it, fire up Terminal which you'll find in Menu -> Accessories -> Terminal on your Raspberry Pi desktop, as illustrated below:
In the new terminal window type the commands exactly as it appears below (check for typos) and follow the on-screen instructions:
git clone https://github.com/pimoroni/inky
cd inky
./install.sh
Note Libraries will be installed in the "pimoroni" virtual environment, you will need to activate it to run examples:
source ~/.virtualenvs/pimoroni/bin/activate
If you want to contribute, or like living on the edge of your seat by having the latest code, you can install the development version like so:
git clone https://github.com/pimoroni/inky
cd inky
./install.sh --unstable- Set up a virtual environment:
python3 -m venv --system-site-packages $HOME/.virtualenvs/pimoroni - Switch to the virtual environment:
source ~/.virtualenvs/pimoroni/bin/activate - Install the library:
pip install inky
This will not make any configuration changes, so you may also need to enable:
- i2c:
sudo raspi-config nonint do_i2c 0 - spi:
sudo raspi-config nonint do_spi 0
You can optionally run sudo raspi-config or the graphical Raspberry Pi Configuration UI to enable interfaces.
Additionally you may need to disable SPI's chip-select to avoid the error:
Woah there, some pins we need are in use!
  ⚠️   Chip Select: (line 8, GPIO8) currently claimed by spi0 CS0
This requires the addition of dtoverlay=spi0-0cs to /boot/firmware/config.txt.
The library should be run with Python 3.
Inky can try to automatically identify your board (from the information stored on its EEPROM) and set up accordingly. This is the easiest way to work with recent Inky displays.
from inky.auto import auto
display = auto()
You can then get the colour and resolution from the board:
display.colour
display.resolutionIf you have an older Inky without an EEPROM, you can specify the type manually. The Inky library contains modules for both the pHAT and wHAT, load the Inky pHAT one as follows:
from inky import InkyPHATYou'll then need to pick your colour, one of 'red', 'yellow' or 'black' and instantiate the class:
display = InkyPHAT('red')If you're using the wHAT you'll need to load the InkyWHAT class from the Inky library like so:
from inky import InkyWHAT
display = InkyWHAT('red')
Once you've initialised Inky, there are only three methods you need to be concerned with:
Set a PIL image, numpy array or list to Inky's internal buffer. The image dimensions should match the dimensions of the pHAT or wHAT you're using.
display.set_image(image)You should use PIL to create an image. PIL provides an ImageDraw module which allow you to draw text, lines and shapes over your image. See: https://pillow.readthedocs.io/en/stable/reference/ImageDraw.html
Set the border colour of you pHAT or wHAT.
display.set_border(colour)colour should be one of inky.RED, inky.YELLOW, inky.WHITE or inky.BLACK with available colours depending on your display type.
Once you've prepared and set your image, and chosen a border colour, you can update your e-ink display with:
display.show()If you're migrating code from the old inkyphat library you'll find that much of the drawing and image manipulation functions have been removed from Inky. These functions were always supplied by PIL, and the recommended approach is to use PIL to create and prepare your image before setting it to Inky with set_image().
Assuming you've run ./install.sh already, make sure you have your virtual environment active. If you're using the one set up by our installer, that looks like this:
source ~/.virtualenvs/pimoroni/bin/activate
You're missing some dependencies that the example code needs to run. A list of dependencies can be found here, and you can install them like this (make sure you have your virtual environment active):
pip install font-hanken-grotesk
Check that I2C and SPI are enabled. You can do this using sudo raspi-config - they're under 'Interfacing Options'. You may need to reboot your Pi after you've enabled them (sudo reboot).
Check you have the following line present in your /boot/firmware/config.txt:
dtoverlay=spi0-0cs
You can edit the config file using sudo nano boot/firmware/config.txt, and it's Ctrl-X, then 'Y' and Enter to save your changes. You'll need to reboot your Pi after you've made this change (sudo reboot)