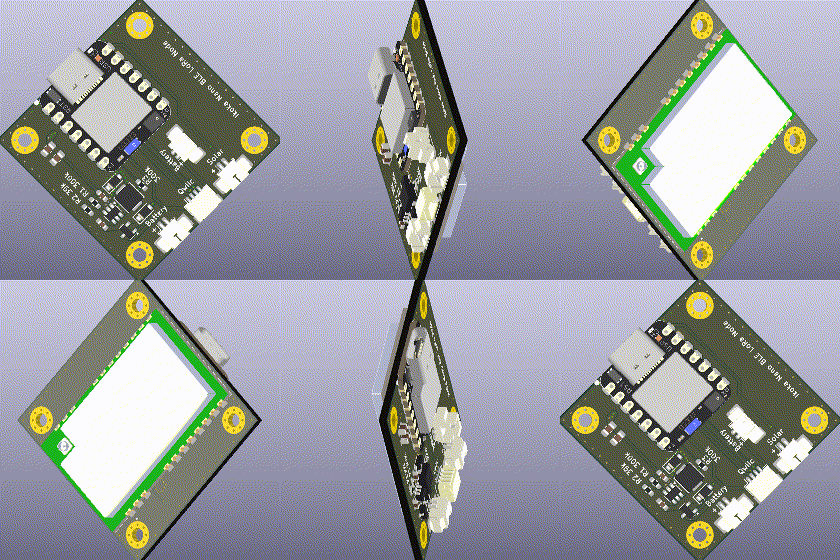
A Meshtastic device based on the Seeed Studio XIAO nRF52840 and EBYTE E22-XXXMXXS series LoRa modules. Pinout matches the Meshtastic xiao_ble variant.
The focus is on small size without an onboard display or buttons, meaning it must be used with Meshtastic client software, or as a remote repeater managed with remote node administration.
- USB-C for power and data
- Qwiic connector for I²C sensors
- Battery connectors (PicoBlade 1.25-2P)
- Solar connector (PicoBlade 1.25-2P, 4.45 to 6.45 V - BQ25100 charge IC)
- SnapMagic E22-900M30S footprint & symbol
- SparkFun KiCad Libraries
- SeeedStudio OPL KiCad Library (forked to add missing XIAO nRF5240 symbol)
- The files were created in KiCad 8
- Clone this git repository recursively, i.e. with
--recursive
- Generate the production files
- Install kicad-jlcpcb-tools
- Open the PCB file
- Tools -> External Plugins -> JLCPCB Tools
- Look over the Bill of Materials list and perform any substitutions required
- Click Generate
- Order the PCBs
- Use the Gerbers, BOM and CPL files in
jlcpcb/production_files - Default 1.6mm 2-layer PCB settings should work well, this PCB passes DRC based on JLCPCB specifications (other than the silkscreen of XIAO module being clipped by the PCB edge)
- Use the Gerbers, BOM and CPL files in
- Check the exported BOM file in
jlcpcb/production_files
I suggest PCBA, but I used handsoldering pads and all SMDs are 0603 or larger so can be hand-soldered.
- Solder the SMD components
- D1, C4, D2, R1
- U3, Q1
- R2, C3
- C1, C2
- L1
- Solder the connectors
- Qwiic connector
- Solar connector, battery connector x2
- Solder the XIAO BLE (solder 1-2 pins first then verify the rear VBAT hole is lined up well, before soldering the rest of the pads)
- Solder the E22-900M30S module
Follow the instructions at meshtastic/firmware/variants/xiao_ble/.
A snap-fit 3D printable enclosure is available in the enclosures folder. This has not been updated for the latest board design (2b17a53).


