Raspberry is an amazing single-board computer, compact, powerful and low-cost. With 25 dollars you have a quad-core Cortex-A7 CPU running at 900 MHz and 1 GB RAM, HDMI out...
Most used with Java, C and processing applications. Languages that allowed to work at low level and control hardware resources. But to run a web application you are dependent on an OS and far away from these resources. You must customize a distro to take advantage of GPU.
The frequent use is to install the special distro Raspbian and open your application in the web browser available (Epiphany or Midori). You will be able to navigate but forget about animations and high performance:
- First, because the 1GB memory is the same for video and RAM. You have 1GB split.
- Second, the browsers cannot natively use the GPU (hardware acceleration) to process animations.
But there is a hack using the QT library to force the use of the GPU. Compiling the webkit engine inside the QT giving access to this resource.
To do that you need to build a clean Linux distro. Remove unnecessary stuff to free the RAM memory and compile just the essential for your web application.
Cross compile, kernel configuration, make are common keywords in the Linux world, very low-level knowledge compare to the web environment. But are some tools to help us in this chaos. The Buildroot is a simple, efficient and easy-to-use tool to generate embedded Linux systems through cross-compilation.
Tip: cltr + / : search
Even with buildroot is important to understand the dependencies to each library you want to compile. The Methorogical company did an excellent job, started by @albertd. A repository with the best performance configurations for the buildroot to run the QT library and WebKit engine in Raspberry.
You just need clone the repository:
git clone https://github.com/Metrological/buildroot
cd buildroot
inside the directory, apply the basics configurations for RPI Model 2.
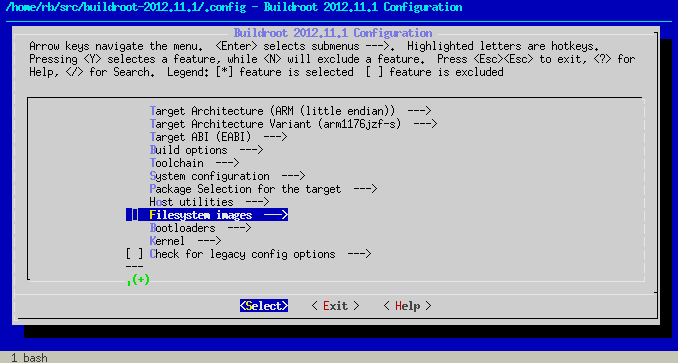
make rpi2_qt5webkit_defconfigin case of you want to access the buildroot menu and see other libraries available, use:
make menuconfigIn this repository have a basic .config file with all libraries we think are essential to run a web application (like git, fbv, websockt, python...). Ready to use.
copy the file for your builroot directory and run:
makeThe process takes a long time. Running Linux ubuntu on Macbook Air took about 3 hours.
Now you have an image ready to clone for your sdcard. This link you have all the instructions to copy the image using the terminal.
With your card ready. You can login to the system using ssh (login: root, password: root). Insert the sdcard in the RPI, connect the cables and use:
ssh [email protected] # replace with RPI ip addressTo run your web application:
qtbrowser --url=http://urlThe QTbrowser is not chrome and safari. Even all use the WebKit engine for rendering. Qtbrowser has details and different ways of dealing with HTML. It is important to develop your front-end code testing directly on RPI. But we could make that interface:
Below some notes about render machine of Qtbrowser:
- In the boot of page classes with CSS animations do not work, you must add the class after loading the page.
- Use only the properties that use the CSS composite layer
transition,opacity. - Images with the size greater than 1000px decrease the FPS
- You do not need jQuery
- Avoid gradients and images with opacity
- Multiple images on the screen have better performance than multiple canvas
- Clone your DOM elements than create entire by javascript
PS: To server our pages we use tornado web server from python, but you can use PHP our grunt too
The distro compiled by buldroot is very clean. Many features that a regular Linux user is used to run, probably does exist, for example apt-get. Sometimes you need install manual this features.
Inside boot partition, you have the file config.txt. It set the default values for RPI hardware. Below some new values for this project:
gpu_mem_1024=512 # memory video set
hdmi_group=1
hdmi_mode=16 # Full HD 60p
hdmi_force_hotplug=1 # force HDMI entranceThe cool to use an RPI is built an auto system. Update and initialize automatic. Using bash script we create some snippets to help that:
Inside the folder /etc/init.d/ you have files named S01*, S02* the number meaning the order of the file will be executed in the boot.
@felipesanches develop a system to have splashscreen in 3 simple steps:
- 1 - Create a PNG sequence with name
frame*.pngand put in some diretory inside RPI. - 2 - Edit the file
S01loggingand include in the first line the follow code:
#early splash!
cat /dev/zero 1> /dev/fb0 2>/dev/null
fbv -i -c /home/default/bootanimations/frame*.png --delay 1- 3 - Use the file cmdline.txt. It be prepare to mute the boot log.
Thanks to @netoarmando and @felipesanches for help me in the process to run web application 60FPs in Raspberry.
If you have any doubt use the github issues :D


