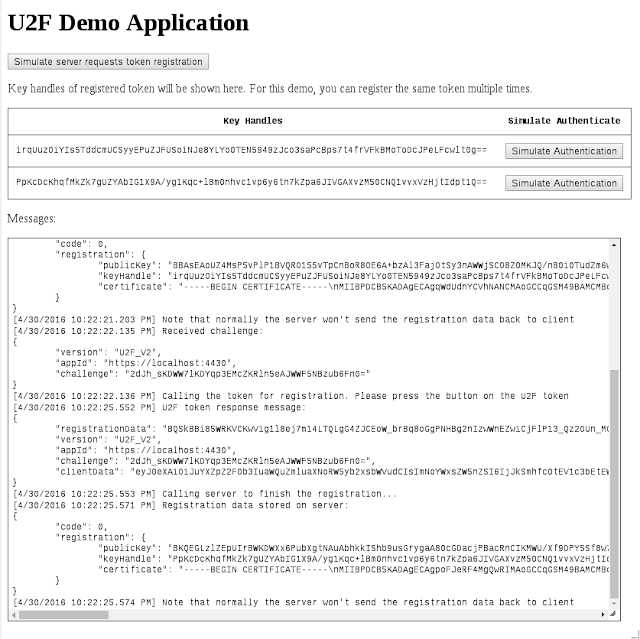
A simple node.js server setup to demonstrate the Fido U2F authentication.
Make sure you have node.js install on your machine. Clone the source code from github and install the dependencies
npm install
Note that the demo uses https connections. A sample self-signed certificate is included. You can generate your own self-signed certificate by
openssl ecparam -genkey -out sslcert/private-key.pem -name prime256v1
openssl req -x509 -new -key sslcert/private-key.pem -out sslcert/server.pem
Start the server by running
npm start
The server will start listening on localhost and port 4430 by default. Point your Chrome / Chromium browser to
https://localhost:4430/demo
You can then simulate:
- Register a new token with the server.
- Authenticate with the server using the token.
You will be able to see the U2F messages passed between the server and token.
To simulate a registration, click on the button to request a challenge from server. Then, depending on the type of the token you have, your will need to
- un-plug and then plug in your token; or
- press the button on your token
The token will generate a key pair to sign the challenge and generate a response. The response will then be sent to the server for validation and persisted for future authentication.
For demo purpose only, you can register the same token multiple times with the demo server. After each successful registration, a new keyHandle will be shown on the browser page. Note that in real life the server (Relying Party) will not send back the registration data to the browser (Client). See comments in source code for details.
For this demo, the registration data is stored in session only. In real life application, the data should be persisted in DB.
To simulate an authentication event, click on the button next to a particular keyHandle. The server will generate a challenge in which the browser will pass to the token. Again, plug in the token or click on the button on the token to sign the challenge. The response will be sent to server to validate and complete the authentication.
Note that in real life the token is used as a two-factor authentication device. So normally the server will trigger such authentication after the initial user/password authentication.
If your token failed to process the authentication challenge, try to modify node-u2flib-server to change the base64 encoded string
var base64_to_RFC4648 = function(input) {
  // RFC 4648 uses '-' instead of '+', and '_' instead of '/'.
  // Also remove the padding '='
  return input.replace(/\+/g, '-').replace(/\//g, '_').replace(/\=/g, '');
}
Note that each registration requires a new key pair from the token. Some tokens can generate infinite number of key pairs by using key-wrapping or deterministic algorithm (e.g. Yubico's U2F tokens).
But some tokens (e.g. the one I have from HyperFIDO) only support limited number of key pairs (64 pairs for HyperFIDO). Once over the limit, you won't be able to register the token with any new sites. Some vendors do provide a reset program for you to wipe the token though.
