aws-device-farm-integration is a built for executing Katalon Studio tests on AWS Device Farm. AWS Device Farm only supports running tests using supported frameworks such as Working with Appium and AWS Device Farm; hence, Katalon users cannot execute their tests on AWS Device farm directly.
By using aws-device-farm-integration, you can execute your Katalon test scripts with devices provided on AWS Device Farm. This tutorial shows you how to configure Katalon projects, AWS device farm and aws-device-farm-integration to execute the usage sample, which is KatalonDemoProject. Also, at the end of this tutorial, we provide some configurations that you can try to execute your Katalon projects on AWS Device Farm.
You need
- An active Katalon Runtime Engine license
- KRE v7.8+
Your machine should
- Install Apache Maven version 3.3.9 or later
- Install Java JDK 8
- Mobile app on Android
- Mobile app on iOS
- Web app on Android
- Web app on iOS
- Prepare Katalon tested test cases, test suites that can run successfully on local device
For Mobile test, a test should start with Start Existing Application keyword because AWS Device Farm already installs the application on tested device before every run.
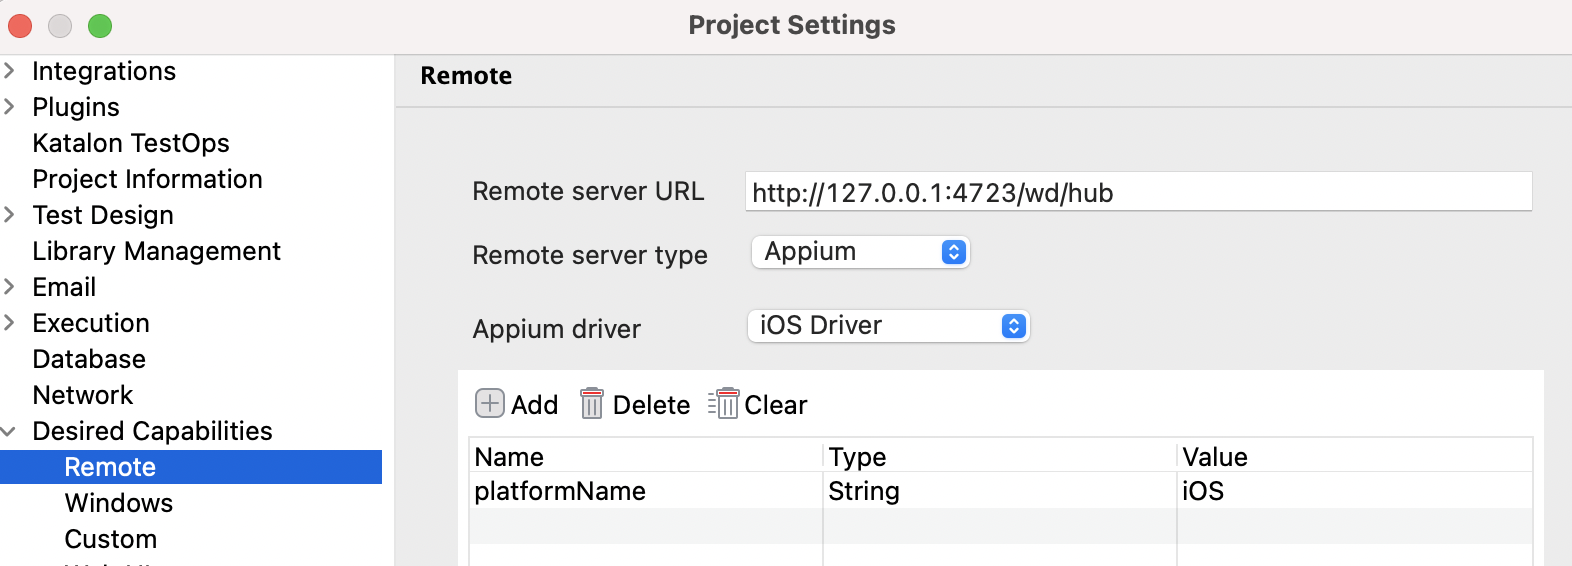
- Open Project Settings/Desired Capabilities/Remote
- In
Remote server URL, enter the Appium server URL: http://127.0.0.1:4723/wd/hub and select Appium in Remote server type. - In
Appium driver, select Android Driver for Android devices; or iOS Driver for iOS devices. - Add a desired capability
platformNamewith valueAndroidfor Android devices; oriOSfor iOS devices.- For Android app testing, we need to add extra desired capabilities
appPackage: [app ID]andappActivity: [main activity name]. Main activity can retrieve after uploading app to AWS Device Farm
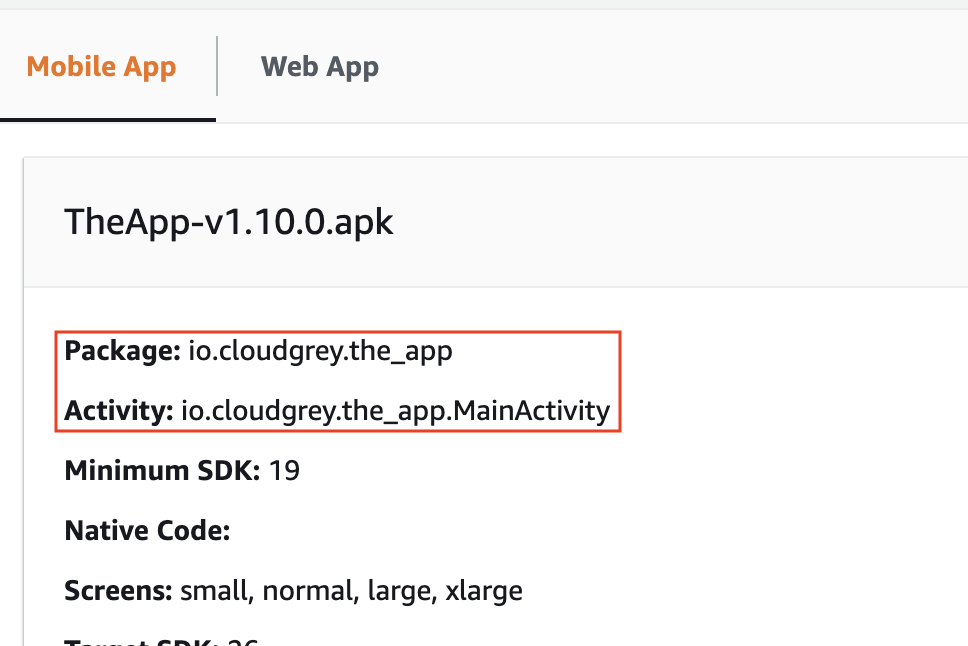
- For Android app testing, we need to add extra desired capabilities
- Press
Apply and Close.
- Clone this repository
- Open this open in any IDE choice (Eclipse, VSCode,...)
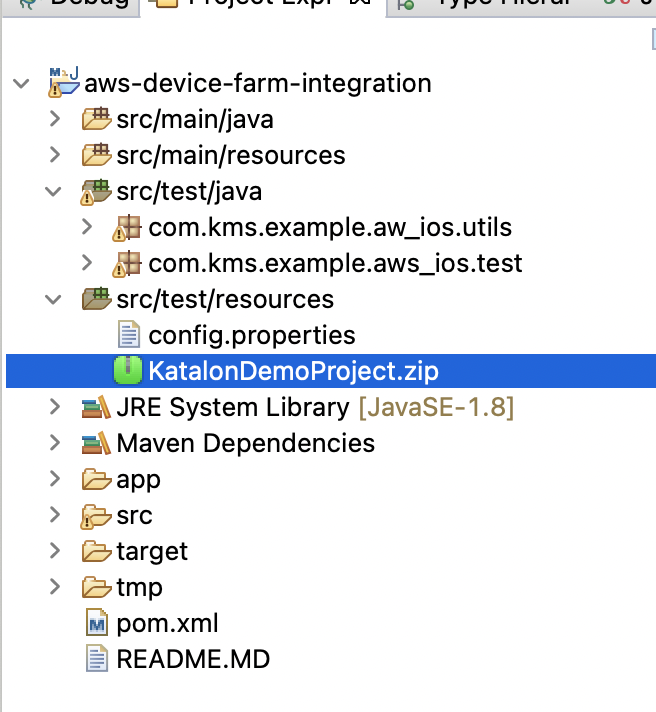
- Zip your Katalon project and put in src/test/resources folder
- Open config.properties file and change the following variables as your context:
-
KATALON_VERSION: Katalon Runtime Engine version- (e.g.
"8.1.0, 7.8.2")
- (e.g.
-
KATALON_PROJECT_PACKAGE_FILE: Your package file- (e.g.
"KatalonDemoProject.zip")
- (e.g.
-
KATALON_EXECUTE_ARGS: The arguments part of your Katalon run command- (e.g.
"-retry=0 -testSuitePath="Test Suites/Regression Tests" -executionProfile="default" -browserType="Remote" -reportFolder=$DEVICEFARM_LOG_DIR -apiKey="xxxxxx"")
Please note that the
-browserTypeargument must be set to"Remote".The
-reportFolder=$DEVICEFARM_LOG_DIRargument allows us can download the execution report in Files/Customer Artifact of the AWS Device Farm Job - (e.g.
- Build aws-device-farm-integration by typing the below command in terminal
mvn clean package -DskipTests=true
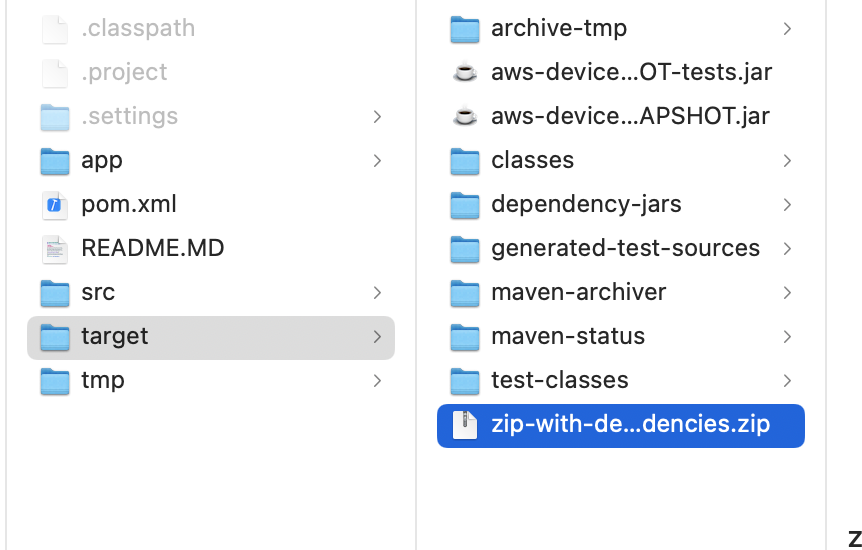
If the build runs successfully, you will see a zip name zip-with-dependencies.zip in the target folder. We will use this file for the next step.
- In AWS Console, create or click on an existing project
- Click on
Create a new run - In
Choose Applicationstep,
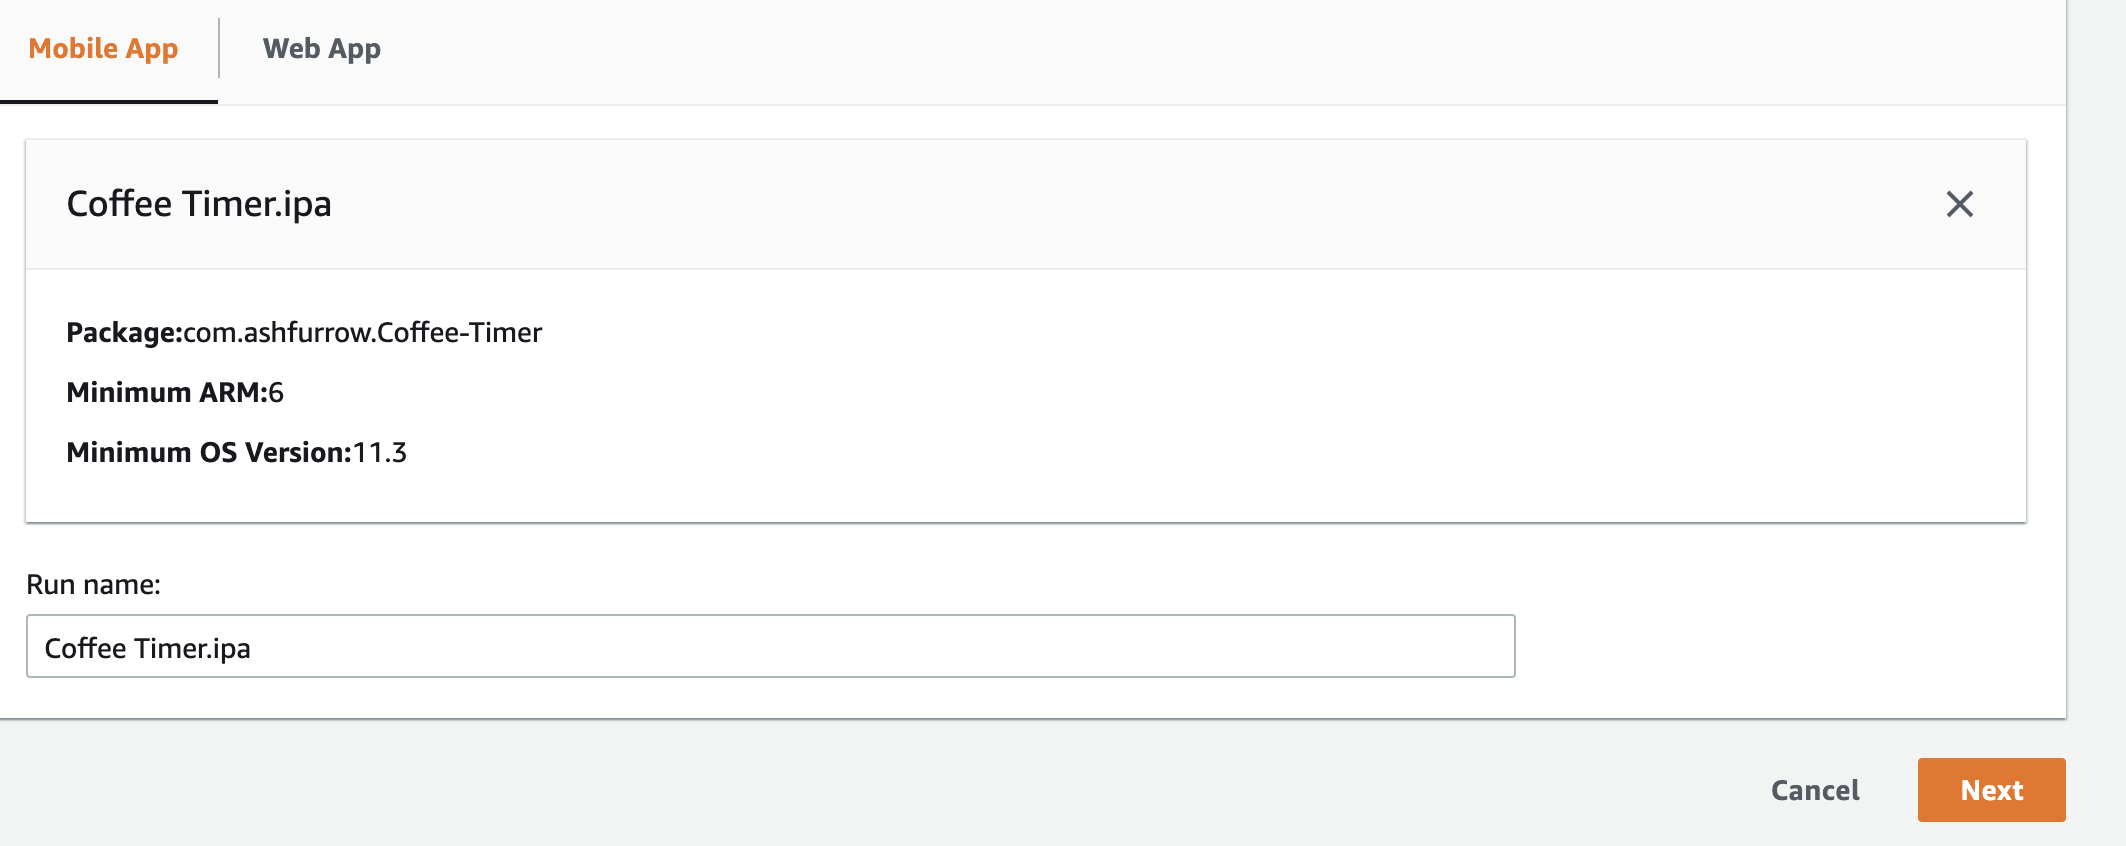
- For Mobile app testing, select
Mobile Apptab and upload your tested application (.apk for Anroid application and .ipa for iOS application). Wait for uploading app successfully then clickNext.
- For Web app testing, select
Web Appand type a run name then clickNext.
- In
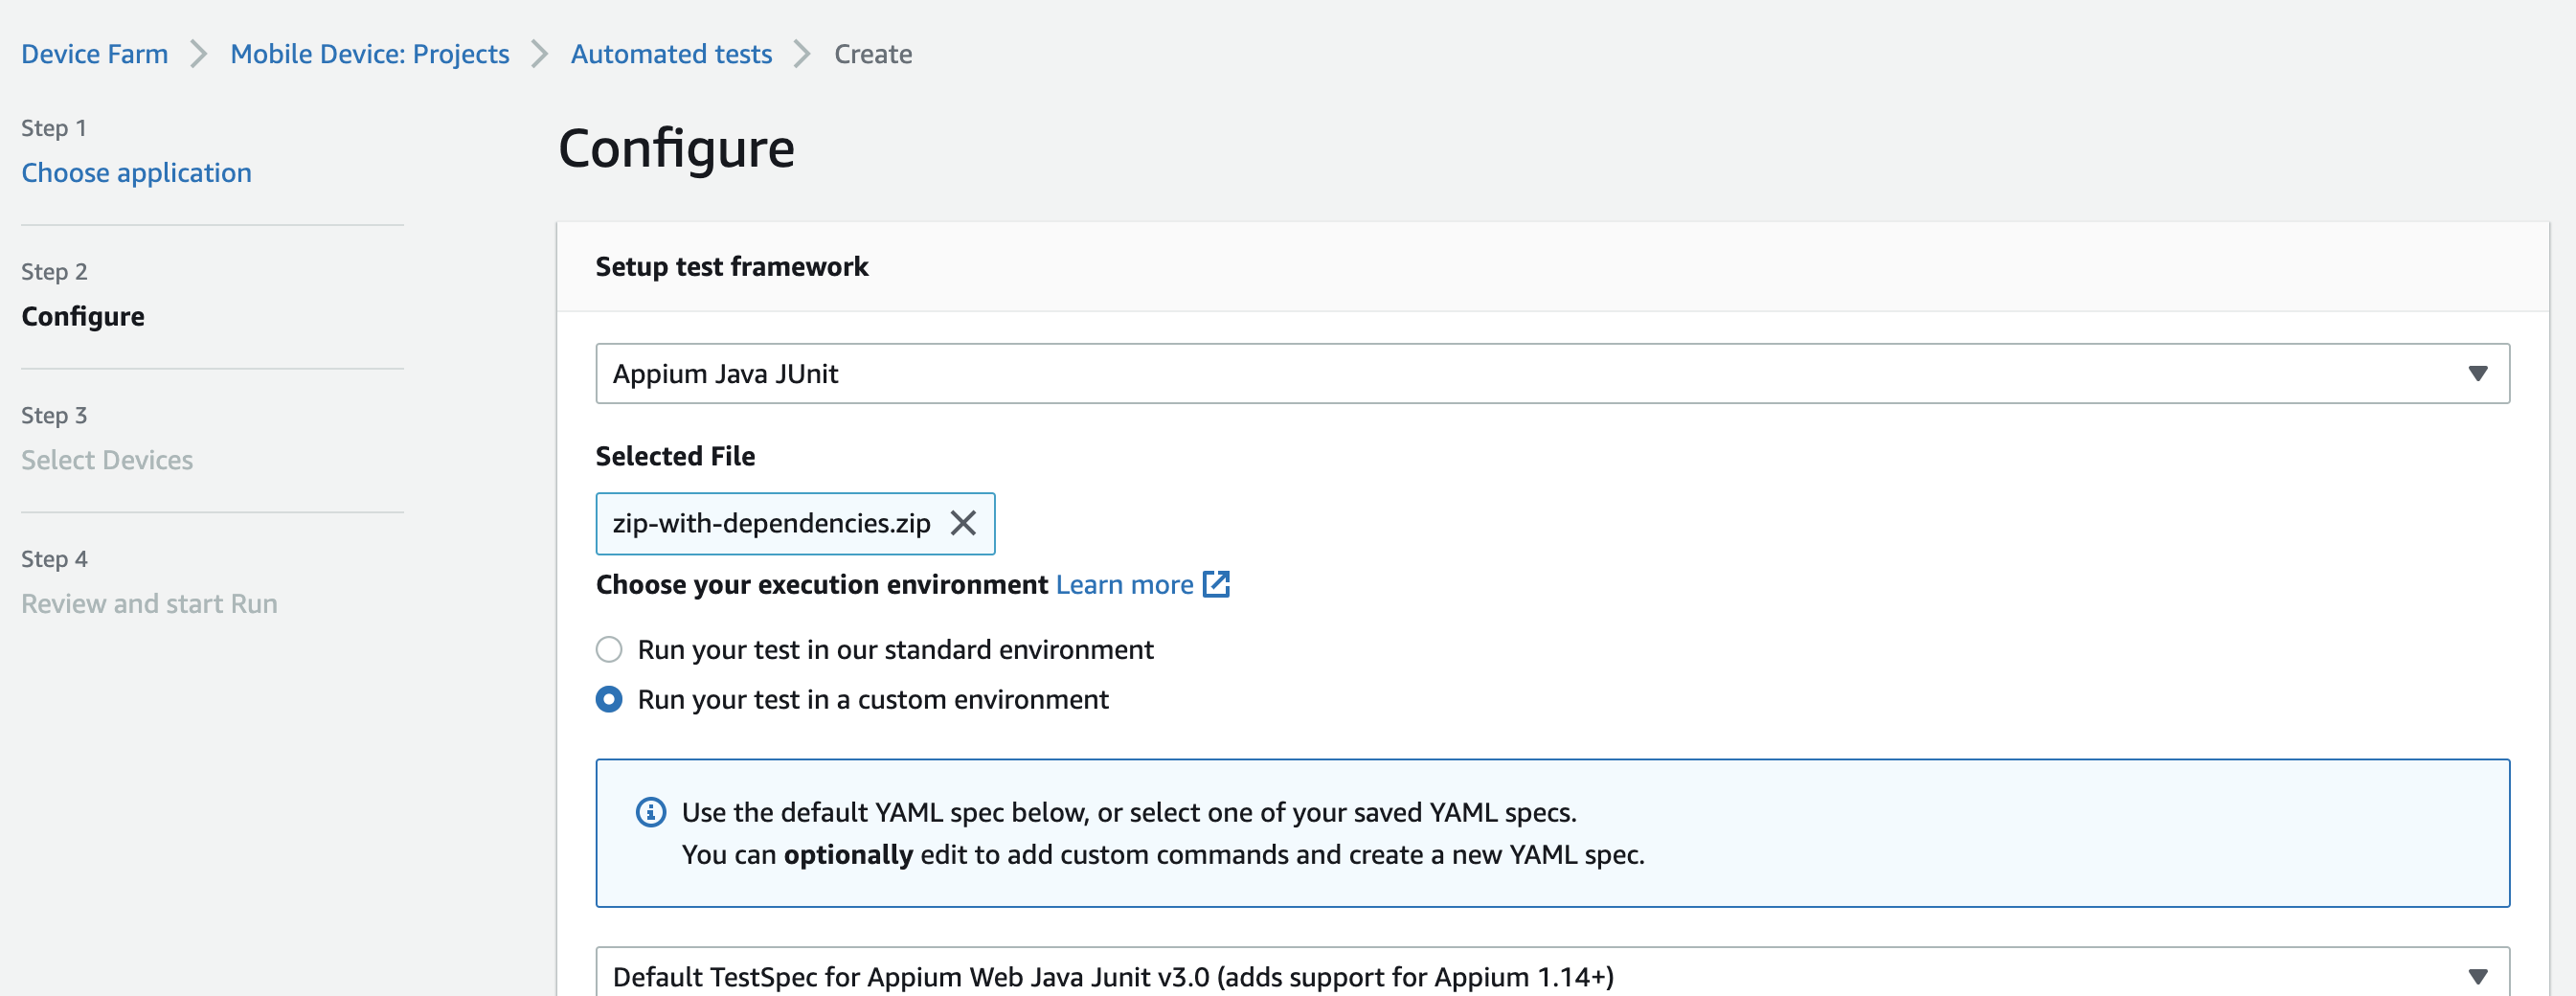
ConfigureStep, selectAppium Java JUnitin test type drop-down. Upload thezip-with-dependencies.zipthat was created from Maven in the previous step then clickNext.
In Appium Java Unit section, click Edit and replace the yaml file with the content below:
- iOS
version: 0.1

# Phases represent collections of commands that are executed during your test run on the test host.
phases:

  # The install phase contains commands for installing dependencies to run your tests.
  # For your convenience, certain dependencies are preinstalled on the test host.

  # For iOS tests, Java 12 is preinstalled and preconfigured on the test host. For more information
  # about how to package your Java dependencies for your test, please see:
  # https://docs.aws.amazon.com/devicefarm/latest/developerguide/test-types-appium.html
  # Additionally, you can use the Node.JS tools nvm, npm, and avm to setup your Appium server.
  install:
    commands:
      # The Appium server is written using Node.js. In order to run your desired version of Appium,
      # you first need to set up a Node.js environment that is compatible with your version of Appium.
      # For iOS, use "nvm use" to switch between the two preinstalled NodeJS versions 14 and 16, and
      # use "nvm install" to download a new version of your choice.
      - export NVM_DIR=$HOME/.nvm
      - . $NVM_DIR/nvm.sh
      - nvm use 16
      - node --version

      # For iOS, Appium versions 1.22.2 and 2.2.1 are preinstalled and selectable through avm.
      # For all other versions, please use npm to install them. For example:
      # - npm install -g [email protected];
      # Note that, for iOS devices, Appium 2 is only supported on iOS version 14 and above using
      # NodeJS version 16 and above.
      - avm 2.2.1
      - appium --version

      # For Appium version 2, for iOS tests, the XCUITest driver is preinstalled using version 5.7.0
      # If you want to install a different version of the driver, you can use the Appium extension CLI
      # to uninstall the existing XCUITest driver and install your desired version:
      # - |-
      #   if [ $DEVICEFARM_DEVICE_PLATFORM_NAME = "iOS" ];
      #   then
      #     appium driver uninstall xcuitest;
      #     appium driver install [email protected];
      #   fi;

      # We recommend setting the Appium server's base path explicitly for accepting commands.
      - export APPIUM_BASE_PATH=/wd/hub

      # On iOS, all tests run using Java version 12. This is not configurable at this time.
      - java -version

  # The pre-test phase contains commands for setting up your test environment.
  pre_test:
    commands:
      # Setup the CLASSPATH so that Java knows where to find your test classes.
      - export CLASSPATH=$CLASSPATH:$DEVICEFARM_TEST_PACKAGE_PATH/*
      - export CLASSPATH=$CLASSPATH:$DEVICEFARM_TEST_PACKAGE_PATH/dependency-jars/*

      # Device farm provides different pre-built versions of WebDriverAgent, an essential Appium
      # dependency for iOS devices, and each version is suggested for different versions of Appium:
      # DEVICEFARM_WDA_DERIVED_DATA_PATH_V8: this version is suggested for Appium 2
      # DEVICEFARM_WDA_DERIVED_DATA_PATH_V7: this version is suggested for Appium 1
      # Additionally, for iOS versions 16 and below, the device unique identifier (UDID) needs
      # to be slightly modified for Appium tests.
      - |-
        if [ $DEVICEFARM_DEVICE_PLATFORM_NAME = "iOS" ];
        then
          if [ $(appium --version | cut -d "." -f1) -ge 2 ];
          then
            DEVICEFARM_WDA_DERIVED_DATA_PATH=$DEVICEFARM_WDA_DERIVED_DATA_PATH_V8;
          else
            DEVICEFARM_WDA_DERIVED_DATA_PATH=$DEVICEFARM_WDA_DERIVED_DATA_PATH_V7;
          fi;

          if [ $(echo $DEVICEFARM_DEVICE_OS_VERSION | cut -d "." -f 1) -le 16 ];
          then
            DEVICEFARM_DEVICE_UDID_FOR_APPIUM=$(echo $DEVICEFARM_DEVICE_UDID | tr -d "-");
          else
            DEVICEFARM_DEVICE_UDID_FOR_APPIUM=$DEVICEFARM_DEVICE_UDID;
          fi;
        fi;

      # We recommend starting the Appium server process in the background using the command below.
      # The Appium server log will be written to the $DEVICEFARM_LOG_DIR directory.
      # The environment variables passed as capabilities to the server will be automatically assigned
      # during your test run based on your test's specific device.
      # For more information about which environment variables are set and how they're set, please see
      # https://docs.aws.amazon.com/devicefarm/latest/developerguide/custom-test-environment-variables.html
      - |-
        appium --base-path=$APPIUM_BASE_PATH --log-timestamp \
          --log-no-colors --relaxed-security --default-capabilities \
          "{\"appium:deviceName\": \"$DEVICEFARM_DEVICE_NAME\", \
          \"platformName\": \"$DEVICEFARM_DEVICE_PLATFORM_NAME\", \
          \"appium:app\": \"$DEVICEFARM_APP_PATH\", \
          \"appium:udid\":\"$DEVICEFARM_DEVICE_UDID_FOR_APPIUM\", \
          \"appium:platformVersion\": \"$DEVICEFARM_DEVICE_OS_VERSION\", \
          \"appium:derivedDataPath\": \"$DEVICEFARM_WDA_DERIVED_DATA_PATH\", \
          \"appium:usePrebuiltWDA\": true, \
          \"appium:automationName\": \"XCUITest\"}" \
          >> $DEVICEFARM_LOG_DIR/appium.log 2>&1 &

      # This code will wait until the Appium server starts.
      - |-
        appium_initialization_time=0;
        until curl --silent --fail "http://0.0.0.0:4723${APPIUM_BASE_PATH}/status"; do
          if [[ $appium_initialization_time -gt 30 ]]; then
            echo "Appium did not start within 30 seconds. Exiting...";
            exit 1;
          fi;
          appium_initialization_time=$((appium_initialization_time + 1));
          echo "Waiting for Appium to start on port 4723...";
          sleep 1;
        done;

  # The test phase contains commands for running your tests.
  test:
    commands:
      # Your test package is downloaded and unpackaged into the $DEVICEFARM_TEST_PACKAGE_PATH directory.
      - cd $DEVICEFARM_TEST_PACKAGE_PATH
      - echo "Starting the Appium Java JUnit test"

      # Below are examples of how to run Appium Java  tests on Device Farm using different JUnit versions:
      # 1. JUnit 5 (default configuration)
      # 2. TestNG with support for running JUnit 4 tests
      # 3. JUnit 4
      # Uncomment and adapt the section that corresponds to your chosen JUnit version and test setup.

      # JUnit 5 example:

      # TestNG with JUnit 4 support example:
      # Note: TestNG can directly run JUnit 4 tests. Ensure your TestNG suite XML is set up accordingly.
      # For details, see the TestNG documentation: http://testng.org/doc/documentation-main.html
      # - |-
      #   java -Dappium.screenshots.dir=$DEVICEFARM_SCREENSHOT_PATH org.testng.TestNG -junit \
      #     -testjar *-tests.jar -d $DEVICEFARM_LOG_DIR/test-output -verbose 10

      # JUnit 4 example:
      # Make sure to replace 'Replace.With Your.TestClasses Here' with your actual test classes.
      - export TEST_CLASSES="com.kms.example.aws_ios.test.TestIos"
      - java -Dappium.screenshots.dir=$DEVICEFARM_SCREENSHOT_PATH org.junit.runner.JUnitCore $TEST_CLASSES

      # Before starting tests, verify that all dependencies and configurations are in place.
      # For more information, refer to AWS Device Farm's documentation on Appium Java JUnit testing:
      # https://docs.aws.amazon.com/devicefarm/latest/developerguide/test-types-appium.html

  # The post-test phase contains commands that are run after your tests have completed.
  # If you need to run any commands to generating logs and reports on how your test performed,
  # we recommend adding them to this section.
  post_test:
    commands:

# Artifacts are a list of paths on the filesystem where you can store test output and reports.
# All files in these paths will be collected by Device Farm.
# These files will be available through the ListArtifacts API as your "Customer Artifacts".
artifacts:
  # By default, Device Farm will collect your artifacts from the $DEVICEFARM_LOG_DIR directory.
  - $DEVICEFARM_LOG_DIR
- Android
version: 0.1

# This flag enables your test to run using Device Farm's Amazon Linux 2 test host. For more information,
# please see https://docs.aws.amazon.com/devicefarm/latest/developerguide/amazon-linux-2.html
android_test_host: legacy

# Phases represent collections of commands that are executed during your test run on the test host.
phases:

  # The install phase contains commands for installing dependencies to run your tests.
  # For your convenience, certain dependencies are preinstalled on the test host. To lean about which
  # software is included with the host, and how to install additional software, please see:
  # https://docs.aws.amazon.com/devicefarm/latest/developerguide/amazon-linux-2-supported-software.html

  # Many software libraries you may need are available from the test host using the devicefarm-cli tool.
  # To learn more about what software is available from it and how to use it, please see:
  # https://docs.aws.amazon.com/devicefarm/latest/developerguide/amazon-linux-2-devicefarm-cli.html
  install:
    commands:
      # The Appium server is written using Node.js. In order to run your desired version of Appium,
      # you first need to set up a Node.js environment that is compatible with your version of Appium.
      - devicefarm-cli use node 18
      - node --version

      # Use the devicefarm-cli to select a preinstalled major version of Appium.
      - devicefarm-cli use appium 1
      - appium --version

      # The Device Farm service automatically updates the preinstalled Appium versions over time to
      # incorporate the latest minor and patch versions for each major version. If you wish to
      # select a specific version of Appium, you can use NPM to install it.
      # - npm install -g [email protected]

      # For Appium version 2, Device Farm automatically updates the preinstalled UIAutomator2 driver
      # over time to incorporate the latest minor and patch versions for its major version 2. If you
      # want to install a specific version of the driver, you can use the Appium extension CLI to
      # uninstall the existing UIAutomator2 driver and install your desired version:
      # - appium driver uninstall uiautomator2
      # - appium driver install [email protected]

      # We recommend setting the Appium server's base path explicitly for accepting commands.
      - export APPIUM_BASE_PATH=/wd/hub

      # Use the devicefarm-cli to setup a Java environment, with which you can run your test suite.
      - devicefarm-cli use java 11
      - java -version

  # The pre-test phase contains commands for setting up your test environment.
  pre_test:
    commands:
      # Setup the CLASSPATH so that Java knows where to find your test classes.
      - export CLASSPATH=$CLASSPATH:$DEVICEFARM_TEST_PACKAGE_PATH/*
      - export CLASSPATH=$CLASSPATH:$DEVICEFARM_TEST_PACKAGE_PATH/dependency-jars/*

      # Appium downloads Chromedriver using a feature that is considered insecure for multitenant
      # environments. This is not a problem for Device Farm because each test host is allocated
      # exclusively for one customer, then terminated entirely. For more information, please see
      # https://github.com/appium/appium/blob/master/packages/appium/docs/en/guides/security.md

      # We recommend starting the Appium server process in the background using the command below.
      # The Appium server log will be written to the $DEVICEFARM_LOG_DIR directory.
      # The environment variables passed as capabilities to the server will be automatically assigned
      # during your test run based on your test's specific device.
      # For more information about which environment variables are set and how they're set, please see
      # https://docs.aws.amazon.com/devicefarm/latest/developerguide/custom-test-environment-variables.html
      - |-
        appium  --default-capabilities \
          "{\"appium:deviceName\": \"$DEVICEFARM_DEVICE_NAME\", \
          \"platformName\": \"$DEVICEFARM_DEVICE_PLATFORM_NAME\", \
          \"appium:app\": \"$DEVICEFARM_APP_PATH\", \
          \"appium:udid\":\"$DEVICEFARM_DEVICE_UDID\", \
          \"appium:platformVersion\": \"$DEVICEFARM_DEVICE_OS_VERSION\", \
          \"appium:automationName\": \"UiAutomator2\"}" \
          >> $DEVICEFARM_LOG_DIR/appium.log 2>&1 &

      # This code will wait until the Appium server starts.
      - |-
        appium_initialization_time=0;
        until curl --silent --fail "http://0.0.0.0:4723/wd/hub/status"; do
          if [[ $appium_initialization_time -gt 30 ]]; then
            echo "Appium did not start within 30 seconds. Exiting...";
            exit 1;
          fi;
          appium_initialization_time=$((appium_initialization_time + 1));
          echo "Waiting for Appium to start on port 4723...";
          sleep 1;
        done;

  # The test phase contains commands for running your tests.
  test:
    commands:
      # Your test package is downloaded and unpackaged into the $DEVICEFARM_TEST_PACKAGE_PATH directory.
      - cd $DEVICEFARM_TEST_PACKAGE_PATH
      - echo "Starting the Appium Java JUnit test"

      # Below are examples of how to run Appium Java tests on Device Farm using different JUnit versions:
      # 1. JUnit 5 (default configuration)
      # 2. TestNG with support for running JUnit 4 tests
      # 3. JUnit 4
      # Uncomment and adapt the section that corresponds to your chosen JUnit version and test setup.

      # JUnit 5 example:

      # TestNG with JUnit 4 support example:
      # Note: TestNG can directly run JUnit 4 tests. Ensure your TestNG suite XML is set up accordingly.
      # For details, see the TestNG documentation: http://testng.org/doc/documentation-main.html
      # - |-
      #   java -Dappium.screenshots.dir=$DEVICEFARM_SCREENSHOT_PATH org.testng.TestNG -junit \
      #     -testjar *-tests.jar -d $DEVICEFARM_LOG_DIR/test-output -verbose 10

      # JUnit 4 example:
      # Make sure to replace 'Replace.With Your.TestClasses Here' with your actual test classes.
      - export TEST_CLASSES="com.kms.example.aws_ios.test.TestIos"
      - java -Dappium.screenshots.dir=$DEVICEFARM_SCREENSHOT_PATH org.junit.runner.JUnitCore $TEST_CLASSES

      # Before starting tests, verify that all dependencies and configurations are in place.
      # For more information, refer to AWS Device Farm's documentation on Appium Java JUnit testing:
      # https://docs.aws.amazon.com/devicefarm/latest/developerguide/test-types-appium.html

  # The post-test phase contains commands that are run after your tests have completed.
  # If you need to run any commands to generating logs and reports on how your test performed,
  # we recommend adding them to this section.
  post_test:
    commands:

# Artifacts are a list of paths on the filesystem where you can store test output and reports.
# All files in these paths will be collected by Device Farm.
# These files will be available through the ListArtifacts API as your "Customer Artifacts".
artifacts:
  # By default, Device Farm will collect your artifacts from the $DEVICEFARM_LOG_DIR directory.
  - $DEVICEFARM_LOG_DIR
- In
Select devicesStep, choose a suitable device pool then clickNext. - In
Specify device stateStep, review other settings and change when needed then clickNext - In
Review and start runStep, review all of configurations one last time then clickConfirm and Start Run.
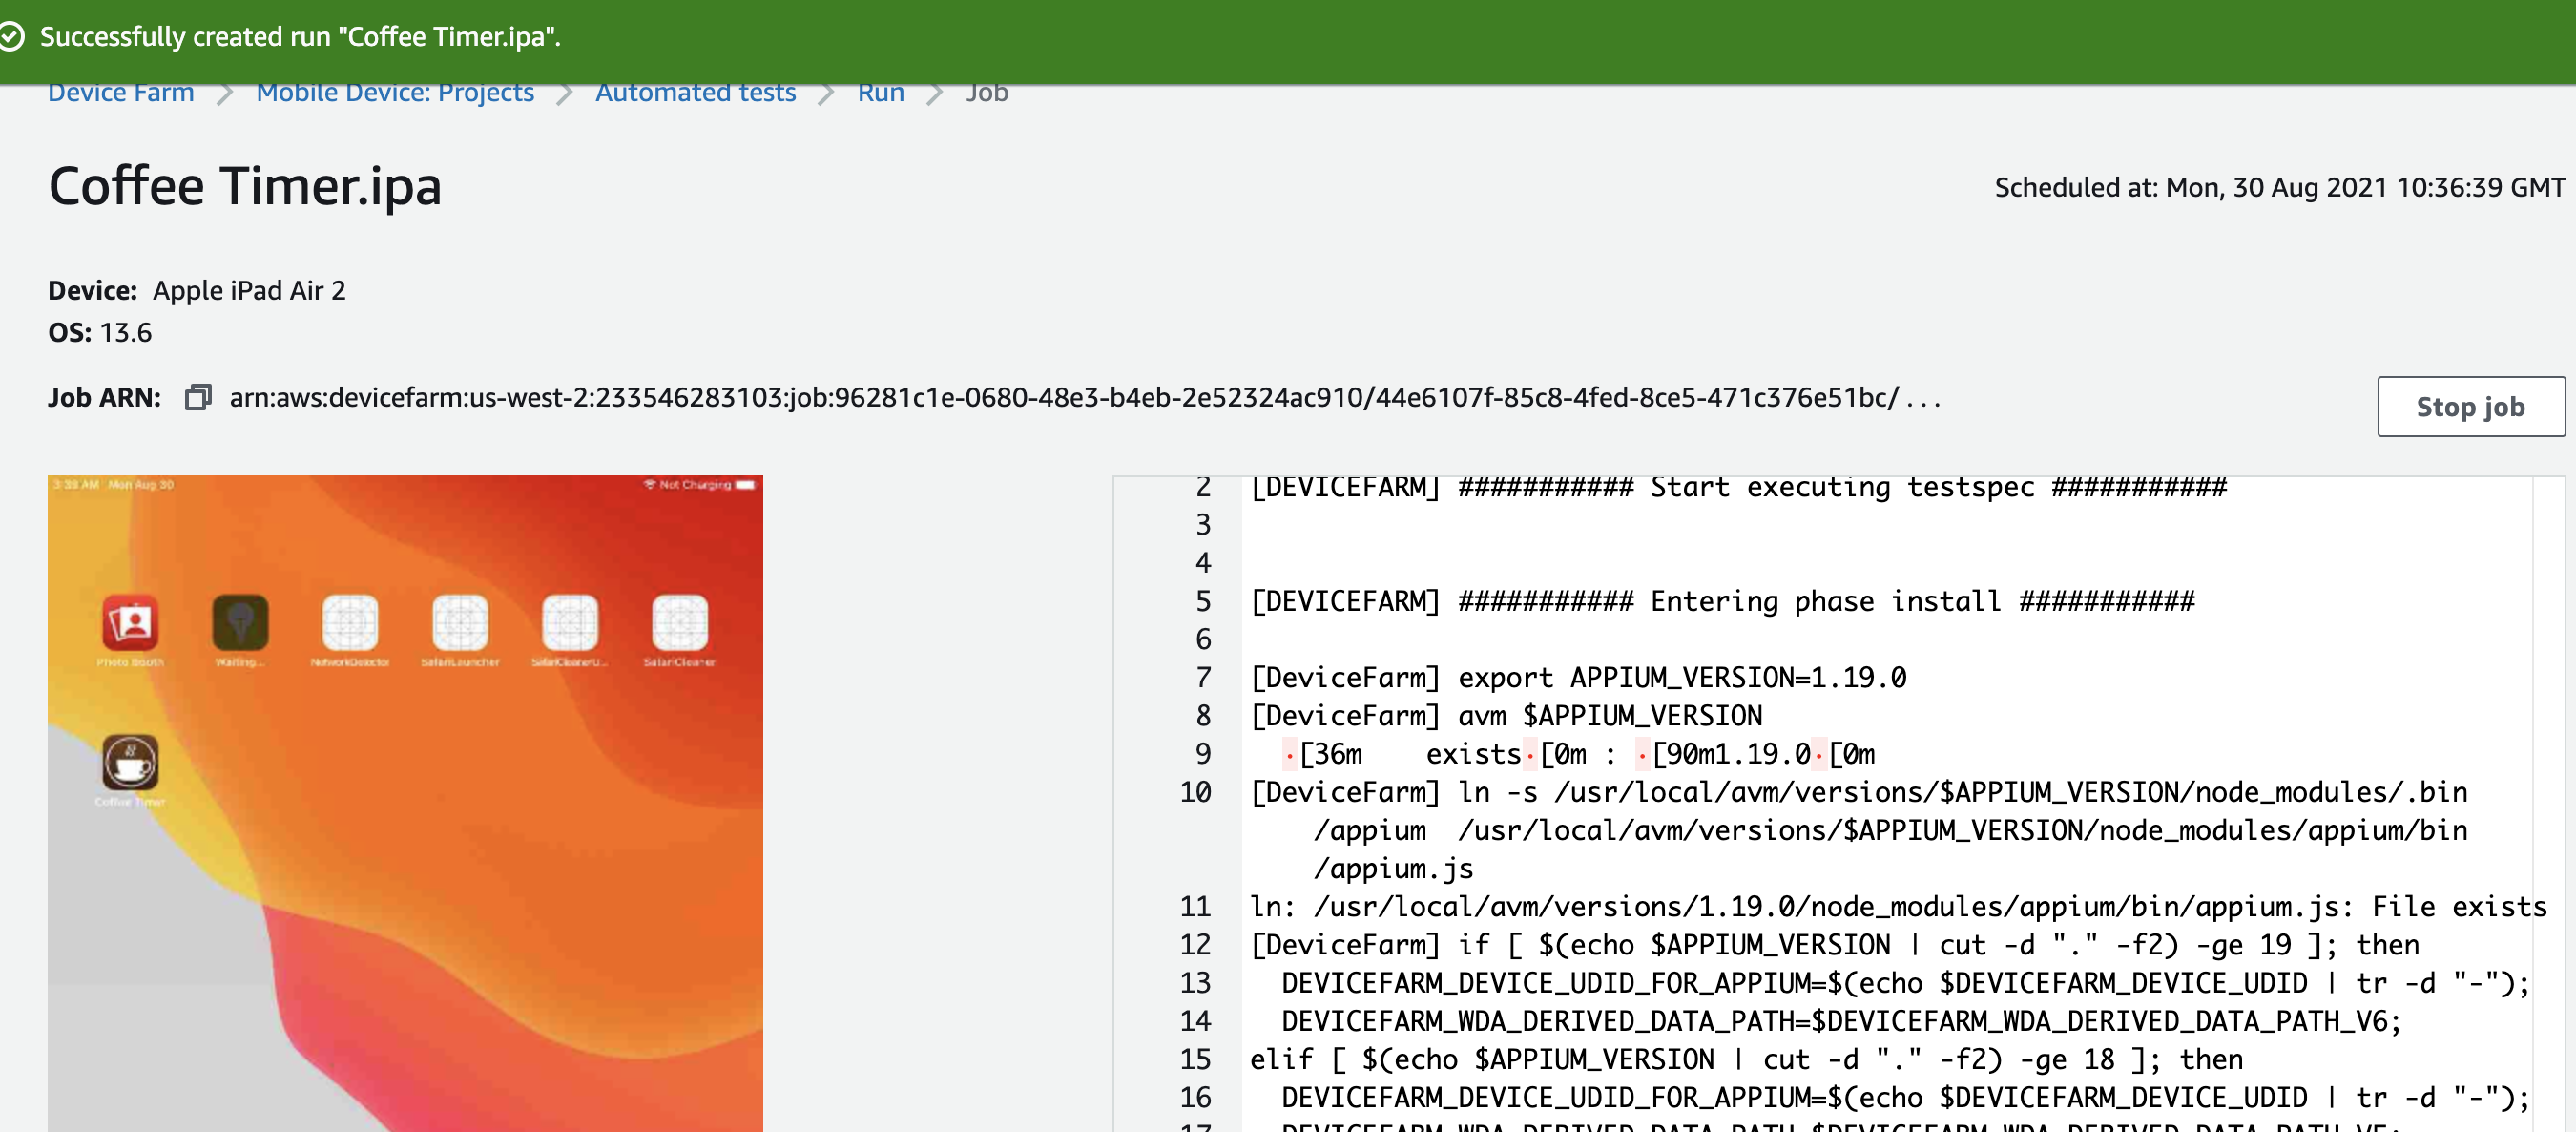
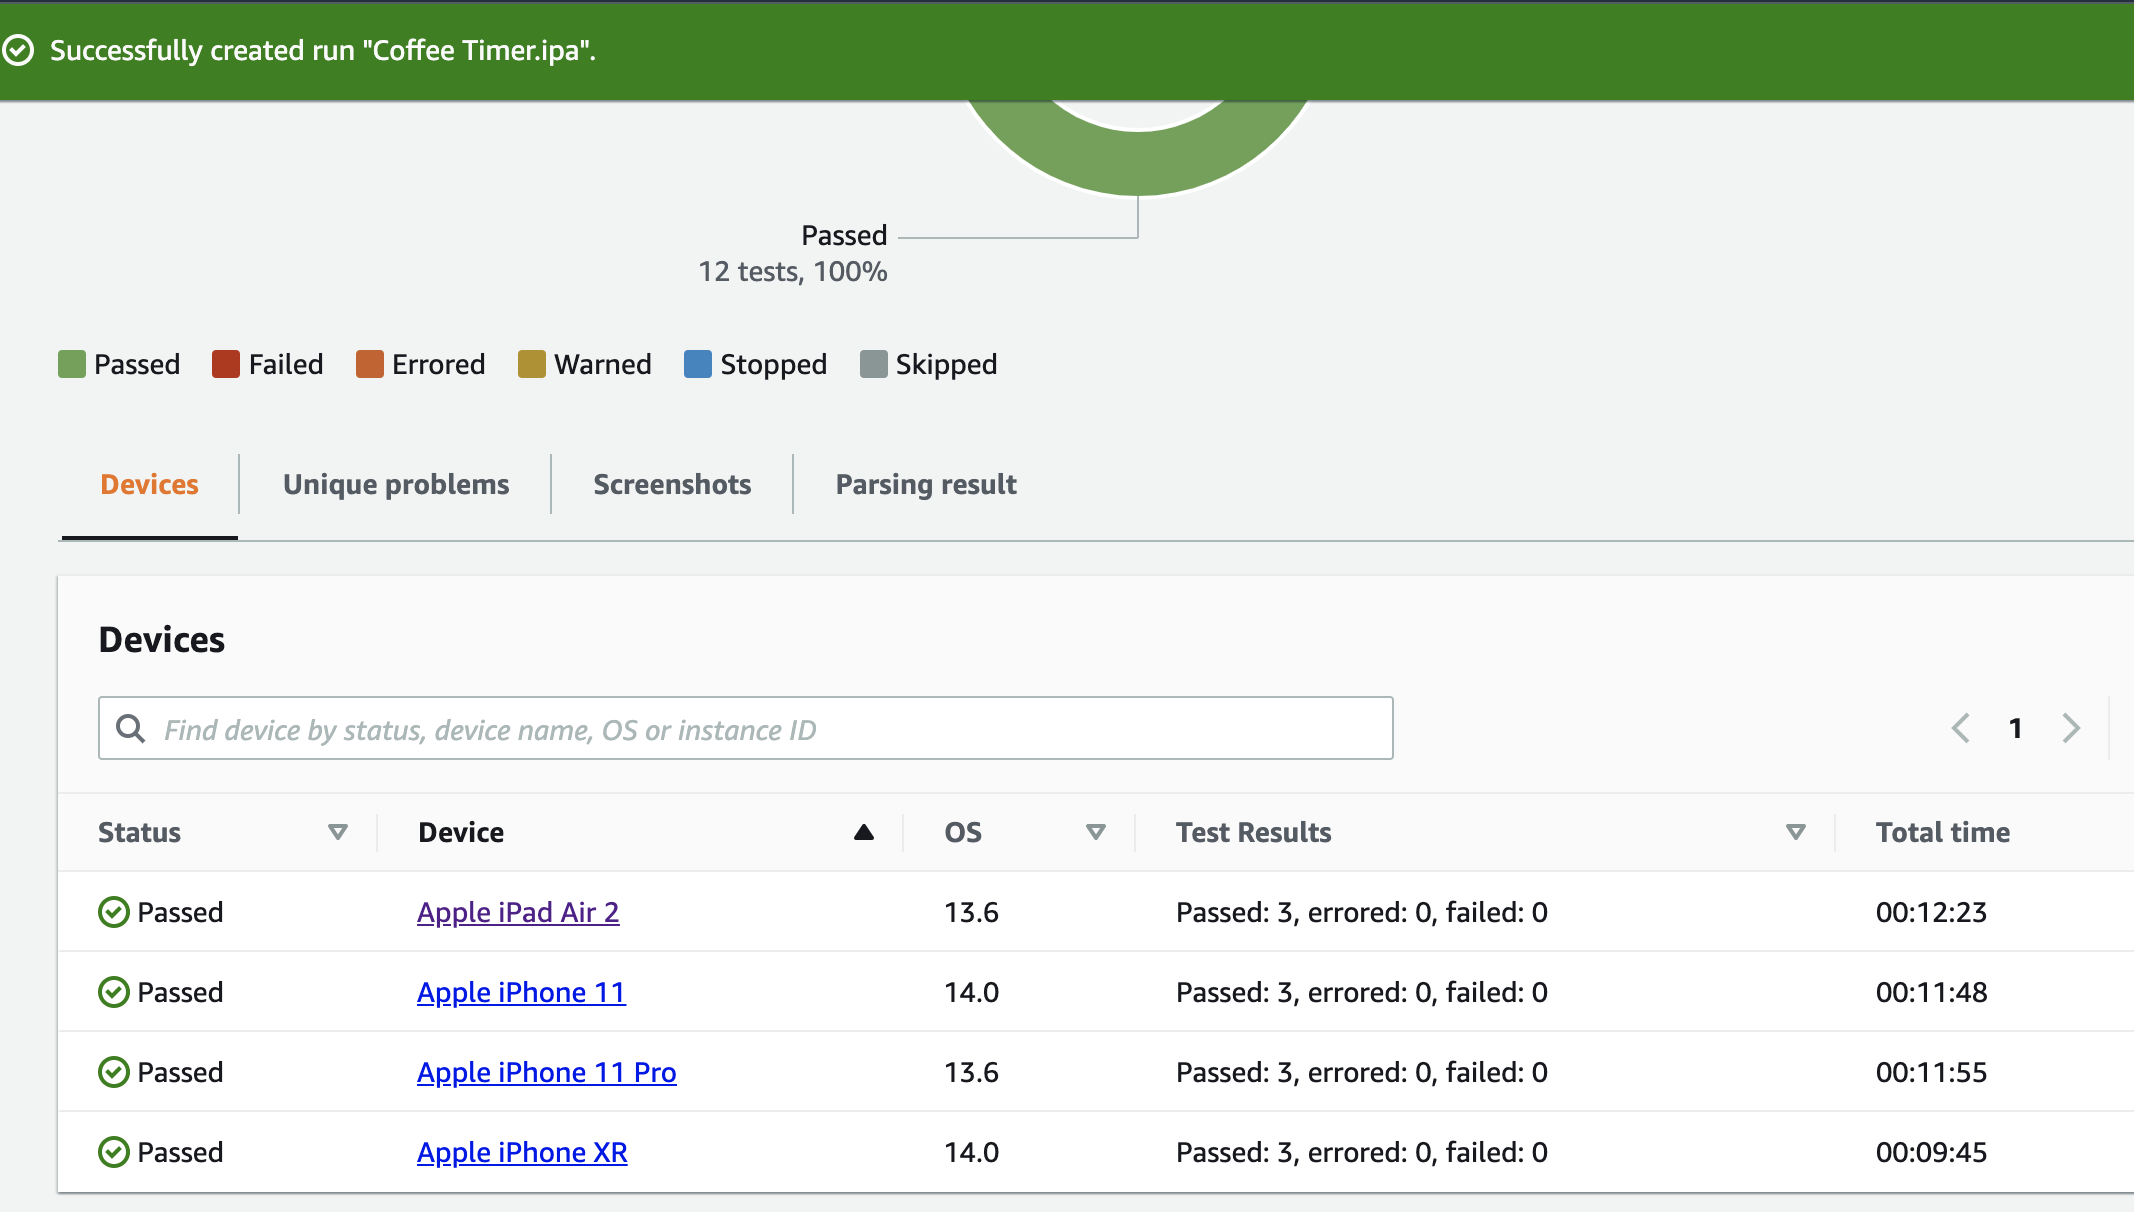
- A run already starts, we can click on test run name and a specificed device to view the test status
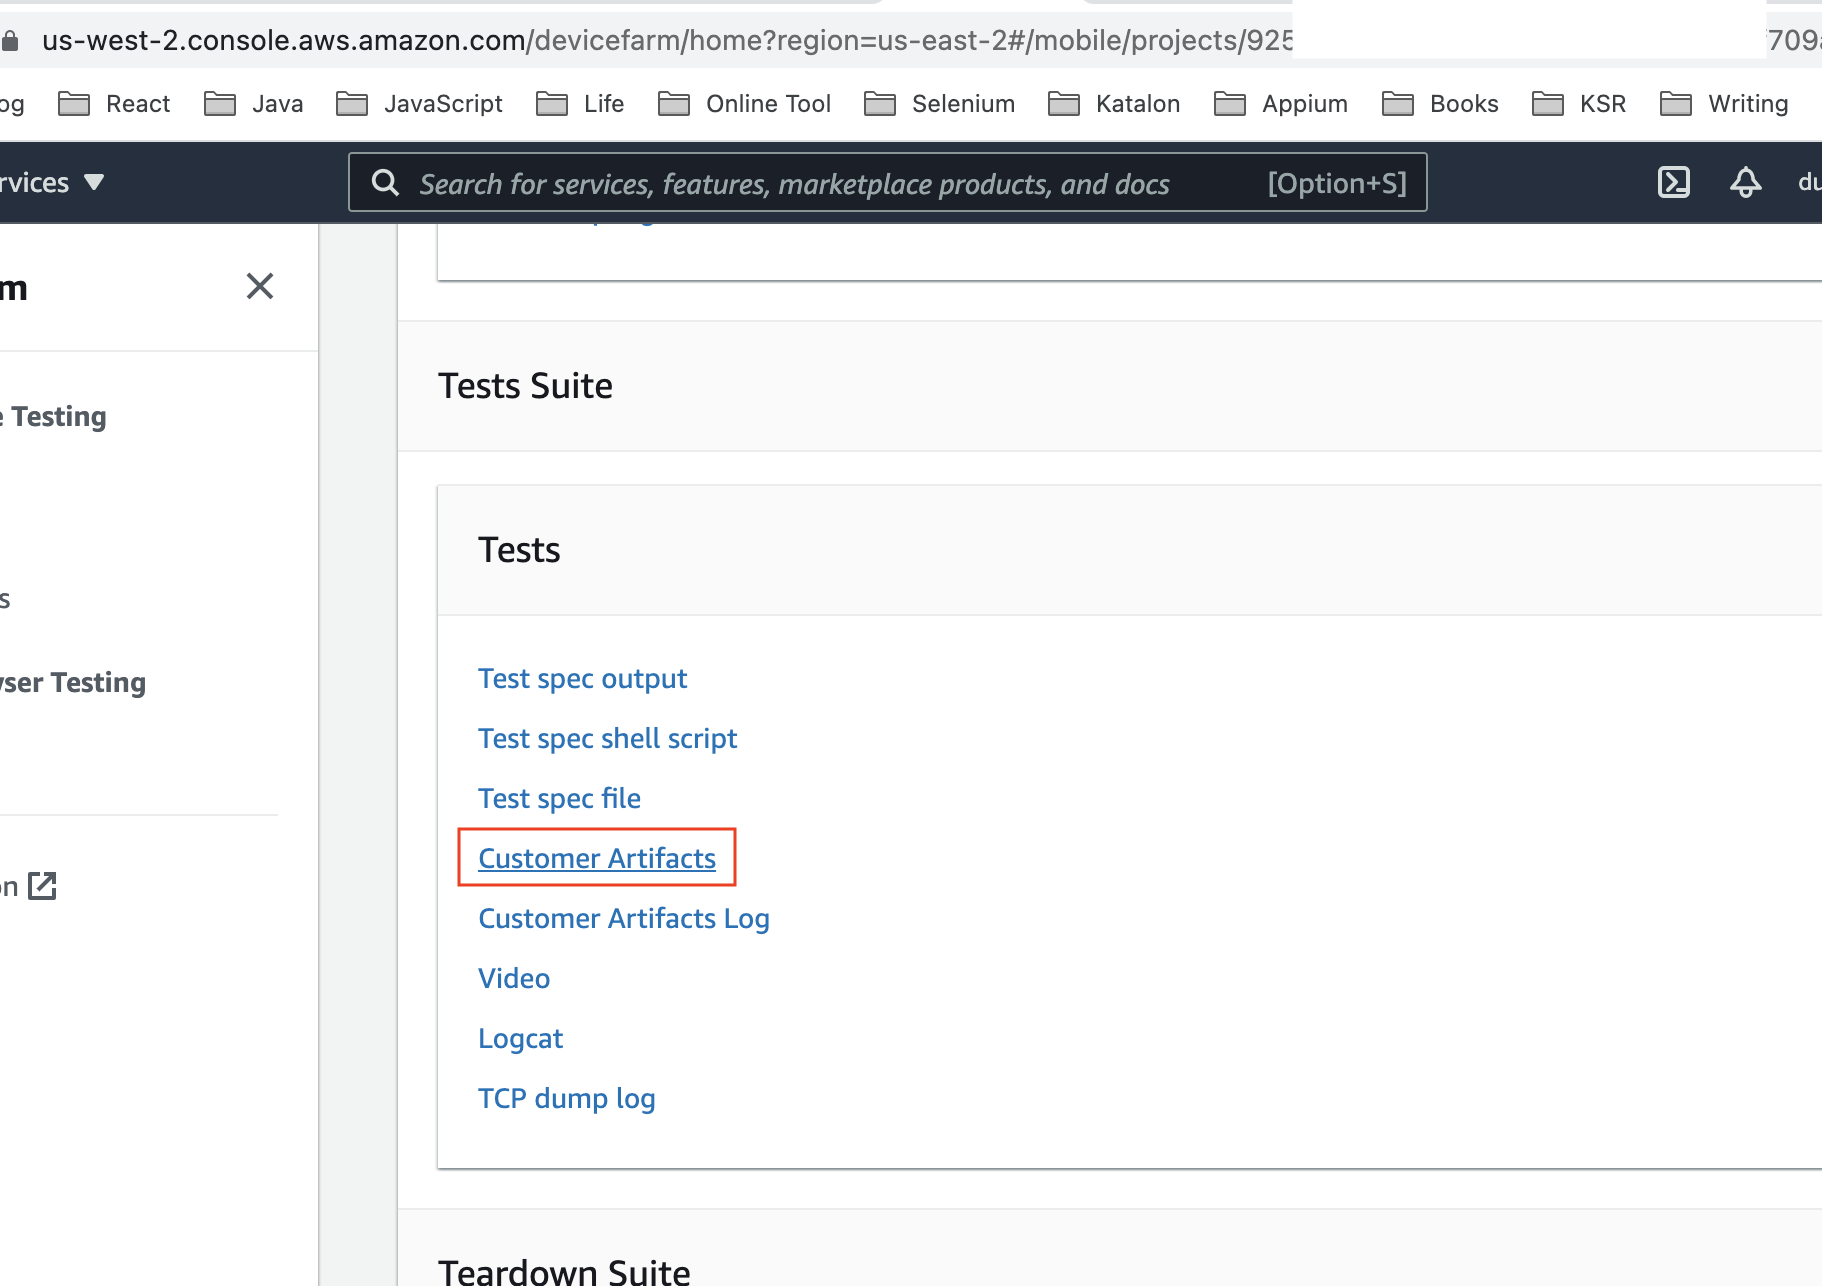
After the run finishes, we can download the execution report at Files/Customer Artifacts
- Sample Katalon project in
aut/KatalonDemoProject - Sample iOS application in
aut/Coffee Timer.ipa
