This is a simple project that I made to help me with recurring tasks in life. I couldn't find a self prioritizing task list in any apps or other tools that I could find, so I built this! ToDo allows you to set up a bunch of recurring chores or tasks and will prioritize them based on frequency and date since last completion.
- React
- Next.js API routes
- Prisma Client (backend).
- NextAuth.js for authentication.
- PostgreSQL as the database of choice.
- Docker local deployment containers for db
- Flowbite React prebuild flowbite components for react
This repo is connected to Vercel (postgres db hosted through Railway) and will automatically build and deploy the application depending on the branch.
Note that the app uses a mix of server-side rendering with getServerSideProps (SSR) and static site generation with getStaticProps (SSG). When possible, SSG is used to make database queries already at build-time (e.g. when fetching the public feed). Sometimes, the user requesting data needs to be authenticated, so SSR is being used to render data dynamically on the server-side (e.g. when viewing a user's drafts).
Clone this repository:
git clone [email protected]:jango2106/Todo.git
Install npm dependencies:
cd Todo
npm i
An example of environment variables is in the .env.example file. To get the project running locally, you will need to create a .env file in the top level directory and replace the appropriate values.
With Docker on your computer, the following command to set up PostgreSQL database using the docker-compose.yml file at the root of your project. Run the following command to create your PostgreSQL database. This also creates the User, Post, Account, Session and VerificationToken tables that are defined in prisma/schema.prisma:
npm run db:up
With Docker on your computer, the next command will bring up an instance of Prisma-Studio to view and manipulate the local development database.
npm run prisma-studio:up
Check the package.json file for more helpful commands.
The app is now running, navigate to http://localhost:3000/ in your browser to explore its UI.
Expand to learn how you can configure the GitHub authentication provider
First, log into your GitHub account.
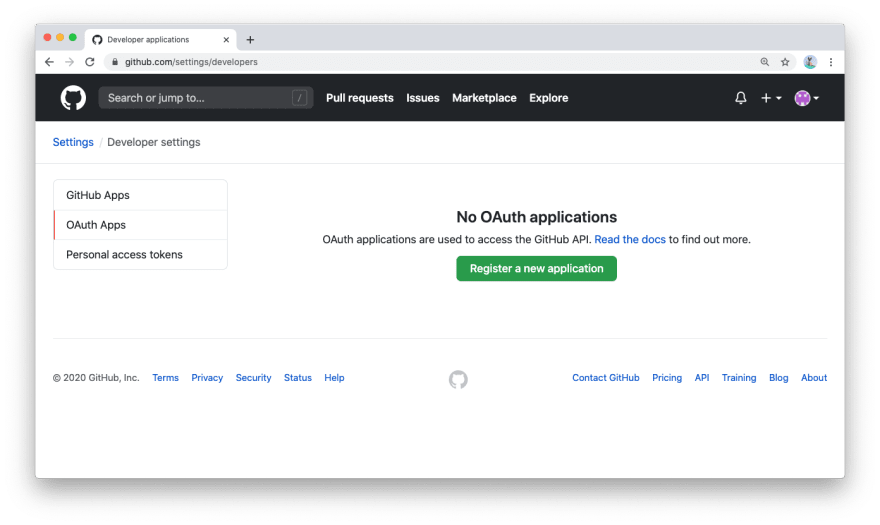
Then, navigate to Settings, then open to Developer Settings, then switch to OAuth Apps.
Clicking on the Register a new application button will redirect you to a registration form to fill out some information for your app. The Authorization callback URL should be the Next.js /api/auth route.
An important thing to note here is that the Authorization callback URL field only supports a single URL, unlike e.g. Auth0, which allows you to add additional callback URLs separated with a comma. This means if you want to deploy your app later with a production URL, you will need to set up a new GitHub OAuth app.
Click on the Register application button, and then you will be able to find your newly generated Client ID and Client Secret. Copy and paste this info into the .env file in the root directory.
The resulting section in the .env file might look like this:
# GitHub oAuth example
GITHUB_ID=6bafeb321963449bdf51
GITHUB_SECRET=509298c32faa283f28679ad6de6f86b2472e1bff

