-
Notifications
You must be signed in to change notification settings - Fork 21
APNs Certificate guide
- Creating an Explicit App ID
- Generating a new APNs certificate for your Push Application on Infobip Portal
- Creating the Development Provisioning Profile
- Creating the Distribution Provisioning Profile
- Relation between APNs environments and Provisioning Profiles
In order to support Push Notifications, each application should have it's own Explicit App ID. As a standard, the applications is represented by reversed address (ex. com.example.MyApp).
Can I use my existing App ID? If you have already configured an App ID for your app, double check that it was set up as an Explicit App ID. Wildcard App IDs cannot support push notifications and they are easy to identify: the last character in the bundle identifier is an asterisk (*). Wildcard App IDs cannot be converted to Explicit App IDs, but setting up a new App ID for your app is quite straightforward.
If you already have an Explicit App ID for this app, proceed with Generating a new APNs certificate for your Push Application on Infobip Portal. The following instructions cover the creation of a new Explicit App ID.
-
Navigate to the Apple Developer Member Center website, and click on Certificates, IDs & Profiles.
-
Select App IDs under the Identifier section.
-
You will see a list of your App IDs if available. Click the "+"" button to register a new App ID.
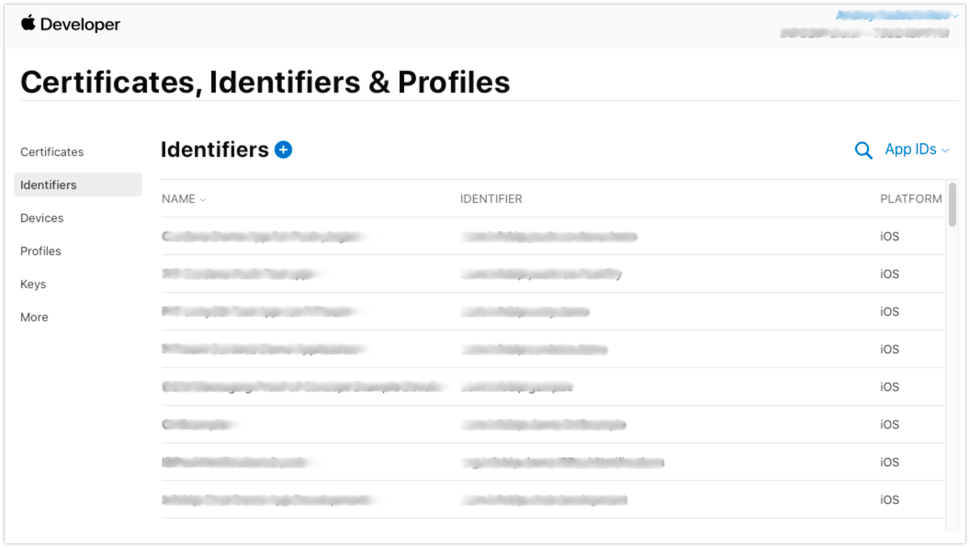
-
Enter the description for your App ID.
-
Under App ID Prefix, select "Explicit". Enter your iOS app's Bundle ID. This string should match the Bundle Identifier in your Xcode project configuration or Info.plist file.
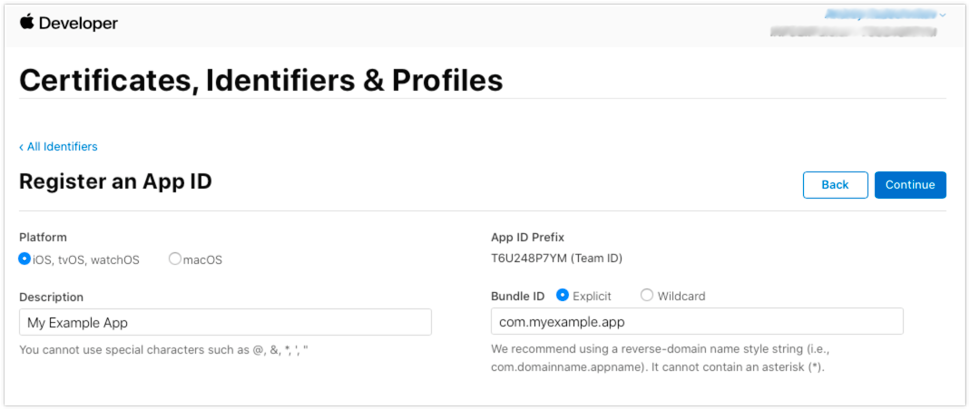
-
Click "Continue" and make sure that all the values were entered correctly. Push Notifications should be enabled, and the Identifier field should match your app's Bundle Identifier (plus App ID Prefix).
-
Click "Register" to finalize the registration of your new App ID.
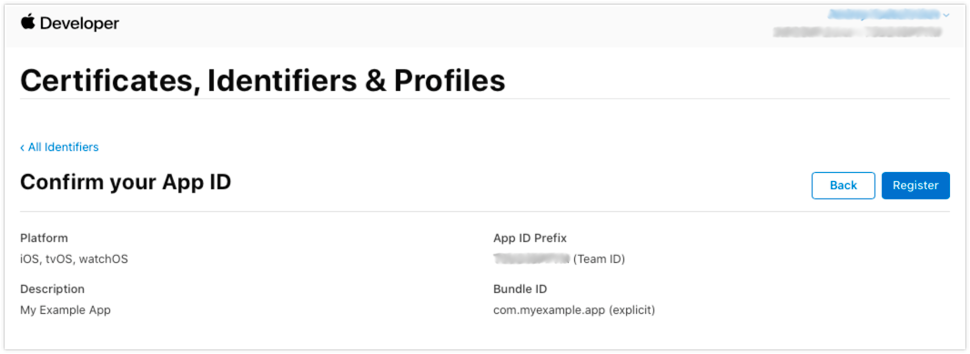
Now that you've created a new App ID (or you are using an existing Explicit App ID), it's time to generate an APNs certificate for the App ID.
- Select your App ID from the list of App IDs:
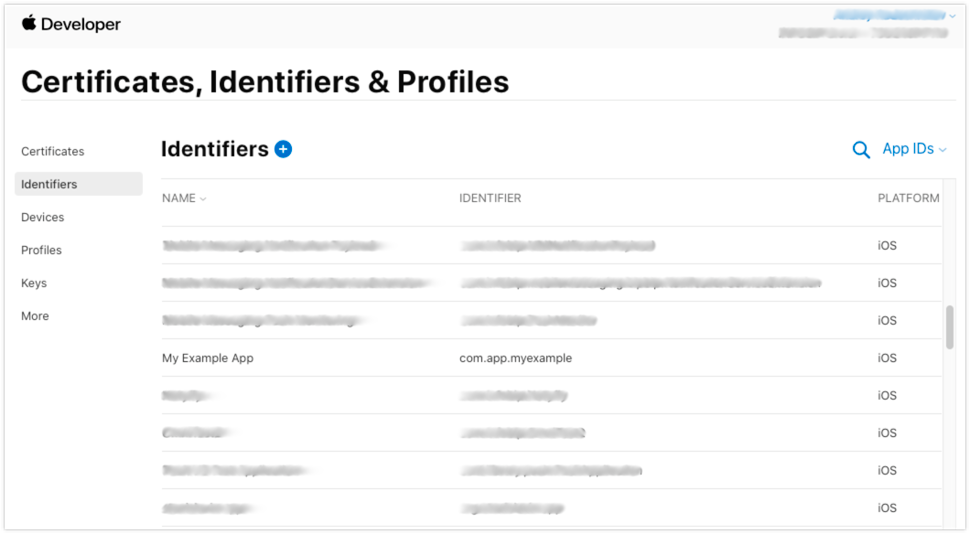
- Scroll down to the Push Notifications section and enable it:
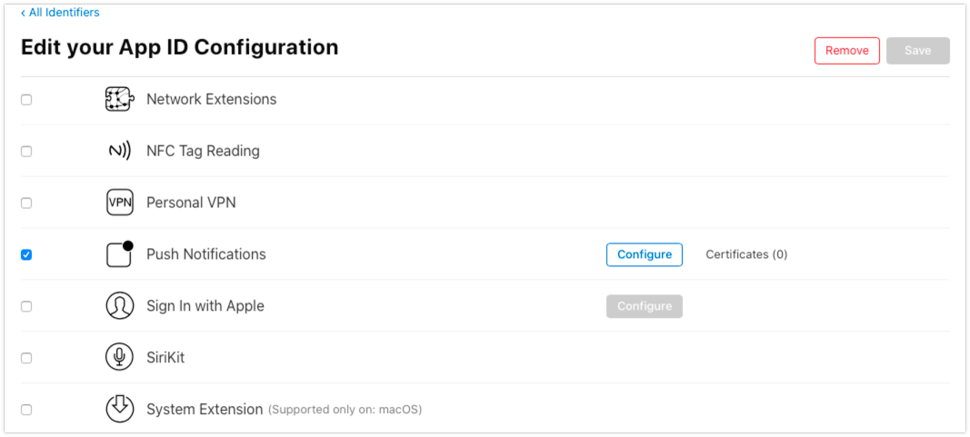
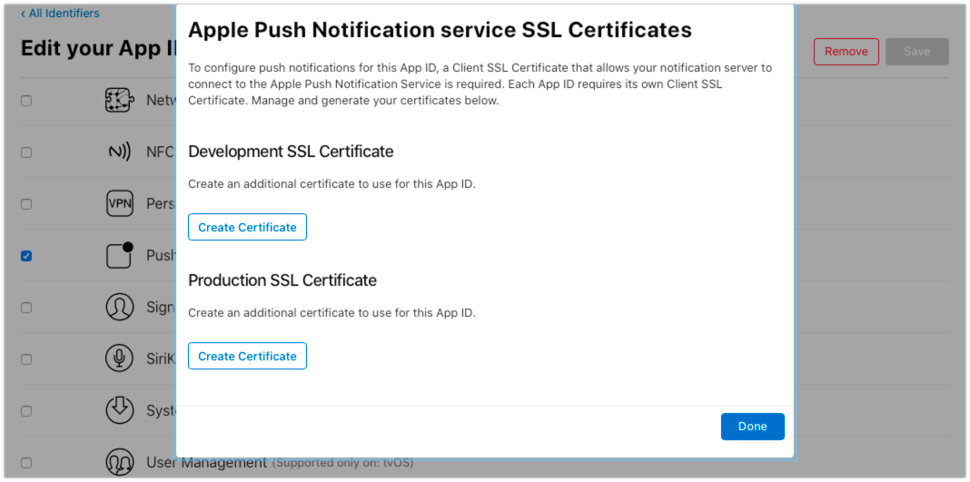
- Click on the "Configure" button. Here you will be able to create both a Development SSL Certificate (supports sandbox environment only), as well as a Production SSL Certificate (supports both sandbox and production environments). Start by clicking "Create Certificate" under "Production SSL Certificate".
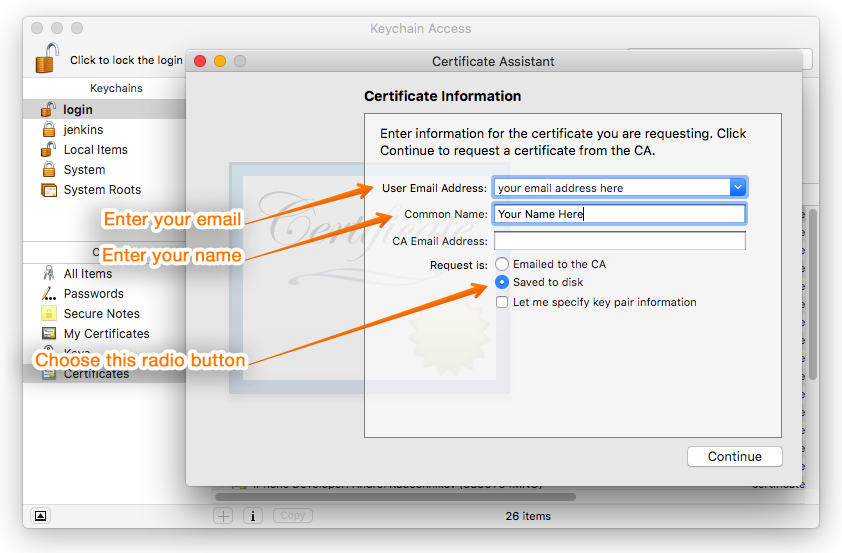
- Follow the instructions in the next screen to create a Certificate Signing Request (CSR) using the Keychain Access utility on your Mac. This will be used to authenticate the creation of the SSL certificate.
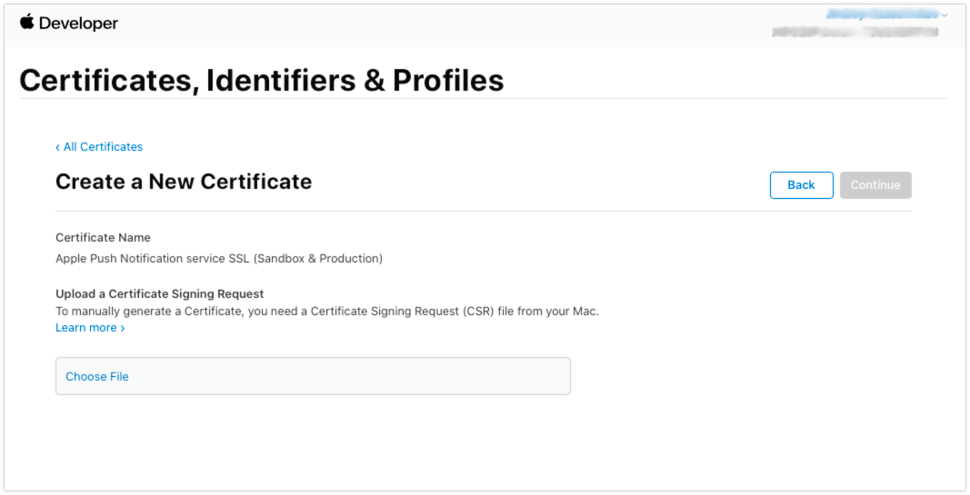
- Locate the CSR and upload it to Apple's servers, then click on "Continue". Once the certificate is ready, download the generated SSL certificate to your computer.
- Download the certificate by clicking on "Download" button:
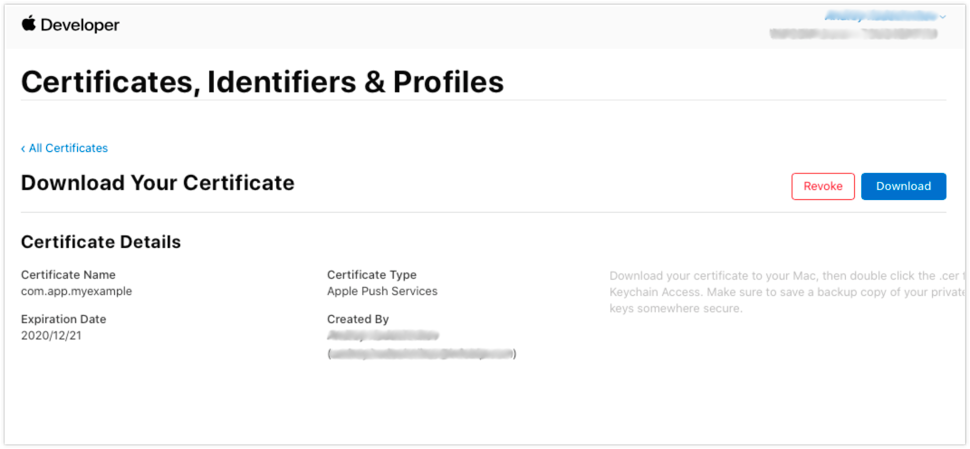
- Double click on the downloaded SSL certificate to add it to your login keychain.
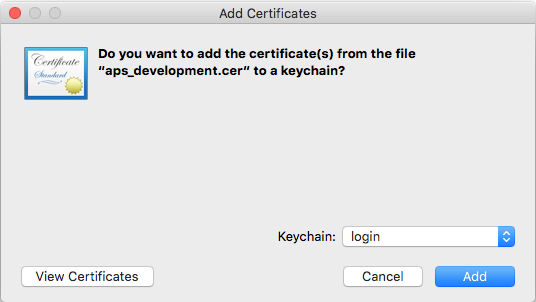
-
Open the Keychain Access utility, and locate the certificate you just added under "My Certificates". It should be called "Apple Development Push Services: " if it is a development certificate, or "Apple Push Services: " if it is a production certificate.
-
Right-click on it, click "Export", and save it as a .p12 file. You will be prompted to enter a password which will be used to protect the exported certificate. Do not enter an export password when prompted! Leave both fields blank and click OK. You will then be asked to enter your OS X account password to allow Keychain Access to export the certificate from your keychain on the next screen. Enter your OS X password and click on Allow.
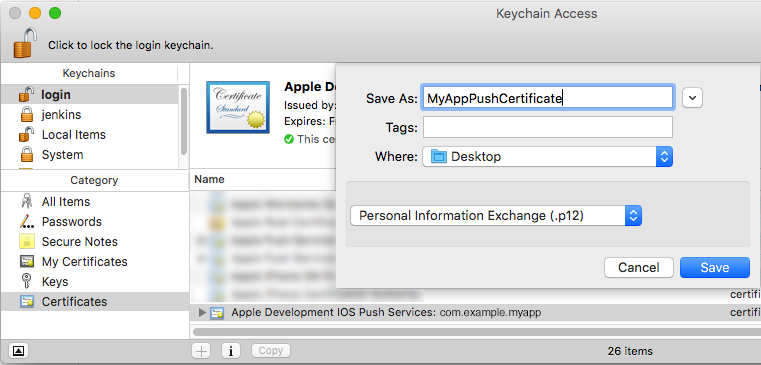
If the Personal Information Exchange (.p12) option is grayed out in the export sheet, make sure "My Certificates" is selected in Keychain Access. If that does not help, double check that your certificate appears under the login keychain. You can drag and drop it into login if needed.
You have just enabled Push Notification for your app in both production and sandbox modes.
A Provisioning Profile authenticates your device to run the app you are developing. Whether you have created a new App ID or modified an existing one, you will need to regenerate your provisioning profile and install it. If you have trouble using an existing profile, try removing the App ID and setting it back. For purposes of this tutorial, we'll create a new profile.
Note that prior to submitting your app to the App Store, you will need to test push notifications in production. This will be covered in the next section.
-
Navigate to the Apple Developer Member Center website, and select Certificates, IDs & Profiles.
-
Select All under Provisioning Porfiles.
-
Click the "+"" button to create a new Provisioning Profile.
-
Choose "iOS App Development" as your provisioning profile type then click "Continue". We will create Ad Hoc and App Store profiles later.
-
Choose the Explicit App ID you created in Section 1 from the drop down then click "Continue".
-
Make sure to select your Development certificate in the next screen, then click "Continue". If you do not have one, this is a good time to create a new "iOS App Development" (or "Mac App Development") certificate.
-
You will be asked to select which devices will be included in the provisioning profile. Click "Continue" after selecting the devices you will be using to test push notifications during development.
-
Choose a name for this provisioning profile, such as "My App Development Profile", then click "Generate".
-
Download the generated provisioning profile from the next screen by clicking the "Download" button.
-
Add the profile to Xcode by double-clicking on the downloaded file.
-
Navigate to the Apple Developer Member Center website, and select Certificates, IDs & Profiles.
-
Select All under Provisioning Porfiles.
-
Click the "+"" button to create a new Provisioning Profile.
-
Choose "App Store" or "Ad Hoc" as your provisioning profile type then click "Continue".
-
Choose the Explicit App ID you created in Section 1 from the drop down then click "Continue".
-
Make sure to select your Distribution certificate in the next screen, then click "Continue". If you do not have one, this is a good time to create a new "App Store and AdHoc" certificate.
-
Choose a name for this provisioning profile, such as "My App Ad Hoc Profile" or "My App App Store Profile", then click "Generate".
-
Download the generated provisioning profile from the next screen by cicking the "Download" button.
-
Add the profile to Xcode by double-clicking on the downloaded file.
Apple Push Notification service has two environments: Sandbox and Production. They represent two parallel channels for delivering notifications to iOS, tvOS and macOS devices. It is important to understand that a Provisioning Profile embedded in the application build, defines which of these two channels to be used (what channel a device will be connected to).
- Development Provisioning Profile matches the Sandbox environment, that is a device will receive push notifications sent through Sandbox APNs environment;
- App Store and AdHoc Provisioning Profile matches the Production environment.
In case you don't receive push notifications on your device, make sure the Provisioning Profile matches the APNs environment chosen for your Push Application on Infobip Portal. Another issue that may cause notifications not being delivered to the device is that you switched from one Provisioning Profile to another (for example, you changed a development profile to a distribution profile or vice versa) for the same application installation. In such case you need to reinstall the application with a new Provisioning Profile (remove it and install from scratch). Accordingly, it follows that a good practice for developing application with support of Push Notifications is to have three different Push Applications on Infobip Portal for different stages of application development lifecycle:
| iOS Application lifecycle | iOS Application Provisioning Profile | Push Application -> "Sandbox" checkmark |
|---|---|---|
| Development | Development Provisioning Profile | ☑ |
| Testing | AdHoc Provisioning Profile | ☐ |
| Release | App Store Provisioning Profile | ☐ |
This setup protects you from undesirable situations when testing traffic goes to production by mistake.
If you have any questions or suggestions, feel free to send an email to [email protected] or create an issue.
- Library events
- Server errors
- Users and installations
- Messages and notifications management
- Inbox
Geofencing serviceDEPRECATED- Privacy settings
- In-app chat
- WebRTC Calls and UI