In app chat
Find more info about Live chat product on Infobip docs.
- Intro
- Example application
- Display In-app chat screen
- Display In-app chat view
- Customize In-app chat
- Customer's Chat History
- Handle notification taps
- Customize notifications
- In-app chat events
- Sending attachments
- Attachments preview
- Supported attachment types
- Unread chat push messages counter
- Changing localization
- Sending Contextual Data
- Multiple chat threads
- Authenticated chat
- Chat and push notifications
- Example application
- Troubleshooting
In-app chat is the mobile component for connecting and interacting with Infobip's LiveChat product. In-app chat is built on top of Mobile Messaging SDK and that's why Mobile Messaging should be included into your application and properly configured. In-app chat requires from you a careful setup, both in your mobile app and in your Infobip account. The following steps must be prepared in order to ensure the chat communication:
-
Include and setup Mobile Messaging SDK plugin in your application. If you haven't already, please follow its Quick start guide carefully. Only by being able to receive a
pushRegistrationIdin your device, you'll be able to successfully connect to In-app chat in the next steps. -
Create a LiveChat Widget and connect it with the Mobile Messaging application profile you created in step 1 to the widget configuration.
-
Setup In-app chat for Mobile Messaging SDK plugin, put
inAppChatEnabled: truein configuration:
InfobipMobilemessaging.init(Configuration(
        ...
        inAppChatEnabled: true,
        ...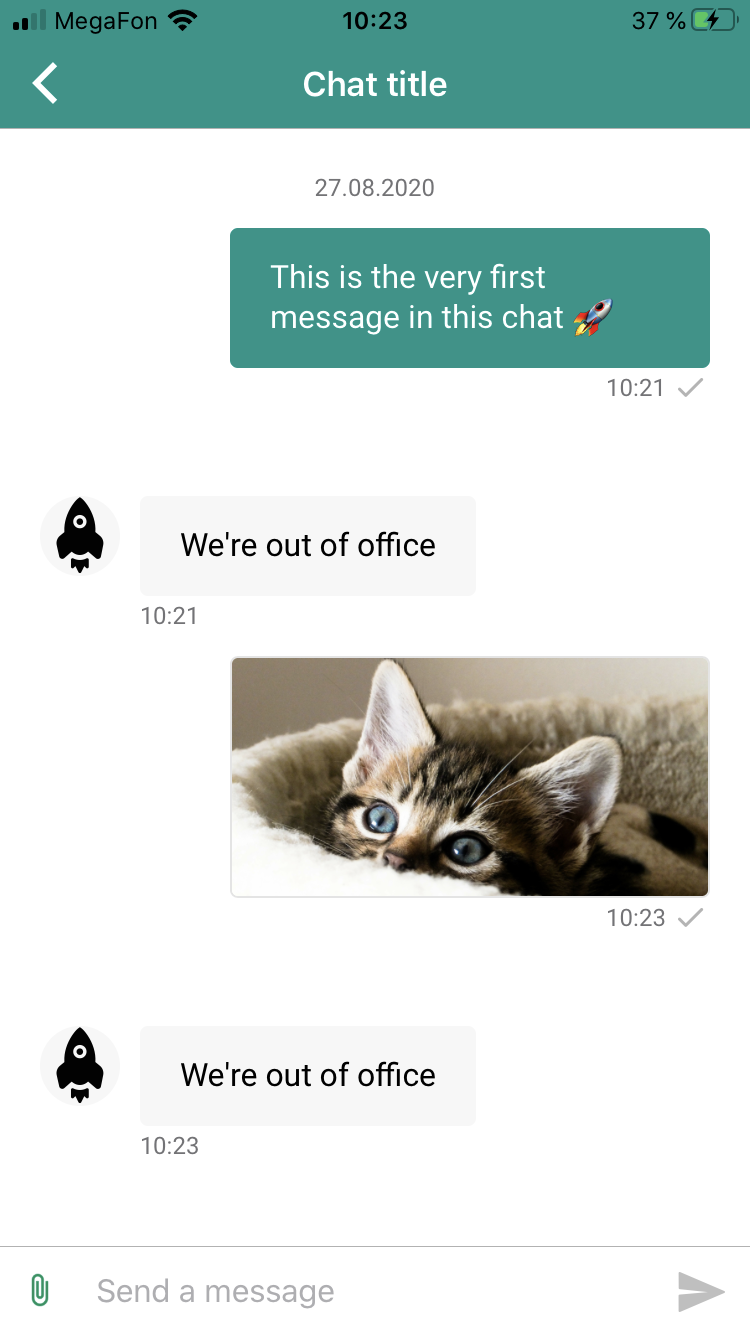
));In-app chat provides a built-in chat screen which you can quickly embed into your own application. It contains a navigation toolbar, a messages list and the message text and attachment input. For a more flexible and customizable approach to show chat, such as hiding the toolbar and/or the input to replace them with your own, check the next section Display In-app chat view. Together with chat customization options you can integrate In-app chat to perfectly fit all your design needs. If instead you prefer to use our provided components, initialize In-app chat screen with just one line of code:
InfobipMobilemessaging.showChat()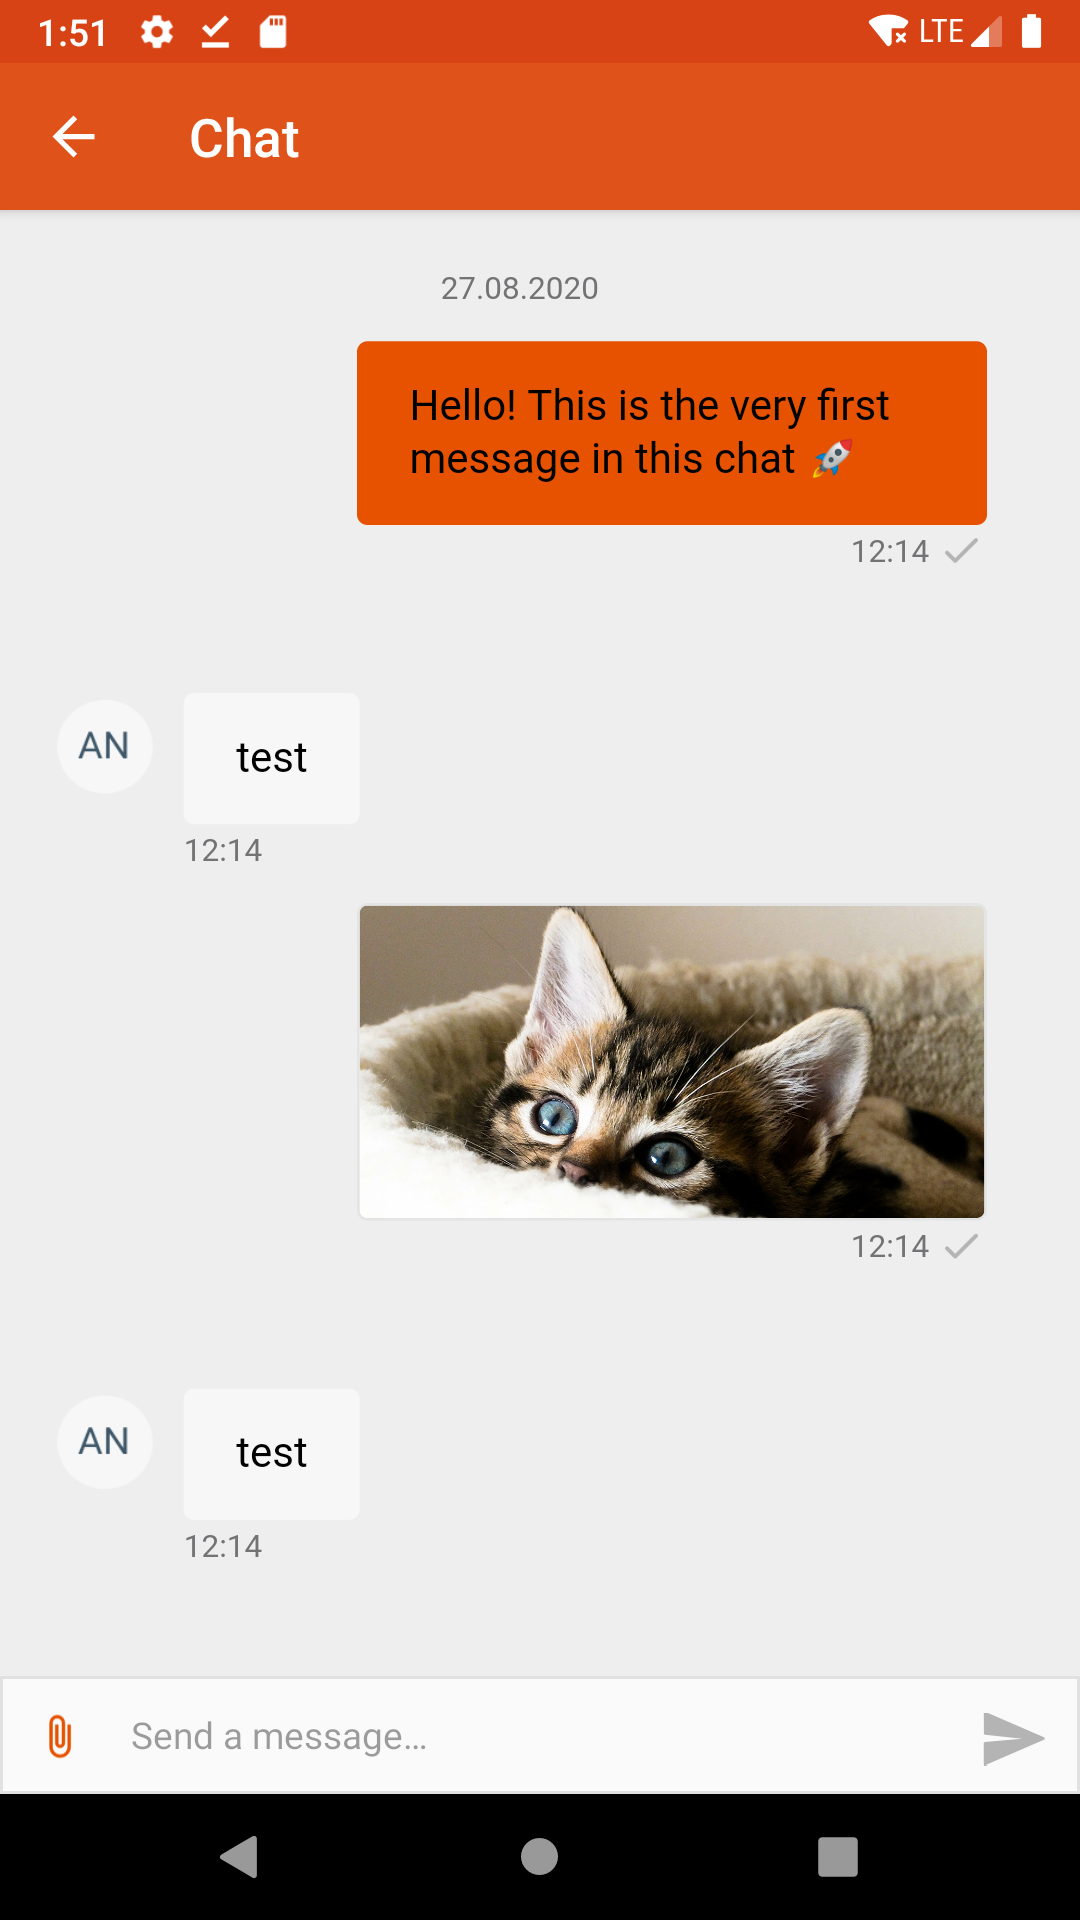 |
 |
It will immediately open the chat screen on top of the current screen. It is a quick and simple to integrate full screen end-to-end chat solution.
In-app chat provides ChatView widget where you have much more control over the chat. The widget offers many public functions and properties, such as control over the visibility of navigation toolbar and message input, and the possibility of replacing with your own. Although you have a full control over the chat screen content, there are some steps we recommend you to follow:
Full code of example integration of ChatView can be checked in the Example application.
- Create base skeleton of stateful widget and build
ChatView.ChatViewconstructor optional argumentswithToolbarandwithInputallows you to define visibility of navigation toolbar and message input. The only mandatory argumentonNativeViewCreatedcallback function provides you with aChatViewController, which offers the public functions to control the chat.
import 'package:infobip_mobilemessaging/chat_view.dart';

class ChatViewDemo extends StatefulWidget {
  const ChatViewDemo({super.key});

  @override
  State createState() => _ChatViewDemoState();
}

class _ChatViewDemoState extends State<ChatViewDemo> {
  ChatViewController? _chatViewController;

  @override
  void initState() {
    super.initState();
  }

  @override
  void dispose() {
    super.dispose();
  }

  @override
  Widget build(BuildContext context) {
    return ChatView(
      withInput: true,
      withToolbar: true,
      onNativeViewCreated: _onNativeViewCreated,
    );
  }

  void _onNativeViewCreated(ChatViewController controller) {
    _chatViewController = controller;
}- Use the
ChatViewControllerto subscribe chat events and much more, see controller public functions for more details. You can find all chat events in theChatViewEventclass.
import 'package:infobip_mobilemessaging/chat_view.dart';
import 'package:infobip_mobilemessaging/models/chat_view_event.dart';

...

  void _subscribeToEvents() {
    _chatViewController?.on(
        ChatViewEvent.chatViewChanged, (String chatView) => {
          log('chat view changed: $chatView'),
        }
    );
  }

...
- Important note on iOS: when using the ChatView mentioned here, instead of the chat screen from showChat() method, you need to define, in the chat customisation, the variable
shouldHandleKeyboardAppearanceas false, so it is Flutter the one defining the frames when keyboard appear, and not the native chat. Otherwise, the chat input would be moved up twice.
  /**
   * Navigates chat from [THREAD] back to [THREAD_LIST] destination in multithread chat.
   * It does nothing if widget is not multithread.
   * All multi-thread chat destinations:
   * LOADING, THREAD_LIST, LOADING_THREAD, THREAD, CLOSED_THREAD, SINGLE_MODE_THREAD
   */
  void showThreadsList();

  /**
   * Set the language of the chat.
   * Parameter [language] in locale format e.g.: en-US
   */
  void setLanguage(String language);

  /**
   * Set contextual data of the chat.
   * If the function is called when the chat is loaded data will be sent immediately, otherwise they will be sent to the chat once it is loaded.
   * Every function invocation will overwrite the previous contextual data.
   * See [ChatViewEvent.chatLoaded] to detect if chat is loaded.
   * Parameter [data] in JSON string format
   * Parameter [allMultiThreadStrategy] multithread strategy flag, true -> ALL, false -> ACTIVE
   */
  void sendContextualData(String data, bool allMultiThreadStrategy)

  /**
   * Set the theme of the Livechat Widget.
   * You can define widget themes in [https://portal.infobip.com/apps/livechat/widgets"](Live chat widget setup page) in Infobip Portal, section `Advanced customization`.
   * Please check widget [https://www.infobip.com/docs/live-chat/widget-customization](documentation) for more details.
   * Function allows to change widget theme while chat is shown - in runtime.
   * If you set widget theme before chat is initialized by [InAppChatView.init] the theme will be used once chat is loaded.
   * Parameter [widgetTheme] unique theme name, empty or blank value is ignored.
   */
  void setWidgetTheme(String widgetTheme);

  /**
   * Sends draft message to be show in chat to peer's chat.
   * Parameter [draft] message to be sent
   */
  void sendChatMessageDraft(String draft);

  /**
   * Sends message to the chat.
   * Parameter [message] message to be send, max length allowed is 4096 characters
   */
  void sendChatMessage(String message);

  /**
   * Sends attachment to the chat.
   * Parameter [attachment] attachment to be send
   */
  void sendChatAttachment(ChatViewAttachmentData attachment);

  /**
   * Returns true if chat is synchronized and multithread feature is enabled, otherwise returns false.
   */
  Future<bool> isMultithread();

  /**
   * Registers a callback for the given event name.
   * [ChatViewEvent] class provides constants of all available events names
   */
  Future<void> on(String eventName, Function callback);

  /**
   * Unregisters a callback for the given event name.
   */
  Future<void> unregister(String eventName, Function? callback);

  /**
   * Unregisters all callbacks for the given event name.
   */
Future<void> unregisterAllHandlers(String eventName);You can define your own custom appearance for the chat view by sending an instance of ChatCustomization in the method InfobipMobilemessaging.setChatCustomization();. Call this method before loading the chat, once our SDK has been initialised, for the changes to be applied.
We offer an example on chat customization in the example application.
- Status bar
-
chatStatusBarBackgroundColor-- in hex format, color of the status bar -
chatStatusBarIconsColorMode-- text one of ['dark','light'] indicating mode of status bar's icons
-
- Toolbar
-
chatToolbar-- a ToolbarCustomization instance, used in chat screen -
attachmentPreviewToolbar-- a ToolbarCustomization instance, used in attachment preview screen -
attachmentPreviewSaveMenuItemIcon-- save icon resource (path to file) in attachment preview screen -
attachmentPreviewMenuItemsIconTint-- in hex format, icons tint in attachment preview screen
-
- Network error
-
networkErrorText-- text of network error alert -
networkErrorTextColor-- in hex format, text color of network error alert -
networkErrorTextAppearance-- text appearance of network error alert -
networkErrorLabelBackgroundColor-- background of text in network error alert
-
- Chat
-
chatBackgroundColor-- in hex format, chat background color -
chatProgressBarColor-- in hex format, chat's loading progress bar's color
-
- Input
-
chatInputTextAppearance-- text appearance in input -
chatInputTextColor-- in hex format, color text in input -
chatInputBackgroundColor-- in hex format, input's background color -
chatInputHintText-- input's hint text (placeholder) -
chatInputHintTextColor-- in hex format, input hint's color -
chatInputAttachmentIcon-- attachment's icon resource (path to file) in input -
chatInputAttachmentIconTint-- in hex format, input attachment's icon color -
chatInputAttachmentBackgroundDrawable-- resource (path to file), icon which is used as background for attachment button in chat input -
chatInputAttachmentBackgroundColor-- in hex format, background color of the attachment icon in the input view -
chatInputSendIcon-- resource (path to file), icon which represent send button in chat input -
chatInputSendIconTint-- in hex format, tint color of chat input send button -
chatInputSendBackgroundDrawable-- resource (path to file), icon which is used as background for send button in chat input -
chatInputSendBackgroundColor-- resource (path to file), icon which is used as background for send button in chat input -
chatInputSeparatorLineColor-- in hex format, color of a separator between the chat and the chat input -
chatInputSeparatorLineVisible-- boolean indicating if separator line is visible -
chatInputCursorColor-- in hex format, color of chat input cursor -
shouldHandleKeyboardAppearance-- iOS only. This parameter defines if the displacement of chat content when the keyboard appears (or disappears) needs to be handled by native input, or left to Flutter. Default is true. As general rule, calls to showChat() will need it enabled, while use of ChatView() will need it disabled.
-
-
backgroundColor-- in hex format, background of toolbar -
navigationIcon-- back icon resource (path to file) -
navigationIconTint-- tint of back icon -
titleTextAppearance-- text appearance of toolbar title -
titleTextColor-- in hex format, color of toolbar title -
titleText-- toolbar title text -
titleCentered-- boolean indicating if toolbar text is centered -
subtitleTextAppearance-- text appearance of toolbar subtitle, android only -
subtitleTextColor-- in hex format, color of subtitle, android only -
subtitleText-- subtitle text, android only -
subtitleCentered-- boolean indicating if subtitle text is centered, android only
Note: Same style can be achieved in an xml format of android styles. Define your own theme.
Livechat widget themes are defined on the Live chat widget setup page on Infobip Portal. You can define multiple custom themes and customize various widget attributes, read Livechat documentation to get information about all possible widget customization options.
To set Livechat theme in In-app chat you must:
- Define the name and values of your theme(s) in a JSON format, under widget section Theme -> Advanced Customization, in Infobip Portal.
- Once you know the names of your themes, you can use them in
Configuration.
Once your app is installed, it is assigned a set of IDs for receiving push notifications and connecting to LiveChat. Additionally, a mostly empty "person" entity is automatically created on the Infobip side as part of the installation. For more details, see another page explaining users and installations terminology.
While having an anonymous customer/person fits some use cases, most likely you'll have an authenticated customer you can/want to identify (for example, by their email, phone number, or some other unique ID). To do so, use the Personalize feature of the Mobile messaging SDK. You can link your customer to your app installation and also you'll be able to recover a chat history with that customer.
Once your app has received the push registration, personalize your customer. Next time the chat shows up, previously sent messages will be present, recovering the open conversation.
There is also an option to depersonalize a customer. This reverts the customer to its original, anonymous state emptying the chat history. This is a common/suggested practice for log-out flows.
Mobile Messaging Plugin has notificationTapped event, which will be sent when user opens the app by tapping on the notification alert. Note that chat messages may be recognised by chat attribute:
InfobipMobilemessaging.on(
    LibraryEvent.notificationTapped,
    (Message message) => {
          if (message.chat) {print('Chat message tapped')}
});Set title and message body in in-app chat notifications and override default values.
Default value for title is Chat message.
Default value for body is original message content from push notification.
To use default values again you have to set setChatPushTitle(null) and setChatPushBody(null).
Supported only by Android platform.
InfobipMobilemessaging.setChatPushTitle("Custom notification title");
InfobipMobilemessaging.setChatPushBody("Custom notification body");
In-app chat library supports all core SDK library events plus following chat specific events: All In-app chat events are currently supported only in Android.
| Event | Parameters | Description |
|---|---|---|
unreadMessageCounterUpdated |
Unread messages count | Triggered when number of unread messages is changed. |
chatViewStateChanged |
In-app chat view name: LOADING, THREAD_LIST, LOADING_THREAD, THREAD, CLOSED_THREAD, SINGLE_MODE_THREAD, UNKNOWN
|
Triggered when when view in InAppChat is changed. |
chatConfigurationSynced |
Triggered when chat configuration is synchronized. (Note: Android only) | |
chatLivechatRegistrationIdUpdated |
Livechat registration id | Triggered when livechat registration id is updated. (Note: Android only) |
chatAvailabilityUpdated |
Boolean telling if chat is available | Triggered when chat availability is updated. |
Library events can be subscribed on using the following code snippet:
import 'package:infobip_mobilemessaging/models/library_event.dart';

InfobipMobilemessaging.on(
    LibraryEvent.'<event name>',
    (event) => {
        print('Event received: ' + event.toString());
});We've added sending attachments support, more info in iOS SDK docs, Android SDK docs
For saving attachments to photo library you will need to add additional permissions
An API is available to get and reset current unread chat push messages counter. The counter increments each time the application receives chat push message (this usually happens when chat screen is inactive or the application is in background/terminated state). In order to get current counter value use following API:
int counter = await InfobipMobilemessaging.getMessageCounter();MobileMessaging SDK automatically resets the counter to 0 whenever user opens the chat screen. However, use the following API in case you need to manually reset the counter:
InfobipMobilemessaging.resetMessageCounter();You can register to the event unreadMessageCounterUpdated with inAppChat.unreadMessageCounterUpdated value, in order to get updates of the counter in runtime.
The predefined messages prompted within the In-app chat (such as status updates, button titles, input field prompt) by default are localized using system locale setting, but can be easily changed providing your locale string with the following formats: "es_ES", "es-ES", "es".
InfobipMobilemessaging.setLanguage("es");It is possible to send contextual data / metadata to Infobip’s Conversations via the Mobile Messaging SDK. Data can be sent several times but only last sent data are stored in conversation. Every sent data will overwrite the previously sent contextual data.
There are two possible scenarios:
- Contextual data is sent before chat is present and loaded. Mobile Messaging SDK stores the data and automatically sends it once the chat is loaded.
- Contextual data is sent when chat is present and loaded. In a single thread, the data will be sent to an open conversation. In multi-thread, LiveChat widget tracks a list of open conversations, and based on the strategy, it will either send it to a currently
ACTIVEconversation orALLconversations.
In-app chat supports having multiple conversations between an agent and a customer. Considering this, Mobile Messaging SDK needs to know to which conversations send contextual data:
-
ACTIVE- sends metadata to a currently active conversation -
ALL- sends metadata to all non-closed conversations between an agent and a customer (This field has no impact in case of a single-thread LiveChat widget.) -
ALL_PLUS_NEW- sends metadata to all non-closed conversations for the widget and to any newly created conversations within the current session. If you send an event of a different type in the same session after usingALL_PLUS_NEW, it will override the previous metadata settings, and newly created chats will no longer receive metadata from the earlier usage ofALL_PLUS_NEW.
Mobile Messaging SDK function to send contextual data has two parameters:
- The mandatory data, sent as string, in a format of JavaScript objects and values (for guidance, it must be accepted by JSON.stringify())
- A multithread strategy, possible values are:
-
ChatMultithreadStrategies.all= metadata sent to all non-closed conversations for a widget -
ChatMultithreadStrategies.active= metadata sent to active only conversation for a widget -
ChatMultithreadStrategies.allPlusNew= metadata sent to all non-closed and new conversations.
Usage:
InfobipMobilemessaging.sendContextualDataWithStrategy("{ exampleKey: 'InAppChat Metadata Value Example' }", ChatMultithreadStrategies.active);If you use In-app chat view you must use
ChatViewControllerpublic function to send contextual data.
Default LiveChat widget works with single chat thread, one customer can only have one single open conversation. But the LiveChat widget settings page offers option to enable multiple chat threads.

When the setting above is enabled, the In-app chat UI will automatically offer in mobile:
- A list (initially empty) of all the unsolved conversation threads the user has opened.
- A button to "Start new chat" thread.
- A navigation to each specific conversation thread, to open particular chat view tap on conversation thread in the list.
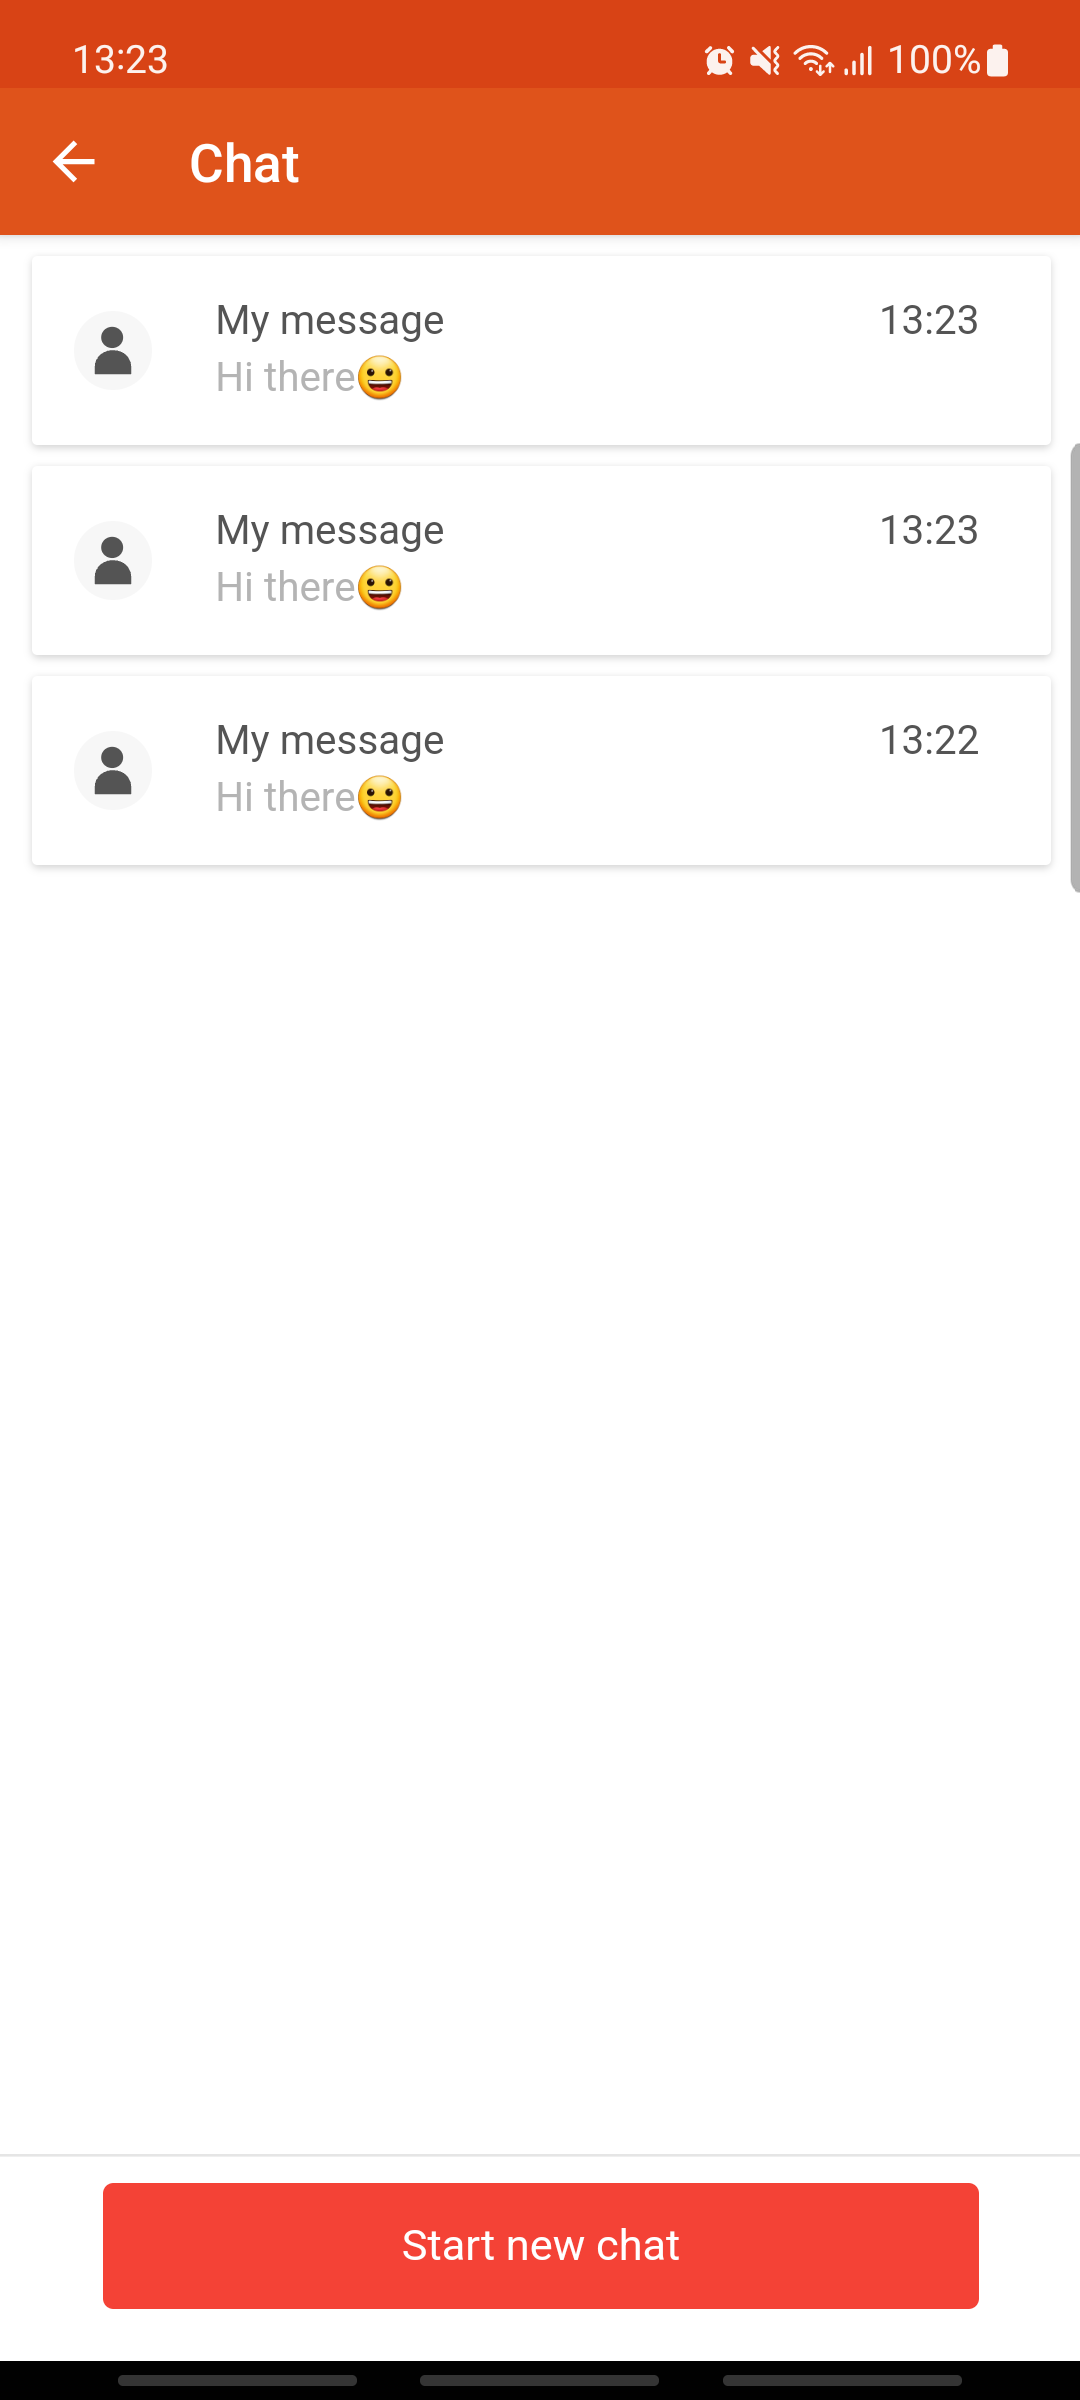
The functionality for multiple chat threads works out of the box: there is no need for extra implementation in the mobile integrator's side.
It is possible to authenticate a user before accessing the In-app chat, given you have enabled this feature in the LiveChat widget.

The authentication is accomplished by combining the Mobile Messaging SDK personalisation method with a JWT (JSON Web Token). The token needs to be generated by your end (see instructions here).
The authentication will use a unique identifier for your user, that can be an email address, a phone number, or an external identifier. It is crucial for this identifier to be valid, and to match the identity defined in the UserIdentity you passed in Mobile Messaging SDK personalisation call - there will be an authentication error otherwise.
Mobile messaging provides setJwt() method to give In-app chat the ability to authenticate users. In Android, provided JWT can be used multiple times during In-app chat lifetime, due to various
events like screen orientation change, internet re-connection and others. You must ensure JWT expiration time is more than In-app chat lifetime.
/*
1 - The customer authenticate in your system, and you recognise his/her unique identifier
2 - You call personalise (InfobipMobilemessaging.personalize()) with this unique identifier (and optionally, with other attributes such as first name, second name, etc)
3 - Now you can display the chat as an authenticated user by doing the following:
*/

InfobipMobilemessaging.setJwt("your JWT");
InfobipMobilemessaging.showChat();In-app chat decides automatically when to send push notifications for incoming messages events based on the following rules:
- If In-app chat is not loaded/disconnected => push notifications will be sent.
- If your app is in the background or a device is locked regardless of its connection status => push notifications will be sent.
- If the app is in the foreground and In-app chat is loaded/connected => push notification will NOT be sent.
In Android In-app chat connection is established and stopped based on component lifecycle. Chat connection is active only when Lifecycle.State is at least Lifecycle.State.STARTED. Chat connection is stopped when Lifecycle.State is below Lifecycle.State.STARTED.
In iOS chat could be loaded/connected but your app may have it hidden (e.g. behind another view) we provide you with the flexibility to control its connection. You can still receive push notifications in the foreground with these methods: stopConnection and restartConnection. Usage example:
InfobipMobilemessaging.showChat();
// Hide the chat, e.g., by displaying a new modal on top of it
InfobipMobilemessaging.stopConnection();
// Push notifications for new message events will start coming to the device
// When you detect that a chat is visible again to a user, you can reload the chat and stop push notifications by invoking:
InfobipMobilemessaging.restartConnection();If you face any issue using the chat, specially on the first time integration, we encourage to try your application code/certificates in our Example application, as this may give you a hint of potential mistakes. An example of the most common issues our integrators face:
- I get in the logs an error about no push registration id.
Please re-check the quick start guide and the steps mentioned above. For iOS, specially the part about the difference between Sandbox and Production environments, and how they need different p12 files uploaded to Infobip's web portal for Apple push notification's to work.
- When a chat push notification is tapped, the app is invoked, and remains wherever it previously was - but I want it to display the chat related to the push notification I tapped.
InAppChat cannot present itself: if needs the parent application (your app) to present it. So, when a push notification is tapped, your app needs to recognise that event, and present the chat if you wish so. You can detect when a push notification is tapped, its nature and content, by listening to our library-events. For this case, the event you are looking for is called 'notificationTapped'.
- The chat content appears blank, and the text input fields is disabled.
There are many reasons for the chat not working: from incorrect codes/ids in your setup, to badly defined livechat widget in Infobip's web portal. Usually, the console logs (if you enabled debug logs in our SDK) will give you a hint of the issue, and re-checking this guide, or comparing with our Example, should be enough to successfully integrate InAppChat. But if the issue continues, don't exitate to contact our support or ask for help here in our repository's Issues section.
- I have all the setup correct, but the chat is still blank and disabled.
Please confirm, within the security and authentication (last) section of your widget setup (in Infobip's web portal), if "Mobile app customer authentication - Authenticate users on mobile using JSON Web Token" is enabled. If you enabled it by mistake, disable it. If you want to authenticate mobile users, make sure you are sending a correct JSON Web Token (otherwise, similar to the point #1, the chat will remain disabled).