![]()
This repo contains a detached fork of FullTeaching that is used as a System Test and as a demonstrator of the RETORCH Framework.
FullTeaching is an educational platform developed as a demonstrator of the ElasTest EU Project.
To run FullTeaching integrated with the RETORCH scheduling:
- Fork this repo (only main branch, preferably)
- Create a multibranch job in Jenkins
- Configure the integration between the Jenkins job and the forked repo (you need to configure the credentials in a Jenkins/GitHub integration plugin and a GitHub webhook).
To integrate Jenkins with GitHub you may use one of these jenkins plugins:
- GitHub Branch Source Plugin
and a webhook
https://<your-jenkins-url>/github-webhook/ - Scan Webhook Trigger,
set a token (Scan multibranch pipeline triggers -> scan by webhook)
and a webhook
https://<your-jenkins-url>/multibranch-webhook-trigger/invoke?token=TOKEN
After doing this, every push to a branch in your fork will start the Jenkins job for that branch.
Content below is the original FullTeaching README.file


FullTeaching is an educational web application to make online classes easy for teachers as well as students. Its current main features are the following:
-
Teachers can create all the courses they want and easily invite their students. Every user will see their courses and sessions well ordered on their dashboards.
-
Teachers can stablish an unlimited number of classes for each course, indicating the content and date for each one of them.
-
A calendar view is provided in order to check all your classes at a glance.
-
Every course has a forum where the users can open entries, write comments and reply others so they can share doubts and knowledge.
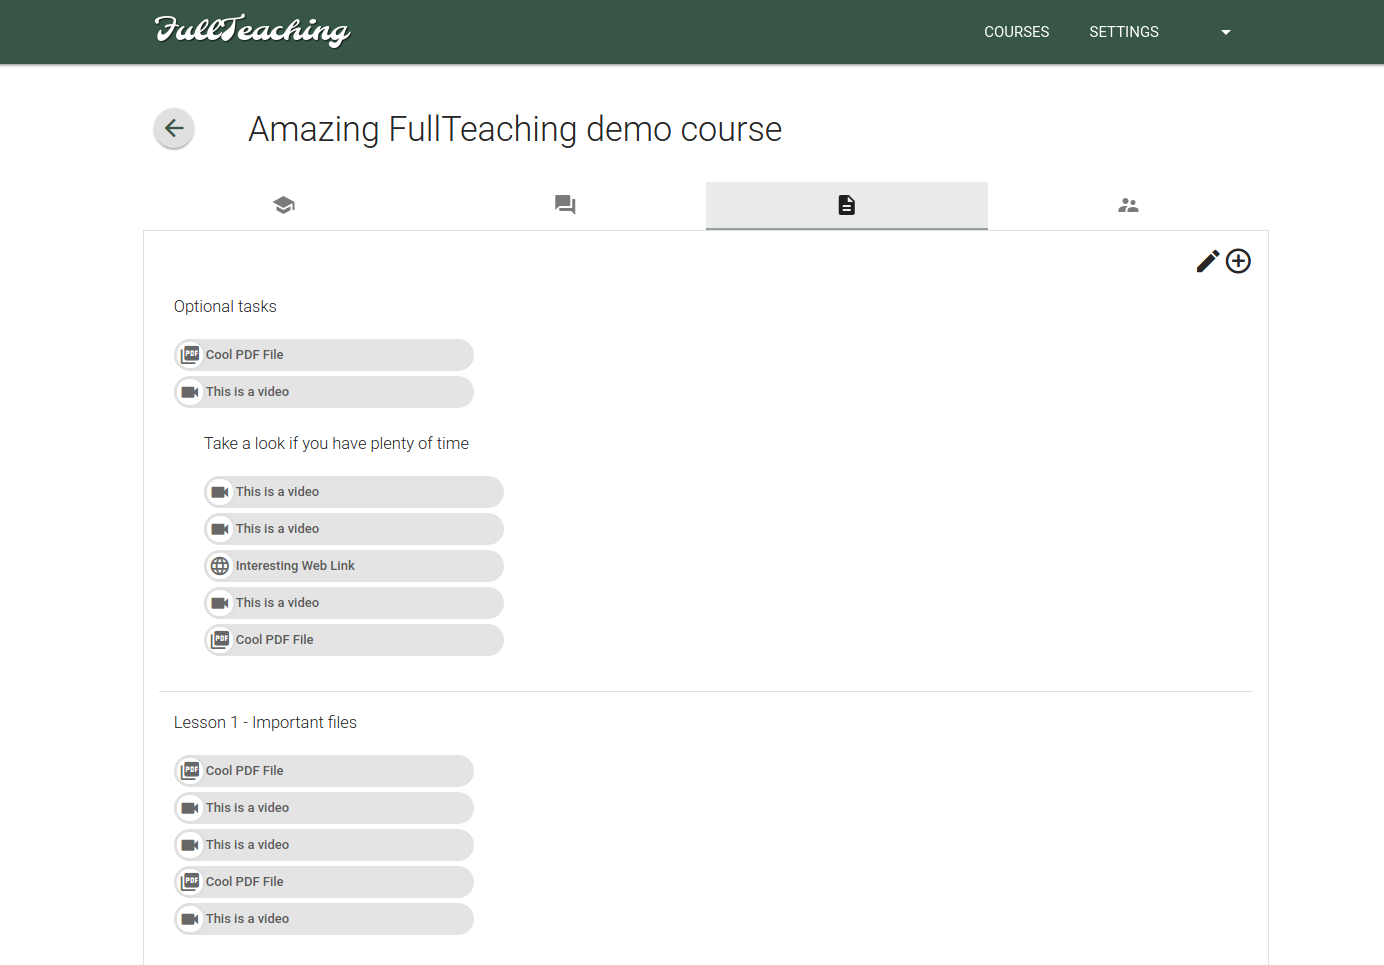
-
Teachers have an advanced system for attaching files to a course. They can customize groups of files, name them as they want and reorder them at any moment. The uploading process has been greatly simplified.
-
FullTeaching uses OpenVidu technology to provide video-conference capabilities. Teachers can initialize a class and every student invited can connect and see the teacher in real time. FullTeaching also allows students to intervene during the class (the teacher must authorize it first).
Dashboard: all your courses and your calendar
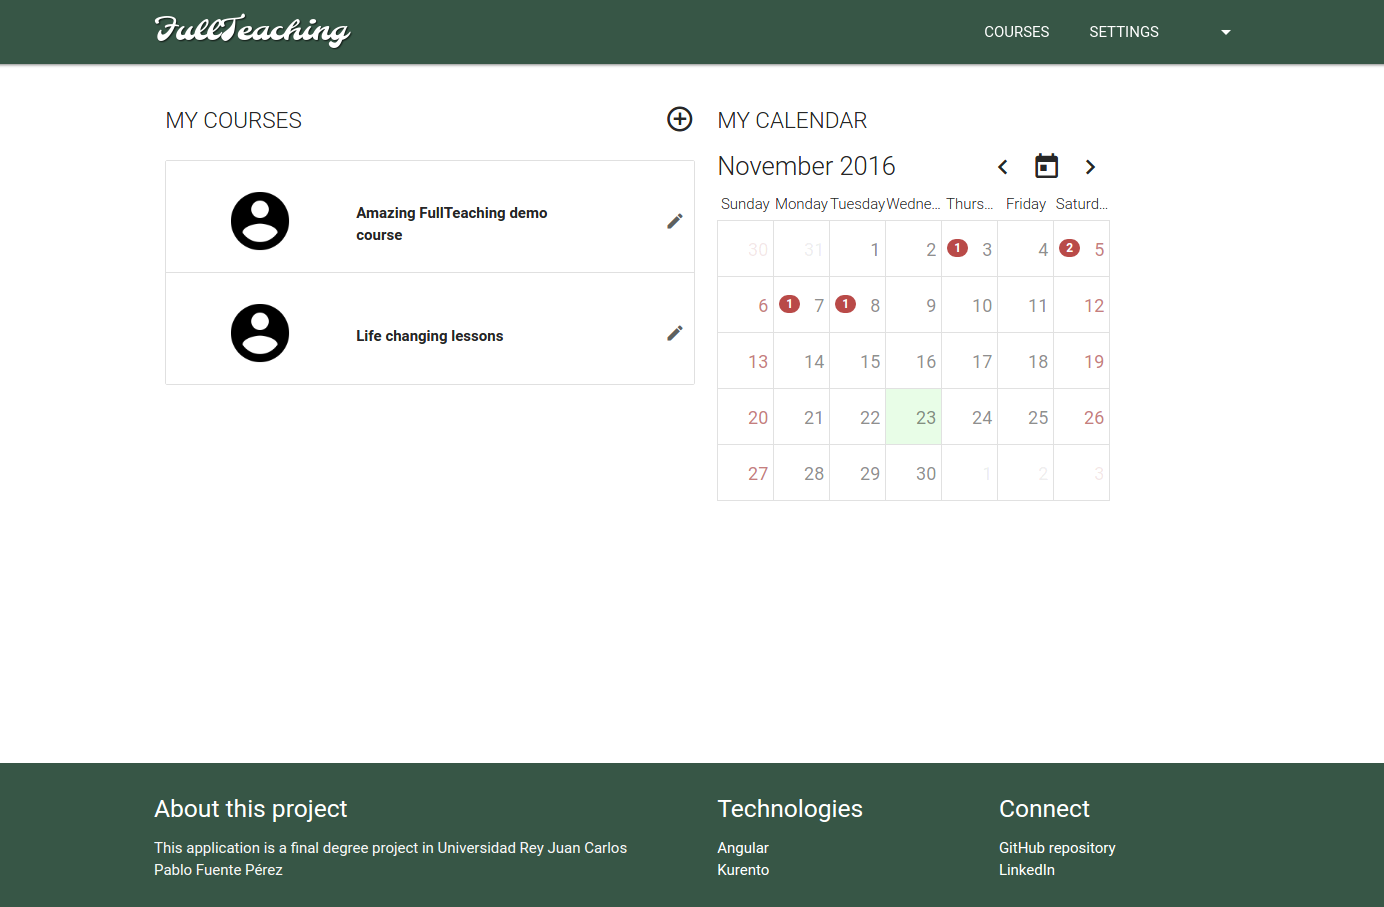
Calendar: here you have all your sessions, with direct access to their specific course

Classes: ordered by date, teachers can easily add new ones and modify existing ones

Forum: unlimited entries for posting all your questions

Files: advanced tree structure to keep all the course's files clear and tidy
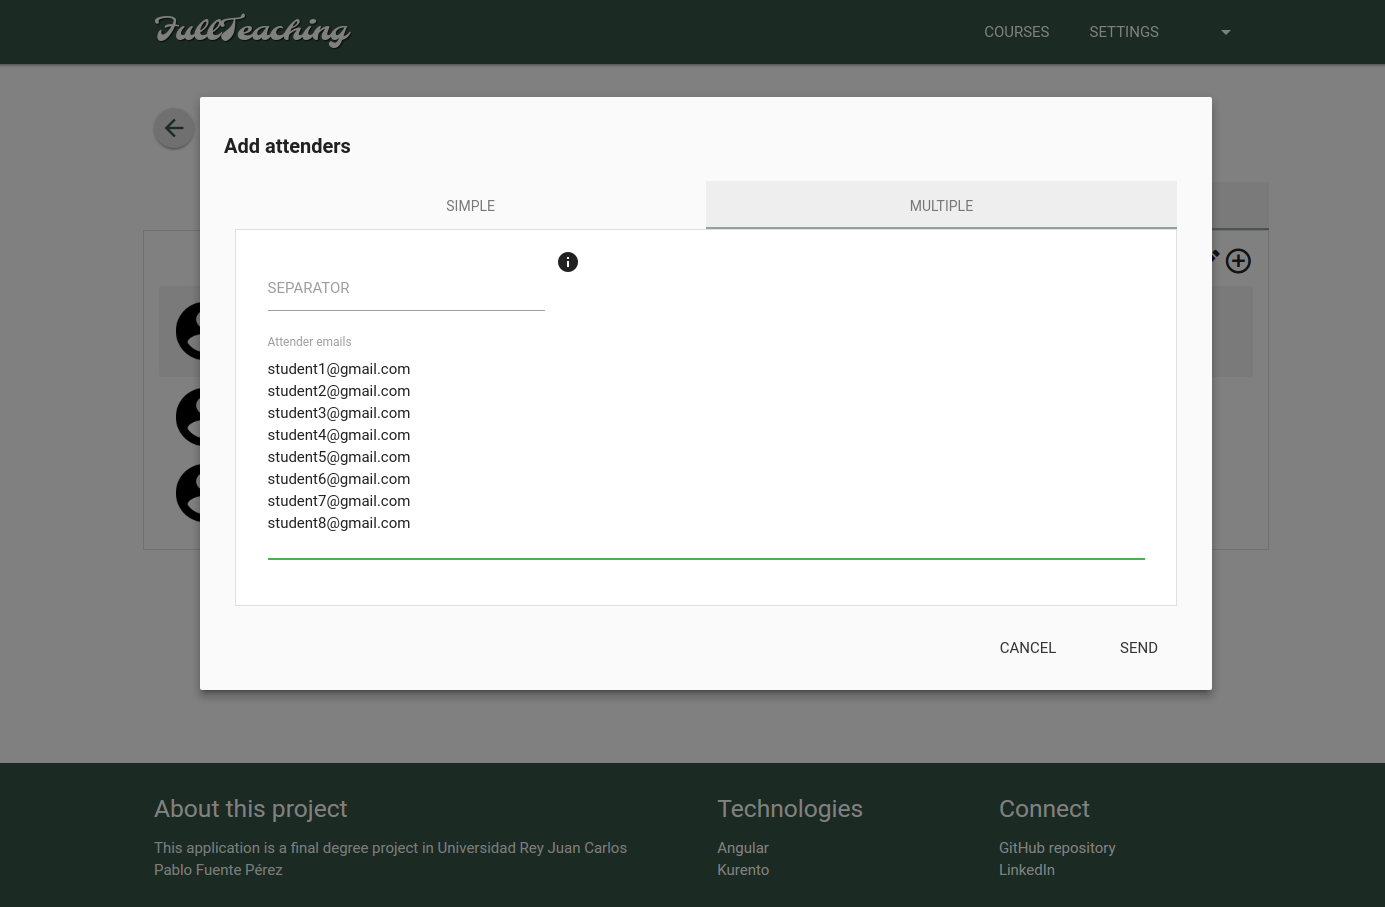
Adding students to the course is as simple as pasting their emails. FullTeaching will automatically do the rest
To get FullTeaching working in the easiest way, you just have to download the file above docker-compose.yml and run docker-compose up in its directory. This will pull all the necessary images from DockerHub and will execute everything (it will take one minute after the pull ends). Go to http://localhost:5000/ and there you have it!
You will need some user data to test the features. These are the default users for the demo:
- Email:
[email protected]Pass:pass(Teacher account) - Email:
[email protected]Pass:pass(Student account) - Email:
[email protected]Pass:pass(Student account)
To get a full development version of the app just execute the following commands:
-
Java 8
Check version:
$ java -versionInstall:
$ sudo apt-get install -y default-jdk -
AngularCLI ( which requires Node.js > 4.x.x and npm > 3.x.x )
Check versions:
$ node -v $ npm -v $ ng -vInstall:
$ sudo apt-get install nodejs $ sudo apt-get install npm $ npm install -g @angular/cli -
Maven
Check version:
$ mvn -vInstall:
$ sudo apt-get install maven -
MySQL
Check version:
$ mysql --versionInstall:
$ sudo apt-get update
$ sudo apt-get install mysql-server
$ sudo mysql_secure_installation
First of all, it is necessary to create a schema for MySQL:
    $ mysql -u root -p
    $ CREATE DATABASE full_teaching;
    $ exit
Then we can build and run the project:
    $ git clone https://github.com/elastest/full-teaching-experiment.git
    $ cd full-teaching-experiment/src/main/angular
    $ npm install
    $ cd ../../../
    $ ./BuildFrontWarAndRun.sh
This clones the project in your working directory, installs dependencies with npm install and executes the BuildFrontJarAndRun.sh script.
This script BuildFrontJarAndRun.sh builds the FrontEnd with angular-cli, copies all generated files to the Backend static folder, builds and generates the WAR with Maven and runs the WAR file.
Go to http://localhost:5000/ and there you have it!
-
Before executing the script to build and run the app, it is necessary to change the following properties of
application.propertiesfile to match your credentials for MySQL:spring.datasource.username=YOUR_USERNAME spring.datasource.password=YOUR_PASS -
You may have to change permissions in order to execute the scripts.
These instructions have been tested for Ubuntu 14.04 and Ubuntu 16.04