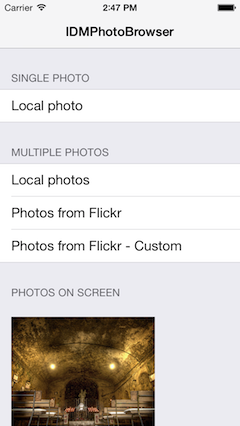
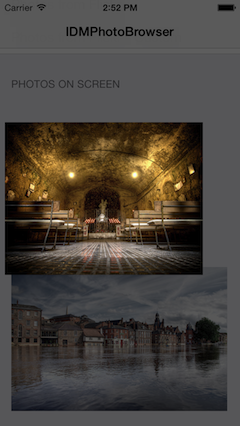
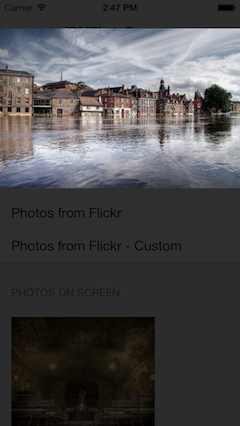
IDMPhotoBrowser is a new implementation based on MWPhotoBrowser.
We've added both user experience and technical features inspired by Facebook's and Tweetbot's photo browsers.
- Uses ARC
- Uses SDWebImage for image loading
- Image progress shown
- Minimalistic Facebook-like interface, swipe up/down to dismiss
- Ability to add custom actions on the action sheet
- Can display one or more images by providing either
UIImageobjects, file paths to images on the device, or URLs to images online - Handles the downloading and caching of photos from the web seamlessly
- Photos can be zoomed and panned, and optional captions can be displayed
See the code snippet below for an example of how to implement the photo browser.
First create a photos array containing IDMPhoto objects:
// URLs array
NSArray *photosURL = @[[NSURL URLWithString:@"http://farm4.static.flickr.com/3567/3523321514_371d9ac42f_b.jpg"],
[NSURL URLWithString:@"http://farm4.static.flickr.com/3629/3339128908_7aecabc34b_b.jpg"],
[NSURL URLWithString:@"http://farm4.static.flickr.com/3364/3338617424_7ff836d55f_b.jpg"],
[NSURL URLWithString:@"http://farm4.static.flickr.com/3590/3329114220_5fbc5bc92b_b.jpg"]];

// Create an array to store IDMPhoto objects
NSMutableArray *photos = [NSMutableArray new];

for (NSURL *url in photosURL) {
	IDMPhoto *photo = [IDMPhoto photoWithURL:url];
	[photos addObject:photo];
}

// Or use this constructor to receive an NSArray of IDMPhoto objects from your NSURL objects
NSArray *photos = [IDMPhoto photosWithURLs:photosURL];
There are two main ways to presente the photoBrowser, with a fade on screen or with a zooming effect from an existing view.
Using a simple fade transition:
IDMPhotoBrowser *browser = [[IDMPhotoBrowser alloc] initWithPhotos:photos];Zooming effect from a view:
IDMPhotoBrowser *browser = [[IDMPhotoBrowser alloc] initWithPhotos:photos animatedFromView:sender];When using this animation you can set the scaleImage property, in case the image from the view is not the same as the one that will be shown on the browser, so it will dynamically scale it:
browser.scaleImage = buttonSender.currentImage;Presenting using a modal view controller:
[self presentViewController:browser animated:YES completion:nil];You can customize the toolbar. There are three boolean properties you can set: displayActionButton (default is YES), displayArrowButton (default is YES) and displayCounterLabel (default is NO). If you dont want the toolbar at all, you can set displayToolbar = NO.
Toolbar setup example:
browser.displayActionButton = NO;
browser.displayArrowButton = YES;
browser.displayCounterLabel = YES;
It is possible to use your own image on the toolbar arrows:
browser.leftArrowImage = [UIImage imageNamed:@"IDMPhotoBrowser_customArrowLeft.png"];
browser.rightArrowImage = [UIImage imageNamed:@"IDMPhotoBrowser_customArrowRight.png"];
browser.leftArrowSelectedImage = [UIImage imageNamed:@"IDMPhotoBrowser_customArrowLeftSelected.png"];
browser.rightArrowSelectedImage = [UIImage imageNamed:@"IDMPhotoBrowser_customArrowRightSelected.png"];
If you want to use custom actions, set the actionButtonTitles array with the titles for the actionSheet. Then, implement the photoBrowser:didDismissActionSheetWithButtonIndex:photoIndex: method, from the IDMPhotoBrowser delegate
browser.actionButtonTitles = @[@"Option 1", @"Option 2", @"Option 3", @"Option 4"];Others customizations you can make are: use white background color, don't display the done button and change the done button background image:
browser.useWhiteBackgroundColor = YES;
browser.displayDoneButton = NO;
browser.doneButtonImage = [UIImage imageNamed:@"IDMPhotoBrowser_customDoneButton.png"];
If you want to keep the interface shown when the user is scrolling :
browser.autoHideInterface = NO;You can use a smooth pop animation when presenting and dismissing a photo:
browser.usePopAnimation = YES;If the presenting view controller doesn't have a status bar, in some cases you can force it to be hidden:
browser.forceHideStatusBar = YES;It's possible to disable the vertical dismiss swipe gesture:
browser.disableVerticalSwipe = YES;Dismiss the photo browser with a touch (instead of showing/hiding controls):
browser.dismissOnTouch = YES;Photo captions can be displayed simply by setting the caption property on specific photos:
IDMPhoto *photo = [IDMPhoto photoWithFilePath:[[NSBundle mainBundle] pathForResource:@"photo2l" ofType:@"jpg"]];
photo.caption = @"Campervan";
No caption will be displayed if the caption property is not set.
By default, the caption is a simple black transparent view with a label displaying the photo's caption in white. If you want to implement your own caption view, follow these steps:
- Optionally use a subclass of
IDMPhotofor your photos so you can store more data than a simple caption string. - Subclass
IDMCaptionViewand override-setupCaptionand-sizeThatFits:(and any other UIView methods you see fit) to layout your own view and set it's size. More information on this can be found inIDMCaptionView.h - Implement the
-photoBrowser:captionViewForPhotoAtIndex:IDMPhotoBrowser delegate method (shown below).
Example delegate method for custom caption view:
- (IDMCaptionView *)photoBrowser:(IDMPhotoBrowser *)photoBrowser captionViewForPhotoAtIndex:(NSUInteger)index {
	IDMPhoto *photo = [self.photos objectAtIndex:index];
	MyIDMCaptionViewSubclass *captionView = [[MyIDMCaptionViewSubclass alloc] initWithPhoto:photo];
	return captionView;
}Just add pod 'IDMPhotoBrowser' to your Podfile.
This project uses MIT License.


