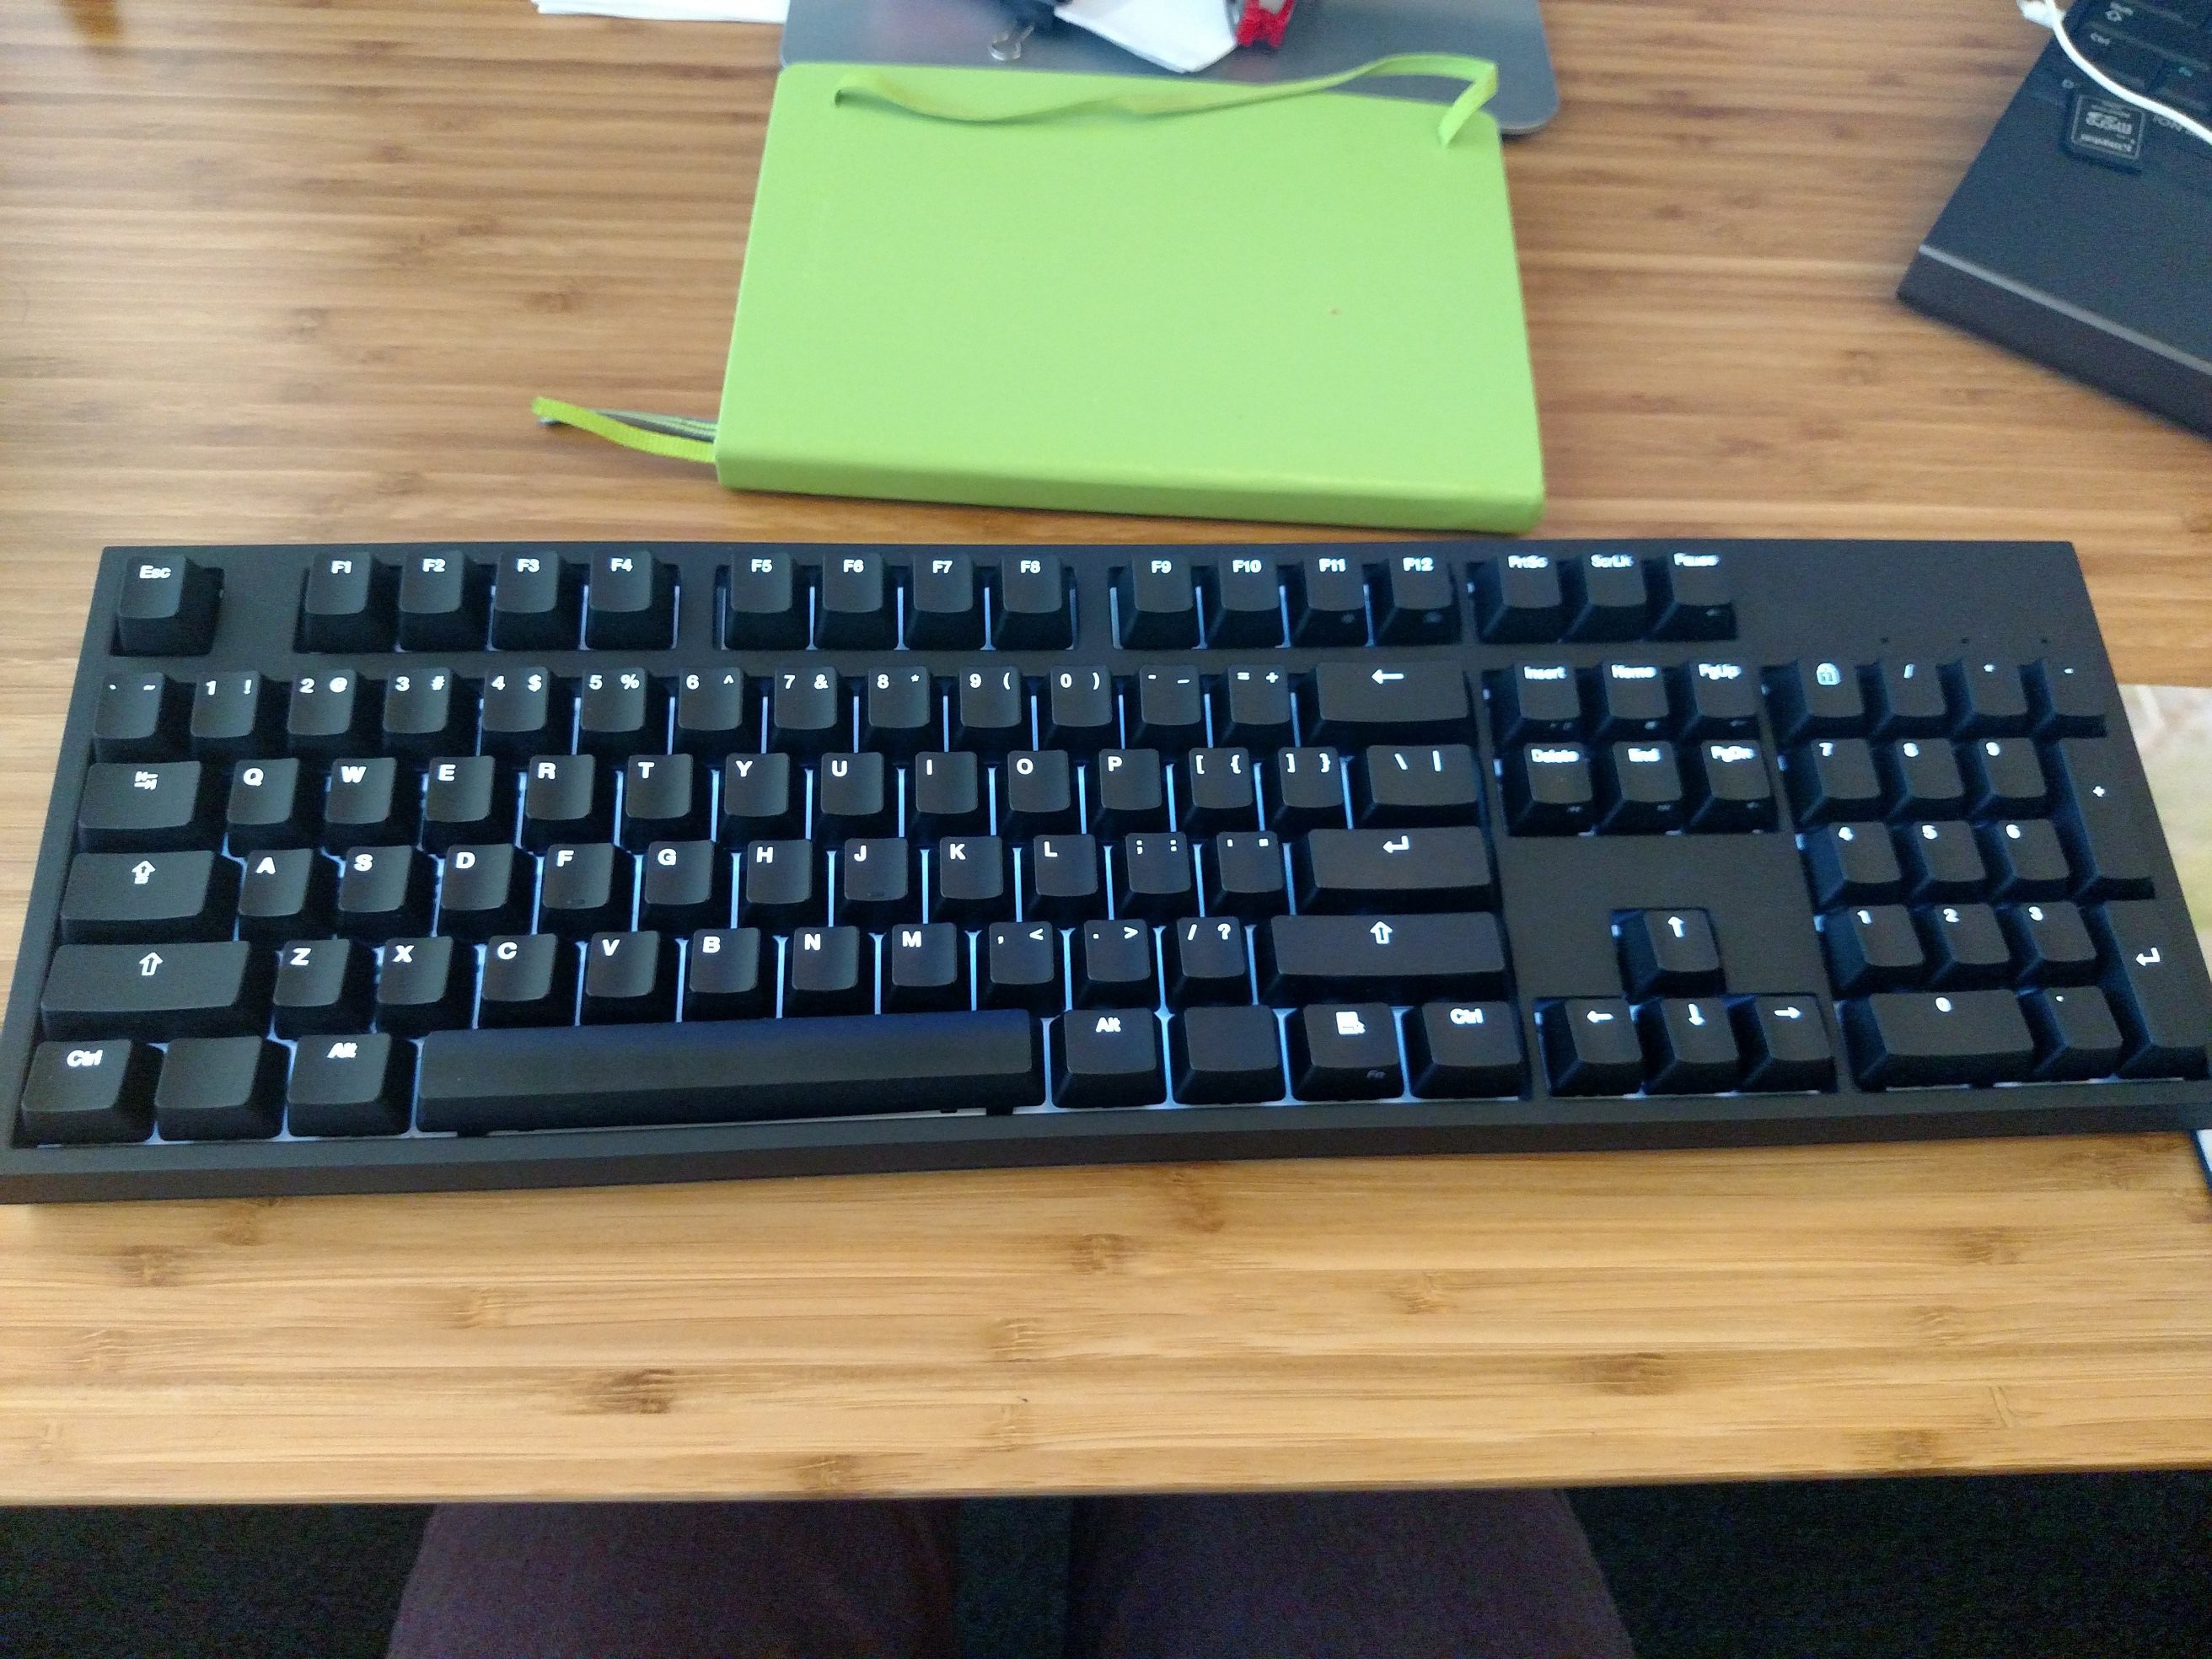
Checkout updated version forked by another github user! https://github.com/michaeldjcox/BLE_WASD
See https://hackaday.io/project/7646-ble-wasdmechanical-keyboard for build instructions!
I created a wireless mechanical keyboard using an arduino and BLE. I love the feel of a mechanical keyboard but I hate the wires. So I made it wireless.
This was a great project because I had never used bluetooth or BLE before. Nor had I used the PS2 protocol. It was a fun little project. Now I have very clean looking desk.
Gamers may freak out because this is a slap in the face for low latency. However, I am coder. As long as my eyes can't tell then I don't care. I just want a professional looking, nice feeling keyboard for coding and a wireless WASD fits that description.
1 × WASD Code Keyboard (Or any PS2 keyboard)
http://www.wasdkeyboards.com/index.php/products/code-keyboard.html
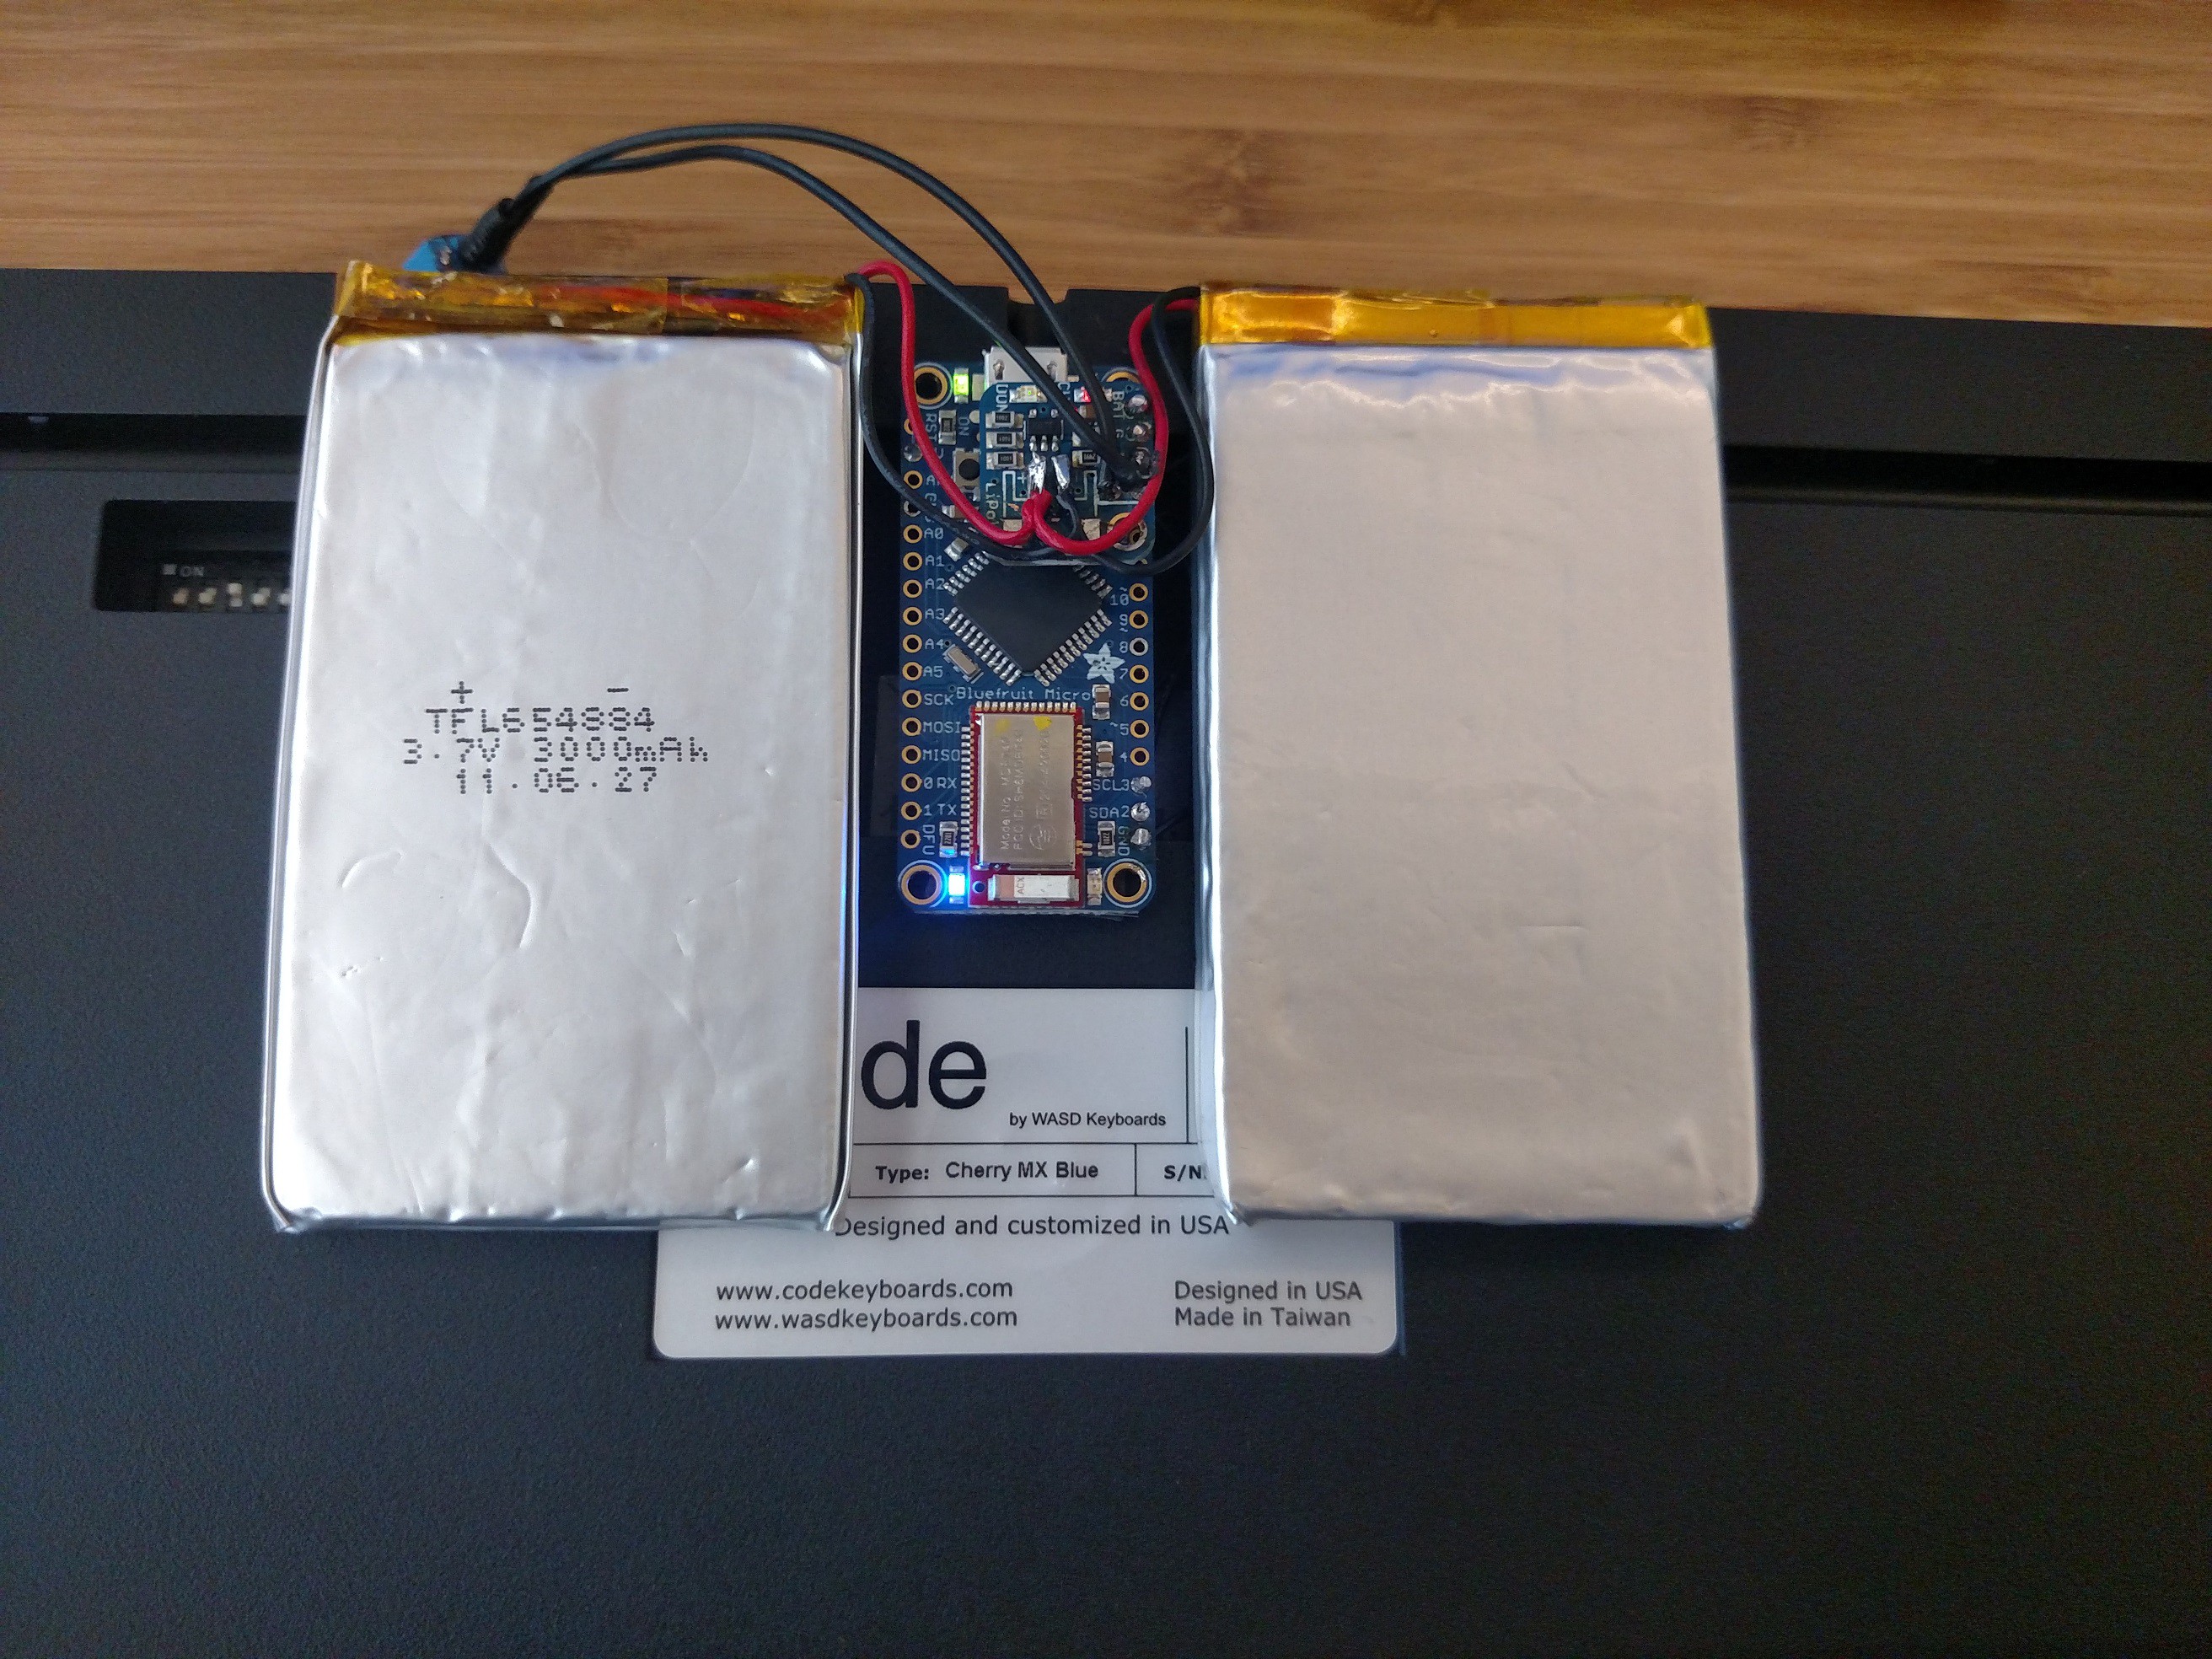
1 × Bluefruit LE micro
http://www.adafruit.com/product/2661
1 × Trinket lipo backpack
http://www.adafruit.com/products/2124
1 × USB Bluetooth 4.0 module
http://www.adafruit.com/products/1327
2 × 3.7v Lipo Battery(Any size you want)
http://www.adafruit.com/products/328
1 × Micro USB
https://www.adafruit.com/products/1826
- Solder the 500mah jumper on the trinket backpack for batteries larger than 500mah
- (Optional) Cut the switch trace on the trinket backpack and solder a micro switch between the two contacts. See https://learn.adafruit.com/adafruit-pro-trinket-lipoly-slash-liion-backpack for more details
- Solder the trinket backpack to the Bluefruit micro
- Solder the micro USB power connections to ground and 3.3v on the Bluefruit Micro
- Solder the Data ( + ) pin(PS2 clk) of the micro USB to pin 2 on the Bluefruit micro
- Solder the Data ( - ) pin(PS2 data) of the micro USB to pin 3 on the Bluefruit micro
- Solder all batteries in PARALLEL to the trinket backpack
- Plug the micro USB into the keyboard and double stick tape the electronics
- Battery life depends on the size of your battery, power consumption of your keyboard, and the power level of your bluetooth
- I haven't tested my battery life with 6000mah battery nor have I measured the power consumption( multimeter broken :( )
- I can run a 12 hour work day with stock bluetooth power settings and medium backlight with no problems
- You can charge the keyboard through the micro USB on the bluefruit.
- I usually charge mine when I leave work
- Download my git repo
- Install the proper drivers
- Download the adafruit Bluefruit library
- https://github.com/adafruit/Adafruit_BluefruitLE_nRF51/archive/master.zip
- Add to your arduino library
- Add Adafruit board support in Arduino IDE
- Download the adafruit app
- Follow this procedure
- https://learn.adafruit.com/bluefruit-le-micro-atmega32u4-microcontroller-usb-bluetooth-le-in-one/dfu-bluefruit-updates
- REMEMBER TO GROUND THE DFU PIN
- Open this project in the Arduino IDE
- Select Bluefruit Micro as your board
- Select the proper serial port
- Click upload
- Hit shift + ctrl + esc on your MODIFIED keyboard
- This will reconfigure your bluetooth module for keyboard use
- Bluetooth is now named "BLE_WASD"
- Do this again if your keyboard ever stops working randomly
- Connect your keyboard to your computer or phone
- I have only had luck with Windows 10(it was able to solve the funky driver errors from the adafruit bluefruit module)
- Windows 7 was a no go
- Windows 8 is untested
- Android only works upon first pairing
- Apple products untested
- This code will work with any arduino and bluefruit module, you just need to change the pinouts and stuff.
- This code supports 100% of the PS2 receiving protocol(one way communication) and has some extra features for a WASD keyboard(media keys)
- Use the
special_functions( )function to do custom things with your keyboard. Like make a T9 number pad. - You can change the power output of the Bluetooth module to increase range or save battery

