This tutorial is heavily influenced by deploy-django.md, but has been modified slightly and includes some clarifications in order to deploy the Django App in AWS according to metromap requirements.
By following this tutorial, you will be able to successfully deploy the metromap Django app, which includes:
- An AWS EC2 server configured as hosting
- SSL-certification with Certbot
- A custom domain name
Please note that all commands in this document were executed using Linux (Ubuntu) operating system. It is important to be aware that if you are using a different operating system, the bash inputs may vary and require different commands to achieve the same results.
- Deploying a Production ready Django app on AWS
Here is the project layout:
ppi_06
├── AWS_deploy.md
├── core/ (Api & Embed powered by Django)
├── daniel.pem
├── integrantes.py
├── LICENSE
├── ppi_06_info02.md
├── README.md
└── site/ (Documentation powered by Nextra)Why choose AWS?
- It offers a lot of free services for new accounts.
- Very popular among startups and even enterprises.
- If you do not have an account, check out this step by step guide by Amazon here.
Before you provision a new server, it is best practice to make sure your account is as secure as possible by following the prompts on your Security Status checklist. This can be found under the IAM tab from your console's homepage.

Amazon's EC2 or Elastic Compute Cloud is one of the core products/services AWS provides and is the main building block for many of AWS's other services. It allows users to essentially rent virtual computers on which to run their own applications. You can learn more about EC2 here.
Start out by going into the AWS Console and going to the EC2 tab. An easy way to get there is through the Services link at the top and search for EC2 in the prompt.
We selected "US East (N. Virginia) us-east-1" as our region of choice because it is relatively closer to Colombia compared to other locations. Additionally, it is one of the primary locations in AWS, and thus offers access to almost all of their products.
You should see this screen (as of July 2020):

Go to the Running Instances link on the EC2 dashboard and click Launch Instance.

In this step, AWS will prompt you to choose an AMI. AMI's are templates to configure new instances. For this tutorial, we will be using Ubuntu 18.04 64-bit (free tier).

Next, select the t2.micro instance type.

On the next screen, keep clicking next until you see the option to Configure Security Group.
Security groups are virtual firewalls for your instances.
Important: by default, there is an implicit deny on all ports meaning if you do not add rules, all incoming/outgoing traffic is blocked. Security groups are also stateful, which means setting inbound rules for a certain port will also affect the outbound rules for that port.
Set your Security Group settings with the following:
| Type | Port Range | Source | Description. |
|---|---|---|---|
| SSH | 22 | My IP | Port for SSH'ing into your server |
| HTTP | 80 | Anywhere | Port for HTTP requests to your web server |
| HTTPS | 443 | Anywhere | Port for HTTPS requests to your web server |
| Custom TCP | 8000 | Anywhere | Port which Django will run |
Click forward to Review and Launch to view all configurations of your Instance/AMI. If the configurations look correct go ahead and hit Launch.
Once you launch the instance, AWS will prompt you to create a key pair. A key pair consists of a public key that AWS stores and a private key file that you store. Together they allow you to connect to your instance securely through asymmetrical encryption.
If this is the first time you are creating a key pair for your project, select Create a new key pair from the drop-down and add a name for the key pair.
Be sure to store the key pair in a secure location. It is generated only once and AWS will not have access to it if you lose it. This is your only means to log into the EC2 instance via SSH.

Once you have downloaded the key pair make sure to move the .pem file to the root directory of your project on your local computer. It is also recommended to not upload the .pem file to GitHub. To ensure that the file is not accidentally uploaded to the repository, you should add it to the .gitignore file.

Next, check the checkbox acknowledging that you have access to the private key pair and click Launch Instances. This should take you to the Launch Status page.
Click on the Instances tab on your EC2 console.

The instance may take a couple of minutes to launch. Once it passes its' status checks, the instance state should show a green circle and a "running" state.
Before you can log into your EC2 instance, it is important to first generate an Elastic IP and associate it to your EC2 instance.
An Elastic IP is a dedicated IP address for your EC2 instance. Although the instance has a public IP address assigned upon creation, that IP address is dynamic and does not persist if you stop and start the instance. With an Elastic IP address, you can mask the failure of an instance by remapping the address to another instance in your account.
Therefore, by using an Elastic IP, you can have a dedicated IP to which users from the internet can access your instance. This will come in handy later when you assign a custom domain name and add SSL certification to the server.
Note: If you are using the free tier, AWS will charge you if your Elastic IP is NOT associated with an AWS identity.
On the EC2 dashboard, look under the Network & Security tab and go to Elastic IPs:

It should take you here:

Click on Allocate Elastic IP address.
It should take you here:

Select Allocate.

This should create an Elastic IP. The next step is to associate that Elastic IP to the instance.
With the Elastic IP checked on the left side:
- Go to Actions
- Click on Associate Elastic IP address
- Make sure your Resource type is Instance
- Search for your instance (if this is your first time, it should be the only one)
- Click Associate
To check if everything is done correctly, go to the Instances tab and in the instance details, you should see the Elastic IP.
With the instance selected in the EC2 console, click Connect near the top. You will be prompted with directions on how to connect to your EC2 instance:

- Changing the .pem file's permission to read-only ensures nobody can modify your private key.
Now that we have our instance and have allocated an Elastic IP to it. It is time to connect to our server!
If you have not already, go to the Instances link in the EC2 Dashboard.
With the instance highlighted, click on Connect on the top banner of the Instaces Dashboard.
It should give you a pop up with directions on how to connect to your EC2 instance.
Go back to your project root directory and make sure that your .pem file has the correct permissions.
Run the command:
chmod 400 *.pemNext run the command given to you in the example:
ssh -i "<KEY-PAIR>.pem" ubuntu@<YOUR-IP-ADDRESS>.compute-1.amazonaws.comThe ssh should prompt you that the authenticity of host instance can't be established and will show an ECDSA key fingerprint.
It will also ask you Are you sure you want to continue connecting (yes/no)?
Type yes and Enter.
This should take you into the EC2 Instance.
If not, try the ssh command again.
Congratulations you are inside your EC2 Instance!
Once you are logged into your server, we will install all of the project dependencies: We will install the following:
- Django and Python3
- pip
- gunicorn
- NGINX
- UFW (Firewall)
Updating packages:
  sudo apt update
  sudo apt upgrade
Installing Python 3, NGINX and Gunicorn:
sudo apt install python3-pip python3-dev nginx gunicorn curlEnable Firewall and allow OpenSSH:
  sudo ufw enable
  sudo ufw allow OpenSSH
  sudo ufw allow 'Nginx Full'
Check to make sure we are allowing OpenSSH
sudo ufw statusExpected output:
To                         Action      From
--                         ------      ----
Nginx Full                 ALLOW       Anywhere
OpenSSH                    ALLOW       Anywhere
Nginx Full (v6)            ALLOW       Anywhere (v6)
OpenSSH (v6) ALLOW Anywhere (v6)To deploy our GitHub repository on our EC2 instance:
Before creating python environment, you may install venv using
sudo apt install python3.10-venv.
  git clone https://github.com/danielcgiraldo/ppi_06.git
  cd ppi_06/core
  python3 -m venv env
  source env/bin/activate
  pip3 install -r requirements.txt
Note: Make sure to update your .env file so that your project has the correct Environment Varialbes necessary to run.
Create a gunicorn.socket file:
sudo vim /etc/systemd/system/gunicorn.socketConfigure the gunicorn.socket file with:
[Unit]
Description=gunicorn socket

[Socket]
ListenStream=/run/gunicorn.sock

[Install]
WantedBy=sockets.target
Next configure the gunicorn.service file with:
sudo nano /etc/systemd/system/gunicorn.serviceUse the configurations below:
[Unit]
Description=gunicorn daemon
Requires=gunicorn.socket
After=network.target

[Service]
User=ubuntu
Group=www-data
WorkingDirectory=/home/ubuntu/ppi_06/core
ExecStart=/home/ubuntu/ppi_06/core/env/bin/gunicorn --access-logfile - --workers 3 --bind unix:/run/gunicorn.sock core.wsgi:application

[Install]
WantedBy=multi-user.target
Start and enable Gunicorn:
  sudo systemctl start gunicorn
  sudo systemctl enable gunicorn
Check the status of gunicorn with:
sudo systemctl status gunicornNext, we need to configure NGINX to redirect web traffic.
Create a new NGINX config file with the following command:
sudo vim /etc/nginx/sites-available/metromapPaste in the following configurations and replace any of the ALL CAPS sections with your own project details:
server {
    listen 80;
    listen 443 ssl;
    server_name api.metromap.online embed.metromap.online;

    add_header Access-Control-Allow-Origin *;

    ssl_certificate /etc/letsencrypt/live/api.metromap.online/fullchain.pem;
    ssl_certificate_key /etc/letsencrypt/live/api.metromap.online/privkey.pem;
    ssl_certificate /etc/letsencrypt/live/api.metromap.online/fullchain.pem;
    ssl_certificate_key /etc/letsencrypt/live/api.metromap.online/privkey.pem;

    root /home/ubuntu/ppi_06/core;

    location / {
        include proxy_params;
        proxy_pass http://unix:/run/gunicorn.sock;
    }
}
It may be necessary to modify the allowed hosts setting in the Django settings file.
So far, users can access the site using the Elastic IP. However, it can be difficult to remember and share so we will configure a custom domain name.
To get started, you need to first purchase a domain. This can range from $1 to $1,000+s. Amazon has a service called Route53 you can use or you can choose other providers such as Google Domains, GoDaddy, etc.
There are two steps you would need to configure to connect the project with a custom domain:
- Create domain records with DNS registrar
- Configure NGINX on the EC2 instance to recognize the domain
Let's start with configuring our DNS with records:
- Go to the DNS portion of your registrar.
- Find where you can create custom resource records.
Set the records like so:
| Name | Type | TTL | Data |
|---|---|---|---|
| api | A | AUTO | YOUR-ELASTIC-IP-ADDRESS |
| embed | A | AUTO | YOUR-ELASTIC-IP-ADDRESS |
Secure Sockets Layer (SSL) is a standard security technology for establishing an encrypted link between a server and a client. So far, we have been serving web content over HTTP, which can be dangerous as data sent between the server and client is not encrypted. If you are handling user sign-in and need to protect data such as passwords or credit card information, it is always best practice to have SSL certification on your applications.
In this tutorial, we will be using Certbot by letsencrypt.org, a non-profit organization that provides free SSL Certificates.
On your browser go to https://certbot.eff.org/instructions.
Select the Software and Operating System (OS) you are using. In this case, we are using NGINX and Ubuntu 18.04 LTS (bionic).
Inside your EC2 Instance, follow the command-line instructions until you see these instructions:
sudo certbot --nginxAfter running this command, Certbot will present to you the following prompt: Which names would you like to activate HTTPS for?
If NGINX is configured correctly, it should show both your root domain as well as with the www subdomain:
1: api.metromap.online
2: embed.metromap.online
Select enter to activate both HTTP and HTTPs. The next prompt will be:
Please choose whether or not to redirect HTTP traffic to HTTPS, removing HTTP access.
- - - - - - - - - - - - - - - - - - - - - - - - - - - - - - - - - - - - - - - -
1: No redirect - Make no further changes to the web server configuration.
2: Redirect - Make all requests redirect to secure HTTPS access. Choose this for
new sites, or if you're confident your site works on HTTPS. You can undo this
change by editing your web server's configuration.
Select option 2 as this will redirect all traffic through HTTPS and is the most secure option. Afterward, Certbot will make changes to the NGINX configuration file.
Note: Once your site is using HTTPS, double-check your API calls and make sure that they are going to the https:// endpoint rather than http://. This may be an unnecessary precaution, but it is an easy bug to miss.
Next, go to your custom domain. Check to see if there is a lock icon next to your URL.
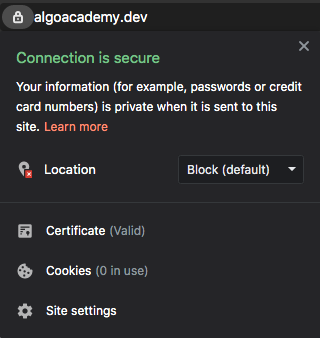
Congratulations! You have successfully deployed a web app with HTTPS!
Once your NGINX config is set up and your SSL are installed, make sure there are no syntax errors with:
sudo nginx -tNext, create a soft link of your config file from sites-available to the sites-enabled directory. This step is important because NGINX will use the configuration settings located at /etc/nginx/sites-available/default by default if there is nothing in sites-enabled.
sudo ln -s /etc/nginx/sites-available/metromap /etc/nginx/sites-enabledRestart the NGINX Web Server with:
sudo systemctl restart nginxI hope this information was helpful for those who are new to web development and AWS. If you encounter any difficulties, please do not hesitate to contact either me or my colleagues for assistance.
We would like to express our gratitude to the author of deploy-django.md, which was the main source of information used in this tutorial. We would also like to thank Chat GPT for assisting in improving the clarity of this document.