Configuration
⚠️ 🚨 ATTENTION this is a huge amount of documentation, if you don't want to read it, then you can find an example configuration file that you can copy and modify here. If you find this example overwhelming, then you can find a more compact version here, just make sure to name it~/.oxrcwhen you download it.
Ox uses Lua as a configuration language.
You can find an example configuration file (which is probably the easiest way to learn how to configure).
As standard, your configuration file is located in ~/.oxrc.
Ox will not install this for you as standard, and instead will use built-in defaults.
You will need to create this ~/.oxrc file yourself. I recommend pulling the default configuration file found in the config folder in the main repository and copying it to ~/.oxrc.
You can use the following commands to do this:
cd ~
curl -O https://github.com/curlpipe/ox/raw/master/config/.oxrc
Then, feel free to play around with this configuration file.
See the Configuration section below to see more details on how the configuration file is structured
You can change many aspects of Ox:
- Key bindings
- Command behaviour
- Mouse behaviour
- Colours of the editor
- Colours of the syntax highlighter
- Line numbers
- Status line contents and padding / alignment
- Contents and visibility of the greeting message
Note: You can reload your configuration file whilst in the editor (if you are making changes) by opening the command line with Ctrl + K and typing
reload
Almost every key binding in Ox can be modified and changed. You can also add your own key bindings if you want to.
Please see here if you wish to learn more on how to do this.
Almost every command in Ox can be modified and changed. You can also add your own commands if you would like.
Please see here if you wish to learn more on how to do this.
This is enabled by default.
This feature will enable you to click on parts of the document and select / copy / paste text natively.
Note that you can change the selection colour as in the following example:
colors.selection_bg = "black"
colors.selection_fg = "white"
You can disable it by including the following line:
terminal.mouse_enabled = false
By default, the editor will scroll one line at a time, this might not be sensitive enough for some user's preference, but there is an option that allows scrolling by any number of lines:
terminal.scroll_amount = 4The above will have the editor scroll by 4 lines with each scroll.
You will want to set this between 1 (very low sensitivity) to 7 (very high sensitivity)
This is a very important part to understand
Colours in the ox configuration file can be of the following form:
{RED, GREEN, BLUE} for rgb colours
"HEX CODE" for hex codes (be sure to include the #)
INTEGER for ANSI codes (make sure these are inclusively between 0 and 255) go here for a list of which colours correspond to which numbers
"COLOUR NAME" for various colour names, these are listed below
blackdarkgreyreddarkredgreendarkgreenyellowdarkyellowbluedarkbluemagentadarkmagentacyandarkcyanwhitegreytransparent
Be sure to check out the Format of Colours section above to learn how to structure colours
In the configuration file, the colors table is in charge of storing the colours the editor should be.
You can change the colours of the editor by setting the following variables:
Note foreground is equivalent to text colour and background is the background colour of the text.
Editor
background found in colors.editor_bg
it can be set (for example) like colors.editor_bg = "black"

foreground found in colors.editor_fg
it can be set (for example) like colors.editor_fg = "black"

Line Numbers
background found in colors.line_number_bg
it can be set (for example) like colors.line_number_bg = "black"
foreground found in colors.line_number_fg
it can be set (for example) like colors.line_number_fg = "black"

Status Line
background found in colors.status_bg
it can be set (for example) like colors.status_bg = "black"
foreground found in colors.status_fg
it can be set (for example) like colors.status_fg = "black"
Highlight
found in colors.highlight
it can be set (for example) like colors.highlight = "black"
Active Tabs
found in colors.active_tab_bg and colors.active_tab_fg
it can be set (for example) like colors.active_tab_fg = "black"

Inactive Tabs
found in colors.inactive_tab_bg and colors.inactive_tab_fg
it can be set (for example) like colors.inactive_tab_bg = "black"

Info Message
background found in colors.info_bg
it can be set (for example) like colors.info_bg = "black"
foreground found in colors.info_fg
it can be set (for example) like colors.info_fg = "black"
Warning Message
background found in colors.warning_bg
it can be set (for example) like colors.warning_bg = "black"
foreground found in colors.warning_fg
it can be set (for example) like colors.warning_fg = "black"

Error Message Background
background found in colors.error_bg
it can be set (for example) like colors.error_bg = "black"
foreground found in colors.error_fg
it can be set (for example) like colors.error_fg = "black"

Splits
Referring to the colour of the separating bars between files
background found in colors.split_bg
it can be set (for example) like colors.split_bg = "black"
foreground found in colors.split_fg
it can be set (for example) like colors.split_fg = "white"
You can configure how many spaces tabs will be rendered as by setting the following:
document.tab_width = 4When you press the tab key, Ox could choose to insert spaces or tabs. Different programmers have different preferences here. You can state your preference as such:
document.indentation = "tabs"or
document.indentation = "spaces"spaces will insert n spaces where n is your tab_width (look above to find it)
tabs is the default option
You can configure after how long the editor will save your current actions and commit them to the event stack so that you can go back to the document state at that time. Let's say you want the document to group your previous actions and save them after 10 seconds of inactivity, you could do that like so:
document.undo_period = 10You can configure the cursor behaviour. Cursor wrapping is where you hit the start or end of a line, and it moves to the previous or next line automatically if you try and move left / right out of bounds. It is enabled by default, but you can disable it as such:
document.wrap_cursor = falseYou can enable or disable line numbers by setting line_numbers.enabled
E.g. line_numbers.enabled = false disables line numbers, line_numbers.enabled = true enables line numbers
You can also adjust the padding to the left and right of the line numbers if you're a fan of extra (or less) space:
-- Here are the defaults that ox uses (measured in space characters " ")
line_numbers.padding_left = 1
line_numbers.padding_right = 1A status line is made up of "parts" these are groups of information.
For example, if you want some of the status line on the left (e.g. file name, file type) and some of the status line on the right (e.g. cursor position), then you must create two parts.
To define parts, you can set status_line.format to an array with each item being a part.
E.g.
status_line.format = {
    "{file_name} | {icon}",
    "{file_type} | {cursor_y}",
}
An example part format string is as follows: This is my file: {file_name}
If you look at the file text.txt This will show This is my file: test.txt
Anything between { and } is used to bring data from the editor and interpolate it into the status line.
The following options are available:
-
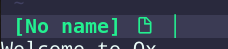
{file_name}- The name of the file that is currently open -
{icon}- The icon of the file that is currently open (this will require nerd fonts to be installed) -
{path}- The path of the file that is currently open (provided by user) -
{absolute_path}- The absolute path to the file that is currently open -
{file_extension}- The extension of the file that is currently open -
{modified}- Will show[+]if the current file differs from the file on the disk and will show nothing if not -
{file_type}- This shows the type of file i.e.Rustfor files with thersextension -
{cursor_y}- The line the cursor is on -
{cursor_x}- The character the cursor is on (horizontally) -
{line_count}- The number of lines in the document currently open
Anything outside of these {} will be put in as is, which allows you to put separators or static text
After defining your parts to the status line, the next thing you can set is the alignment / padding
There are two modes to pad / align status parts:
-
around- this will place padding to the left, right and between parts -
between- this will place padding only between parts
You're probably going to want to use between, unless you want a more unique look to your status line.
The best way to understand what these look like is to experiment with them.
To set the alignment mode, you can set the status_line.alignment variable as such:
status_line.alignment = "around"
-- OR --
status_line.alignment = "between"You can enable the tab line using tab_line.enabled
You also see that | character by default after every tab, that can be configured easily using tab_line.separators, set this to true to keep them, or false to turn them off so you have seamless tabs.
You can also adjust how each tab is formatted, similar to the status line above
The values available to place in tab format are as follows:
-
{file_name}- The name of the file the tab represents -
{icon}- The icon of the file the tab represents (this will require nerd fonts to be installed) -
{path}- The path of the file the tab represents (provided by user) -
{absolute_path}- The absolute path to the file the tab represents -
{file_extension}- The extension of the file the tab represents -
{modified}- Will show[+]if the file the tab represents differs from the file on the disk and will show nothing if not
Using these values, you can set the format of how tabs appear using tab_line.format
Below is an example configuration entry to have the tab line showing with each tab having just the file name and some spacing on each side:
tab_line.enabled = true
tab_line.format = " {file_name} "You can enable / disable the greeting message by setting greeting_message.enabled:
-- For enabling the greeting message: --
greeting_message.enabled = true

-- For disabling the greeting message: --
greeting_message.enabled = false
You can also set the actual contents of the greeting message as such:
greeting_message.format = [[
Ox editor version {version}
]]
Here, if you are running version 0.3.3 of the editor, then the greeting message will show Ox editor version 0.3.3
As with status lines, anything between { and } will be replaced with information from the editor.
The following options are available:
-
{version}- the version of the editor that is running -
{highlight_start}- starts the highlight colour from being used as text colour -
{highlight_end}- stops the highlight colour from being used as text colour
NOTE: when using {highlight_start} or {highlight_end}, it is best practice to put these on their own line as not doing so can mess with the alignment of the greeting message.
Just like status line, you can also have plug-ins output to the greeting message.
This can be toggled by default using the key binding Ctrl + H.
Like the greeting message, you can get help_message.enabled to see if it is active and set it to a value
to show or hide the greeting message.
You can also modify the format through setting help_message.format to a string. All the options available in the
greeting message are available here too.
Just like status line and greeting message, you can also have plug-ins output to the greeting message.
You can select the shell that you would like to use in the in-terminal editor using one of the following options:
terminal.shell = "bash" -- Bash
terminal.shell = "zsh"  -- Zsh
terminal.shell = "fish" -- Fish
terminal.shell = "dash" -- Dash shell (same as `sh` on most unix systems)
These are currently the only shells that are supported. If you would like to see more, please open an issue.
You can add support for certain file types.
Let's say we had a language called Psi. We know a file is of type psi if:
- The file extension is
.psi - Files with
// filetype:psion the first line are files written in the Psi language - Files named
.psiconfare also a file written in psi, despite not having a.psiextension
Languages in Ox also have colours (so that language-specific icons in the file tree have colour).
Each language is one of the following colours: red, orange, yellow, green, lightblue, darkblue, purple, pink, brown, grey
Let's say PSI uses darkblue as a colour.
Currently, when we open psi files in Ox, Ox shows Unknown, doesn't have any syntax highlighting and shows a generic icon.
This is not ideal, but luckily there is infrastructure to have Ox recognise files based on the criteria listed above.
In your config file, you can do the following (for example):
-- Create a new file type named "Psi"
file_types["Psi"] = {
    -- Icons shown on the tab line / status line (if {icon} is present in the formatting of these lines)
    icon = "Ψ ",
    -- Files with the extension .psi are psi files
    extensions = {"psi"},
    -- Files called ".psiconf" are psi files
    files = {".psiconf"},
    -- Files that begin with a line "// filetype:psi" are psi files (strings use regex, here, I allow for whitespace)
    modeline = {"\\s*//\\s*filetype:psi"},
    -- PSI language uses a dark blue colour scheme
    color = "darkblue",
}
now you will be able to open psi files, and Ox will show the correct icon in the correct colour, file type name and, if you were to have it defined, the correct syntax highlighting (see the Syntax Highlighting Rules section below on how to create custom syntax highlighting rules).
There are some file types supported by default, these are:
ABAP, Ada, AutoHotkey, AppleScript, Arc, ASP, ActionScript, AGS Script, Assembly, Awk, Batch, Brainfuck, C, CMake, Cobol, Java, Clojure, CoffeeScript, Crystal, Cuda, C++, C#, CSS, CSV, D, Dart, Diff, Dockerfile, Elixr, Elm, Emacs Lisp, ERB, Erlang, F#, FORTRAN, Fish, Forth, ANTLR, GDScript, GLSL, Gnuplot, Go, Groovy, HLSL, C Header, Haml, Handlebars, Haskell, C++ Header, HTML, INI, Arduino, J, JSON, JSX, JavaScript, Julia, Kotlin, LLVM, Lex, Lua, LiveScript, LOLCODE, Common Lisp, Log file, M4, Groff, Matlab, Objective-C, OCaml, Makefile, Markdown, Nix, NumPy, OpenCL, PHP, Pascal, Perl, PowerShell, Prolog, Python, Cython, R, reStructuredText, Racket, Ruby, Rust, Shell, SCSS, SQL, Sass, Scala, Scheme, Smalltalk, Swift, TOML, Tcl, TeX, TypeScript, Plain Text, Vala, Visual Basic, Vue, Logos, XML, Yacc, Yaml, Bison, Zsh
Keep a note of these names if you want to modify certain aspects of the language. See the example directly below.
By default, the icon shown for the Python programming language is the python logo (see Status Line above to enable icons).
However, let's say that instead, we wanted to have the logo be of a snake.
You can do that as follows:
file_types["Python"].icon = "[snake icon]"where you'd replace [snake icon] with the nerd font snake icon. See https://www.nerdfonts.com/cheat-sheet for a list of all icons available within nerd fonts, and make sure you have them installed in order to use them.
Now, whenever you open python files, the icon will be a snake icon instead of the default logo.
You can also do things like add additional extensions for python files to be recognised by, say you wanted pyw files to be recognised as python files (bear in mind, it already does this by default, so this is for demonstration purposes):
table.insert(file_types["Python"].extensions, "pyw")You can also do this if you want to add additional modeline magic or file names that will trigger a certain file type.
You are able to change how the file tree looks and how it behaves:
You can set the width of the file tree using file_tree.width = [number]. You should replace [number] with the number of characters you want the file tree to be when it opens. The default is 30, which makes the file tree 30 characters wide.
You can set the background / foreground of the file tree, and the background / foreground of the selection as such:
colors.file_tree_bg = {41, 41, 61}
colors.file_tree_fg = {255, 255, 255}
colors.file_tree_selection_fg = {255, 255, 255}
colors.file_tree_selection_bg = {59, 59, 130}
Colours are in the format as defined in the Format of Colours section in this document, and listed above are the defaults in RGB form.
By default, file trees do not have icons because not everyone has nerd fonts installed. Install nerd fonts if you want to make use of icons.
There are two types of icons you can enable:
- Generic (differentiates between files and folders)
- Language specific (differentiates between file of various types and folders)
To enable generic icons OR language specific icons, add the following to your config file: file_tree.icons = true
Then, to enable language specific icons, you can further add file_tree.language_icons = true
For language specific icons, each file type has it's own colour e.g. red for ruby, blue for python, yellow for javascript etc etc
One thing you can easily set is what these colours are.
Each language is one of the following colours: red, orange, yellow, green, lightblue, darkblue, purple, pink, brown, grey
Each language has been assigned a colour by default in Ox based on the branding of each individual language, however, you can actually determine what shade of these colours to use. E.g. which shade of orange should all the orange languages use?
colors.file_tree_red = {240, 104, 89}
colors.file_tree_orange = {240, 142, 89}
colors.file_tree_yellow = {240, 237, 89}
colors.file_tree_green = {89, 240, 169}
colors.file_tree_lightblue = {89, 225, 240}
colors.file_tree_darkblue = {89, 149, 240}
colors.file_tree_purple = {139, 89, 240}
colors.file_tree_pink = {215, 89, 240}
colors.file_tree_brown = {158, 94, 94}
colors.file_tree_grey = {150, 144, 201}
Colours are exactly as defined in the Format of Colours section in this wiki. Listed above are the default options in RGB form.
Next up is the behaviour of the file tree, there is one key behaviour you can change:
When you open the file tree, you can choose to move your focus into the file tree (so you can control it with the keyboard) but you might just want to open it, but not explicitly interact with it. If this is the case, you can add the following to your config file file_tree.move_focus_to_file = false.
The syntax object is in charge of all things syntax highlighting.
Use the set method to set the colour of certain tokens.
Note "tokens" refers to the different snippets of programs that should be highlighted. For example "return" is a keyword in many languages, and therefore, all keywords found in a source file will become "keyword tokens" and will all share a common colour. For example, in Rust, keyword tokens include "return", "fn", "if" etc, and it makes sense that all these should be the same colour. These all become keyword tokens.
So to set the colour of these tokens, which themselves are groups of certain snippets of text (e.g. "return"), you can do the following:
syntax:set("TOKEN NAME", COLOUR)
where TOKEN NAME becomes the name of the token and COLOUR is the corresponding colour (see the Format of Colours section above to see how to write colours into the configuration file)
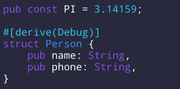
So for example, if we wanted to make keywords orange, we should include the following in the configuration file:
syntax:set("keyword", {255, 165, 0})Here, the RGB value of orange is provided.
If you want a full list of the tokens that are provided to ox with explanations of what they cover, here you go:
-
stringrefers to strings in various programming languages -
commentrefers to comments in various programming languages -
digitrefers to digits in various programming languages -
keywordrefers to keywords in various programming languages -
attributerefers to attributes in various programming languages -
characterrefers to characters in various programming languages -
typerefers to types in various programming languages -
functionrefers to function names in various programming languages -
headerrefers to headers in various programming language -
macrorefers to macro names in various programming languages -
namespacerefers to namespaces in various programming languages -
structrefers to the names of structs, classes, enums in various programming languages -
operatorrefers to operators in various programming languages e.g. +, -, * etc -
booleanrefers to booleans in various programming langauges e.g. true / false -
tablerefers to tables in various programming languages -
referencerefers to references in various programming languages -
tagrefers to tags in various markup langauges e.g. HTML <p> tags -
headingrefers to headings in various markup languages e.g. # in markdown -
linkrefers to links in various markup languages e.g. URLs -
keyrefers to keys in various markup languages -
quoterefers to quotes in various markup languages e.g. > in markdown -
boldrefers to quotes in various markup languages e.g. ** in markdown -
italicrefers to quotes in various markup languages e.g. * in markdown -
blockrefers to code blocks in various markup languages e.g. ``` ``` in markdown -
listrefers to bullet lists in various markup languages e.g. lines starting with - in markdown
You can set each of these tokens individually. I recommend using the default configuration file and tweaking it from there
Ox, by default, comes with a wide variety of syntax highlighting support for various languages, but it isn't an exhaustive list and there will always be languages that aren't included by default (as there are so many of them).
If you really want to support a certain file type in syntax highlighting, then you have the power to manually add it in via the configuration file at ~/.oxrc (you will need to create this file first if you haven't already)
It is a good idea to understand what I mean when I say "token". See the Theme section above for more information on what tokens are, and what tokens are included by default in the editor.
First, it is worth going into the theory of how the syntax highlighting system in Ox works, below is a brief explanation of how it is designed.
Please note, this is quite wordy and may be quite hard to understand without an example. It might be worth jumping back and forth between the example below and the theory, just to really make sure it "clicks" for you.
- tokens - These are snippets of text that should be highlighted. For example "return" is a keyword in many languages, and therefore, all keywords found in a source file ought to become "keyword tokens" and will all share a common colour. For example, in Rust, keyword tokens include "return", "fn", "if" etc, and it makes sense that all these should be the same colour. These all become keyword tokens.
-
patterns - These are how we define what these snippets are. Ox uses regular expressions to define and identify different snippets of text. For example, if we want to make every single instance of a number a token of "digit", then the pattern we can use (in regex) is
[0-9], where all digits 0 through 9 are captured and can assigned as a "digit token". - rules - These are a group of patterns for a certain token, rules can come together to highlight a language. E.g. rules that each include their token and patterns of strings, digits, keywords etc etc to highlight a Python file.
There are also different types of tokens:
- keyword - Not to be confused with a keyword token! This is a type of token that will take a single pattern and assign all instances as a specified token. Tokens with the keyword type can not travel across multiple lines.
- bounded - This will take two patterns, one starting pattern and one ending pattern. This is ideal for multi-line tokens, such as comments or strings.
Creating keyword tokens can be done like this: syntax:keyword(NAME, PATTERN)
You can also create multiple keyword tokens like this: syntax:keywords(NAME, {PATTERN1, PATTERN2, ...})
where
-
NAMEis the name you want to assign to the token e.g.digitorcomment. -
PATTERNare the patterns that you want to attach to that token (as there is often more than one way of making a token, e.g. strings could be made up of""or'')
Creating bounded tokens can be done like this: syntax:bounded(NAME, START_PATTERN, END_PATTERN, ESCAPE)
where
-
NAMEis the name you want to assign to the token e.g.stringorcomment -
START_PATTERNis the pattern you want to start the token with e.g./*for multiline comments -
END_PATTERNis the pattern you want to end the token with e.g.*/for multiline comments -
ESCAPEis true if you want to be able to escape the end pattern, and false if not e.g."here is a quote: \" but the string continues"
To attach these tokens you've made to the syntax highlighter, you must use the syntax:new method, which uses the following syntax: syntax:new(FILE_TYPE_NAME, RULES)
where
-
FILE_TYPE_NAMEis the name of the file type that will be associated with this syntax highlighting. By default, ox has built-in file types, which you can view above in the file types section. -
RULESis a list of rules that you would have defined (using thekeywordandboundedmethods)
Now it's time to bring it all together with an example, where we write very basic syntax highlighting for a python file:
syntax:new(
    -- Give the file type name we want this syntax to have
    "Python",
    -- Now let's define some rules
    {
        -- Adding in tokens of type keyword to highlight keywords in the language
        syntax:keywords("keyword", {"def", "return", "print", "if", "else", "elif", "import"}),
        -- Adding in a token of type keyword to highlight digits in the language
        syntax:keyword("digit", "[0-9]+"),
        -- Adding in a bounded token for strings
        -- We allow escaping strings by passing true in
        -- (e.g. "a quote is \" not going to end the string")
        -- Using a bounded token allows strings to be on multiple lines
        syntax:bounded("string", "\"", "\"", true),
    }
)
This is a small example that is far from complete, but hopefully, it gives you an idea of how to write syntax highlighting rules for your own files.