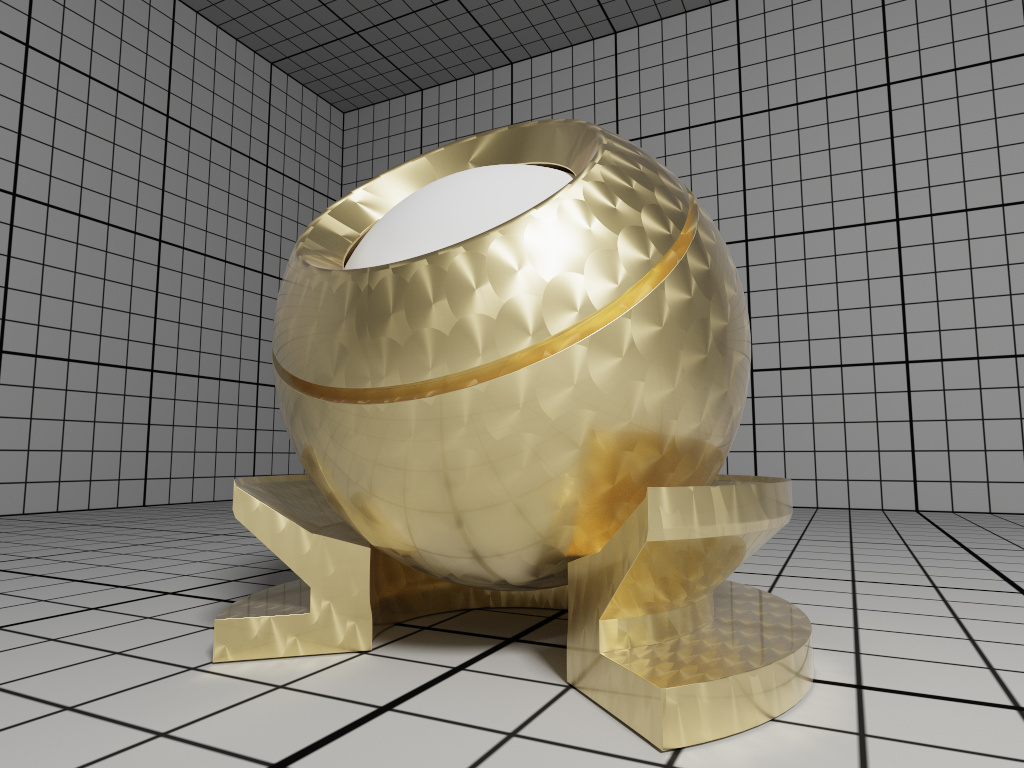
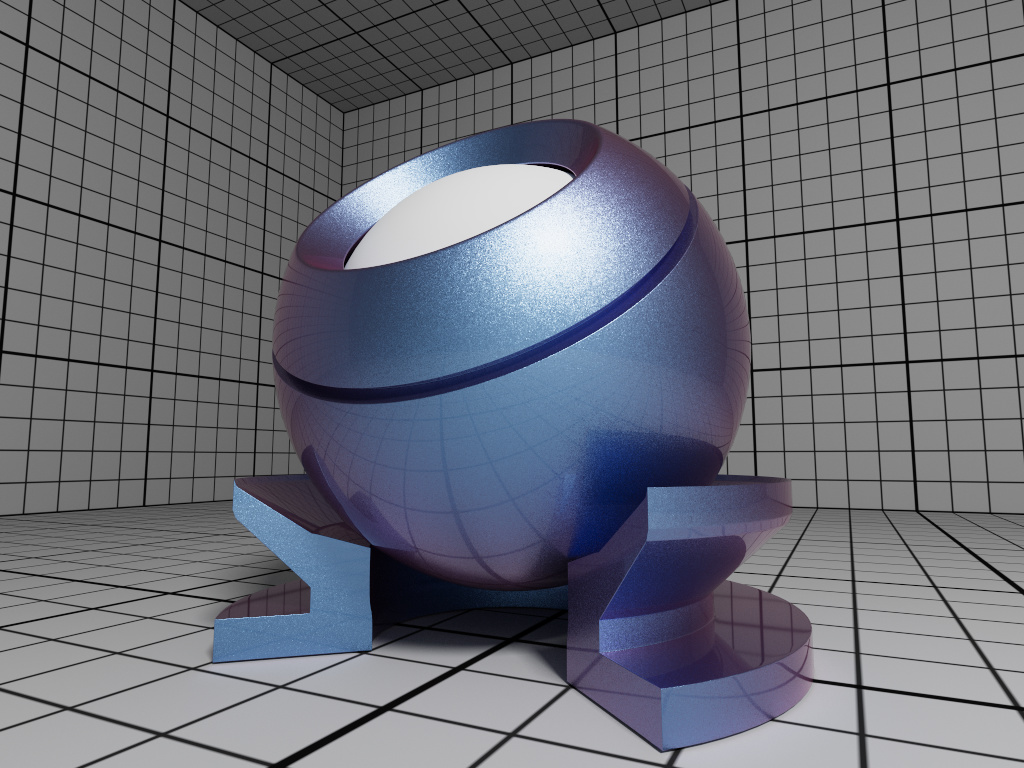
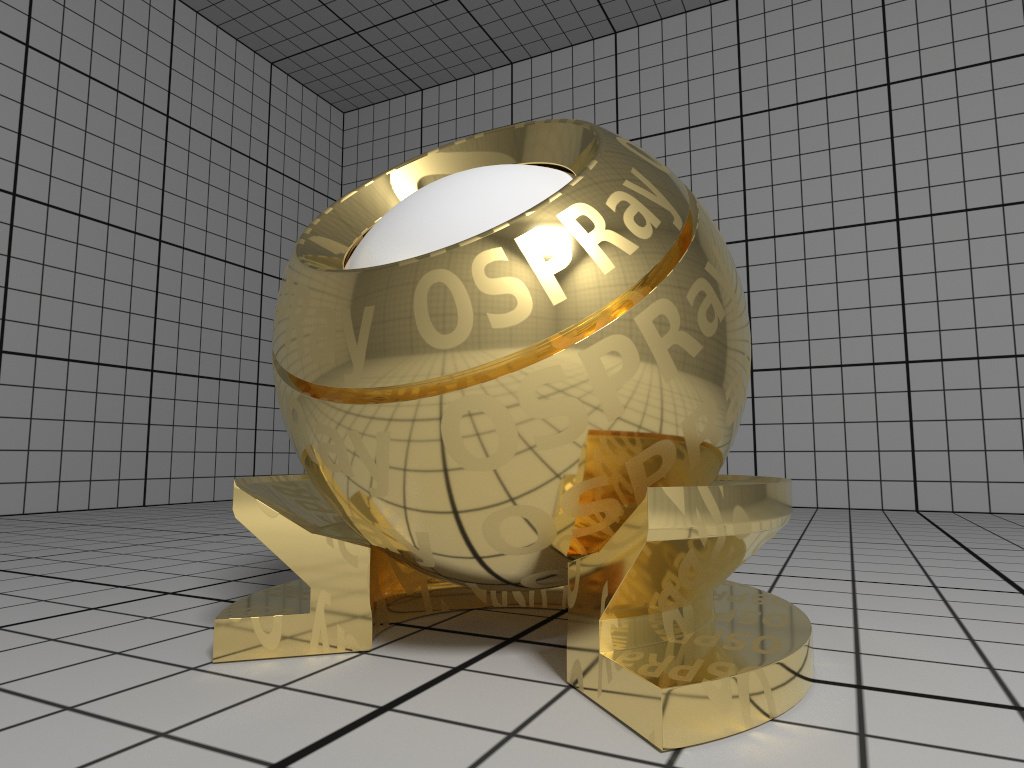
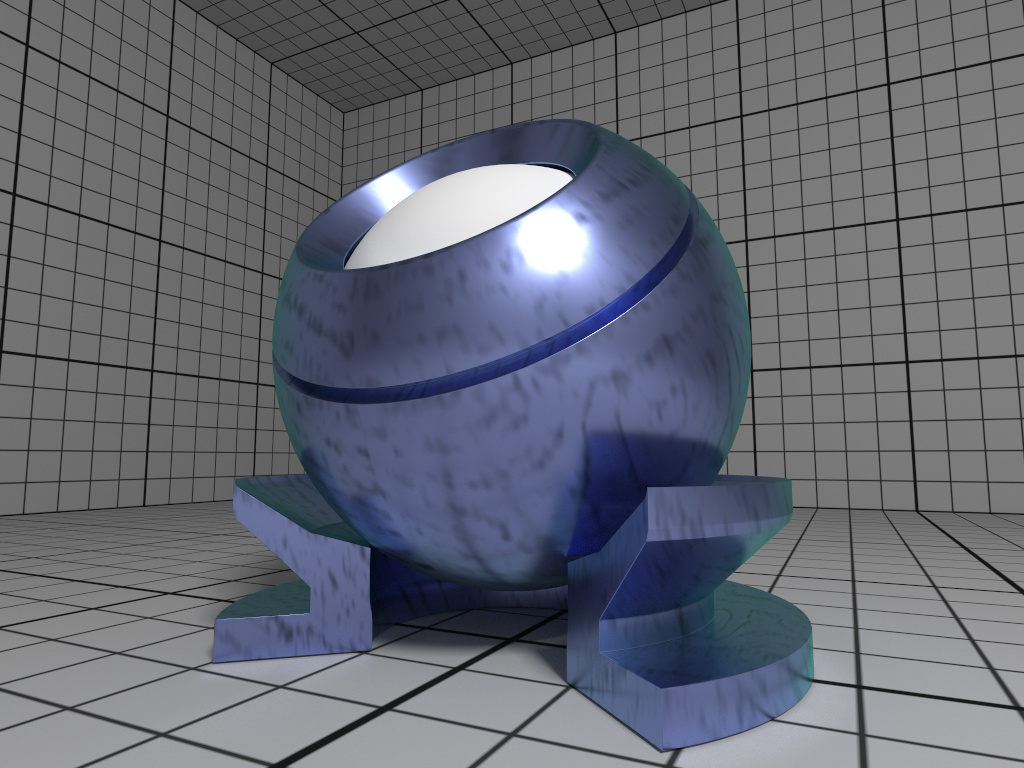
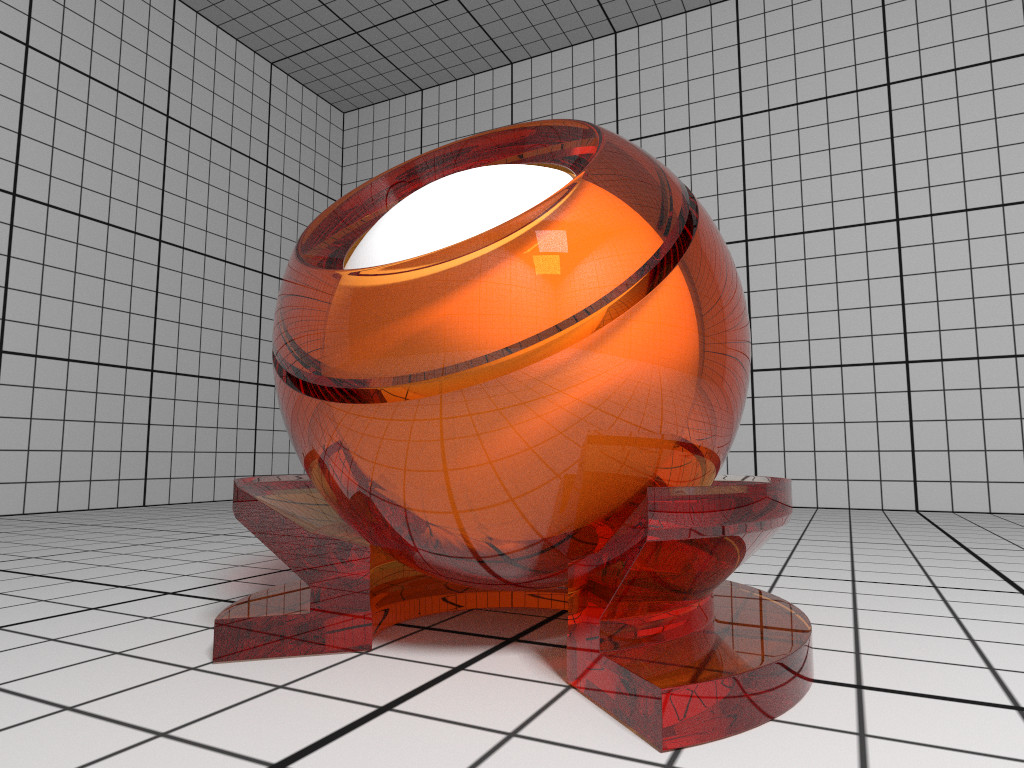
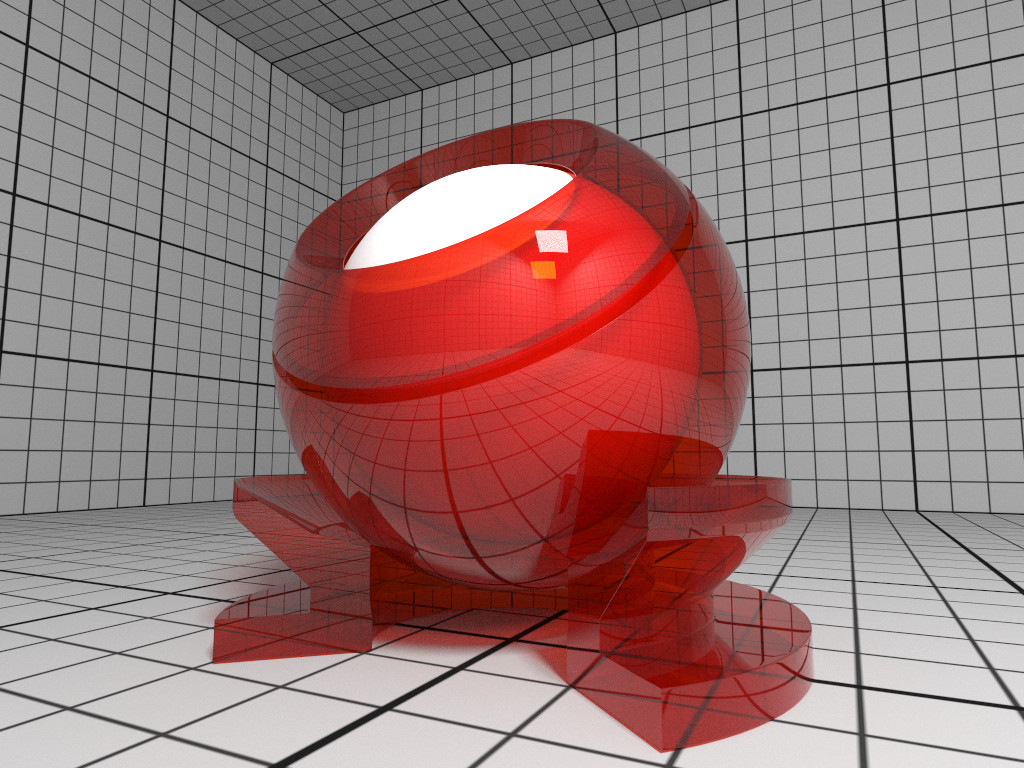
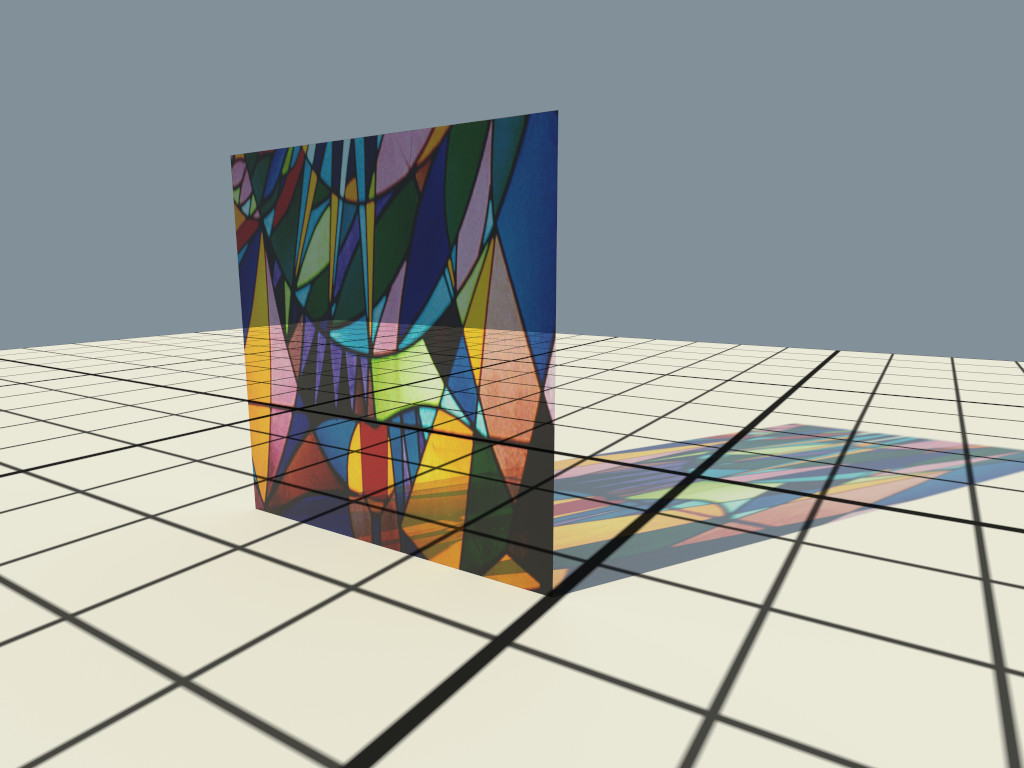
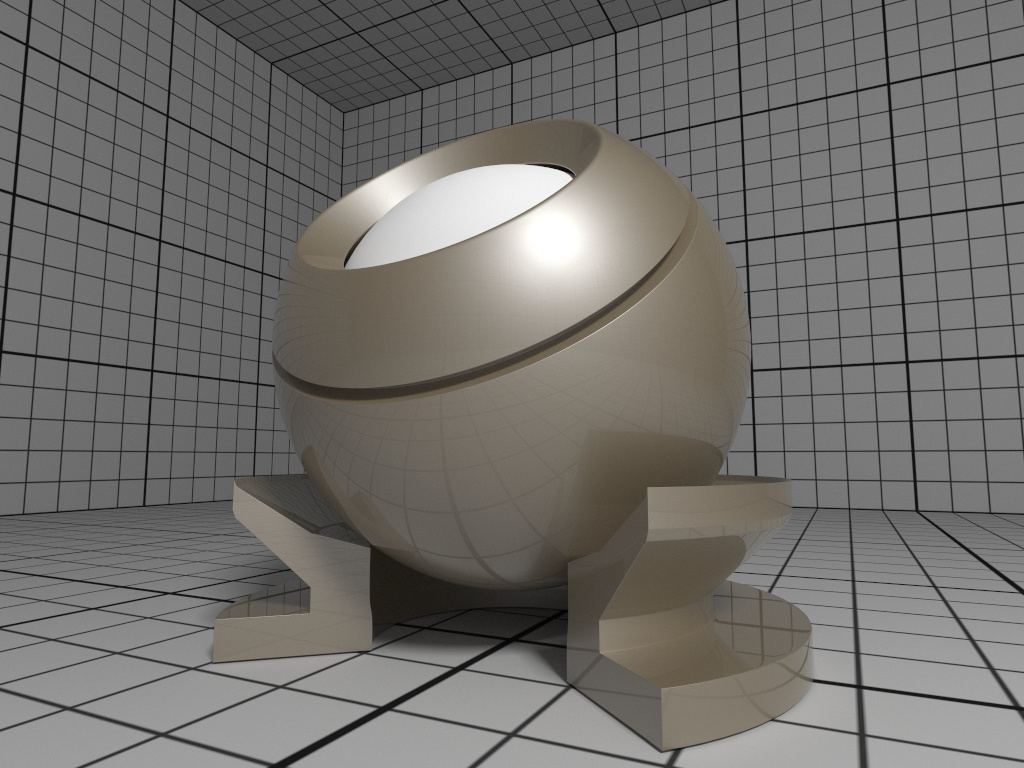
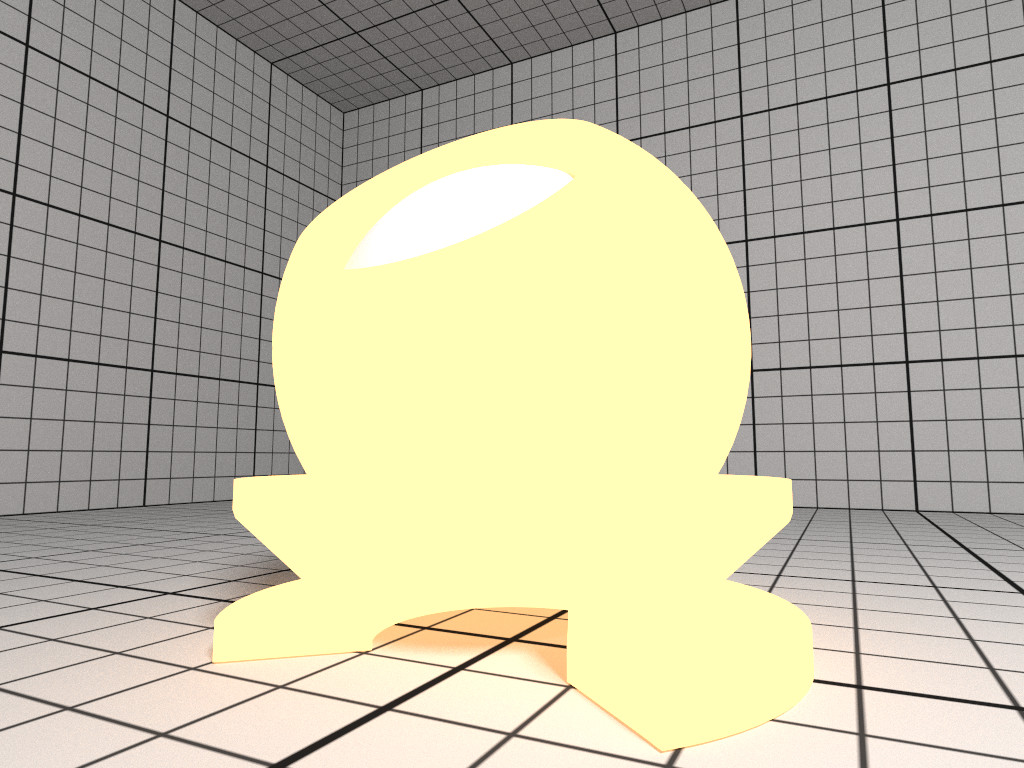
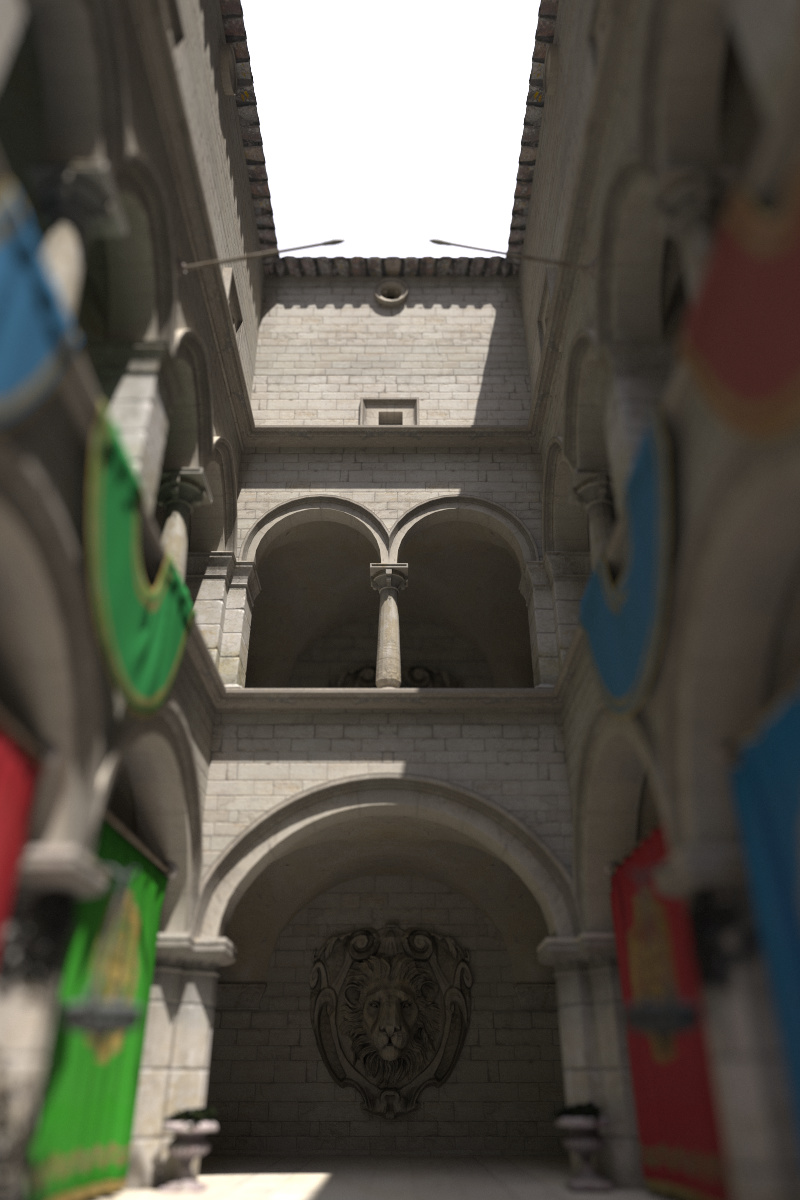
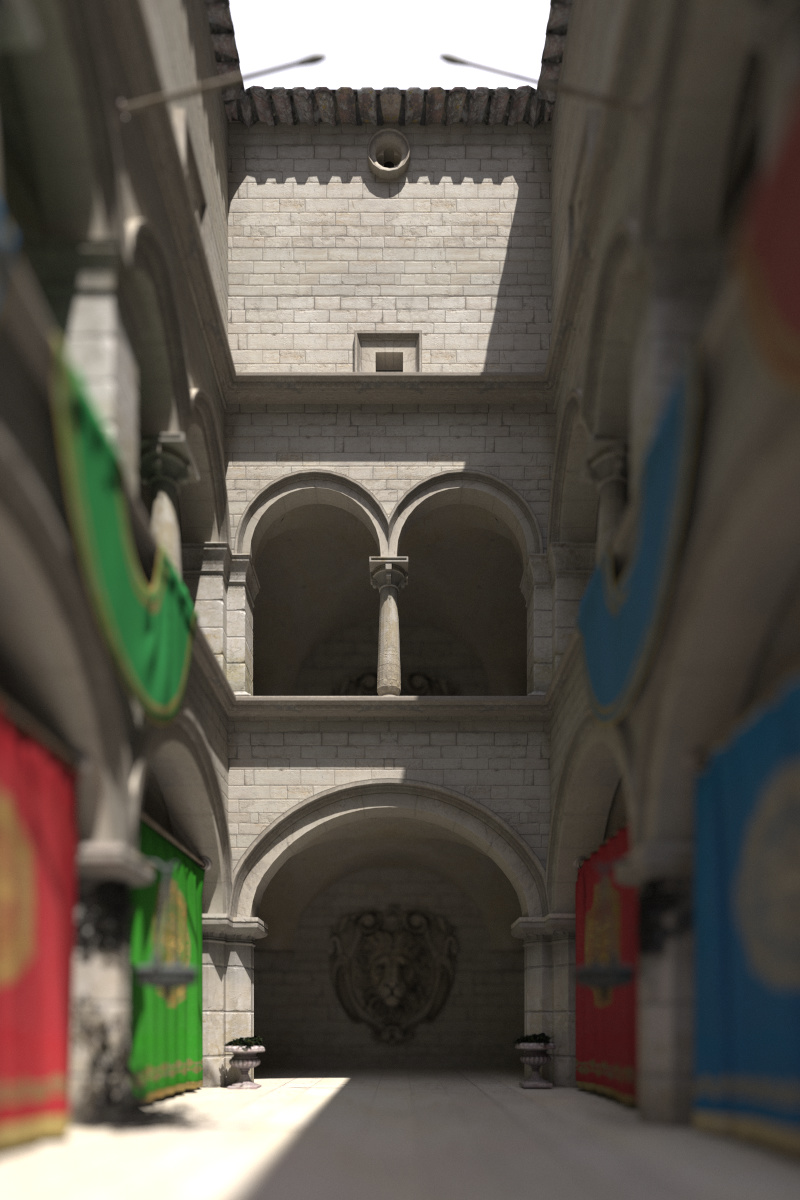
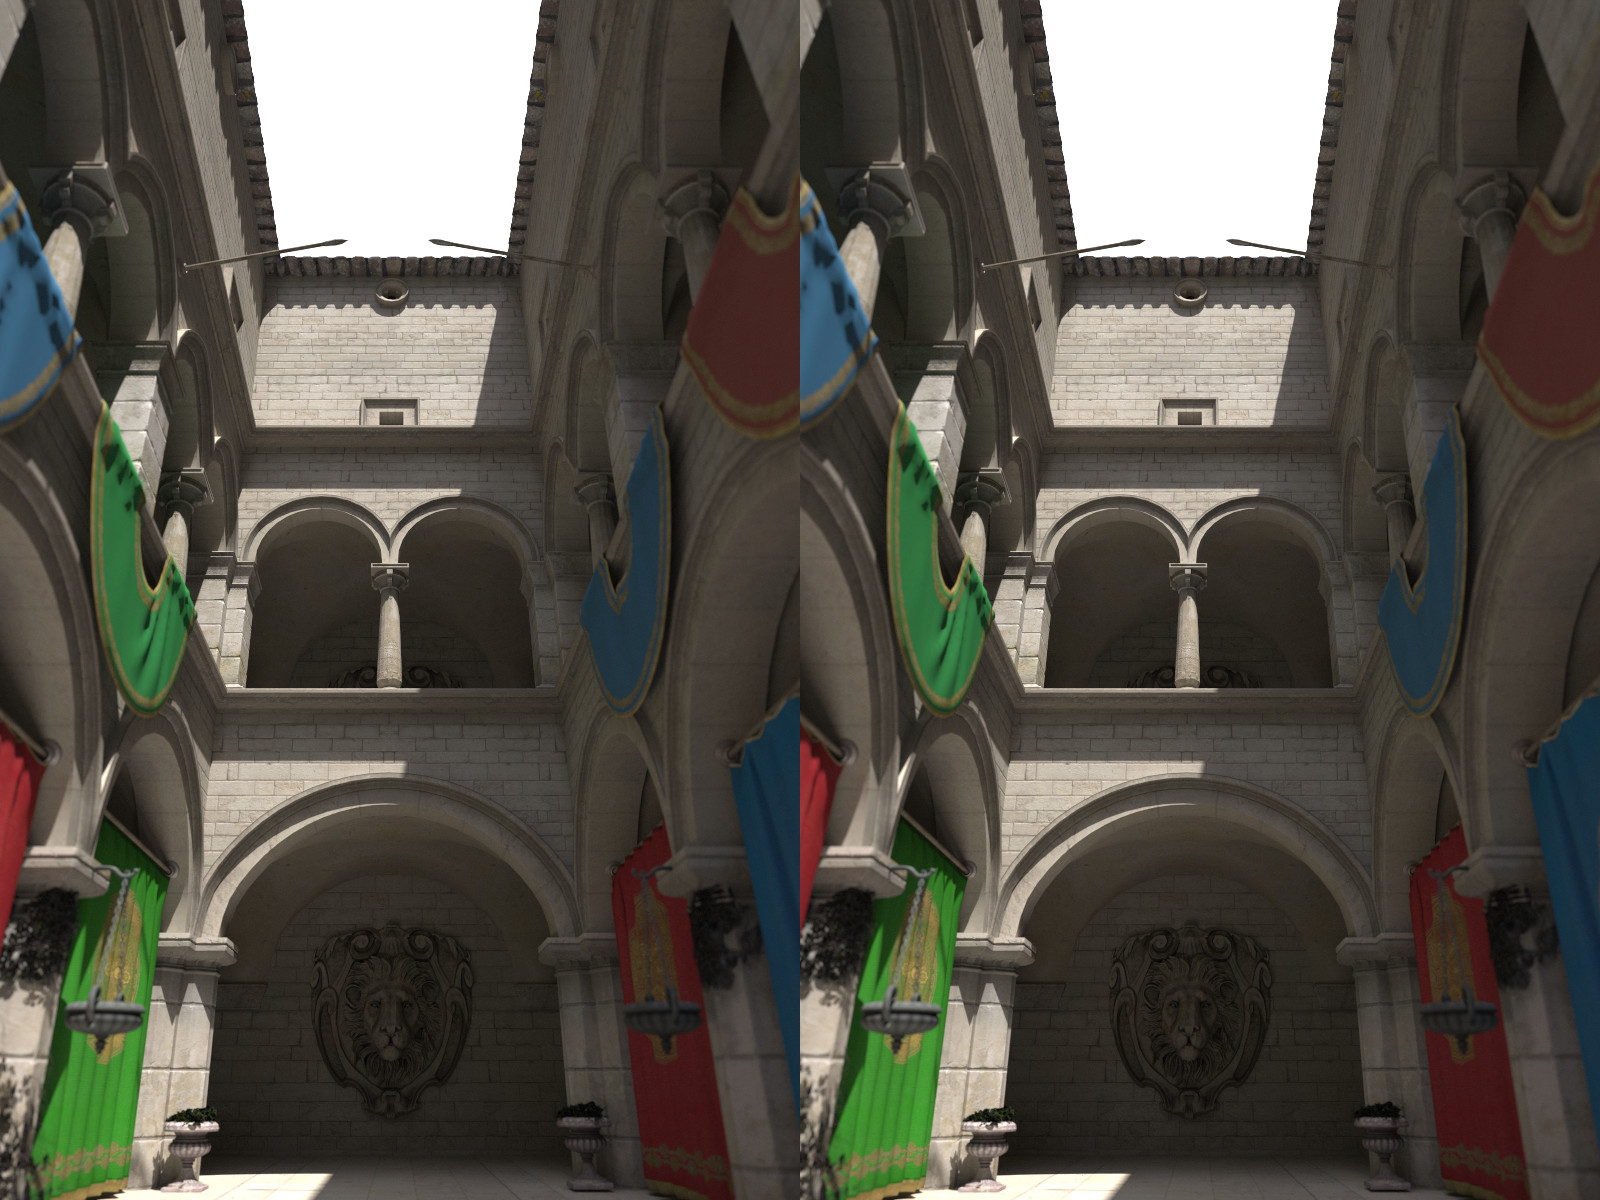
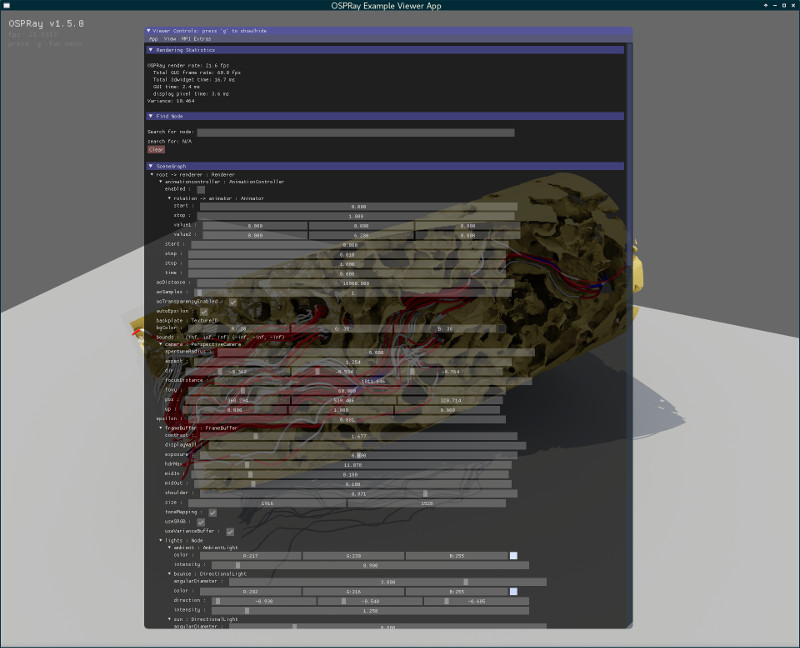
This is release v1.8.5 of OSPRay. For changes and new features see the changelog. Visit http://www.ospray.org for more information.
Intel OSPRay is an open source, scalable, and portable ray tracing engine for high-performance, high-fidelity visualization on Intel Architecture CPUs. OSPRay is part of the Intel Rendering Framework and is released under the permissive Apache 2.0 license.
The purpose of OSPRay is to provide an open, powerful, and easy-to-use rendering library that allows one to easily build applications that use ray tracing based rendering for interactive applications (including both surface- and volume-based visualizations). OSPRay is completely CPU-based, and runs on anything from laptops, to workstations, to compute nodes in HPC systems.
OSPRay internally builds on top of Intel Embree and ISPC (Intel SPMD Program Compiler), and fully exploits modern instruction sets like Intel SSE4, AVX, AVX2, and AVX-512 to achieve high rendering performance, thus a CPU with support for at least SSE4.1 is required to run OSPRay.
OSPRay is under active development, and though we do our best to guarantee stable release versions a certain number of bugs, as-yet-missing features, inconsistencies, or any other issues are still possible. Should you find any such issues please report them immediately via OSPRay’s GitHub Issue Tracker (or, if you should happen to have a fix for it,you can also send us a pull request); for missing features please contact us via email at [email protected].
For recent news, updates, and announcements, please see our complete news/updates page.
Join our mailing list to receive release announcements and major news regarding OSPRay.
The latest OSPRay sources are always available at the OSPRay GitHub
repository. The default master
branch should always point to the latest tested bugfix release.
OSPRay currently supports Linux, Mac OS X, and Windows. In addition, before you can build OSPRay you need the following prerequisites:
-
You can clone the latest OSPRay sources via:
git clone https://github.com/ospray/ospray.git -
To build OSPRay you need CMake, any form of C++11 compiler (we recommend using GCC, but also support Clang and the Intel® C++ Compiler (icc)), and standard Linux development tools. To build the example viewers, you should also have some version of OpenGL.
-
Additionally you require a copy of the Intel® SPMD Program Compiler (ISPC), version 1.9.1 or later. Please obtain a release of ISPC from the ISPC downloads page. The build system looks for ISPC in the
PATHand in the directory right “next to” the checked-out OSPRay sources.1 Alternatively set the CMake variableISPC_EXECUTABLEto the location of the ISPC compiler. -
Per default OSPRay uses the Intel® Threading Building Blocks (TBB) as tasking system, which we recommend for performance and flexibility reasons. Alternatively you can set CMake variable
OSPRAY_TASKING_SYSTEMtoOpenMP,Internal, orCilk(icc only). -
OSPRay also heavily uses Intel Embree, installing version 3.2 or newer is required. If Embree is not found by CMake its location can be hinted with the variable
embree_DIR. NOTE: Windows users should use Embree v3.2.2 or later. -
If available OSPRay’s Example Viewer can be compiled with support for Intel Open Image Denoise by enabling
OSPRAY_APPS_ENABLE_DENOISER. You may need to hint the location of the library with the CMake variableOpenImageDenoise_DIR.
Depending on your Linux distribution you can install these dependencies
using yum or apt-get. Some of these packages might already be
installed or might have slightly different names.
Type the following to install the dependencies using yum:
sudo yum install cmake.x86_64
sudo yum install tbb.x86_64 tbb-devel.x86_64
Type the following to install the dependencies using apt-get:
sudo apt-get install cmake-curses-gui
sudo apt-get install libtbb-dev
Under Mac OS X these dependencies can be installed using MacPorts:
sudo port install cmake tbb
Under Windows please directly use the appropriate installers for CMake, TBB, ISPC (for your Visual Studio version) and Embree.
Assume the above requisites are all fulfilled, building OSPRay through CMake is easy:
-
Create a build directory, and go into it
mkdir ospray/build
cd ospray/build
(We do recommend having separate build directories for different configurations such as release, debug, etc.).
-
The compiler CMake will use will default to whatever the
CCandCXXenvironment variables point to. Should you want to specify a different compiler, run cmake manually while specifying the desired compiler. The default compiler on most linux machines isgcc, but it can be pointed toclanginstead by executing the following:cmake -DCMAKE_CXX_COMPILER=clang++ -DCMAKE_C_COMPILER=clang ..CMake will now use Clang instead of GCC. If you are ok with using the default compiler on your system, then simply skip this step. Note that the compiler variables cannot be changed after the first
cmakeorccmakerun. -
Open the CMake configuration dialog
ccmake .. -
Make sure to properly set build mode and enable the components you need, etc.; then type ’c’onfigure and ’g’enerate. When back on the command prompt, build it using
make -
You should now have
libospray.soas well as a set of example application. You can test your version of OSPRay using any of the examples on the OSPRay Demos and Examples page.
On Windows using the CMake GUI (cmake-gui.exe) is the most convenient
way to configure OSPRay and to create the Visual Studio solution files:
-
Browse to the OSPRay sources and specify a build directory (if it does not exist yet CMake will create it).
-
Click “Configure” and select as generator the Visual Studio version you have (OSPRay needs Visual Studio 14 2015 or newer), for Win64 (32 bit builds are not supported by OSPRay), e.g., “Visual Studio 15 2017 Win64”.
-
If the configuration fails because some dependencies could not be found then follow the instructions given in the error message, e.g., set the variable
embree_DIRto the folder where Embree was installed. -
Optionally change the default build options, and then click “Generate” to create the solution and project files in the build directory.
-
Open the generated
OSPRay.slnin Visual Studio, select the build configuration and compile the project.
Alternatively, OSPRay can also be built without any GUI, entirely on the console. In the Visual Studio command prompt type:
cd path\to\ospray
mkdir build
cd build
cmake -G "Visual Studio 15 2017 Win64" [-D VARIABLE=value] ..
cmake --build . --config Release
Use -D to set variables for CMake, e.g., the path to Embree with
“-D embree_DIR=\path\to\embree”.
You can also build only some projects with the --target switch.
Additional parameters after “--” will be passed to msbuild. For
example, to build in parallel only the OSPRay library without the
example applications use
cmake --build . --config Release --target ospray -- /m
Client applications using OSPRay can find it with CMake’s
find_package() command. For example,
find_package(ospray 1.8.0 REQUIRED)
finds OSPRay via OSPRay’s configuration file osprayConfig.cmake2.
Once found, the following is all that is required to use OSPRay:
target_link_libraries(${client_target} ospray::ospray)
This will automatically propagate all required include paths, linked libraries, and compiler definitions to the client CMake target (either an executable or library).
Advanced users may want to link to additional targets which are exported
in OSPRay’s CMake config, which includes all installed modules. All
targets built with OSPRay are exported in the ospray:: namespace,
therefore all targets locally used in the OSPRay source tree can be
accessed from an install. For example, ospray_common can be consumed
directly via the ospray::ospray_common target. All targets have their
libraries, includes, and definitions attached to them for public
consumption (please report bugs if this
is broken!).
The following API documentation of OSPRay can also be found as a pdf document.
For a deeper explanation of the concepts, design, features and performance of OSPRay also have a look at the IEEE Vis 2016 paper “OSPRay – A CPU Ray Tracing Framework for Scientific Visualization” (49MB, or get the smaller version 1.8MB). The slides of the talk (5.2MB) are also available.
To access the OSPRay API you first need to include the OSPRay header
#include "ospray/ospray.h"
where the API is compatible with C99 and C++.
To use the API, OSPRay must be initialized with a “device”. A device is the object which implements the API. Creating and initializing a device can be done in either of two ways: command line arguments or manually instantiating a device.
The first is to do so by giving OSPRay the command line from main() by
calling
OSPError ospInit(int *argc, const char **argv);
OSPRay parses (and removes) its known command line parameters from your
application’s main function. For an example see the
tutorial. For possible error codes see section Error
Handling and Status Messages. It
is important to note that the arguments passed to ospInit() are
processed in order they are listed. The following parameters (which are
prefixed by convention with “--osp:”) are understood:
ospInit.
| Parameter | Description |
|---|---|
--osp:debug |
enables various extra checks and debug output, and disables multi-threading |
--osp:numthreads <n> |
use n threads instead of per default using all detected hardware threads |
--osp:loglevel <n> |
set logging level, default 0; increasing n means increasingly verbose log messages |
--osp:verbose |
shortcut for --osp:loglevel 1 and enable debug output on console |
--osp:vv |
shortcut for --osp:loglevel 2 and enable debug output on console |
--osp:module:<name> |
load a module during initialization; equivalent to calling ospLoadModule(name) |
--osp:mpi |
enables MPI mode for parallel rendering with the mpi_offload device, to be used in conjunction with mpirun; this will automatically load the “mpi” module if it is not yet loaded or linked |
--osp:mpi-offload |
same as --osp:mpi |
--osp:mpi-distributed |
same as --osp:mpi, but will create an mpi_distributed device instead; Note that this will likely require application changes to work properly |
--osp:logoutput <dst> |
convenience for setting where status messages go; valid values for dst are cerr and cout |
--osp:erroroutput <dst> |
convenience for setting where error messages go; valid values for dst are cerr and cout |
--osp:device:<name> |
use name as the type of device for OSPRay to create; e.g., --osp:device:default gives you the default local device; Note if the device to be used is defined in a module, remember to pass --osp:module:<name> first |
--osp:setaffinity <n> |
if 1, bind software threads to hardware threads; 0 disables binding; default is 1 on KNL and 0 otherwise |
: Command line parameters accepted by OSPRay’s ospInit.
The second method of initialization is to explicitly create the device yourself, and possibly set parameters. This method looks almost identical to how other objects are created and used by OSPRay (described in later sections). The first step is to create the device with
OSPDevice ospNewDevice(const char *type);
where the type string maps to a specific device implementation. OSPRay
always provides the “default” device, which maps to a local CPU
rendering device. If it is enabled in the build, you can also use
“mpi” to access the MPI multi-node rendering device (see Parallel
Rendering with MPI section for more
information). Once a device is created, you can call
void ospDeviceSet1i(OSPDevice, const char *id, int val);
void ospDeviceSetString(OSPDevice, const char *id, const char *val);
void ospDeviceSetVoidPtr(OSPDevice, const char *id, void *val);
to set parameters on the device. The following parameters can be set on all devices:
| Type | Name | Description |
|---|---|---|
| int | numThreads | number of threads which OSPRay should use |
| int | logLevel | logging level |
| string | logOutput | convenience for setting where status messages go; valid values are cerr and cout |
| string | errorOutput | convenience for setting where error messages go; valid values are cerr and cout |
| int | debug | set debug mode; equivalent to logLevel=2 and numThreads=1 |
| int | setAffinity | bind software threads to hardware threads if set to 1; 0 disables binding omitting the parameter will let OSPRay choose |
: Parameters shared by all devices.
Once parameters are set on the created device, the device must be committed with
void ospDeviceCommit(OSPDevice);
To use the newly committed device, you must call
void ospSetCurrentDevice(OSPDevice);
This then sets the given device as the object which will respond to all other OSPRay API calls.
Users can change parameters on the device after initialization (from either method above), by calling
OSPDevice ospGetCurrentDevice();
This function returns the handle to the device currently used to respond to OSPRay API calls, where users can set/change parameters and recommit the device. If changes are made to the device that is already set as the current device, it does not need to be set as current again.
Finally, OSPRay’s generic device parameters can be overridden via
environment variables for easy changes to OSPRay’s behavior without
needing to change the application (variables are prefixed by convention
with “OSPRAY_”):
| Variable | Description |
|---|---|
| OSPRAY_THREADS | equivalent to --osp:numthreads |
| OSPRAY_LOG_LEVEL | equivalent to --osp:loglevel |
| OSPRAY_LOG_OUTPUT | equivalent to --osp:logoutput |
| OSPRAY_ERROR_OUTPUT | equivalent to --osp:erroroutput |
| OSPRAY_DEBUG | equivalent to --osp:debug |
| OSPRAY_SET_AFFINITY | equivalent to --osp:setaffinity |
| OSPRAY_LOAD_MODULES | equivalent to --osp:module:, |
| can be a comma separated list | |
| of modules which will be loaded | |
| in order | |
| OSPRAY_DEFAULT_DEVICE | equivalent to --osp:device: |
: Environment variables interpreted by OSPRay.
The following errors are currently used by OSPRay:
| Name | Description |
|---|---|
| OSP_NO_ERROR | no error occurred |
| OSP_UNKNOWN_ERROR | an unknown error occurred |
| OSP_INVALID_ARGUMENT | an invalid argument was specified |
| OSP_INVALID_OPERATION | the operation is not allowed for the specified object |
| OSP_OUT_OF_MEMORY | there is not enough memory to execute the command |
| OSP_UNSUPPORTED_CPU | the CPU is not supported (minimum ISA is SSE4.1) |
: Possible error codes, i.e., valid named constants of type OSPError.
These error codes are either directly return by some API functions, or are recorded to be later queried by the application via
OSPError ospDeviceGetLastErrorCode(OSPDevice);
A more descriptive error message can be queried by calling
const char* ospDeviceGetLastErrorMsg(OSPDevice);
Alternatively, the application can also register a callback function of type
typedef void (*OSPErrorFunc)(OSPError, const char* errorDetails);
via
void ospDeviceSetErrorFunc(OSPDevice, OSPErrorFunc);
to get notified when errors occur.
Applications may be interested in messages which OSPRay emits, whether for debugging or logging events. Applications can call
void ospDeviceSetStatusFunc(OSPDevice, OSPStatusFunc);
in order to register a callback function of type
typedef void (*OSPStatusFunc)(const char* messageText);
which OSPRay will use to emit status messages. By default, OSPRay uses a
callback which does nothing, so any output desired by an application
will require that a callback is provided. Note that callbacks for C++
std::cout and std::cerr can be alternatively set through ospInit()
or the OSPRAY_LOG_OUTPUT environment variable.
OSPRay’s functionality can be extended via plugins, which are
implemented in shared libraries. To load plugin name from
libospray_module_<name>.so (on Linux and Mac OS X) or
ospray_module_<name>.dll (on Windows) use
OSPError ospLoadModule(const char *name);
Modules are searched in OS-dependent paths. ospLoadModule returns
OSP_NO_ERROR if the plugin could be successfully loaded.
When the application is finished using OSPRay (typically on application exit), the OSPRay API should be finalized with
void ospShutdown();
This API call ensures that the current device is cleaned up
appropriately. Due to static object allocation having non-deterministic
ordering, it is recommended that applications call ospShutdown()
before the calling application process terminates.
All entities of OSPRay (the renderer, volumes, geometries, lights,
cameras, …) are a specialization of OSPObject and share common
mechanism to deal with parameters and lifetime.
An important aspect of object parameters is that parameters do not get passed to objects immediately. Instead, parameters are not visible at all to objects until they get explicitly committed to a given object via a call to
void ospCommit(OSPObject);
at which time all previously additions or changes to parameters are visible at the same time. If a user wants to change the state of an existing object (e.g., to change the origin of an already existing camera) it is perfectly valid to do so, as long as the changed parameters are recommitted.
The commit semantic allow for batching up multiple small changes, and specifies exactly when changes to objects will occur. This is important to ensure performance and consistency for devices crossing a PCI bus, or across a network. In our MPI implementation, for example, we can easily guarantee consistency among different nodes by MPI barrier’ing on every commit.
Note that OSPRay uses reference counting to manage the lifetime of all objects, so one cannot explicitly “delete” any object. Instead, to indicate that the application does not need and does not access the given object anymore, call
void ospRelease(OSPObject);
This decreases its reference count and if the count reaches 0 the
object will automatically get deleted. Passing NULL is not an error.
Parameters allow to configure the behavior of and to pass data to
objects. However, objects do not have an explicit interface for
reasons of high flexibility and a more stable compile-time API. Instead,
parameters are passed separately to objects in an arbitrary order, and
unknown parameters will simply be ignored. The following functions allow
adding various types of parameters with name id to a given object:
// add a C-string (zero-terminated char *) parameter
void ospSetString(OSPObject, const char *id, const char *s);

// add an object handle parameter to another object
void ospSetObject(OSPObject, const char *id, OSPObject object);

// add an untyped pointer -- this will *ONLY* work in local rendering!
void ospSetVoidPtr(OSPObject, const char *id, void *v);

// add scalar and vector integer and float parameters
void ospSetf  (OSPObject, const char *id, float x);
void ospSet1f (OSPObject, const char *id, float x);
void ospSet1i (OSPObject, const char *id, int32_t x);
void ospSet2f (OSPObject, const char *id, float x, float y);
void ospSet2fv(OSPObject, const char *id, const float *xy);
void ospSet2i (OSPObject, const char *id, int x, int y);
void ospSet2iv(OSPObject, const char *id, const int *xy);
void ospSet3f (OSPObject, const char *id, float x, float y, float z);
void ospSet3fv(OSPObject, const char *id, const float *xyz);
void ospSet3i (OSPObject, const char *id, int x, int y, int z);
void ospSet3iv(OSPObject, const char *id, const int *xyz);
void ospSet4f (OSPObject, const char *id, float x, float y, float z, float w);
void ospSet4fv(OSPObject, const char *id, const float *xyzw);

// additional functions to pass vector integer and float parameters in C++
void ospSetVec2f(OSPObject, const char *id, const vec2f &v);
void ospSetVec2i(OSPObject, const char *id, const vec2i &v);
void ospSetVec3f(OSPObject, const char *id, const vec3f &v);
void ospSetVec3i(OSPObject, const char *id, const vec3i &v);
void ospSetVec4f(OSPObject, const char *id, const vec4f &v);
Users can also remove parameters that have been explicitly set via an ospSet call. Any parameters which have been removed will go back to their default value during the next commit unless a new parameter was set after the parameter was removed. The following API function removes the named parameter from the given object:
void ospRemoveParam(OSPObject, const char *id);
There is also the possibility to aggregate many values of the same type
into an array, which then itself can be used as a parameter to objects.
To create such a new data buffer, holding numItems elements of the
given type, from the initialization data pointed to by source and
optional creation flags, use
OSPData ospNewData(size_t numItems,
                   OSPDataType,
                   const void *source,
                   const uint32_t dataCreationFlags = 0);
The call returns an OSPData handle to the created array. The flag
OSP_DATA_SHARED_BUFFER indicates that the buffer can be shared with
the application. In this case the calling program guarantees that the
source pointer will remain valid for the duration that this data array
is being used. The enum type OSPDataType describes the different data
types that can be represented in OSPRay; valid constants are listed in
the table below.
| Type/Name | Description |
|---|---|
| OSP_DEVICE | API device object reference |
| OSP_VOID_PTR | void pointer |
| OSP_DATA | data reference |
| OSP_OBJECT | generic object reference |
| OSP_CAMERA | camera object reference |
| OSP_FRAMEBUFFER | framebuffer object reference |
| OSP_LIGHT | light object reference |
| OSP_MATERIAL | material object reference |
| OSP_TEXTURE | texture object reference |
| OSP_RENDERER | renderer object reference |
| OSP_MODEL | model object reference |
| OSP_GEOMETRY | geometry object reference |
| OSP_VOLUME | volume object reference |
| OSP_TRANSFER_FUNCTION | transfer function object reference |
| OSP_PIXEL_OP | pixel operation object reference |
| OSP_STRING | C-style zero-terminated character string |
| OSP_CHAR | 8 bit signed character scalar |
| OSP_UCHAR | 8 bit unsigned character scalar |
| OSP_UCHAR[234] | … and [234]-element vector |
| OSP_USHORT | 16 bit unsigned integer scalar |
| OSP_INT | 32 bit signed integer scalar |
| OSP_INT[234] | … and [234]-element vector |
| OSP_UINT | 32 bit unsigned integer scalar |
| OSP_UINT[234] | … and [234]-element vector |
| OSP_LONG | 64 bit signed integer scalar |
| OSP_LONG[234] | … and [234]-element vector |
| OSP_ULONG | 64 bit unsigned integer scalar |
| OSP_ULONG[234] | … and [234]-element vector |
| OSP_FLOAT | 32 bit single precision floating-point scalar |
| OSP_FLOAT[234] | … and [234]-element vector |
| OSP_FLOAT3A | … and 3-element vector with padding (same size as an OSP_FLOAT4) |
| OSP_DOUBLE | 64 bit double precision floating-point scalar |
: Valid named constants for OSPDataType.
To add a data array as parameter named id to another object call
void ospSetData(OSPObject, const char *id, OSPData);
Volumes are volumetric data sets with discretely sampled values in 3D
space, typically a 3D scalar field. To create a new volume object of
given type type use
OSPVolume ospNewVolume(const char *type);
The call returns NULL if that type of volume is not known by OSPRay,
or else an OSPVolume handle.
The common parameters understood by all volume variants are summarized in the table below.
| Type | Name | Default | Description |
|---|---|---|---|
| OSPTransferFunction | transferFunction | transfer function to use | |
| vec2f | voxelRange | minimum and maximum of the scalar values | |
| bool | gradientShadingEnabled | false | volume is rendered with surface shading wrt. to normalized gradient |
| bool | preIntegration | false | use pre-integration for transfer function lookups |
| bool | singleShade | true | shade only at the point of maximum intensity |
| bool | adaptiveSampling | true | adapt ray step size based on opacity |
| float | adaptiveScalar | 15 | modifier for adaptive step size |
| float | adaptiveMaxSamplingRate | 2 | maximum sampling rate for adaptive sampling |
| float | samplingRate | 0.125 | sampling rate of the volume (this is the minimum step size for adaptive sampling) |
| vec3f | specular | gray 0.3 | specular color for shading |
| vec3f | volumeClippingBoxLower | disabled | lower coordinate (in object-space) to clip the volume values |
| vec3f | volumeClippingBoxUpper | disabled | upper coordinate (in object-space) to clip the volume values |
: Configuration parameters shared by all volume types.
Note that if voxelRange is not provided for a volume then OSPRay will
compute it based on the voxel data, which may result in slower data
updates.
Structured volumes only need to store the values of the samples, because their addresses in memory can be easily computed from a 3D position. A common type of structured volumes are regular grids. OSPRay supports two variants that differ in how the volumetric data for the regular grids is specified.
The first variant shares the voxel data with the application. Such a
volume type is created by passing the type string
“shared_structured_volume” to ospNewVolume. The voxel data is laid
out in memory in xyz-order3 and provided to the volume via a
data buffer parameter named “voxelData”.
The second regular grid variant is optimized for rendering performance:
data locality in memory is increased by arranging the voxel data in
smaller blocks. This volume type is created by passing the type string
“block_bricked_volume” to ospNewVolume. Because of this
rearrangement of voxel data it cannot be shared the with the application
anymore, but has to be transferred to OSPRay via
OSPError ospSetRegion(OSPVolume, void *source,
const vec3i ®ionCoords,
const vec3i ®ionSize);
The voxel data pointed to by source is copied into the given volume
starting at position regionCoords, must be of size regionSize and be
placed in memory in xyz-order. Note that OSPRay distinguishes between
volume data and volume parameters. This function must be called only
after all volume parameters (in particular dimensions and voxelType,
see below) have been set and before ospCommit(volume) is called. If
necessary then memory for the volume is allocated on the first call to
this function.
The common parameters understood by both structured volume variants are summarized in the table below.
| Type | Name | Default | Description |
|---|---|---|---|
| vec3i | dimensions | number of voxels in each dimension (x, y, z) | |
| string | voxelType | data type of each voxel, currently supported are: | |
| “uchar” (8 bit unsigned integer) | |||
| “short” (16 bit signed integer) | |||
| “ushort” (16 bit unsigned integer) | |||
| “float” (32 bit single precision floating point) | |||
| “double” (64 bit double precision floating point) | |||
| vec3f | gridOrigin | (0, 0, 0) | origin of the grid in world-space |
| vec3f | gridSpacing | (1, 1, 1) | size of the grid cells in world-space |
: Additional configuration parameters for structured volumes.
AMR volumes are specified as a list of bricks, which are levels of
refinement in potentially overlapping regions. There can be any number
of refinement levels and any number of bricks at any level of
refinement. An AMR volume type is created by passing the type string
“amr_volume” to ospNewVolume.
Applications should first create an OSPData array which holds
information about each brick. The following structure is used to
populate this array (found in ospray.h):
struct amr_brick_info
{
  box3i bounds;
  int   refinementLevel;
  float cellWidth;
};
Then for each brick, the application should create an OSPData array of
OSPData handles, where each handle is the data per-brick. Currently we
only support float voxels.
| Type | Name | Default | Description |
|---|---|---|---|
| vec3f | gridOrigin | (0, 0, 0) | origin of the grid in world-space |
| vec3f | gridSpacing | (1, 1, 1) | size of the grid cells in world-space |
| string | amrMethod | current | sampling method; valid values are “finest”, “current”, or “octant” |
| string | voxelType | undefined | data type of each voxel, currently supported are: |
| “uchar” (8 bit unsigned integer) | |||
| “short” (16 bit signed integer) | |||
| “ushort” (16 bit unsigned integer) | |||
| “float” (32 bit single precision floating point) | |||
| “double” (64 bit double precision floating point) | |||
| OSPData | brickInfo | array of info defining each brick | |
| OSPData | brickData | array of handles to per-brick voxel data |
: Additional configuration parameters for AMR volumes.
Lastly, note that the gridOrigin and gridSpacing parameters act just
like the structured volume equivalent, but they only modify the root
(coarsest level) of refinement.
Unstructured volumes can contain tetrahedral, wedge, or hexahedral cell
types, and are defined by three arrays: vertices, corresponding field
values, and eight indices per cell (first four are -1 for tetrahedral
cells, first two are -2 for wedge cells). An unstructured volume type is
created by passing the type string “unstructured_volume” to
ospNewVolume.
Field values can be specified per-vertex (field) or per-cell
(cellField). If both values are set, cellField takes precedence.
Similar to triangle mesh, each tetrahedron is formed by a group of indices into the vertices. For each vertex, the corresponding (by array index) data value will be used for sampling when rendering. Note that the index order for each tetrahedron does not matter, as OSPRay internally calculates vertex normals to ensure proper sampling and interpolation.
For wedge cells, each wedge is formed by a group of six indices into the
vertices and data value. Vertex ordering is the same as VTK_WEDGE:
three bottom vertices counterclockwise, then top three counterclockwise.
For hexahedral cells, each hexahedron is formed by a group of eight
indices into the vertices and data value. Vertex ordering is the same as
VTK_HEXAHEDRON: four bottom vertices counterclockwise, then top four
counterclockwise.
| Type | Name | Default | Description |
|---|---|---|---|
| vec3f[] | vertices | data array of vertex positions | |
| float[] | field | data array of vertex data values to be sampled | |
| float[] | cellField | data array of cell data values to be sampled | |
| vec4i[] | indices | data array of tetrahedra indices (into vertices and field) | |
| string | hexMethod | planar | “planar” (faster, assumes planar sides) or “nonplanar” |
| bool | precomputedNormals | true | whether to accelerate by precomputing, at a cost of 72 bytes/cell |
: Additional configuration parameters for unstructured volumes.
Transfer functions map the scalar values of volumes to color and opacity
and thus they can be used to visually emphasize certain features of the
volume. To create a new transfer function of given type type use
OSPTransferFunction ospNewTransferFunction(const char *type);
The call returns NULL if that type of transfer functions is not known
by OSPRay, or else an OSPTransferFunction handle to the created
transfer function. That handle can be assigned to a volume as parameter
“transferFunction” using ospSetObject.
One type of transfer function that is supported by OSPRay is the linear
transfer function, which interpolates between given equidistant colors
and opacities. It is create by passing the string “piecewise_linear”
to ospNewTransferFunction and it is controlled by these parameters:
| Type | Name | Description |
|---|---|---|
| vec3f[] | colors | data array of RGB colors |
| float[] | opacities | data array of opacities |
| vec2f | valueRange | domain (scalar range) this function maps from |
: Parameters accepted by the linear transfer function.
Geometries in OSPRay are objects that describe surfaces. To create a new
geometry object of given type type use
OSPGeometry ospNewGeometry(const char *type);
The call returns NULL if that type of geometry is not known by OSPRay,
or else an OSPGeometry handle.
A traditional triangle mesh (indexed face set) geometry is created by
calling ospNewGeometry with type string “triangles”. Once created, a
triangle mesh recognizes the following parameters:
| Type | Name | Description |
|---|---|---|
| vec3f(a)[] | vertex | data array of vertex positions |
| vec3f(a)[] | vertex.normal | data array of vertex normals |
| vec4f[] / vec3fa[] | vertex.color | data array of vertex colors (RGBA/RGB) |
| vec2f[] | vertex.texcoord | data array of vertex texture coordinates |
| vec3i(a)[] | index | data array of triangle indices (into the vertex array(s)) |
: Parameters defining a triangle mesh geometry.
The vertex and index arrays are mandatory to create a valid triangle
mesh.
A mesh consisting of quads is created by calling ospNewGeometry with
type string “quads”. Once created, a quad mesh recognizes the
following parameters:
| Type | Name | Description |
|---|---|---|
| vec3f(a)[] | vertex | data array of vertex positions |
| vec3f(a)[] | vertex.normal | data array of vertex normals |
| vec4f[] / vec3fa[] | vertex.color | data array of vertex colors (RGBA/RGB) |
| vec2f[] | vertex.texcoord | data array of vertex texture coordinates |
| vec4i[] | index | data array of quad indices (into the vertex array(s)) |
: Parameters defining a quad mesh geometry.
The vertex and index arrays are mandatory to create a valid quad
mesh. A quad is internally handled as a pair of two triangles, thus
mixing triangles and quad is supported by encoding a triangle as a quad
with the last two vertex indices being identical (w=z).
A mesh consisting of subdivision surfaces, created by specifying a
geometry of type “subdivision”. Once created, a subdivision recognizes
the following parameters:
| Type | Name | Description |
|---|---|---|
| vec3f[] | vertex | data array of vertex positions |
| vec4f[] | vertex.color | data array of vertex colors (RGBA) |
| vec2f[] | vertex.texcoord | data array of vertex texture coordinates |
| float | level | global level of tessellation, default is 5 |
| uint[]/vec4i[] | index | data array of indices (into the vertex array(s)) |
| float[] | index.level | data array of per-edge levels of tessellation, overrides global level |
| uint[] | face | data array holding the number of indices/edges (3 to 15) per face |
| vec2i[] | edgeCrease.index | data array of edge crease indices |
| float[] | edgeCrease.weight | data array of edge crease weights |
| uint[] | vertexCrease.inde | x data array of vertex crease indices |
| float[] | vertexCrease.weig | ht data array of vertex crease weights |
: Parameters defining a Subdivision geometry.
The vertex and index arrays are mandatory to create a valid
subdivision surface. If no face array is present then a pure quad mesh
is assumed (and indices must be of type vec4i). Optionally supported
are edge and vertex creases.
A geometry consisting of individual spheres, each of which can have an
own radius, is created by calling ospNewGeometry with type string
“spheres”. The spheres will not be tessellated but rendered
procedurally and are thus perfectly round. To allow a variety of sphere
representations in the application this geometry allows a flexible way
of specifying the data of center position and radius within a
data array:
| Type | Name | Default | Description |
|---|---|---|---|
| float | radius | 0.01 | radius of all spheres (if offset_radius is not used) |
| OSPData | spheres | NULL | memory holding the spatial data of all spheres |
| int | bytes_per_sphere | 16 | size (in bytes) of each sphere within the spheres array |
| int | offset_center | 0 | offset (in bytes) of each sphere’s “vec3f center” position (in object-space) within the spheres array |
| int | offset_radius | -1 | offset (in bytes) of each sphere’s “float radius” within the spheres array (-1 means disabled and use radius) |
| int | offset_colorID | -1 | offset (in bytes) of each sphere’s “int colorID” within the spheres array (-1 means disabled and use the shared material color) |
| vec4f[] / vec3f(a)[] / vec4uc | color | NULL | data array of colors (RGBA/RGB), color is constant for each sphere |
| int | color_offset | 0 | offset (in bytes) to the start of the color data in color |
| int | color_format | color.data_type |
the format of the color data. Can be one of: OSP_FLOAT4, OSP_FLOAT3, OSP_FLOAT3A or OSP_UCHAR4. Defaults to the type of data in color |
| int | color_stride | sizeof(color_format) |
stride (in bytes) between each color element in the color array. Defaults to the size of a single element of type color_format |
| vec2f[] | texcoord | NULL | data array of texture coordinates, coordinate is constant for each sphere |
: Parameters defining a spheres geometry.
A geometry consisting of individual cylinders, each of which can have an
own radius, is created by calling ospNewGeometry with type string
“cylinders”. The cylinders will not be tessellated but rendered
procedurally and are thus perfectly round. To allow a variety of
cylinder representations in the application this geometry allows a
flexible way of specifying the data of offsets for start position, end
position and radius within a data array. All parameters are
listed in the table below.
| Type | Name | Default | Description |
|---|---|---|---|
| float | radius | 0.01 | radius of all cylinders (if offset_radius is not used) |
| OSPData | cylinders | NULL | memory holding the spatial data of all cylinders |
| int | bytes_per_cylinder | 24 | size (in bytes) of each cylinder within the cylinders array |
| int | offset_v0 | 0 | offset (in bytes) of each cylinder’s “vec3f v0” position (the start vertex, in object-space) within the cylinders array |
| int | offset_v1 | 12 | offset (in bytes) of each cylinder’s “vec3f v1” position (the end vertex, in object-space) within the cylinders array |
| int | offset_radius | -1 | offset (in bytes) of each cylinder’s “float radius” within the cylinders array (-1 means disabled and use radius instead) |
| vec4f[] / vec3f(a)[] | color | NULL | data array of colors (RGBA/RGB), color is constant for each cylinder |
| OSPData | texcoord | NULL | data array of texture coordinates, in pairs (each a vec2f at vertex v0 and v1) |
: Parameters defining a cylinders geometry.
For texturing each cylinder is seen as a 1D primitive, i.e., a line segment: the 2D texture coordinates at its vertices v0 and v1 are linearly interpolated.
A geometry consisting of multiple streamlines is created by calling
ospNewGeometry with type string “streamlines”. The streamlines are
internally assembled either from connected (and rounded) cylinder
segments, or represented as Bézier curves; they are thus always
perfectly round. The parameters defining this geometry are listed in the
table below.
| Type | Name | Description |
|---|---|---|
| float | radius | global radius of all streamlines (if per-vertex radius is not used), default 0.01 |
| bool | smooth | enable curve interpolation, default off (always on if per-vertex radius is used) |
| vec3fa[] / vec4f[] | vertex | data array of all vertex position (and optional radius) for all streamlines |
| vec4f[] | vertex.color | data array of corresponding vertex colors (RGBA) |
| float[] | vertex.radius | data array of corresponding vertex radius |
| int32[] | index | data array of indices to the first vertex of a link |
: Parameters defining a streamlines geometry.
Each streamline is specified by a set of (aligned) control points in
vertex. If smooth is disabled and a constant radius is used for
all streamlines then all vertices belonging to the same logical
streamline are connected via cylinders, with additional
spheres at each vertex to create a continuous, closed
surface. Otherwise, streamlines are represented as Bézier curves,
smoothly interpolating the vertices. This mode supports per-vertex
varying radii (either given in vertex.radius, or in the 4th component
of a vec4f vertex), but is slower and consumes more memory.
Additionally, the radius needs to be smaller than the curvature radius
of the Bézier curve at each location on the curve.
A streamlines geometry can contain multiple disjoint streamlines, each
streamline is specified as a list of segments (or links) referenced via
index: each entry e of the index array points the first vertex of
a link (vertex[index[e]]) and the second vertex of the link is
implicitly the directly following one (vertex[index[e]+1]). For
example, two streamlines of vertices (A-B-C-D) and (E-F-G),
respectively, would internally correspond to five links (A-B, B-C,
C-D, E-F, and F-G), and would be specified via an array of
vertices [A,B,C,D,E,F,G], plus an array of link indices [0,1,2,4,5].
A geometry consisting of multiple curves is created by calling
ospNewGeometry with type string “curves”. The parameters defining
this geometry are listed in the table below.
| Type | Name | Description |
|---|---|---|
| string | curveType | “flat” (ray oriented), “round” (circular cross section), “ribbon” (normal oriented flat curve) |
| string | curveBasis | “linear”, “bezier”, “bspline”, “hermite” |
| vec4f[] | vertex | data array of vertex position and radius |
| int32[] | index | data array of indices to the first vertex or tangent of a curve segment |
| vec3f[] | vertex.normal | data array of curve normals (only for “ribbon” curves) |
| vec3f[] | vertex.tangent | data array of curve tangents (only for “hermite” curves) |
: Parameters defining a curves geometry.
See Embree documentation for discussion of curve types and data formatting.
OSPRay can directly render multiple isosurfaces of a volume without
first tessellating them. To do so create an isosurfaces geometry by
calling ospNewGeometry with type string “isosurfaces”. Each
isosurface will be colored according to the provided volume’s transfer
function.
| Type | Name | Description |
|---|---|---|
| float[] | isovalues | data array of isovalues |
| OSPVolume | volume | handle of the volume to be isosurfaced |
: Parameters defining an isosurfaces geometry.
One tool to highlight notable features of volumetric data is to
visualize 2D cuts (or slices) by placing planes into the volume. Such a
slices geometry is created by calling ospNewGeometry with type string
“slices”. The planes are defined by the coefficients
| Type | Name | Description |
|---|---|---|
| vec4f[] | planes | data array with plane coefficients for all slices |
| OSPVolume | volume | handle of the volume that will be sliced |
: Parameters defining a slices geometry.
OSPRay supports instancing via a special type of geometry. Instances are
created by transforming another given model
modelToInstantiate with the given affine transformation transform by
calling
OSPGeometry ospNewInstance(OSPModel modelToInstantiate, const affine3f &transform);
A renderer is the central object for rendering in OSPRay. Different
renderers implement different features and support different materials.
To create a new renderer of given type type use
OSPRenderer ospNewRenderer(const char *type);
The call returns NULL if that type of renderer is not known, or else
an OSPRenderer handle to the created renderer. General parameters of
all renderers are
| Type | Name | Default | Description |
|---|---|---|---|
| OSPModel | model | the model to render | |
| OSPCamera | camera | the camera to be used for rendering | |
| OSPLight[] | lights | data array with handles of the lights | |
| int | spp | 1 | samples per pixel |
| int | maxDepth | 20 | maximum ray recursion depth |
| float | minContribution | 0.001 | sample contributions below this value will be neglected to speedup rendering |
| float | varianceThreshold | 0 | threshold for adaptive accumulation |
: Parameters understood by all renderers.
OSPRay’s renderers support a feature called adaptive accumulation, which
accelerates progressive rendering by stopping the
rendering and refinement of image regions that have an estimated
variance below the varianceThreshold. This feature requires a
framebuffer with an OSP_FB_VARIANCE channel.
The SciVis renderer is a fast ray tracer for scientific visualization
which supports volume rendering and ambient occlusion (AO). It is
created by passing the type string “scivis” or “raytracer” to
ospNewRenderer. In addition to the general parameters
understood by all renderers the SciVis renderer supports the following
special parameters:
| Type | Name | Default | Description |
|---|---|---|---|
| bool | shadowsEnabled | false | whether to compute (hard) shadows |
| int | aoSamples | 0 | number of rays per sample to compute ambient occlusion |
| float | aoDistance | 1020 | maximum distance to consider for ambient occlusion |
| bool | aoTransparencyEnabled | false | whether object transparency is respected when computing ambient occlusion (slower) |
| bool | oneSidedLighting | true | if true, backfacing surfaces (wrt. light source) receive no illumination |
| float / vec3f / vec4f | bgColor | black, transparent | background color and alpha (RGBA) |
| OSPTexture | maxDepthTexture | NULL | screen-sized float texture with maximum far distance per pixel (use texture type ‘texture2d’) |
: Special parameters understood by the SciVis renderer.
Note that the intensity (and color) of AO is deduced from an ambient
light in the lights array.4 If aoSamples is zero
(the default) then ambient lights cause ambient illumination (without
occlusion).
Per default the background of the rendered image will be transparent
black, i.e., the alpha channel holds the opacity of the rendered
objects. This eases transparency-aware blending of the image with an
arbitrary background image by the application. The parameter bgColor
can be used to already blend with a constant background color (and
alpha) during rendering.
The SciVis renderer supports depth composition with images of other
renderers, for example to incorporate help geometries of a 3D UI that
were rendered with OpenGL. The screen-sized texture
maxDepthTexture must have format OSP_TEXTURE_R32F and flag
OSP_TEXTURE_FILTER_NEAREST. The fetched values are used to limit the
distance of primary rays, thus objects of other renderers can hide
objects rendered by OSPRay.
The path tracer supports soft shadows, indirect illumination and
realistic materials. This renderer is created by passing the type string
“pathtracer” to ospNewRenderer. In addition to the general
parameters understood by all renderers the path tracer
supports the following special parameters:
| Type | Name | Default | Description |
|---|---|---|---|
| int | rouletteDepth | 5 | ray recursion depth at which to start Russian roulette termination |
| float | maxContribution | ∞ | samples are clamped to this value before they are accumulated into the framebuffer |
| OSPTexture | backplate | NULL | texture image used as background, replacing visible lights in infinity (e.g., the HDRI light) |
: Special parameters understood by the path tracer.
The path tracer requires that materials are assigned to geometries, otherwise surfaces are treated as completely black.
Models are a container of scene data. They can hold the different geometries and volumes as well as references to (and instances of) other models. A model is associated with a single logical acceleration structure. To create an (empty) model call
OSPModel ospNewModel();
The call returns an OSPModel handle to the created model. To add an
already created geometry or volume to a model use
void ospAddGeometry(OSPModel, OSPGeometry);
void ospAddVolume(OSPModel, OSPVolume);
An existing geometry or volume can be removed from a model with
void ospRemoveGeometry(OSPModel, OSPGeometry);
void ospRemoveVolume(OSPModel, OSPVolume);
Finally, Models can be configured with parameters for making various feature/performance trade-offs:
| Type | Name | Default | Description |
|---|---|---|---|
| bool | dynamicScene | false | use RTC_SCENE_DYNAMIC flag (faster BVH build, slower ray traversal), otherwise uses RTC_SCENE_STATIC flag (faster ray traversal, slightly slower BVH build) |
| bool | compactMode | false | tell Embree to use a more compact BVH in memory by trading ray traversal performance |
| bool | robustMode | false | tell Embree to enable more robust ray intersection code paths (slightly slower) |
: Parameters understood by Models
To create a new light source of given type type use
OSPLight ospNewLight3(const char *type);
The call returns NULL if that type of light is not known by the
renderer, or else an OSPLight handle to the created light source. All
light sources5 accept the following parameters:
| Type | Name | Default | Description |
|---|---|---|---|
| vec3f(a) | color | white | color of the light |
| float | intensity | 1 | intensity of the light (a factor) |
| bool | isVisible | true | whether the light can be directly seen |
: Parameters accepted by all lights.
The following light types are supported by most OSPRay renderers.
The distant light (or traditionally the directional light) is thought to
be far away (outside of the scene), thus its light arrives (almost) as
parallel rays. It is created by passing the type string “distant” to
ospNewLight3. In addition to the general parameters
understood by all lights the distant light supports the following
special parameters:
| Type | Name | Description |
|---|---|---|
| vec3f(a) | direction | main emission direction of the distant light |
| float | angularDiameter | apparent size (angle in degree) of the light |
: Special parameters accepted by the distant light.
Setting the angular diameter to a value greater than zero will result in soft shadows when the renderer uses stochastic sampling (like the path tracer). For instance, the apparent size of the sun is about 0.53°.
The sphere light (or the special case point light) is a light emitting
uniformly in all directions. It is created by passing the type string
“sphere” to ospNewLight3. In addition to the general
parameters understood by all lights the sphere light supports
the following special parameters:
| Type | Name | Description |
|---|---|---|
| vec3f(a) | position | the center of the sphere light, in world-space |
| float | radius | the size of the sphere light |
: Special parameters accepted by the sphere light.
Setting the radius to a value greater than zero will result in soft shadows when the renderer uses stochastic sampling (like the path tracer).
The spotlight is a light emitting into a cone of directions. It is
created by passing the type string “spot” to ospNewLight3. In
addition to the general parameters understood by all lights
the spotlight supports the special parameters listed in the table.
| Type | Name | Description |
|---|---|---|
| vec3f(a) | position | the center of the spotlight, in world-space |
| vec3f(a) | direction | main emission direction of the spot |
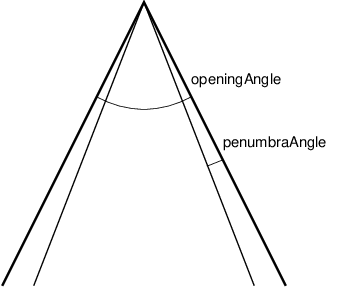
| float | openingAngle | full opening angle (in degree) of the spot; outside of this cone is no illumination |
| float | penumbraAngle | size (angle in degree) of the “penumbra”, the region between the rim (of the illumination cone) and full intensity of the spot; should be smaller than half of openingAngle |
| float | radius | the size of the spotlight, the radius of a disk with normal direction |
: Special parameters accepted by the spotlight.
Setting the radius to a value greater than zero will result in soft shadows when the renderer uses stochastic sampling (like the path tracer).
The quad6 light is a planar, procedural area light source emitting
uniformly on one side into the half-space. It is created by passing the
type string “quad” to ospNewLight3. In addition to the general
parameters understood by all lights the quad light supports
the following special parameters:
| Type | Name | Description |
|---|---|---|
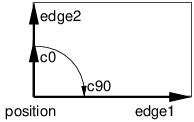
| vec3f(a) | position | world-space position of one vertex of the quad light |
| vec3f(a) | edge1 | vector to one adjacent vertex |
| vec3f(a) | edge2 | vector to the other adjacent vertex |
: Special parameters accepted by the quad light.
The emission side is determined by the cross product of edge1×edge2.
Note that only renderers that use stochastic sampling (like the path
tracer) will compute soft shadows from the quad light. Other renderers
will just sample the center of the quad light, which results in hard
shadows.
The HDRI light is a textured light source surrounding the scene and
illuminating it from infinity. It is created by passing the type string
“hdri” to ospNewLight3. In addition to the parameter
intensity the HDRI light supports the following special
parameters:
| Type | Name | Description |
|---|---|---|
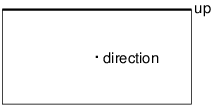
| vec3f(a) | up | up direction of the light in world-space |
| vec3f(a) | dir | direction to which the center of the texture will be mapped to (analog to panoramic camera) |
| OSPTexture | map | environment map in latitude / longitude format |
: Special parameters accepted by the HDRI light.
Note that the currently only the path tracer supports the HDRI light.
The ambient light surrounds the scene and illuminates it from infinity
with constant radiance (determined by combining the parameters color
and intensity). It is created by passing the type string
“ambient” to ospNewLight3.
Note that the SciVis renderer uses ambient lights to control the color and intensity of the computed ambient occlusion (AO).
The path tracer will consider illumination by geometries which have a light emitting material assigned (for example the Luminous material).
Materials describe how light interacts with surfaces, they give objects
their distinctive look. To let the given renderer create a new material
of given type type call
OSPMaterial ospNewMaterial2(const char *renderer_type, const char *material_type);
The call returns NULL if the material type is not known by the
renderer type, or else an OSPMaterial handle to the created material.
The handle can then be used to assign the material to a given geometry
with
void ospSetMaterial(OSPGeometry, OSPMaterial);
The OBJ material is the workhorse material supported by both the SciVis
renderer and the path tracer. It
offers widely used common properties like diffuse and specular
reflection and is based on the MTL material
format of Lightwave’s OBJ scene
files. To create an OBJ material pass the type string “OBJMaterial” to
ospNewMaterial2. Its main parameters are
| Type | Name | Default | Description |
|---|---|---|---|
| vec3f | Kd | white 0.8 | diffuse color |
| vec3f | Ks | black | specular color |
| float | Ns | 10 | shininess (Phong exponent), usually in [2–10^4^] |
| float | d | opaque | opacity |
| vec3f | Tf | black | transparency filter color |
| OSPTexture | map_Bump | NULL | normal map |
: Main parameters of the OBJ material.
In particular when using the path tracer it is important to adhere to
the principle of energy conservation, i.e., that the amount of light
reflected by a surface is not larger than the light arriving. Therefore
the path tracer issues a warning and renormalizes the color parameters
if the sum of Kd, Ks, and Tf is larger than one in any color
channel. Similarly important to mention is that almost all materials of
the real world reflect at most only about 80% of the incoming light. So
even for a white sheet of paper or white wall paint do better not set
Kd larger than 0.8; otherwise rendering times are unnecessary long and
the contrast in the final images is low (for example, the corners of a
white room would hardly be discernible, as can be seen in the figure
below).
If present, the color component of geometries is also
used for the diffuse color Kd and the alpha component is also used for
the opacity d.
Note that currently only the path tracer implements colored transparency
with Tf.
Normal mapping can simulate small geometric features via the texture
map_Bump. The normals
All parameters (except Tf) can be textured by passing a
texture handle, prefixed with “map_”. The fetched texels
are multiplied by the respective parameter value. Texturing requires
geometries with texture coordinates, e.g., a triangle
mesh with vertex.texcoord provided. The color
textures map_Kd and map_Ks are typically in one of the sRGB gamma
encoded formats, whereas textures map_Ns and map_d are usually in a
linear format (and only the first component is used). Additionally, all
textures support texture transformations.
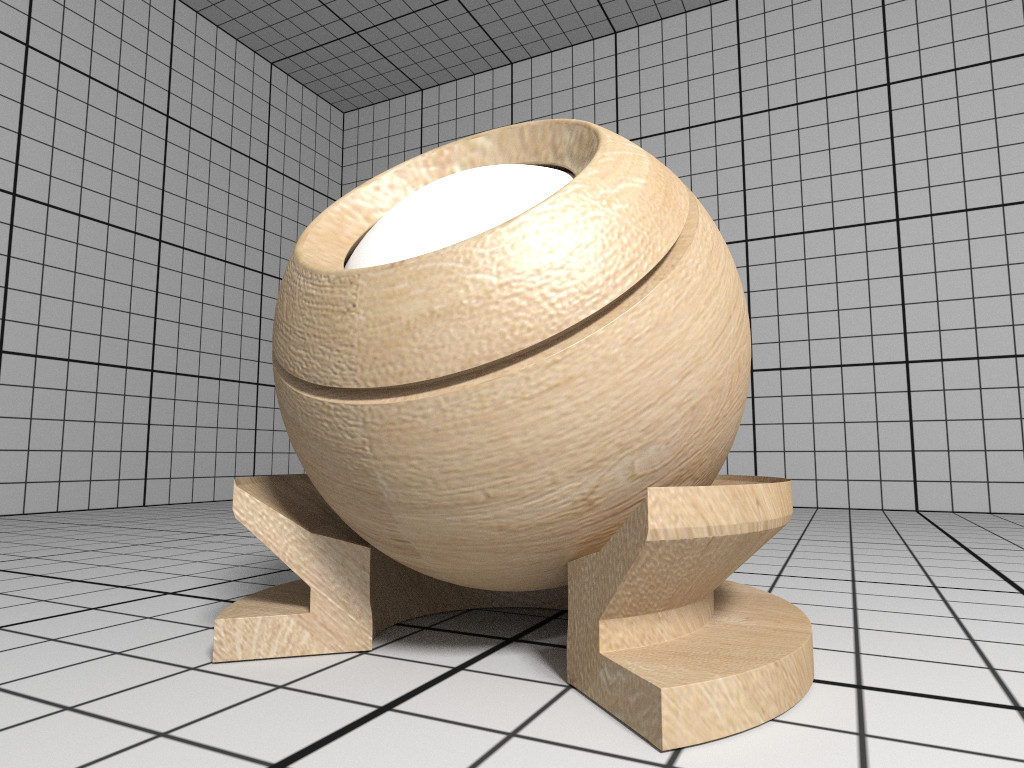
The Principled material is the most complex material offered by the
path tracer, which is capable of producing a wide
variety of materials (e.g., plastic, metal, wood, glass) by combining
multiple different layers and lobes. It uses the GGX microfacet
distribution with approximate multiple scattering for dielectrics and
metals, uses the Oren-Nayar model for diffuse reflection, and is energy
conserving. To create a Principled material, pass the type string
“Principled” to ospNewMaterial2. Its parameters are listed in the
table below.
| Type | Name | Default | Description |
|---|---|---|---|
| vec3f | baseColor | white 0.8 | base reflectivity (diffuse and/or metallic) |
| vec3f | edgeColor | white | edge tint (metallic only) |
| float | metallic | 0 | mix between dielectric (diffuse and/or specular) and metallic (specular only with complex IOR) in [0–1] |
| float | diffuse | 1 | diffuse reflection weight in [0–1] |
| float | specular | 1 | specular reflection/transmission weight in [0–1] |
| float | ior | 1 | dielectric index of refraction |
| float | transmission | 0 | specular transmission weight in [0–1] |
| vec3f | transmissionColor | white | attenuated color due to transmission (Beer’s law) |
| float | transmissionDepth | 1 | distance at which color attenuation is equal to transmissionColor |
| float | roughness | 0 | diffuse and specular roughness in [0–1], 0 is perfectly smooth |
| float | anisotropy | 0 | amount of specular anisotropy in [0–1] |
| float | rotation | 0 | rotation of the direction of anisotropy in [0–1], 1 is going full circle |
| float | normal | 1 | default normal map/scale for all layers |
| float | baseNormal | 1 | base normal map/scale (overrides default normal) |
| bool | thin | false | flag specifying whether the material is thin or solid |
| float | thickness | 1 | thickness of the material (thin only), affects the amount of color attenuation due to specular transmission |
| float | backlight | 0 | amount of diffuse transmission (thin only) in [0–2], 1 is 50% reflection and 50% transmission, 2 is transmission only |
| float | coat | 0 | clear coat layer weight in [0–1] |
| float | coatIor | 1.5 | clear coat index of refraction |
| vec3f | coatColor | white | clear coat color tint |
| float | coatThickness | 1 | clear coat thickness, affects the amount of color attenuation |
| float | coatRoughness | 0 | clear coat roughness in [0–1], 0 is perfectly smooth |
| float | coatNormal | 1 | clear coat normal map/scale (overrides default normal) |
| float | sheen | 0 | sheen layer weight in [0–1] |
| vec3f | sheenColor | white | sheen color tint |
| float | sheenTint | 0 | how much sheen is tinted from sheenColor toward baseColor |
| float | sheenRoughness | 0.2 | sheen roughness in [0–1], 0 is perfectly smooth |
| float | opacity | 1 | cut-out opacity/transparency, 1 is fully opaque |
: Parameters of the Principled material.
All parameters can be textured by passing a texture handle,
suffixed with “Map” (e.g., “baseColorMap”); texture
transformations are supported as well.
The CarPaint material is a specialized version of the Principled
material for rendering different types of car paints. To create a
CarPaint material, pass the type string “CarPaint” to
ospNewMaterial2. Its parameters are listed in the table below.
| Type | Name | Default | Description |
|---|---|---|---|
| vec3f | baseColor | white 0.8 | diffuse base reflectivity |
| float | roughness | 0 | diffuse roughness in [0–1], 0 is perfectly smooth |
| float | normal | 1 | normal map/scale |
| float | flakeDensity | 0 | density of metallic flakes in [0–1], 0 disables flakes, 1 fully covers the surface with flakes |
| float | flakeScale | 100 | scale of the flake structure, higher values increase the amount of flakes |
| float | flakeSpread | 0.3 | flake spread in [0–1] |
| float | flakeJitter | 0.75 | flake randomness in [0–1] |
| float | flakeRoughness | 0.3 | flake roughness in [0–1], 0 is perfectly smooth |
| float | coat | 1 | clear coat layer weight in [0–1] |
| float | coatIor | 1.5 | clear coat index of refraction |
| vec3f | coatColor | white | clear coat color tint |
| float | coatThickness | 1 | clear coat thickness, affects the amount of color attenuation |
| float | coatRoughness | 0 | clear coat roughness in [0–1], 0 is perfectly smooth |
| float | coatNormal | 1 | clear coat normal map/scale |
| vec3f | flipflopColor | white | reflectivity of coated flakes at grazing angle, used together with coatColor produces a pearlescent paint |
| float | flipflopFalloff | 1 | flip flop color falloff, 1 disables the flip flop effect |
: Parameters of the CarPaint material.
All parameters can be textured by passing a texture handle,
suffixed with “Map” (e.g., “baseColorMap”); texture
transformations are supported as well.
The path tracer offers a physical metal, supporting
changing roughness and realistic color shifts at edges. To create a
Metal material pass the type string “Metal” to ospNewMaterial2. Its
parameters are
| Type | Name | Default | Description |
|---|---|---|---|
| vec3f[] | ior | Aluminium | data array of spectral samples of complex refractive index, each entry in the form (wavelength, eta, k), ordered by wavelength (which is in nm) |
| vec3f | eta | RGB complex refractive index, real part | |
| vec3f | k | RGB complex refractive index, imaginary part | |
| float | roughness | 0.1 | roughness in [0–1], 0 is perfect mirror |
: Parameters of the Metal material.
The main appearance (mostly the color) of the Metal material is
controlled by the physical parameters eta and k, the
wavelength-dependent, complex index of refraction. These coefficients
are quite counterintuitive but can be found in published
measurements. For accuracy the index of
refraction can be given as an array of spectral samples in ior, each
sample a triplet of wavelength (in nm), eta, and k, ordered
monotonically increasing by wavelength; OSPRay will then calculate the
Fresnel in the spectral domain. Alternatively, eta and k can also be
specified as approximated RGB coefficients; some examples are given in
below table.
| Metal | eta | k |
|---|---|---|
| Ag, Silver | (0.051, 0.043, 0.041) | (5.3, 3.6, 2.3) |
| Al, Aluminium | (1.5, 0.98, 0.6) | (7.6, 6.6, 5.4) |
| Au, Gold | (0.07, 0.37, 1.5) | (3.7, 2.3, 1.7) |
| Cr, Chromium | (3.2, 3.1, 2.3) | (3.3, 3.3, 3.1) |
| Cu, Copper | (0.1, 0.8, 1.1) | (3.5, 2.5, 2.4) |
: Index of refraction of selected metals as approximated RGB coefficients, based on data from https://refractiveindex.info/.
The roughness parameter controls the variation of microfacets and thus
how polished the metal will look. The roughness can be modified by a
texture map_roughness (texture
transformations are supported as well) to
create notable edging effects.
The path tracer offers an alloy material, which behaves
similar to Metal, but allows for more intuitive and flexible
control of the color. To create an Alloy material pass the type string
“Alloy” to ospNewMaterial2. Its parameters are
| Type | Name | Default | Description |
|---|---|---|---|
| vec3f | color | white 0.9 | reflectivity at normal incidence (0 degree) |
| vec3f | edgeColor | white | reflectivity at grazing angle (90 degree) |
| float | roughness | 0.1 | roughness, in [0–1], 0 is perfect mirror |
: Parameters of the Alloy material.
The main appearance of the Alloy material is controlled by the parameter
color, while edgeColor influences the tint of reflections when seen
at grazing angles (for real metals this is always 100% white). If
present, the color component of geometries is also used
for reflectivity at normal incidence color. As in Metal the
roughness parameter controls the variation of microfacets and thus how
polished the alloy will look. All parameters can be textured by passing
a texture handle, prefixed with “map_”; texture
transformations are supported as well.
The path tracer offers a realistic a glass material,
supporting refraction and volumetric attenuation (i.e., the transparency
color varies with the geometric thickness). To create a Glass material
pass the type string “Glass” to ospNewMaterial2. Its parameters are
| Type | Name | Default | Description |
|---|---|---|---|
| float | eta | 1.5 | index of refraction |
| vec3f | attenuationColor | white | resulting color due to attenuation |
| float | attenuationDistance | 1 | distance affecting attenuation |
: Parameters of the Glass material.
For convenience, the rather counterintuitive physical attenuation
coefficients will be calculated from the user inputs in such a way, that
the attenuationColor will be the result when white light traveled
trough a glass of thickness attenuationDistance.
The path tracer offers a thin glass material useful for
objects with just a single surface, most prominently windows. It models
a thin, transparent slab, i.e., it behaves as if a second, virtual
surface is parallel to the real geometric surface. The implementation
accounts for multiple internal reflections between the interfaces
(including attenuation), but neglects parallax effects due to its
(virtual) thickness. To create a such a thin glass material pass the
type string “ThinGlass” to ospNewMaterial2. Its parameters are
| Type | Name | Default | Description |
|---|---|---|---|
| float | eta | 1.5 | index of refraction |
| vec3f | attenuationColor | white | resulting color due to attenuation |
| float | attenuationDistance | 1 | distance affecting attenuation |
| float | thickness | 1 | virtual thickness |
: Parameters of the ThinGlass material.
For convenience the attenuation is controlled the same way as with the
Glass material. Additionally, the color due to attenuation can
be modulated with a texture map_attenuationColor (texture
transformations are supported as well). If
present, the color component of geometries is also used
for the attenuation color. The thickness parameter sets the (virtual)
thickness and allows for easy exchange of parameters with the (real)
Glass material; internally just the ratio between
attenuationDistance and thickness is used to calculate the resulting
attenuation and thus the material appearance.
The path tracer offers a metallic paint material,
consisting of a base coat with optional flakes and a clear coat. To
create a MetallicPaint material pass the type string “MetallicPaint”
to ospNewMaterial2. Its parameters are listed in the table below.
| Type | Name | Default | Description |
|---|---|---|---|
| vec3f | baseColor | white 0.8 | color of base coat |
| float | flakeAmount | 0.3 | amount of flakes, in [0–1] |
| vec3f | flakeColor | Aluminium | color of metallic flakes |
| float | flakeSpread | 0.5 | spread of flakes, in [0–1] |
| float | eta | 1.5 | index of refraction of clear coat |
: Parameters of the MetallicPaint material.
The color of the base coat baseColor can be textured by a
texture map_baseColor, which also supports texture
transformations. If present, the color
component of geometries is also used for the color of the
base coat. Parameter flakeAmount controls the proportion of flakes in
the base coat, so when setting it to 1 the baseColor will not be
visible. The shininess of the metallic component is governed by
flakeSpread, which controls the variation of the orientation of the
flakes, similar to the roughness parameter of Metal. Note
that the effect of the metallic flakes is currently only computed on
average, thus individual flakes are not visible.
The path tracer supports the Luminous material which
emits light uniformly in all directions and which can thus be used to
turn any geometric object into a light source. It is created by passing
the type string “Luminous” to ospNewMaterial2. The amount of
constant radiance that is emitted is determined by combining the general
parameters of lights: color and intensity.
OSPRay currently implements two texture types (texture2d and volume)
and is open for extension to other types by applications. More types may
be added in future releases.
To create a new texture use
OSPTexture ospNewTexture(const char *type);
The call returns NULL if the texture could not be created with the
given parameters, or else an OSPTexture handle to the created texture.
The texture2D texture type implements an image-based texture, where
its parameters are as follows
| Type | Name | Description |
|---|---|---|
| vec2i | size | size of the textures |
| int | type | OSPTextureFormat for the texture |
| int | flags | special attribute flags for this |
| texture, currently only responds | ||
to OSP_TEXTURE_FILTER_NEAREST or |
||
| no flags | ||
| OSPData | data | the actual texel data |
: Parameters of texture2D texture type
The supported texture formats for texture2d are:
| Name | Description |
|---|---|
| OSP_TEXTURE_RGBA8 | 8 bit [0–255] linear components red, green, blue, alpha |
| OSP_TEXTURE_SRGBA | 8 bit sRGB gamma encoded color components, and linear alpha |
| OSP_TEXTURE_RGBA32F | 32 bit float components red, green, blue, alpha |
| OSP_TEXTURE_RGB8 | 8 bit [0–255] linear components red, green, blue |
| OSP_TEXTURE_SRGB | 8 bit sRGB gamma encoded components red, green, blue |
| OSP_TEXTURE_RGB32F | 32 bit float components red, green, blue |
| OSP_TEXTURE_R8 | 8 bit [0–255] linear single component |
| OSP_TEXTURE_RA8 | 8 bit [0–255] linear two component |
| OSP_TEXTURE_L8 | 8 bit [0–255] gamma encoded luminance |
| OSP_TEXTURE_LA8 | 8 bit [0–255] gamma encoded luminance, and linear alpha |
| OSP_TEXTURE_R32F | 32 bit float single component |
: Supported texture formats by texture2D, i.e., valid constants of
type OSPTextureFormat.
The texel data addressed by source starts with the texels in the lower
left corner of the texture image, like in OpenGL. Per default a texture
fetch is filtered by performing bi-linear interpolation of the nearest
2×2 texels; if instead fetching only the nearest texel is desired (i.e.,
no filtering) then pass the OSP_TEXTURE_FILTER_NEAREST flag.
The volume texture type implements texture lookups based on 3D world
coordinates of the surface hit point on the associated geometry. If the
given hit point is within the attached volume, the volume is sampled and
classified with the transfer function attached to the volume. This
implements the ability to visualize volume values (as colored by its
transfer function) on arbitrary surfaces inside the volume (as opposed
to an isosurface showing a particular value in the volume). Its
parameters are as follows
| Type | Name | Description |
|---|---|---|
| OSPVolume | volume | volume used to generate color lookups |
: Parameters of volume texture type
All materials with textures also offer to manipulate the placement of
these textures with the help of texture transformations. If so, this
convention shall be used. The following parameters (prefixed with
“texture_name.”) are combined into one transformation matrix:
| Type | Name | Description |
|---|---|---|
| vec4f | transform | interpreted as 2×2 matrix (linear part), column-major |
| float | rotation | angle in degree, counterclockwise, around center |
| vec2f | scale | enlarge texture, relative to center (0.5, 0.5) |
| vec2f | translation | move texture in positive direction (right/up) |
: Parameters to define texture coordinate transformations.
The transformations are applied in the given order. Rotation, scale and translation are interpreted “texture centric”, i.e., their effect seen by an user are relative to the texture (although the transformations are applied to the texture coordinates).
To create a new camera of given type type use
OSPCamera ospNewCamera(const char *type);
The call returns NULL if that type of camera is not known, or else an
OSPCamera handle to the created camera. All cameras accept these
parameters:
| Type | Name | Description |
|---|---|---|
| vec3f(a) | pos | position of the camera in world-space |
| vec3f(a) | dir | main viewing direction of the camera |
| vec3f(a) | up | up direction of the camera |
| float | nearClip | near clipping distance |
| vec2f | imageStart | start of image region (lower left corner) |
| vec2f | imageEnd | end of image region (upper right corner) |
: Parameters accepted by all cameras.
The camera is placed and oriented in the world with pos, dir and
up. OSPRay uses a right-handed coordinate system. The region of the
camera sensor that is rendered to the image can be specified in
normalized screen-space coordinates with imageStart (lower left
corner) and imageEnd (upper right corner). This can be used, for
example, to crop the image, to achieve asymmetrical view frusta, or to
horizontally flip the image to view scenes which are specified in a
left-handed coordinate system. Note that values outside the default
range of [0–1] are valid, which is useful to easily realize overscan
or film gate, or to emulate a shifted sensor.
The perspective camera implements a simple thinlens camera for
perspective rendering, supporting optionally depth of field and stereo
rendering, but no motion blur. It is created by passing the type string
“perspective” to ospNewCamera. In addition to the general
parameters understood by all cameras the perspective camera
supports the special parameters listed in the table below.
| Type | Name | Description |
|---|---|---|
| float | fovy | the field of view (angle in degree) of the frame’s height |
| float | aspect | ratio of width by height of the frame (and image region) |
| float | apertureRadius | size of the aperture, controls the depth of field |
| float | focusDistance | distance at where the image is sharpest when depth of field is enabled |
| bool | architectural | vertical edges are projected to be parallel |
| int | stereoMode | 0: no stereo (default), 1: left eye, 2: right eye, 3: side-by-side |
| float | interpupillaryDistance | distance between left and right eye when stereo is enabled |
: Parameters accepted by the perspective camera.
Note that when computing the aspect ratio a potentially set image
region (using imageStart & imageEnd) needs to be regarded as well.
In architectural photography it is often desired for aesthetic reasons
to display the vertical edges of buildings or walls vertically in the
image as well, regardless of how the camera is tilted. Enabling the
architectural mode achieves this by internally leveling the camera
parallel to the ground (based on the up direction) and then shifting
the lens such that the objects in direction dir are centered in the
image. If finer control of the lens shift is needed use imageStart &
imageEnd. Because the camera is now effectively leveled its image
plane and thus the plane of focus is oriented parallel to the front of
buildings, the whole façade appears sharp, as can be seen in the example
images below.
architectural flag corrects the perspective projection distortion, resulting in parallel vertical edges.
Example 3D stereo image using stereoMode side-by-side.
The orthographic camera implements a simple camera with orthographic
projection, without support for depth of field or motion blur. It is
created by passing the type string “orthographic” to ospNewCamera.
In addition to the general parameters understood by all
cameras the orthographic camera supports the following special
parameters:
| Type | Name | Description |
|---|---|---|
| float | height | size of the camera’s image plane in y, in world coordinates |
| float | aspect | ratio of width by height of the frame |
: Parameters accepted by the orthographic camera.
For convenience the size of the camera sensor, and thus the extent of
the scene that is captured in the image, can be controlled with the
height parameter. The same effect can be achieved with imageStart
and imageEnd, and both methods can be combined. In any case, the
aspect ratio needs to be set accordingly to get an undistorted image.
The panoramic camera implements a simple camera without support for
motion blur. It captures the complete surrounding with a latitude /
longitude mapping and thus the rendered images should best have a ratio
of 2:1. A panoramic camera is created by passing the type string
“panoramic” to ospNewCamera. It is placed and oriented in the scene
by using the general parameters understood by all cameras.
To get the world-space position of the geometry (if any) seen at [0–1]
normalized screen-space pixel coordinates screenPos use
void ospPick(OSPPickResult*, OSPRenderer, const vec2f &screenPos);
The result is returned in the provided OSPPickResult struct:
typedef struct {
    vec3f position; // the position of the hit point (in world-space)
    bool hit;       // whether or not a hit actually occurred
} OSPPickResult;
Note that ospPick considers exactly the same camera of the given
renderer that is used to render an image, thus matching results can be
expected. If the camera supports depth of field then the center of the
lens and thus the center of the circle of confusion is used for picking.
The framebuffer holds the rendered 2D image (and optionally auxiliary
information associated with pixels). To create a new framebuffer object
of given size size (in pixels), color format, and channels use
OSPFrameBuffer ospNewFrameBuffer(const vec2i &size,
                                 const OSPFrameBufferFormat format = OSP_FB_SRGBA,
                                 const uint32_t frameBufferChannels = OSP_FB_COLOR);
The parameter format describes the format the color buffer has on the
host, and the format that ospMapFrameBuffer will eventually return.
Valid values are:
| Name | Description |
|---|---|
| OSP_FB_NONE | framebuffer will not be mapped by the application |
| OSP_FB_RGBA8 | 8 bit [0–255] linear component red, green, blue, alpha |
| OSP_FB_SRGBA | 8 bit sRGB gamma encoded color components, and linear alpha |
| OSP_FB_RGBA32F | 32 bit float components red, green, blue, alpha |
: Supported color formats of the framebuffer that can be passed to
ospNewFrameBuffer, i.e., valid constants of type
OSPFrameBufferFormat.
The parameter frameBufferChannels specifies which channels the
framebuffer holds, and can be combined together by bitwise OR from the
values of OSPFrameBufferChannel listed in the table below.
| Name | Description |
|---|---|
| OSP_FB_COLOR | RGB color including alpha |
| OSP_FB_DEPTH | euclidean distance to the camera (not to the image plane), as linear 32 bit float |
| OSP_FB_ACCUM | accumulation buffer for progressive refinement |
| OSP_FB_VARIANCE | for estimation of the current noise level if OSP_FB_ACCUM is also present, see rendering |
| OSP_FB_NORMAL | accumulated world-space normal of the first hit, as vec3f |
| OSP_FB_ALBEDO | accumulated material albedo (color without illumination) at the first hit, as vec3f |
: Framebuffer channels constants (of type OSPFrameBufferChannel),
naming optional information the framebuffer can store. These values can
be combined by bitwise OR when passed to ospNewFrameBuffer or
ospFrameBufferClear.
If a certain channel value is not specified, the given buffer channel
will not be present. Note that OSPRay makes a clear distinction between
the external format of the framebuffer and the internal one: The
external format is the format the user specifies in the format
parameter; it specifies what color format OSPRay will eventually
return the framebuffer to the application (when calling
ospMapFrameBuffer): no matter what OSPRay uses internally, it will
simply return a 2D array of pixels of that format, with possibly all
kinds of reformatting, compression/decompression, etc., going on
in-between the generation of the internal framebuffer and the mapping
of the externally visible one.
In particular, OSP_FB_NONE is a perfectly valid pixel format for a
framebuffer that an application will never map. For example, an
application driving a display wall may well generate an intermediate
framebuffer and eventually transfer its pixel to the individual displays
using an OSPPixelOp pixel operation.
The application can map the given channel of a framebuffer – and thus access the stored pixel information – via
const void *ospMapFrameBuffer(OSPFrameBuffer,
                              const OSPFrameBufferChannel = OSP_FB_COLOR);
Note that OSP_FB_ACCUM or OSP_FB_VARIANCE cannot be mapped. The
origin of the screen coordinate system in OSPRay is the lower left
corner (as in OpenGL), thus the first pixel addressed by the returned
pointer is the lower left pixel of the image.
A previously mapped channel of a framebuffer can be unmapped by passing
the received pointer mapped to
void ospUnmapFrameBuffer(const void *mapped, OSPFrameBuffer);
The individual channels of a framebuffer can be cleared with
void ospFrameBufferClear(OSPFrameBuffer, const uint32_t frameBufferChannels);
When selected, OSP_FB_COLOR will clear the color buffer to black
(0, 0, 0, 0), OSP_FB_DEPTH will clear the depth buffer to inf.
OSP_FB_ACCUM will clear all accumulating buffers (OSP_FB_VARIANCE,
OSP_FB_NORMAL, and OSP_FB_ALBEDO, if present) and resets the
accumulation counter accumID.
Pixel operations are functions that are applied to every pixel that gets
written into a framebuffer. Examples include post-processing, filtering,
blending, tone mapping, or sending tiles to a display wall. To create a
new pixel operation of given type type use
OSPPixelOp ospNewPixelOp(const char *type);
The call returns NULL if that type is not known, or else an
OSPPixelOp handle to the created pixel operation.
To set a pixel operation to the given framebuffer use
void ospSetPixelOp(OSPFrameBuffer, OSPPixelOp);
The tone mapper is a pixel operation which implements a generic filmic
tone mapping operator. Using the default parameters it approximates the
Academy Color Encoding System (ACES). The tone mapper is created by
passing the type string “tonemapper” to ospNewPixelOp. The tone
mapping curve can be customized using the parameters listed in the table
below.
| Type | Name | Default | Description |
|---|---|---|---|
| float | contrast | 1.6773 | contrast (toe of the curve); typically is in [1–2] |
| float | shoulder | 0.9714 | highlight compression (shoulder of the curve); typically is in [0.9–1] |
| float | midIn | 0.18 | mid-level anchor input; default is 18% gray |
| float | midOut | 0.18 | mid-level anchor output; default is 18% gray |
| float | hdrMax | 11.0785 | maximum HDR input that is not clipped |
| bool | acesColor | true | apply the ACES color transforms |
: Parameters accepted by the tone mapper.
To use the popular “Uncharted 2” filmic tone mapping curve instead, set the parameters to the values listed in the table below.
| Name | Value |
|---|---|
| contrast | 1.1759 |
| shoulder | 0.9746 |
| midIn | 0.18 |
| midOut | 0.18 |
| hdrMax | 6.3704 |
| acesColor | false |
: Filmic tone mapping curve parameters. Note that the curve includes an exposure bias to match 18% middle gray.
To render a frame into the given framebuffer with the given renderer use
float ospRenderFrame(OSPFrameBuffer, OSPRenderer,
                     const uint32_t frameBufferChannels = OSP_FB_COLOR);
The third parameter specifies what channel(s) of the framebuffer is
written to8. What to render and how to render it depends on the
renderer’s parameters. If the framebuffer supports accumulation (i.e.,
it was created with OSP_FB_ACCUM) then successive calls to
ospRenderFrame will progressively refine the rendered image. If
additionally the framebuffer has an OSP_FB_VARIANCE channel then
ospRenderFrame returns an estimate of the current variance of the
rendered image, otherwise inf is returned. The estimated variance can
be used by the application as a quality indicator and thus to decide
whether to stop or to continue progressive rendering.
To be informed about the progress of rendering the current frame the application can register a callback function of type
typedef int (*OSPProgressFunc)(void* userPtr, const float progress);
via
void ospSetProgressFunc(OSPProgressFunc, void* userPtr);
The provided user pointer userPtr is passed as first argument to the
callback function9 and the reported progress is in (0–1]. If the
callback function returns zero than the application requests to cancel
rendering, i.e., the current ospRenderFrame will return at the first
opportunity and the content of the framebuffer will be undefined.
Therefore, better clear the framebuffer with ospFrameBufferClear then
before a subsequent call of ospRenderFrame.
Passing NULL as OSPProgressFunc function pointer disables the
progress callback.
OSPRay has the ability to scale to multiple nodes in a cluster via MPI. This enables applications to take advantage of larger compute and memory resources when available.
In addition to the standard build requirements of OSPRay, you must have the following items available in your environment in order to build & run OSPRay in MPI mode:
- An MPI enabled multi-node environment, such as an HPC cluster
- An MPI implementation you can build against (i.e., Intel MPI, MVAPICH2, etc…)
To build the MPI module the CMake option OSPRAY_MODULE_MPI must be
enabled, which can be done directly on the command line (with
-DOSPRAY_MODULE_MPI=ON) or through a configuration dialog (ccmake,
cmake-gui), see also Compiling OSPRay.
This will trigger CMake to go look for an MPI implementation in your
environment. You can then inspect the CMake value of MPI_LIBRARY to
make sure that CMake found your MPI build environment correctly.
This will result in an OSPRay module being built. To enable using it,
applications will need to either link libospray_module_mpi, or call
ospLoadModule("mpi");
before initializing OSPRay.
OSPRay provides two ways of using MPI to scale up rendering: offload and distributed.
The “offload” rendering mode is where a single (not-distributed) calling application treats the OSPRay API the same as with local rendering. However, OSPRay uses multiple MPI connected nodes to evenly distribute frame rendering work, where each node contains a full copy of all scene data. This method is most effective for scenes which can fit into memory, but are expensive to render: for example, path tracing with many samples-per-pixel is compute heavy, making it a good situation to use the offload feature. This can be done with any application which already uses OSPRay for local rendering without the need for any code changes.
When doing MPI offload rendering, applications can optionally enable
dynamic load balancing, which can be beneficial in certain contexts.
This load balancing refers to the distribution of tile rendering work
across nodes: thread-level load balancing on each node is still dynamic
with the thread tasking system. The options for enabling/controlling the
dynamic load balancing features on the mpi_offload device are found in
the table below, which can be changed while the application is running.
Please note that these options will likely only pay off for scenes which
have heavy rendering load (e.g., path tracing a non-trivial scene) and
have much variance in how expensive each tile is to render.
| Type | Name | Default | Description |
|---|---|---|---|
| bool | dynamicLoadBalancer | false | whether to use dynamic load balancing |
: Parameters specific to the mpi_offload device.
The “distributed” rendering mode is where a MPI distributed application (such as a scientific simulation) uses OSPRay collectively to render frames. In this case, the API expects all calls (both created objects and parameters) to be the same on every application rank, except each rank can specify arbitrary geometries and volumes. Each renderer will have its own limitations on the topology of the data (i.e., overlapping data regions, concave data, etc.), but the API calls will only differ for scene objects. Thus all other calls (i.e., setting camera, creating framebuffer, rendering frame, etc.) will all be assumed to be identical, but only rendering a frame and committing the model must be in lock-step. This mode targets using all available aggregate memory for huge scenes and for “in-situ” visualization where the data is already distributed by a simulation app.
As an example, our sample viewer can be run as a single application which offloads rendering work to multiple MPI processes running on multiple machines.
The example apps are setup to be launched in two different setups. In
either setup, the application must initialize OSPRay with the offload
device. This can be done by creating an “mpi_offload” device and
setting it as the current device (via the ospSetCurrentDevice()
function), or passing either “--osp:mpi” or “--osp:mpi-offload” as a
command line parameter to ospInit(). Note that passing a command line
parameter will automatically call ospLoadModule("mpi") to load the MPI
module, while the application will have to load the module explicitly if
using ospNewDevice().
OSPRay is initialized with the ospInit() function call which takes
command line arguments in and configures OSPRay based on what it finds.
In this setup, the app is launched across all ranks, but workers will
never return from ospInit(), essentially turning the application into
a worker process for OSPRay. Here’s an example of running the
ospVolumeViewer data-replicated, using c1-c4 as compute nodes and
localhost the process running the viewer itself:
mpirun -perhost 1 -hosts localhost,c1,c2,c3,c4 ./ospExampleViewer <scene file> --osp:mpi
The second option is to explicitly launch the app on rank 0 and worker
ranks on the other nodes. This is done by running ospray_mpi_worker on
worker nodes and the application on the display node. Here’s the same
example above using this syntax:
mpirun -perhost 1 -hosts localhost ./ospExampleViewer <scene file> --osp:mpi \
  : -hosts c1,c2,c3,c4 ./ospray_mpi_worker
This method of launching the application and OSPRay worker separately
works best for applications which do not immediately call ospInit() in
their main() function, or for environments where application
dependencies (such as GUI libraries) may not be available on compute
nodes.
Applications using the new distributed device should initialize OSPRay
by creating (and setting current) an “mpi_distributed” device or pass
"--osp:mpi-distributed" as a command line argument to ospInit().
Note that due to the semantic differences the distributed device gives
the OSPRay API, it is not expected for applications which can already
use the offload device to correctly use the distributed device without
changes to the application.
The following additional parameter can be set on the mpi_distributed
device.
mpi_distributed device.
| Type | Name | Description |
|---|---|---|
| void* | worldCommunicator | A pointer to the MPI_Comm which should be used as OSPRay’s world communicator. This will set how many ranks OSPRay should expect to participate in rendering. The default is MPI_COMM_WORLD where all ranks are expected to participate in rendering. |
: Parameters for the mpi_distributed device.
By setting the worldCommunicator parameter to a different communicator
than MPI_COMM_WORLD the client application can tune how OSPRay is run
within its processes. The default uses MPI_COMM_WORLD and thus expects
all processes to also participate in rendering, thus if a subset of
processes do not call collectives like ospRenderFrame the application
would hang.
For example, an MPI parallel application may be run with one process
per-core, however OSPRay is multithreaded and will perform best when run
with one process per-node. By splitting MPI_COMM_WORLD the application
can create a communicator with one rank per-node to then run OSPRay on
one process per-node. The remaining ranks on each node can then
aggregate their data to the OSPRay process for rendering.
The model used by the distributed device takes three additional parameters, to allow users to express their data distribution to OSPRay. All models should be disjoint to ensure correct sort-last compositing. Geometries used in the distributed MPI renderer can make use of the SciVis renderer’s OBJ material.
OSPModel.
| Type | Name | Description |
|---|---|---|
| int | id | An integer that uniquely identifies this piece of distributed data. For example, in a common case of one sub-brick per-rank, this would just be the region’s MPI rank. Multiple ranks can specify models with the same ID, in which case the rendering work for the model will be shared among them. |
| vec3f | region.lower | Override the original model geometry + volume bounds with a custom lower bound position. This can be used to clip geometry in the case the objects cross over to another region owned by a different node. For example, rendering a set of spheres with radius. |
| vec3f | region.upper | Override the original model geometry + volume bounds with a custom upper bound position. |
: Parameters for the distributed OSPModel.
The renderer supported when using the distributed device is the
mpi_raycast renderer. This renderer is an experimental renderer and
currently only supports ambient occlusion (on the local data only, with
optional ghost data). To compute correct ambient occlusion across the
distributed data the application is responsible for replicating ghost
data and specifying the ghost models and models as described above. Note
that shadows and ambient occlusion are computed on the local geometries,
in the model and the corresponding ghostModel in the ghost model
array, if any where set.
mpi_raycast renderer.
| Type | Name | Default | Description |
|---|---|---|---|
| OSPModel/OSPModel[] | model | NULL | the model to render, can optionally be a data array of multiple models |
| OSPModel/OSPModel[] | ghostModel | NULL | the optional model containing the ghost geometry for ambient occlusion; when setting a data array for both model and ghostModel, each individual ghost model shadows only its corresponding model |
| OSPLight[] | lights | data array with handles of the lights | |
| int | aoSamples | 0 | number of rays per sample to compute ambient occlusion |
| bool | aoTransparencyEnabled | false | whether object transparency is respected when computing ambient occlusion (slower) |
| bool | oneSidedLighting | true | if true, backfacing surfaces (wrt. light source) receive no illumination |
: Parameters for the mpi_raycast renderer.
See the distributed device examples in the MPI module for examples.
WARNING: USE AT YOUR OWN RISK. The Scene graph is currently in Alpha mode and will change frequently. It is not yet recommended for critical production work.
The scene graph is the basis of our Example Viewer which consists of a superset of OSPRay objects represented in a graph hierarchy (currently a tree). This graph functions as a hierarchical specification for scene properties and a self-managed update graph. The scene graph infrastructure includes many convenience functions for templated traversals, queries of state and child state, automated updates, and timestamped modifications to underlying state.
The scene graph nodes closely follow the dependencies of existing OSPRay
API internals, i.e., a sg::Renderer has a “model” child, which in
turn has a “TriangleMesh”, which in turn has a child named “vertex”
similar to how you may set the “vertex” parameter on the
osp::TriangleMesh which in turn is added to an OSPModel object which
is set as the model on the OSPRenderer. The scene graph is a superset
of OSPRay functionality so there is no direct 1:1 mapping between the
scene graph hierarchy in all cases, however it is kept as close as
possible. This makes the scene graph viewer in the Example
Viewer a great way to understand OSPRay state.
The root of the scene graph is based on sg::Renderer. The scene graph
can be created by
auto renderer = sg::createNode("renderer", "Renderer");
which automatically creates child nodes for necessary OSPRay state. To update and commit all state and render a single function is provided which can be called with:
renderer.renderFrame(renderer["frameBuffer"].nodeAs<sg::FrameBuffer>);
Values can be set using:
renderer["spp"] = 16;
The explore the full set of nodes, simply launch the Example Viewer and traverse through the GUI representation of all scene graph nodes.
The scene graph contains a set of builtin traversals as well as modular
visitor functors for implementing custom passes over the scene graph.
The required traversals are handled for you by default within the
renderFrame function on the renderer. For any given node there are two
phases to a traversal operation, pre and post traversal of the nodes
children. preTraversal initializes node state and objects and sets the
current traversal context with appropriate state. For instance,
sg::Model will create a new OSPModel object, set its value to that
object, and set sg::RenderContext.currentOSPModel to its own value.
After preTraversal is finished, the children of sg::Model are
processed in a similar fashion and now use the modified context. In
postTraversal, sg::Model will commit the changes that its children
have potentially set and it will pop its modifications from the current
context. This behavior is replicated for every scene graph node and
enables children to act on parent state without specific implementations
from the parent node. An example of this are the sg::NodeParam nodes
which are containers for values to be set on OSPObjects, such as a
float value. This is put on the scene graph with a call to:
renderer["lights"]["sun"].createChild("intensity", "float", 0.3f);
This call accesses the child named “lights” on the renderer, and in
turn the child named “sun”. This child then gets its own child of a
newly created node with the name “intensity" of type float with a
value of 0.3f. When committed, this node will call ospSet1fwith the
node value on the current OSPObject on the context which is set by the
parent. If you were to create a custom light called”MyLight" and had a
float parameter called “flickerFreq”, a similar line would be used
without requiring any additional changes in the scene graph internals
beyond registering the new light class. Known parameters such as floats
will also show up in the Example Viewer GUI without requiring any
additional code beyond adding them to the scene graph and the internal
implementation in OSPRay.
The base passes required to use the scene graph include verification,
commit, and render traversals. Every node in the scene graph has a
valid state which needs to be set before operating on the node. Nodes
may have custom qualifications for validity, but by default they are set
through valid_ flags on the scene graph Node for things like
whitelists and range checks. Once verified, commit traverses the scene
graph and commits scene graph state to OSPRay. Commits are timestamped,
so re-committing will only have any affect if a dependent child has been
modified requiring a new commit. Because of this, each node does not
have to track if it is valid or if anything in the scene has been
modified, as commit will only be called on that node if those are
already true. By default invalid nodes with throw exceptions, however
this can be turned off which enables the program to keep running. In the
Example Viewer GUI, invalid nodes will be marked in red but the
previously committed state will keep rendering until the invalid state
is corrected.
For examples of implementing custom traversals, see the sg/visitors
folder. Here is an example of a visitor that collects all nodes with a
given name:
struct GatherNodesByName : public Visitor
{
  GatherNodesByName(const std::string &_name);

  bool operator()(Node &node, TraversalContext &ctx) override;

  std::vector<std::shared_ptr<Node>> results();

private:
  std::string name;
  std::vector<std::shared_ptr<Node>> nodes;
};

// Inlined definitions ////////////////////////////////////////////////////

inline GatherNodesByName::GatherNodesByName(const std::string &_name)
    : name(_name)
{
}

inline bool GatherNodesByName::operator()(Node &node, TraversalContext &)
{
  if (utility::longestBeginningMatch(node.name(), this->name) == this->name) {
    auto itr = std::find_if(
      nodes.begin(),
      nodes.end(),
      [&](const std::shared_ptr<Node> &nodeInList) {
        return nodeInList.get() == &node;
      }
    );

    if (itr == nodes.end())
      nodes.push_back(node.shared_from_this());
  }

  return true;
}

inline std::vector<std::shared_ptr<Node>> GatherNodesByName::results()
{
  return nodes;// TODO: should this be a move (i.e., reader 'consumes')?
}
The scene graph is only thread safe for accessing and setting values on nodes. More advanced operations like adding or removing nodes are not thread safe. At some point we hope to add transactions to handle these, but for now the scene graph nodes must be added/removed on the same thread that is committing and rendering.
A minimal working example demonstrating how to use OSPRay can be found
at apps/ospTutorial.c10. On Linux build it in the build directory
with
gcc -std=c99 ../apps/ospTutorial.c -I ../ospray/include -I .. \
./libospray.so -Wl,-rpath,. -o ospTutorial
On Windows build it in the “build_directory\$Configuration” with
cl ..\..\apps\ospTutorial.c -I ..\..\ospray\include -I ..\.. ospray.lib
Running ospTutorial will create two images of two triangles, rendered
with the Scientific Visualization renderer with full Ambient Occlusion.
The first image firstFrame.ppm shows the result after one call to
ospRenderFrame – jagged edges and noise in the shadow can be seen.
Calling ospRenderFrame multiple times enables progressive refinement,
resulting in antialiased edges and converged shadows, shown after ten
frames in the second image accumulatedFrames.ppm.
OSPRay also ships various mini-apps to showcase OSPRay features. These
apps are all prefixed with ospTutorial and can be found in the
tutorials/ directory of the OSPRay source tree. Current tutorials
include:
- structured volumes
- unstructured volumes
- spheres
- animated spheres
- subdivision surfaces
More apps will be created in future releases to further demonstrate other interesting OSPRay features.
OSPRay includes an exemplary viewer application ospExampleViewer,
showcasing most features of OSPRay which can be run as
./ospExampleViewer [options] <filename>. The Example Viewer uses the
ImGui library for user interface controls and is based on a prototype
OSPRay scene graph interface where nodes can be viewed
and edited interactively. Updates to scene graph nodes update OSPRay
state automatically through the scene graph viewer which is enabled by
pressing ‘g’.
The GUI shows the entire state of the program under the root scene graph node. Expanding nodes down to explore and edit the scene is possible, for example a material parameter may be found under renderer→world→mesh→material→Kd. Updates to values will be automatically propagated to the next render. Individual nodes can be easily found using the “Find Node” section, which will find nodes with a given name based on the input string. Scene objects can also be selected with the mouse by shift-left clicking in the viewer.
Click on nodes to expand their children, whose values can be set by dragging or double clicking and typing in values. You can also add new nodes where appropriate: for example, when “lights” is expanded right clicking on “lights” and selecting create new node and typing in a light type, such as “PointLight”, will add it to the scene. Similarly, right clicking on “world” and creating an “Importer” node will add a new scene importer from a file. Changing the filename to an appropriate file will load the scene and propagate the resulting state. Exporting and importing the scene graph is only partially supported at the moment through “ospsg” files. Currently, any nodes with Data members will break this functionality, however right clicking and selecting export on the camera or lights nodes for instance will save out their respective state which can be imported on the command line. The Example Viewer also functions as an OSPRay state debugger – invalid values will be shown in red up the hierarchy and will not change the viewer until corrected.
Volumes are loaded into the viewer just as a mesh is. Volume appearance is modified according to the transfer function, which will show up in a popup window on the GUI after pressing ‘g’. Click and drag across the transfer function to set opacity values, and selecting near the bottom of the editable transfer function widget sets the opacity to zero. The colors themselves can only be modified by selecting from the dropdown menu ‘ColorMap’ or importing and exporting json colors. The range that the transfer function operates on can be modified on the scene graph viewer.
- ‘g’ - toggle scene graph display
- ‘q’ - quit
- Left click and drag to rotate
- Right click and drag or mouse wheel to zoom in and out.
- Mouse-Wheel click will pan the camera.
- Control-Left clicking on an object will select a model and all of its children which will be displayed in the
- Shift-Left click on an object will zoom into that part of the scene and set the focal distance.
- Running
./ospExampleViewer -helpwill bring up a list of command line options. These options allow you to load files, run animations, modify any scene graph state, and many other functions. See the demos page for examples. - Supported file importers currently include:
obj,ply,x3d,vtu,osp,ospsg,xml(rivl),points,xyz.
When the example viewer is built with OpenImageDenoise, the denoiser is
automatically enabled when running the application. It can be toggled
on/off at runtime via the useDenoiser GUI parameter found under the
framebuffer in the scene graph.
The application ospDistribViewerDemo demonstrates how to write a
distributed SciVis style interactive renderer using the distributed MPI
device. Note that because OSPRay uses sort-last compositing it is up to
the user to ensure that the data distribution across the nodes is
suitable. Specifically, each nodes’ data must be convex and disjoint.
This renderer supports multiple volumes and geometries per node. To
ensure they are composited correctly you specify a list of bounding
regions to the model, within these regions can be arbitrary
volumes/geometries and each rank can have as many regions as needed. As
long as the regions are disjoint/convex the data will be rendered
correctly. In this demo we either generate a volume, or load a RAW
volume file if one is passed on the command line.
To load a RAW volume you must specify the filename (-f <file>), the
data type (-dtype <dtype>), the dimensions (-dims <x> <y> <z>) and
the value range for the transfer function (-range <min> <max>). For
example, to run on the CSAFE data set from the demos
page you
would pass the following arguments:
mpirun -np <n> ./ospDistribViewerDemo \
    -f <path to csafe>/csafe-heptane-302-volume.raw \
    -dtype uchar -dims 302 302 302 -range 0 255
The volume file will then be chunked up into an x×y×z grid such that
loadVolume in
gensv/generateSciVis.cpp
for an example of how to properly load a volume distributed across ranks
with correct specification of brick positions and ghost voxels for
interpolation at boundaries. If no volume file data is passed a volume
will be generated instead, in that case see makeVolume.
The viewer can also display some randomly generated sphere geometry if
you pass -spheres <n> where n is the number of spheres to generate
per-node. These spheres will be generated inside the bounding box of the
region’s volume data.
In the case that you have geometry crossing the boundary of nodes and are replicating it on both nodes to render (ghost zones, etc.) the region will be used by the renderer to clip rays against allowing to split the object between the two nodes, with each rendering half. This will keep the regions rendered by each rank disjoint and thus avoid any artifacts. For example, if a sphere center is on the border between two nodes, each would render half the sphere and the halves would be composited to produce the final complete sphere in the image.
Passing the -appMPI flag will have the application initialize MPI
instead of letting OSPRay do it internally when creating the MPI
distributed device. In this case OSPRay will not finalize MPI when
cleaning up the device, allowing the application to use OSPRay for some
work, shut it down and recreate everything later if needed for
additional computation, without accidentally shutting down its MPI
communication.
Rank 0 will open an interactive window with GLFW and display the rendered image. When the application state needs to update (e.g., camera or transfer function changes), this information is broadcasted out to the other nodes to update their scene data.
Several ready-to-run demos, models and data sets for OSPRay can be found at the OSPRay Demos and Examples page.
Footnotes
-
For example, if OSPRay is in
~/Projects/ospray, ISPC will also be searched in~/Projects/ispc-v1.9.2-linux↩ -
This file is usually in
${install_location}/[lib|lib64]/cmake/ospray-${version}/. If CMake does not find it automatically, then specify its location in variableospray_DIR(either an environment variable or CMake variable). ↩ -
For consecutive memory addresses the x-index of the corresponding voxel changes the quickest. ↩
-
If there are multiple ambient lights then their contribution is added ↩
-
The HDRI light is an exception, it knows about
intensity, but not aboutcolor. ↩ -
actually a parallelogram ↩
-
respectively $(127, 127, 255)$ for 8 bit textures ↩
-
This is currently not implemented, i.e., all channels of the framebuffer are always updated. ↩
-
That way applications can also register a member function of a C++ class together with the
thispointer asuserPtr. ↩ -
A C++ version that uses the C++ convenience wrappers of OSPRay’s C99 API via
include/ospray/ospray_cpp.his available atapps/ospTutorial.cpp. ↩

