Importing the Node RED flows
This git repo contains 2 flows for Node-RED in the flows folder. One called Test.flow, which allows you to test the setup of all the hardware components to verify that they can be driven from Node-RED (Speaker, Microphone, RGB LED, Servo to wave arm, SenseHAT and the camera). The other flow, TobyJnr.flow is an example which pulls all the hardware components together with a number of IBM Cloud cognitive services (visual recognition, speech to text, text to speech, weather service, tone analysis and conversation) in addition to other Node-RED features, such as the dashboard, to build a working bot.
The wiki sections following this section will cover each of the services in turn, so you will understand the services and be able to extend the example flow or create your own applications using the services.
To add the flows to Node-RED you need to open a web browser and navigate to the Node-RED editor running on the Raspberry Pi inside your bot. You can use a browser running on your laptop or workstation, so long as it can communicate with the Raspberry Pi over your local network. The browser doesn't need to be running on the Raspberry Pi.
The editor runs on port 1880, so the URL will be http:// address or local network name for the pi:1880. In the setup section I set my Raspberry Pi hostname to bi-tobyjnr, so the URL I can use is http://bi-tobyjnr.local:1880. If local name resolution is not working for you then you can simply use the IP address for your Raspberry Pi, e.g. http://192.168.0.10:1880, replacing 192.168.0.10 with the IP address of your pi (you can get this by running hostname -I on the command line of the Raspberry Pi).
Once in the Node-RED editor,

open the top menu then select import -> clipboard, this will open a dialog box where you can import the flow. Node-RED flows are JSON document, so you can choose to clone or download this git repository then open the flow file in a text editor to then copy it to your system clipboard (ensure it is not a word processor which may replace certain characters with smart-characters to improve appearance, as this will invalidate the JSON document). Alternatively you can simply open up the file in the browser and copy from the browser to your system clipboard. When the file content has been pasted into the dialog box press the import button.

This will create a new tab in your Node-RED editor called Test TobyJnr. Repeat the process with the
TobyJnr.flow file, which will create an editor tab called TonyJnr.
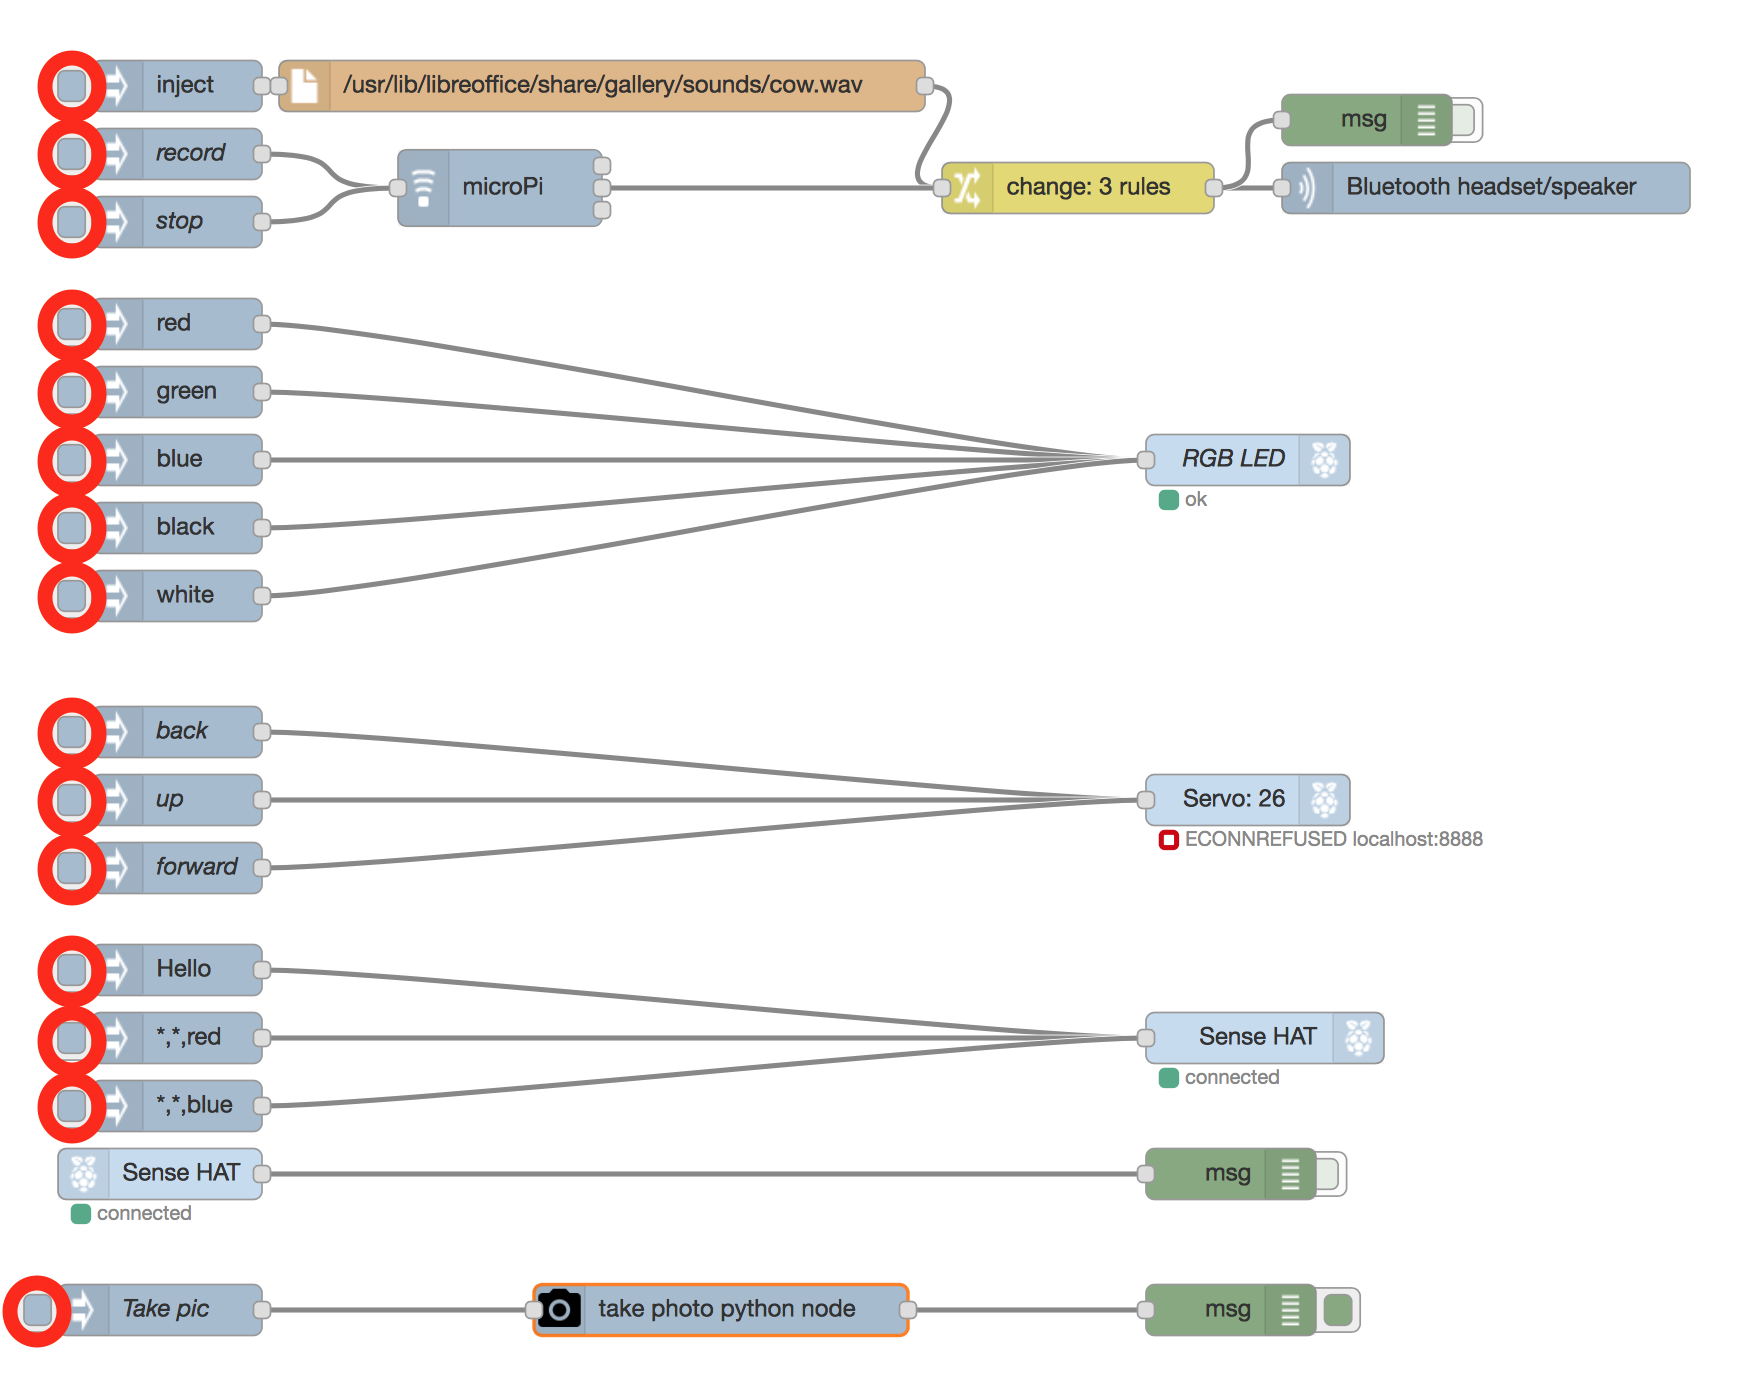
To test the setup switch into the Test TobyJnr tab and press the button on the right of each of the inject nodes in turn and verify that the expected action happens:
-
inject - will play a sound to the speaker
-
record - will start recording (speak or make a noise)
-
stop - will stop the recording and then play the recorded content to the speaker
-
red - will turn the RGB LED to red*
-
green - will turn the RGB LED to green*
-
blue - will turn the RGB LED to blue
-
black - will turn the RGB LED to black
-
white - will turn the RGB LED to white
-
back - will rotate the arm to point behind the bot
-
up - will rotate the arm to point up
-
forward - will rotate the arm to point in front of the bot
If the Servo is showing as not able to connect then you may need to change the address in the node configuration. Raspbian recently changed to prioritise IPv6 over IP v4 so ::1 needs to be used instead of localhost. To open up the configuration double click the servo node then update the host name to ::1. Close the configuration dialog and hit the deploy button to make the change live. You should now see the servo node showing a connected status.
-
Hello - will scroll the word Hello across the SenseHAT display
-
*.*,red - will turn the SenseHAT display red
-
*.*,blue - will turn the SenseHAT display blue
-
Take pic - will take a picture (the debug tab will show where the pic is stored - you can use the file explorer on the pi to launch an image viewer to show the captured image)
* If the Green and Red colours are mixed up, where green is displayed instead of red and red is displayed instead of green then you need to open up the neopixel node configuration and change the ordering GRB/RGB option.
Once you have verified all the hardware is working then you can load the demo flow from the git repo. The file is in the flows directory and is called TobyJnr.flow.
Select the content of the file then using the Node-RED menu select to import from the clipboard then paste in the flow. This will create a new tab containing the sample flow. You need to update the configuration of some of the nodes and link them to IBM Cloud services to get the sample application working.