Xiayu Zeng
Tested on: MacBook air (M1, 2020), macOS Monterey 12.6
-
Why is bit-banging impractical on your laptop, despite it having a much faster processor than the RP2040?
Answer: Bit-banging is applied for data transmissions in commonly embedded systems, it allows device to implement different protoclos woth minimal or no hardware changes. As PC-class processor need to transmit large amount of data at the same time and it would be really low effecient for it to transmi data through bit-banging, moreover, the bit-banging is generated based on high precise timing and IO ports.
-
What are some cases where directly using the GPIO might be a better choice than using the PIO hardware?
Answer: Output control signal, output PWM signal, input nterrupt signal and work as i2c port.
-
How do you get data into a PIO state machine?
Answer: System -> TX FIFO -> PIO SM
-
How do you get data out of a PIO state machine?
Answer: PIO SM -> RX FIFO -> System
-
How do you program a PIO state machine?
Answer: Through PIO assembler language.
-
In the example, which low-level C SDK function is directly responsible for telling the PIO to set the LED to a new color? How is this function accessed from the main “application” code?
Answer: pio_sm_put_blocking()
-
What role does the pioasm “assembler” play in the example, and how does this interact with CMake?
Answer: The pioasm assembler transfer the PIO file into the low level version which is readable for hardware. CMake function pico_generate_pio_header(TARGET PIO_FILE) invokes the assembler


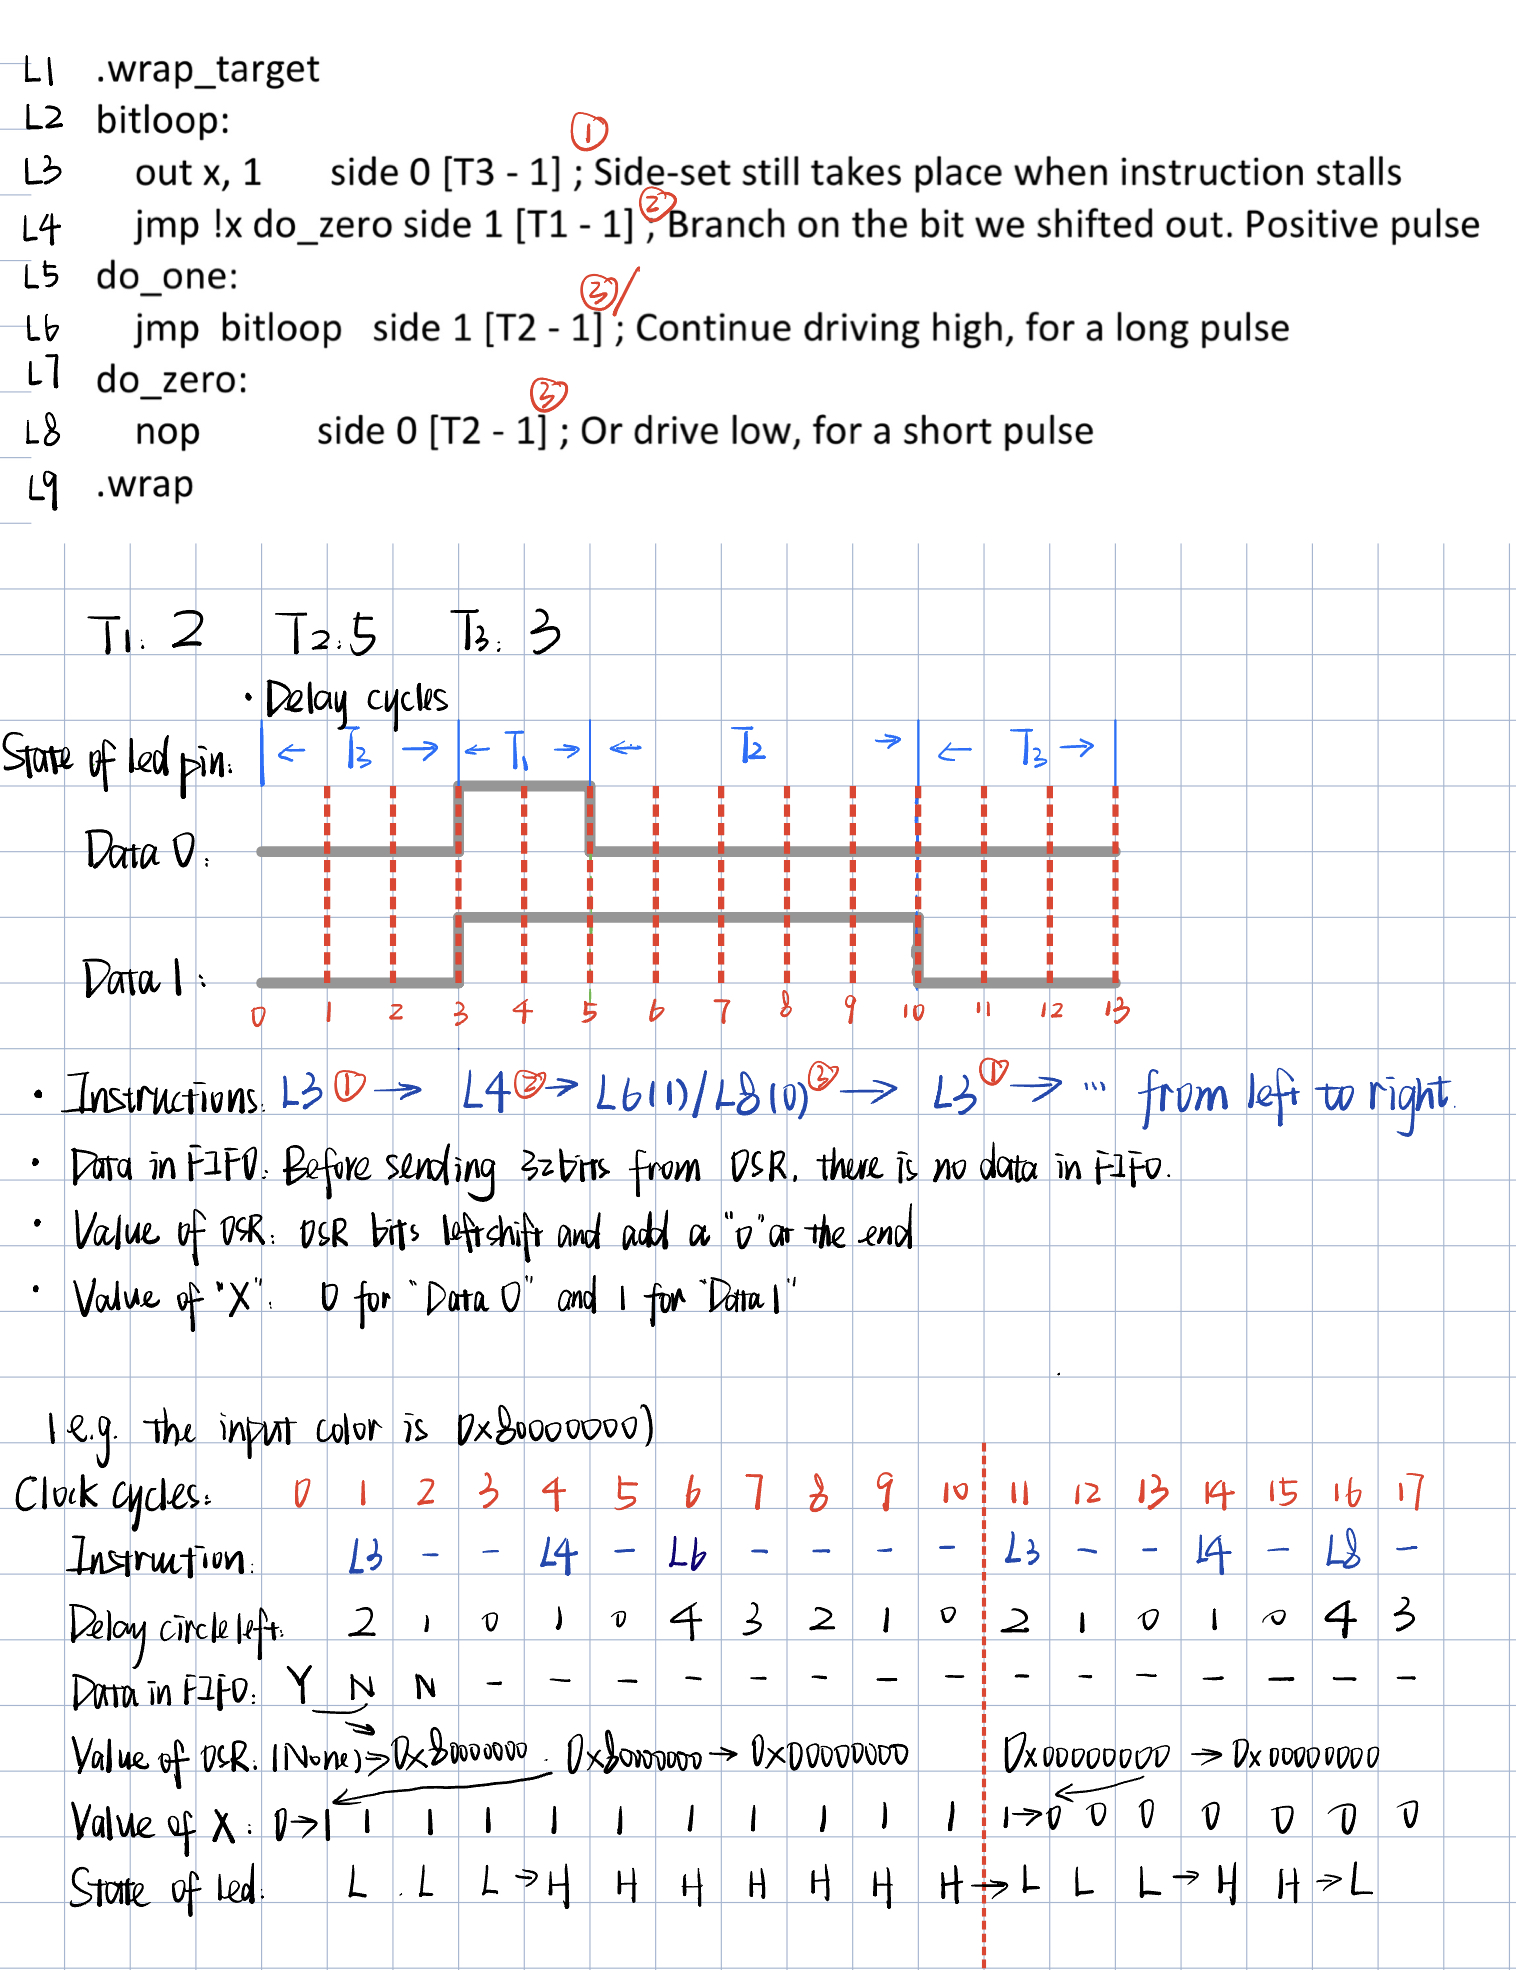
(Sheet 1)
https://github.com/Xiaayu/ese5190-2022-lab2-into-the-void-star/blob/main/Part%203.4%20%26%203.6.xlsx
(Sheet 2)
https://github.com/Xiaayu/ese5190-2022-lab2-into-the-void-star/blob/main/Part%203.4%20%26%203.6.xlsx

-
Wokring with paper help me have a direct understanding of the codes and model's working principles. It is also convenient for me to check out later. However, sometimes it's hard to use them dealing with heavy and similar work.
-
Applying spreadsheet help me check the adddress and status of registers easily and make a clear presentation them.
-
Drawing on ipad make things easier.
https://github.com/Xiaayu/ese5190-2022-lab2-into-the-void-star/tree/main/Part%204
The main task of this part is build the CMake file, and I learned a lot by reading the guidance and a lot of other sources which are really helpful for me to understand its working principles.
cmake_minimum_required(VERSION 3.12)

# Pull in SDK (must be before project)
include(pico_sdk_import.cmake)

project(hello_with_led C CXX ASM)
set(CMAKE_C_STANDARD 11)
set(CMAKE_CXX_STANDARD 17)

# Initialize the SDK
pico_sdk_init()

# add hello_with_led
add_executable(hello_with_led hello_with_led.c)

# generate the header file into the source tree as it is included in the RP2040 datasheet
pico_generate_pio_header(hello_with_led ${CMAKE_CURRENT_LIST_DIR}/ws2812.pio OUTPUT_DIR ${CMAKE_CURRENT_LIST_DIR}/generated)

target_link_libraries(hello_with_led PRIVATE pico_stdlib hardware_pio)

# enable usb output, disable uart output
pico_enable_stdio_usb(hello_with_led 1)
pico_enable_stdio_uart(hello_with_led 0)

pico_add_extra_outputs(hello_with_led)