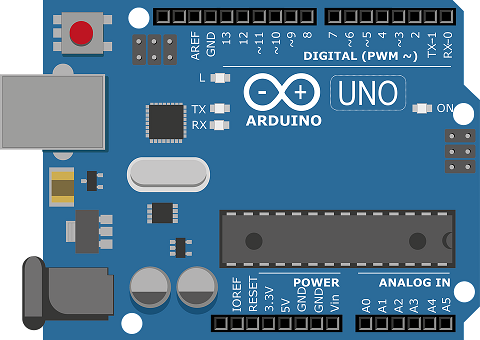
Arduino is a great open-source electronics prototyping platform based on flexible easy-to-use hardware and software. It is basically a simplified microcontroller, in the sense that it uses a normal microcontroller and envelopes its internal functioning which may impede its functioning, but it gives us a very handy, easy to use tool. It is basic version of C
1. Structure
3. Functions
4. Citation
-
- setup():-The
setup()function is used to initialize variables,pin modes,start using libraries etc. the setup function runs only once in a program.
void setup(){ }- loop():-After creating
setup()function,the loop functions run program consecutively and allow our program to change and respond
void loop(){ } - setup():-The
-
- + (addition)
- * (multiplication)
- - (substraction)
- / (division)
- % (remainder)
- = (assignment operator)
-
- != (not equals to)
- == (equals to)
- > or >= (less than or less than equals to)
- < or <= (greater than or greater than equals to)
-
- break:-use to exit from loop (
for,while,do....while). - continue:-It skip the current iteration of loop (
for,while,do....while). - if and else statements:-use as conditionals.example
if(condition 1){ // your code here } if else(condition 2){ // your code here executes if condition 1 is false and condition 2 is true } else{ //your code here executes if condition 1 & 2 is false. }- return:-Terminates a functions and return value from it if it is called.
return ;.
- break:-use to exit from loop (
-
- char:-stores characters
- float:-stores floating point values
- int:-stores intergers
- string:-stores string
" "
-
- HIGH
- LOW
- INPUT
- OUTPUT
- INPUT_PULLUP
- true
- false
-
- PinMode():-It specifies pin to behave either as
INPUTorOUTPUT.It is possible to enable the internal pullup resistors with the modeINPUT_PULLUP.
pinMode(pin,mode);- DigitalRead():-It reads the pin either as
HIGHorLOW.
digitalRead(pin);- DigitalWrite():-Assign value either as
HIGHorLOW.
digitalWrite(pin,value); - PinMode():-It specifies pin to behave either as
-
- AnalogRead():-Read value from specified analog pin and Arduino boards contain 10-bit analog to digital converter. This means that it will map input voltages between 0 and the 5 into integer values between 0 and 1023 and returns it.
analogRead(pin);- AnalogWrite():-Assign value b/w 0 to 255 (duty cycle) to analog pin.
analogWrite(pin,value);- AnalogReference():-Configures the reference voltage used for analog input (the value used as the top of the input range).Type of reference to use is according to board and need. Use link here to get reference type.
analogReference(type); -
-
delay():-Pauses the program for the amount of time(ms).
delay(time);Using delay() function Code for Led blinking.
void setup(){
	//put your code here to run it once
pinMode(2,OUTPUT); // declaring my digital pin 2 as output
}
void loop(){
	// put your code here, to run repeatedly
digitalWrite(2,HIGH); //assigning high  to pin
delay(1000); // add time delay of 1000 ms it means that programs completely stop and wait for that time interval
digitalWrite(2,LOW); // assigning low to pin
delay(1000);
}
-
millis():-It returns the time passed since arduino began running the current program.Advantage of millis() over delay() function is that it doesn't stop the execution of program for some time interval.
time=millis();Using millis() function Code for Led blinking.
int led_pin=2 ;
long previous_time=0;// for updating further in loop initialize it with 0
int interval=1000; // time interval b/w led_state high to low
int led_state=HIGH;//initial state of digital pin

void setup(){
pinMode(led_pin,OUTPUT);
}

void loop(){
long current_time=millis(); // storing time in this variable
if(current_time - previous_time >= 1000){
	    previous_time=current_time;           //update variable to maintain led state high or low for certain interval

 if(led_state==HIGH){                //simply toogle led_state
 	led_state==LOW;
 }
 else{
 	led_state==HIGH;
 }
}
digitalWrite(led_pin,led_state);       //assign led_state to digitalpin
}
-

