Home
- Flash firmware via Web Flasher or ESP Flash Download Tool or PlatformIO
- Connect to
OpenTherm Gatewayhotspot, password:otgateway123456 - Open configuration page in browser:
192.168.4.1 - Configure the connection to your WiFi network on the Network settings page.
- Configure the connection to the OpenTherm bus in the OpenTherm settings section on the Settings page. Required parameters:
In GPIOandOut GPIO. If necessary, set up a theMaster Member ID.
Typical GPIOs for your board can be see here.
- Optional: Configure the indoor and outdoor temperature sensors on the Sensors settings page.
-
Optional: Configure MQTT credentials in the MQTT settings section on the Settings page. Required for integration with Home Assistant.
The OTGateway device will be automatically added to Home Assistant if MQTT credentials are correct.
Tip
After connecting to your WiFi network, you can go to the web portal at the IP address that ESP received.
- It is recommended to use PlatformIO: all necessary dependencies and libraries will be downloaded and installed automatically.
- To build the file system need to install Node.js (for GULP)
- After installing PlatformIO, download the repository as a zip archive and open it in your IDE or clone the repository in your IDE.
- Now you need to select your board from the list of environment and click on Build.
- After building the firmware and file system image, they will be placed in the "build" directory.
Note: If you get a compilation error on Windows related to as.exe, try moving the project folder to the root of the disk.
Important
Supported only with Google Chrome (and Chrome on some Android devices), Microsoft Edge, Opera and some browsers based on Chromium.
- Open the Web Flasher page in a compatible browser
- On the page choose the desired firmware Version and your Board
- Connect your ESP via USB/TTL to PC
- Press Connect and choose COM port with connected ESP
- Press Flash and wait for completion
- Manually restart the ESP
- Download the latest version ESP Flash Download Tool
- Download the firmware and filesystem image for your board from the releases page (or compile yourself)
- Run ESP Flash Download Tool as administrator
- Select the firmware image file, address:
0x0. For ESP32 use factory images! - Select the filesystem image file, address:
-
ESP8266:
0x300000 -
ESP32:
0x370000
- Select the COM port to which the board is connected and the speed (BAUD)
921600 - Press ERASE to clear all ESP memory
- Press START to upload firmware and file system
- Manually restart the ESP
By default, the "Equitherm" and "PID" modes are disabled. In this case, the boiler will simply maintain the temperature you set.
To use "Equitherm" or "PID" modes, the controller needs to know the temperature inside and outside the house.
Some boilers have the ability to connect outdoor temperature sensor. If your boiler supports it, you need to go to the Sensors Settings page, open the Outdoor temp sensor settings and set Type/source = Opentherm, outdoor temp.
After that you need to check Outdoor temp on Dashboard or in Home Assistant. If the value is not available then the boiler is not reporting the temperature via OpenTherm and you need to use an external sensor or report the temperature from Home Assistant via automation.
The highest accuracy of readings is when using external temperature sensors. I prefer to use DS18B20, but you can use any compatible sensors. These sensors must be connected directly to the ESP. Some OT adapters already have connectors to connect them.
After physically connecting the sensors, you need to configure them. Go to the Sensors settings page, open the settings of the configured sensor and change the parameters:
-
Purpose, choose sensor purpose:Outdoor temperatureorIndoor temperature -
Type/source, choose sensor type:NTC sensororDALLAS sensororBLE sensor -
GPIOforNTC sensororDALLAS sensor -
Sensor addressforDALLAS sensororBLE sensor.
For auto detection of DALLAS sensors leave the default value:00:00:00:00:00:00:00:00
And save the settings. After this you can check the sensors on Dashboard.
Tip
Of course you can combine temperature sources. For example, you can take the outdoor temperature from an external compatible sensors, and the indoor temperature from a Zigbee sensor using automation.
Tip
You can add more than one sensor for Purpose = Indoor temperature / Outdoor temperature, the final value for heat carrier temperature calculation using PID or/and Equitherm will be the average of all sensors.
You can use external sensors for these Purpose if your boiler does not report these parameters via OpenTherm:
Heating, temperatureHeating, return temperatureDHW, temperatureDHW, return temperatureExhaust temperature
Or the universal Purpose = Temperature for anything.
P.S. This has no benefit, but it can be useful for collecting statistics in Home Assistant and monitoring the work of the boiler.
There is a simple automation that takes the temperature from any temperature sensor (eg Zigbee) and reports it to the controller.
Before creating automation you need go to the Sensors Settings page, open the Indoor temp sensor settings and set Type/source = Manual via MQTT/API and save the settings.
Use Blueprint to import automation into your Home Assistant:

- Source entity: the source sensor from which we take the temperature.
-
Target entity: to report indoor temperature:
number.opentherm_indoor_temp; to report outdoor temperature:number.opentherm_outdoor_temp.
Tip
The same code can be used to report the outdoor temperature. For example, if you have a Zigbee temperature sensor that is installed outside.
But don't forget to set the Type/source = Manual via MQTT/API parameter on the Sensors Settings page for the Outdoor temperature sensor.
There is a simple automation that takes the temperature from Home Assistant weather integration and reports it to the controller. It is important that the address of your home is entered correctly in the Home Assistant settings.
Before creating automation you need go to the Sensors Settings page, open the Outdoor temp sensor settings and set Type/source = Manual via MQTT/API and save the settings.
Use Blueprint to import automation into your Home Assistant:
- Source entity: the source weather from which we take the temperature.
-
Target entity: target entity number where we set the temperature, usually:
number.opentherm_outdoor_temp.
Some boilers have a water flow rate sensor and report this value via OpenTherm. You can check this, to do this you need to activate the "DHW flow rate" entity. Now when you open a hot water tap, the value of this sensor should change. If the value is non-zero, then your boiler supports this function.
Now we can create a sensor that will calculate the consumption of hot water. It is good practice to use Home Assistant Packages:
- Add to your
configuration.yaml:
homeassistant:
  # ...
packages: !include_dir_merge_named packages/- Create folders
packages/dhw_metersin the root directory/homeassistant - Create file dhw_meter.yaml in the directory
/homeassistant/packages/dhw_meters - After changing the Home Assistant configuration, you must restart HA.
Once the sensor appears in your Home Assistant, you can add it to your Energy dashboard and monitor your hot water consumption:

- Heating min temp - minimum possible temperature of the heat carrier.
- Heating max temp - maximum possible temperature of the heat carrier.
- Max modulation - maximum possible modulation level. Can be used to reduce the burner startup frequency.
Weather-compensated temperature control maintains a comfortable set temperature in the house. The algorithm requires temperature sensors in the house and outside.
Instead of an outdoor sensor, you can use the weather forecast and automation for HA.
N - heating curve coefficient. The coefficient is selected individually, depending on the insulation of the room, the heated area, etc.
Range: 0.001...10, default: 0.7, step 0.001
K - сorrection for desired room temperature.
Range: 0...10, default: 3, step 0.01
T - thermostat correction.
Range: 0...10, default: 2, step 0.01
Tip
I created a table in Excel in which you can enter temperature parameters inside and outside the house and select coefficients. On the graph you can see the temperature that the boiler will set.
- Disable hysteresis (set to 0) in Heating settings and PID on PID settings.
- Set the K and T coefficients to 0.
- The first thing you need to do is to fit the curve (N coefficient). If your home has low heat loss, then start with 0.5. Otherwise start at 0.7. When the temperature inside the house stops changing, increase or decrease the coefficient value in increments of 0.1 to select the optimal curve.
Please note that passive heating (sun) will affect the house temperature during curve fitting. This process is not fast and will take you 1-2 days. Important. During curve fitting, the temperature must be kept stable as the outside temperature changes.
At this stage, it is important for you to stabilize the indoor temperature at exactly 20 (+- 0.5) degrees.
For example. You fit curve 0.67; set temperature 20; the temperature in the house is 20.1 degrees while the outside temperature is -10 degrees and -5 degrees. This is good. - After fitting the curve, you must select the K coefficient. It influences the boiler temperature correction to maintain the set temperature. For example. Set temperature: 23 degrees; temperature in the house: 20 degrees. Try setting it to 2 and see how the temperature in the house changes after stabilization. Select the value so that the temperature in the house is close to the set.
- Now you can choose the T coefficient. Simply put, it affects the sharpness of the temperature change. If you want fast heating, then set a high value (6-10), but then the room may overheat. If you want smooth heating, set 1-5. Choose the optimal value for yourself.
- Check to see if it works correctly at different set temperatures over several days.
- Enable hysteresis and PID if you disabled them at step 1
Read more about the algorithm here.
See Wikipedia.
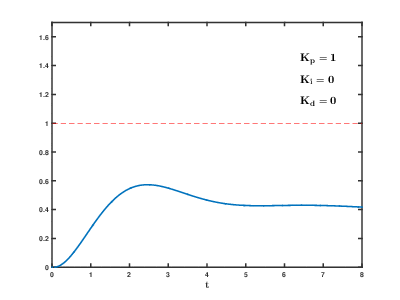
In Google you can find instructions for tuning the PID controller.
- To display all debug messages, you need to change the
Log leveltoVERBOSEin section System settings on the Settings page. - You can see debug messages via:
- Serial port over USB connection
- Telnet (host: ESP IP, default port:
23)