I am Joan Barduena, student of the Bachelor’s Degree in Video Games by UPC at CITM. This content is generated for the second year’s subject Project 2, under supervision of lecturer Ricard Pillosu.
Here I leave my Github if you want to see my other projects.
- What is a Cutscene?
- Types of cutscenes
- Pros & Cons
- Cutscene Editors
- TODOs
- CODE
- Improvements
- Webgraphy
A cutscene is a non-playable or live-action animation, usually employed as a storytelling device. Cutscenes have not or have very limited gameplay, like dialogues or comic book panes.
Cutscenes are divided on Interactive or No-Interactive. Inside this division, each cutscene can be:
Scenes recorded in real-live, like television or films.
These type of cutscenes are not common nowadays, but they were a big novelty when the saga of 16-bits consoles was put on the market. They revolutionized the market, as at that moment it was like watching a film or the television while playing a video game. Live-action cutscenes are generally known for being filmed on a low budget with unprofessional actors and poor dialogue.
Command and Conquer saga is known for having live-action cutscenes with famous actors like Tim Curry, J.K Simmons and Jonathan Pryce. The cutscenes on C&C are very profesional and they are a reference.

Pre-rendered scenes or rendered in-game.
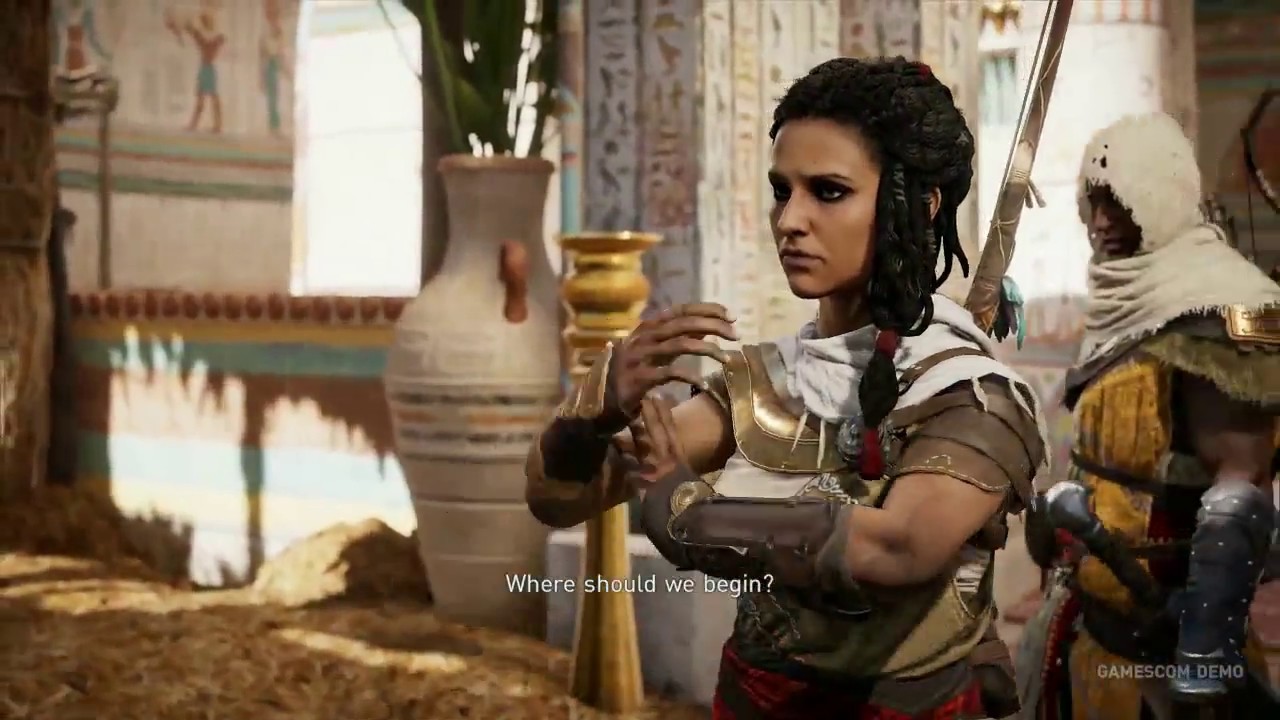
Real-time cutscenes are the ones being rendered for the game engine while playing. Video games like Assassin’s Creed have really good real-time cutscenes, which let the player see what is happening at that moment in the game while watching the scene. If something changes in the game, like the outfit of Bayek, in the cutscene the outfit is the one wear in-game.
Quick Time Events (QTE) is an example of real-time cutscenes. These ones let the player interact with the scene while he is watching it, making him to be alert of what is happening and putting himself on the character shoes. In order to do this, the scene is pre-rendered or automatically in-game set, so the player only needs to press some buttons or keys in certain moments of the scene. Normally, if the player does not follow the instructions the game makes him do, he would have to repeat the scene as the objective is not achieved. This means that if the game is launched in console and in PC, the interaction on the scenes need to fit on both.
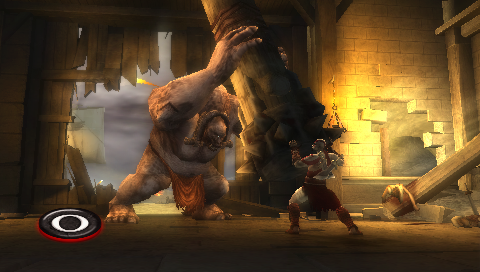
God of War is a good example on how to use QTE. When Kratos is fighting against giant creatures, to give the sensation of enormity and do not lose the power of being fighting, the player only needs to press certain buttons that appear on the screen to kill the creature.
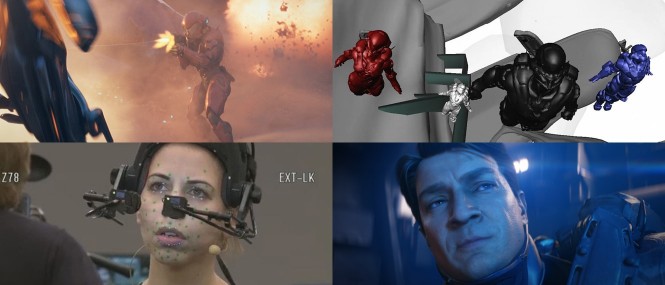
These scenes are usually made in a different studio than the one that makes the game. This allows more modern computer animation techniques and no problems with the video game software. The quality of the scenes created is usually really high, as a cinematic. Years ago, cutscene quality compared to the in-game one was very wide. As the years have gone by, and the industry keeps improving, the difference is every time smaller. One clear example of pre-rendered cutscenes is Halo 5. The first thing the player sees while starting the campaign is this cutscene. Then there is a transition from the cutscene to the gameplay and it is easy to see that there is quality difference between both.
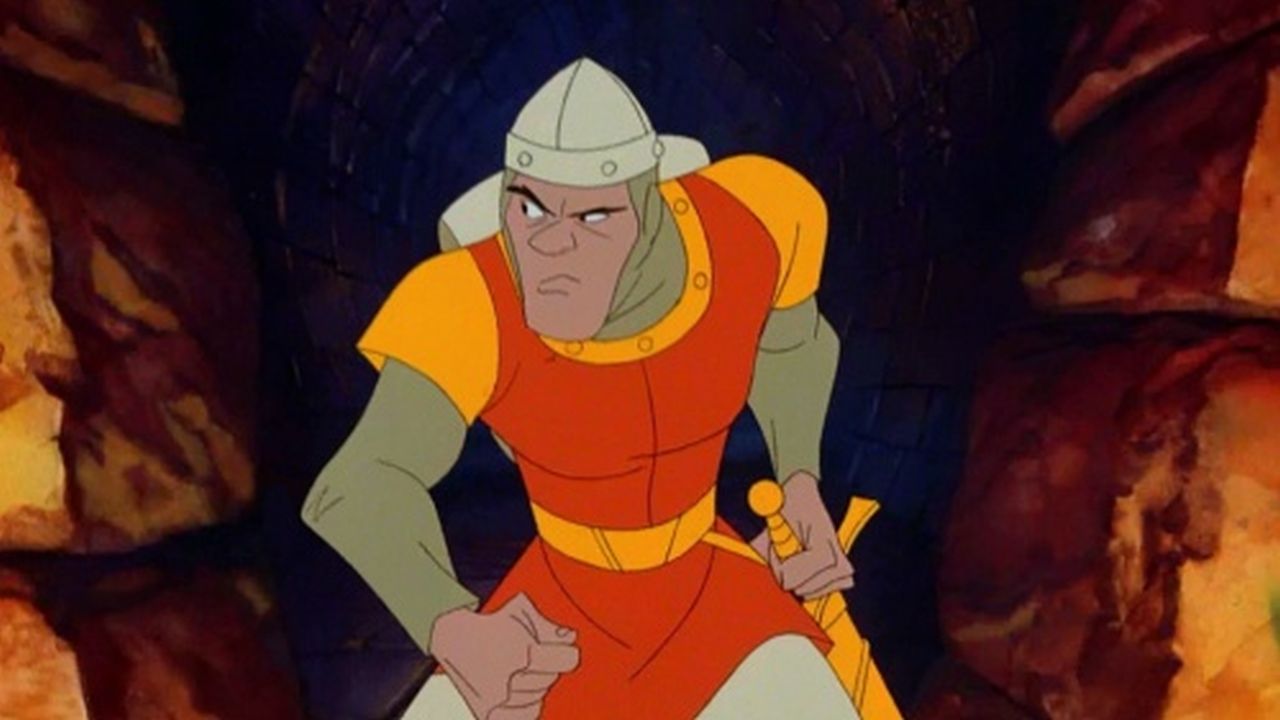
Dragon's Lair is known for being a interactive pre-rendered cutscene transformed into a video game. The player interacts with the cutscene to play the game.
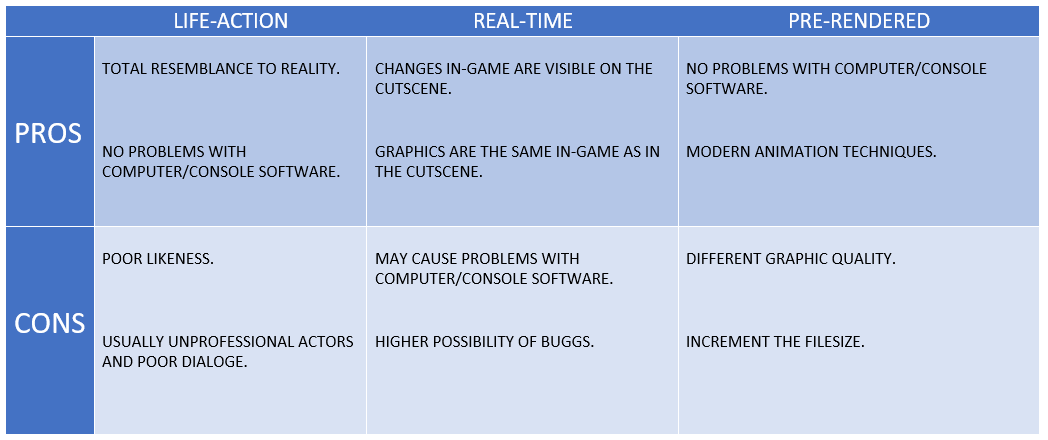
Pre-rendered cutscenes have a few advantages. They can show advanced and complex animations as well as constant framerate. They can also be more detailed than in-game, but this can cause a high expectation on the in-game graphics, which can lead to a bad experience if the gap is big. Their disadvantages are they are fixed. In-game changes like clothes or weapon customization, that can be changed in-game, appear the same on the cutscene. They are also enormous in filesize as they have to be 720p or 1080p in order to have a good quality.
Instead, real-time cutscenes apply their changes in-game to the cutscene and since the quality of both is the same it is less perplexing. Real-time also have disadvantages. Their quality can be as good as pre-rendered videos. They also won’t be able to show physics simulation stuff, unless the game engine already supports it. Furthermore, they are more susceptible of bugs, like audio-video desync, actors teleporting, stuff in the scene that should not be there, etc.
On the other hand, live-action cutscenes are the ones that have more similarity with the real-life as they are recorded with a camera. The problems are the difference between the game and the cutscene is too big and usually the actors are unprofessional, with a poor dialogue and low-cost scenarios.

Programs like 3DS Max, Maya, Blender, zBrush allow us to make the 3D models. Once this models are made, with these tools, cutscenes can be made.
“Cinema Director is a modular Timeline Editor and sequencer for Unity. It enables Game Developers, Film Professionals and Machinima gurus to control, sequence and manipulate almost any Unity Game Object and its associated properties, allowing for dynamic cutscenes, and in-game sequencing, all without the need for scripting or programming. Contains many more tools and options than Unity's timeline.” Cinema Suit INC
Matinee is an animation tool that allows to animate and create in-game cutscenes as well as dynamic gameplay. The system is based on the use of specialized animation tracks in which you can place keyframes to set the values of certain properties of the Actors in the level.
Adobe After Effects tool is more for post-production cutscenes but it can also be used for composing scenes and animating.
RPG Maker has a huge range of tools to make cutscenes. It allows to make the scenery, adding characters and adding actions to the characters. This is very easy to do, but the possibilities are limited.
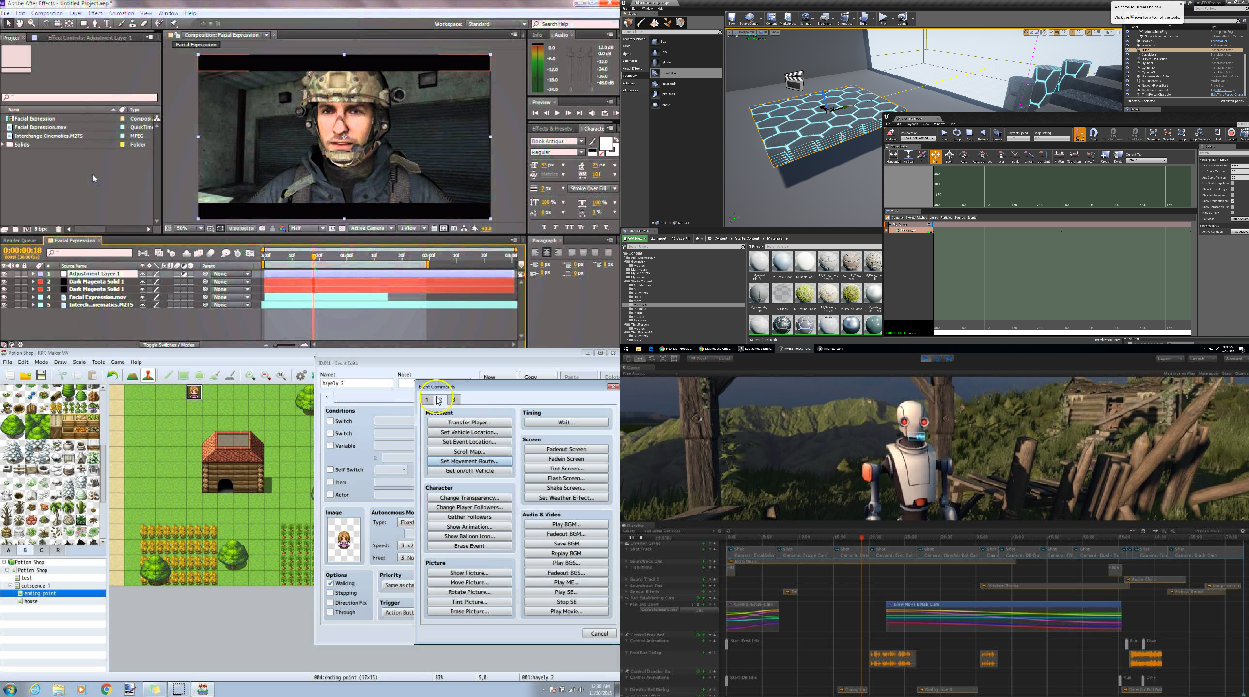
From top to bottom and left to right: AdobeAfterEffects, Matinee(UE4), RPG Maker and Cinema Director(Unity).
Now it's your time to see if you understood the code. To do this, I have implemented 5 simple TODOs.
CLICK HERE TO DOWNLOAD THE ZIP FILE AND DESCOMPRESS IT. The folder /exercises is for doing the TODOs and the folder /fullcode is the solution.
Use the "Action iterator" on j1CutsceneManager.h to pass values from the XML. First you have to uncomment the iterator on the j1CutsceneManager.h.
Solution (click to open)

Complete the if() comparing if the first element on the list of actions is the same as the count_time (on the update()).
Solution (click to open)

Use the parameters on Destination() to move the actor from the coordinates he is to the new ones (use speed value, no teleporting).
Solution (click to open)

Complete the attributes of the functions DoAction() and Destination() in order to see if the cutscene works.
Solution (click to open)

YOUR TURN! It's your turn to make your own cutscene. You will only need to code on the XML document if you did it all correct.
I have created a base code in C++ with STD library. This code has a serie of actors stored on a class. Each actor has a position X and Y where they have to go (destination coordinates), speed they move and time the action will start since the cutscene has started. There is also an actor attribute so the movement is set to the actor selected.
struct Action
{
public:

	int	actor = 0;		//Actor playing the action.
	int	x = 0;			//Position X the actor needs to reach.
	int	y = 0;			//Position Y the actor needs to reach.
	uint	speed = 0;		//Actor speed.
	uint	time = 0;		//Time the action will start.
};The user will only have to touch the XML file to move the actors. The user will introduce a cutscene with an id. This cutscene will have a set of actions the actors will make. If actor="1" the actor 1 is the one making the action. Then the position the actor have to reach in X and Y axis. Speed the actor will move and the time the action will start since the cutscene has started.
This document will have to be like this:
<?xml version="1.0" encoding="utf-8"?>
<cutscene_manager>
  <cutscene id="1">
    <action  actor="1" pos_x="-100" pos_y="900" speed="3" time="4"/>
    <action  actor="1" pos_x="545" pos_y="201" speed="3" time="8"/>
    <action  actor="2" pos_x="-450" pos_y="500" speed="2" time="10"/>
  </cutscene>
  <cutscene id="2">
    <action actor="2" pos_x="489" pos_y="123" speed="4" time="4"/>
  </cutscene>
</cutscene_manager>In order to read the XML file I have made a function LoadData(). This one has a LOOP that reads all the cutscene ids. If the cutscene id is the one the user wants to load, a LOOP will go by each action reading all the attributes. An action ITERATOR is made just to pass the information from the XML to the code. Then, all the attributes of the Action iterator will be pushed_back in a list depending of the actor. Once all the information is loaded, a bool "all_loaded" is set to true and the function DoAction() starts working. This is how it will look like:
void j1Cutscene::LoadData(pugi::xml_node& data, uint id) // Loads the cutscene selected.
{
	pugi::xml_node cutscene_id;
	pugi::xml_node xml_actions;

	for (cutscene_id = data.child("cutscene"); cutscene_id; cutscene_id = cutscene_id.next_sibling("cutscene"))
	{
		if (cutscene_id.attribute("id").as_uint() == id)
		{
			for (xml_actions = cutscene_id.child("action"); xml_actions; xml_actions = xml_actions.next_sibling("action"))
			{
				iterator.x = xml_actions.attribute("pos_x").as_int();
				iterator.y = xml_actions.attribute("pos_y").as_int();
				iterator.speed = xml_actions.attribute("speed").as_uint();
				iterator.time = xml_actions.attribute("time").as_uint();
				iterator.actor = xml_actions.attribute("actor").as_int();

				//One list for each actor.
				if(iterator.actor == 1)
					actions_1.push_back(iterator);
				if(iterator.actor == 2)
					actions_2.push_back(iterator);
			}
		}
	}
	all_loaded = true;
}Now all the information is loaded, but on a list of Actions. To do this, the function will pass two values: a list of Actions and an Action. So we will go through the list until this one is empty. If the element attribute TIME on the front of the list is the same as the time the cutscene is running, the Action attributes of the list will be loaded on a Action and finally we will delete the first element on the list with a pop_front(). If the action has not finished and the time for another action takes place, the first action will be canceled and the second will start from the place the first finished.
void j1Cutscene::DoAction(list<Action> &actions, Action &actor)
{
	if (!actions.empty()) // List of actions.
	{
		if (actions.front().time == count_time) 	//Do not start an action before the previous had finished
		{						//(works individually on each actor).
			actor.x = actions.front().x;
			actor.y = actions.front().y;
			actor.speed = actions.front().speed;

			actions.pop_front();
		}
	}
}
To finish an function Destination() is called so the actor goes automatically to the coordinates set.
The base code has only two actors. If the user wants to add more actors, he should follow this steps:
1. Go to j1Player.cpp and j1Player.h and add a new iPoint position as well a texture(do not forget to initialize it as NULLPTR). The coordinates will be the initial actor position. Also, blit the texture and coordinates and UnLoad() the texture on the CleanUp().
position.x = -10; //On j1Player.cpp Start()
position.y = 600;
________________
SDL_Texture * graphics = nullptr; //On j1Player.h
graphics = App->tex->Load(graphics); //On j1Player.cpp Start()
App->render->Blit(graphics, position.x, position.y); //On j1Player.cpp PostUpdate()
App->tex->UnLoad(graphics); //On j1Player.cpp CleanUp()
2. Go to j1Cutscene.h and create a new list of actions and a action.
list <Action> actions_1;
Action actor_1;
3. Now on j1Cutscene.cpp, on the function LoadData(), inside the loop, if the iterator is equal to the number of the actor passed, add the iterator values to the list made on the step 2.
//One list for each actor.
if(iterator.actor == 1)
  actions_1.push_back(iterator);
if(iterator.actor == 2)
	actions_2.push_back(iterator);
4. Continuing in the j1Cutscene.cpp, now on the function Update(), inside the "if(all_loaded)" Add a DoAction() with the list of actions and action made on step 2 Add a Destination() with the action X, Y and speed made on step 2 and a pointer to player position made on step 1 and finally the action.
if (all_loaded)	//Attributes loaded of the cutscene pressed.
{
	DoAction(actions_1, actor_1);
	DoAction(actions_2, actor_2);
	Destination(actor_1.x, actor_1.y, actor_1.speed, App->player->position, actor_1);
	Destination(actor_2.x, actor_2.y, actor_2.speed, App->player->position2, actor_2);
}- Creation of an actor if the actor does not exist.
- Actions could not only start on integer seconds.
- List of actions lists and a function that read so there are not repeated functions on the code for each actor.
- Create a big list instead of one for every actor with an ID.
- If function Destination() stays between one coordinate smaller and one bigger it buggs.
- The art of Cutscenes: http://www.inmotiongaming.com/the-art-of-cutscenes/
- "Cut-scenes". Klevjer, Rune(2014): https://runeklevjer.files.wordpress.com/2013/01/klevjer_cutscene_johns-hopkins-guide-digital-media-post-print.pdf
- Video Game Cutscenes: A Mixed Bag Of Interactivity And Cinematics: https://gamerant.com/video-game-cutscenes-good-bad-411/
- How are cinematics made?: https://gamedev.stackexchange.com/questions/4642/how-are-game-cinematics-made
- Pre-rendered vs In-engine cutscenes: https://www.reddit.com/r/truegaming/comments/1zksx4/prerendered_vs_inengine_cutscenes/
- A complete history of cutscenes in games: https://www.youtube.com/watch?v=tZKxQ5-DtVA