HomeAssistant implementation of Hekr API communicator


Update to version v0.2.5 and greater is necessary to prevent "Home Assistant is still loading" message.
THIS PROJECT IS HIGHLY WORK-IN-PROGRESS!!! Things are subject to change drastically until at least two to three different Hekr implementations are discovered and added to the integration as well as the parent python module. Please, read release notes carefully before installing or upgrading. I am not responsible for damaging your devices in any way!
- Platform setups are no longer supported. Unfortunately, this is a trade-off for supporting accounts. When you update to the latest version, a persistent notification will appear containing necessary YAML configuration that you can add to your configuration.yaml file.
- Config entry management mechanism vastly overhauled. While this should not influence
existing setups, it is advised to keep a backup of
core.config_entrieson update. - From now on, entries created within interface will override YAML configuration. This is done to facilitate capability of removing YAML entry live and replacing it with different config.
If you found yourself using Wisen application with any of your Smart Home devices, contact me via e-mail [email protected]. The process of adding new devices is not yet completely formalized, the milestone is set for a release-candidate version.
Check original repository with HekrAPI bindings: hekrapi-python: Hekr protocol bindings for Python
You can also help with translating this component. Fork this repository, make changes to preferred language files in
custom_components/hekr/translations, remove the _remove_me_after_making_translations_or_everything_will_be_replaced
translation key, and submit a pull request. Alternatively you can send a translation file directly through one of the
communication channels listed at the end of this page.
(more screenshots available at: images/power_meter)
hekr:
  devices:
    - host: home-power-meter.lan
      device_id: ESP_2M_AABBCCDDEEFF
      control_key: 202cb962ac59075b964b07152d234b70
      protocol: power_meter
      sensors:
        - general
        - detailed
      switches: main_power
In this state, the plugin will generate three sensors, all obtained via a single queryDev command.
These sensors are:
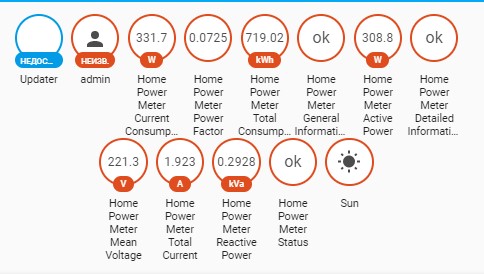
status- Status (whether device reports any kind of errors)current_consumption- Current Consumption (current power consumption in W, phase attributes in kW)total_consumption- Total Consumption (total energy consumption in kW/h).
Also the following sensors are available, but not enabled by default (as they increase the amount of requests required to poll the device, leading to infrequent, but possible timeouts):
general- General Information (spews out all data available fromqueryDevcommand)detailed- Detailed Information (spews out all data available fromqueryDatacommand)voltage- Voltage (voltage for every available phase, also mean voltage)current- Current (current for every available phase, also mean current)power_factor- Power Factoractive_power- Active Powerreactive_power- Reactive Power
Recent release added support for switches, but so far there is only one supported:
main_power- Main Power (toggles relay power on and off)
hekr:
  devices:
    - device_id: ESP_2M_AABBCCDDEEFF
      host: home-power-meter.lan
      control_key: 202cb962ac59075b964b07152d234b70
      scan_interval:
        seconds: 15
      protocol: power_meter
      sensors:
        - general
        - detailed
        - status
        - current_consumption
        - total_consumption
        - voltage
        - current
        - power_factor
        - active_power
- reactive_powerhekr:
devices:
- device_id: ESP_2M_AABBCCDDEEFF
host: home-power-meter.lan
control_key: 202cb962ac59075b964b07152d234b70
scan_interval:
seconds: 15
protocol: power_meter
sensors: false
switches:
- main_powerThe easiest way to accomplish this is to begin an integration flow with account setup type. Tick the box
Create notification with device info, and a persistent notification will appear containing compatible YAML config.
The following tutorial is left for educational purposes / explanation on how protocol decoding was done.
- An android device with working Wi-Fi
- Installed HttpCanary application (Google Play Store link)
- Installed and configured Wisen application (Google Play Store link)
- Configured target device via Wisen application
- Non-isolated access point to communicate with target device
- Open HttpCanary application, and do the following:
- (required) Accept VPN configuration and (optional) install root certificate
- Open
Target Appsfrom the side menu - Tap
+in the top right corner - Search for
Wisenin the search box, and select Wisen from search results - Go back to the main screen; you will see Wisen's icon with
Tap the floating button to start capturetext under it appear in the middle of your screen. !!! DO NOT START CAPTURE YET !!!
- Force-close and re-open Wisen application, and do the following:
- Open
Settingsfrom the side menu - Open
LAN settingssubmenu - Flick the switch to on position
- Open
- Go back to the HttpCanary application, and start listening by pressing button in the bottom left corner; you will
now observe
Capturing...as well as possibly some of cloud Wisen's requests appear on screen; should they not appear, go back to Wisen and open up your device from the grid of available devices. After than, enough requests will be made to successfully extract needed data. - Look for requests with of
WebSockettype, orUDPtype to port10000. Once you found at least one, open it and look for messages containingctrlKey(=control_key) anddevTid(=device_id). An example response would look something like this, mind the linebreaks:{ "msgId": 7, "action": "devSend", "params": { "devTid": "ESP_2M_AABBCCDDEEFF", // This will be your `device_id` "appTid": [], "subDevTid": null, "ctrlKey": "202cb962ac59075b964b07152d234b70", // This will be your `control_key` // more data... }, // more data... }
- Congratulations, you're ready! You can proceed by using any of the configuration methods described above to add your device to HomeAssistant.
👤 Alexander Ryazanov (@alryaz)
- Github: @alryaz
- Telegram: @alryaz
- E-Mail: [email protected]
Give a ⭐ if this project helped you!