- The system setup is an 8 Gb raspberry pi 4 running retropie version 4.7.
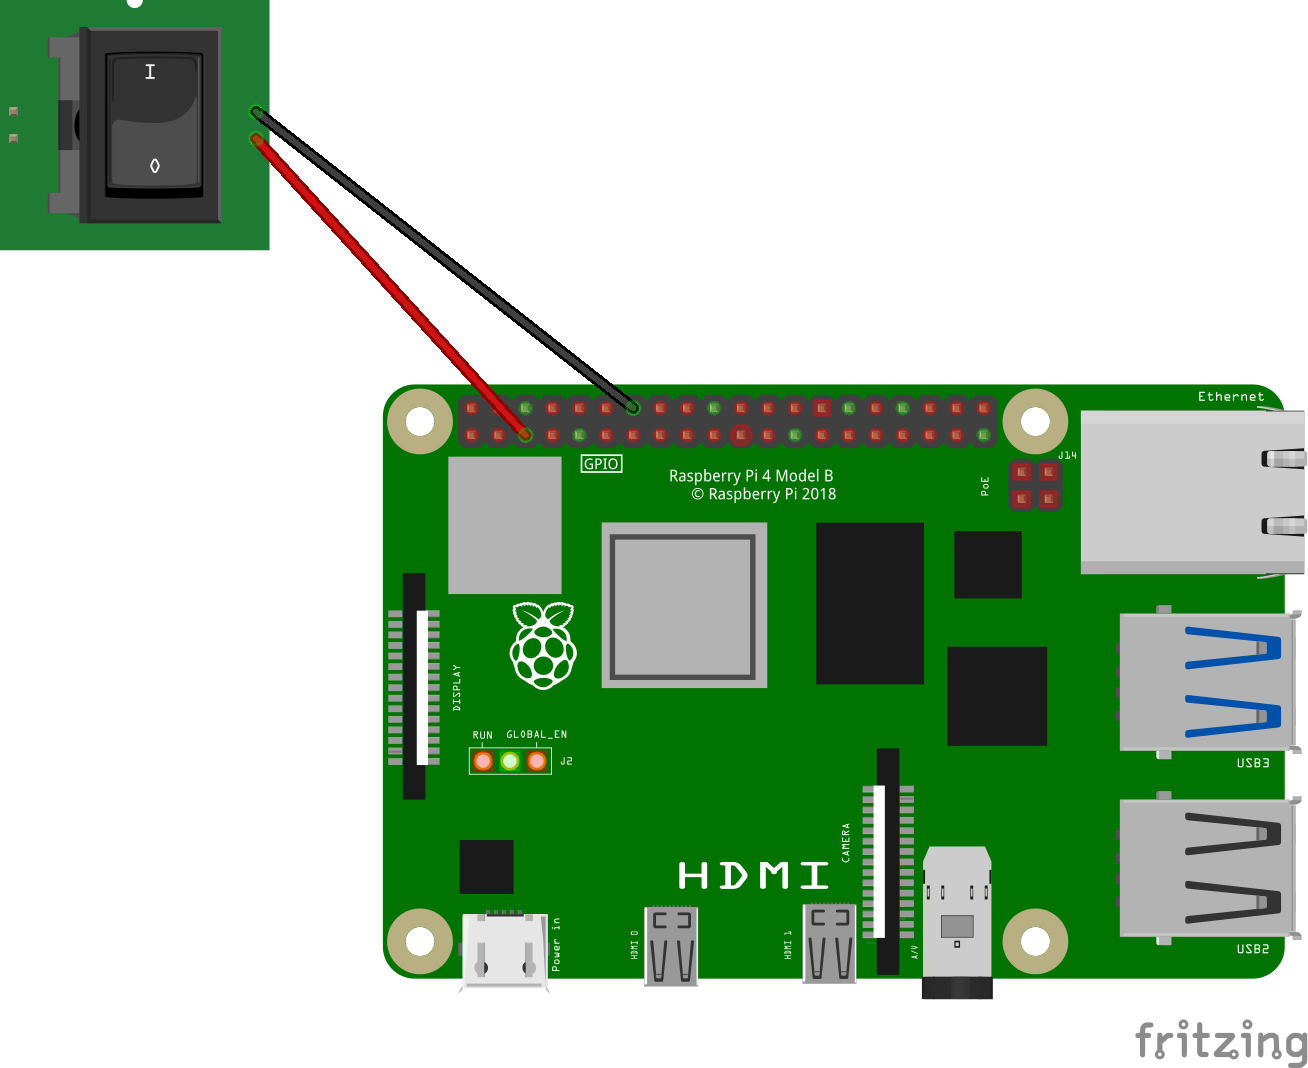
- This script uses a rocker switch attached to GPIO3 (pin 5) on the raspberry pi 4 to allow switch control over the shutdown process and start up process. Since the raspberry pi needs to be shutdown properly through the retropie menu, this provides an easier user interaction which is ideal for an arcade setup.
- This script provides 2 main functions
- Shutdown: Shut the Pi down safely when the switch is moved to the "off" position. The Pi now consumes very little power.
- Wake: Turn the Pi back on when the switch is returned to the "on" position.
- Make sure that the rocker switch is initially in the "on" position before turning on the raspberry pi.
- Interacting with Raspberry pi
- Option 1: Connect to your Raspberry Pi via SSH, Note that there are a number of ways to do this.
- Option 2: Bring up RetroPie bash terminal by pressing F4 on a keyboard attached to Raspberry pi.
- Make sure git is installed by typing this into bash terminal:
sudo apt-get install git - Clone this repo by typing this into the bash terminal:
git clone https://github.com/GaryDeco/RetroPie-Power-Switch.git - To Navigate to the folder containing the install script, type this:
cd RetroPie-Power-Switch/script/ - Run the setup script in the bash terminal by typing this:
bash install- The script is now running and listening for the switch to change states
- Test the shutdown functionality by flipping the switch to the "off" position. The system should shutdown.
- Test the wake functionality by flipping the switch to the "on" position. The system should turn on and load properly.
If you need to uninstall the Power Switch script for any reason.
- Run the uninstall script in the bash terminal:
cd home/pi/RetroPie-Power-Switch/script/, and then:bash uninstall - To remove the directory from the file system:
cd home/pi/, and then:rm -rf RetroPie-Power-Switch- You can confirm deletion by using
lsto return a list of all folders in the root directory.
- You can confirm deletion by using
- Raspberry pi 4 B
- Rocker Switch
- Some 22 gauge wire and jumper wires soldered to provided connectors to male pins on pi 4.
Connect the power button to Pin 5 (GPIO 3/SCL) and Pin 14 (GND) as shown in this diagram (note that any ground pin will work):
- GPIO3 (pin 5) is the only pin that will allow both the Shutdown and Wake functionality (details).
