-
Notifications
You must be signed in to change notification settings - Fork 16
Getting Started Using App Studio
The App Studio Teams application is a very useful tool for both developing and distributing your Teams applications. In this section we'll focus on using App Studio for working with Teams application manifests.
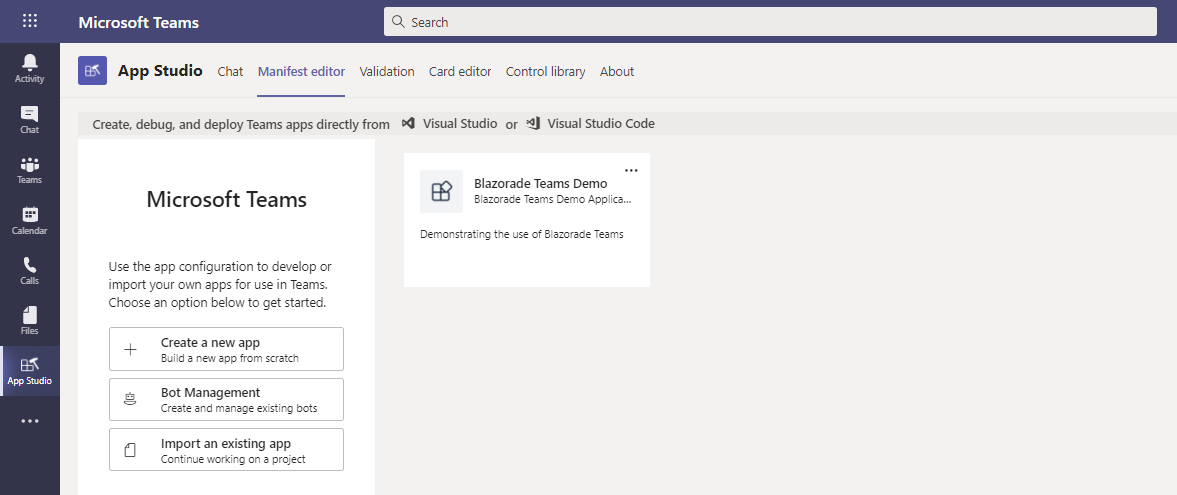
When you have installed the application, fire it up, and select the Manifest editor tab, as shown in the picture below.

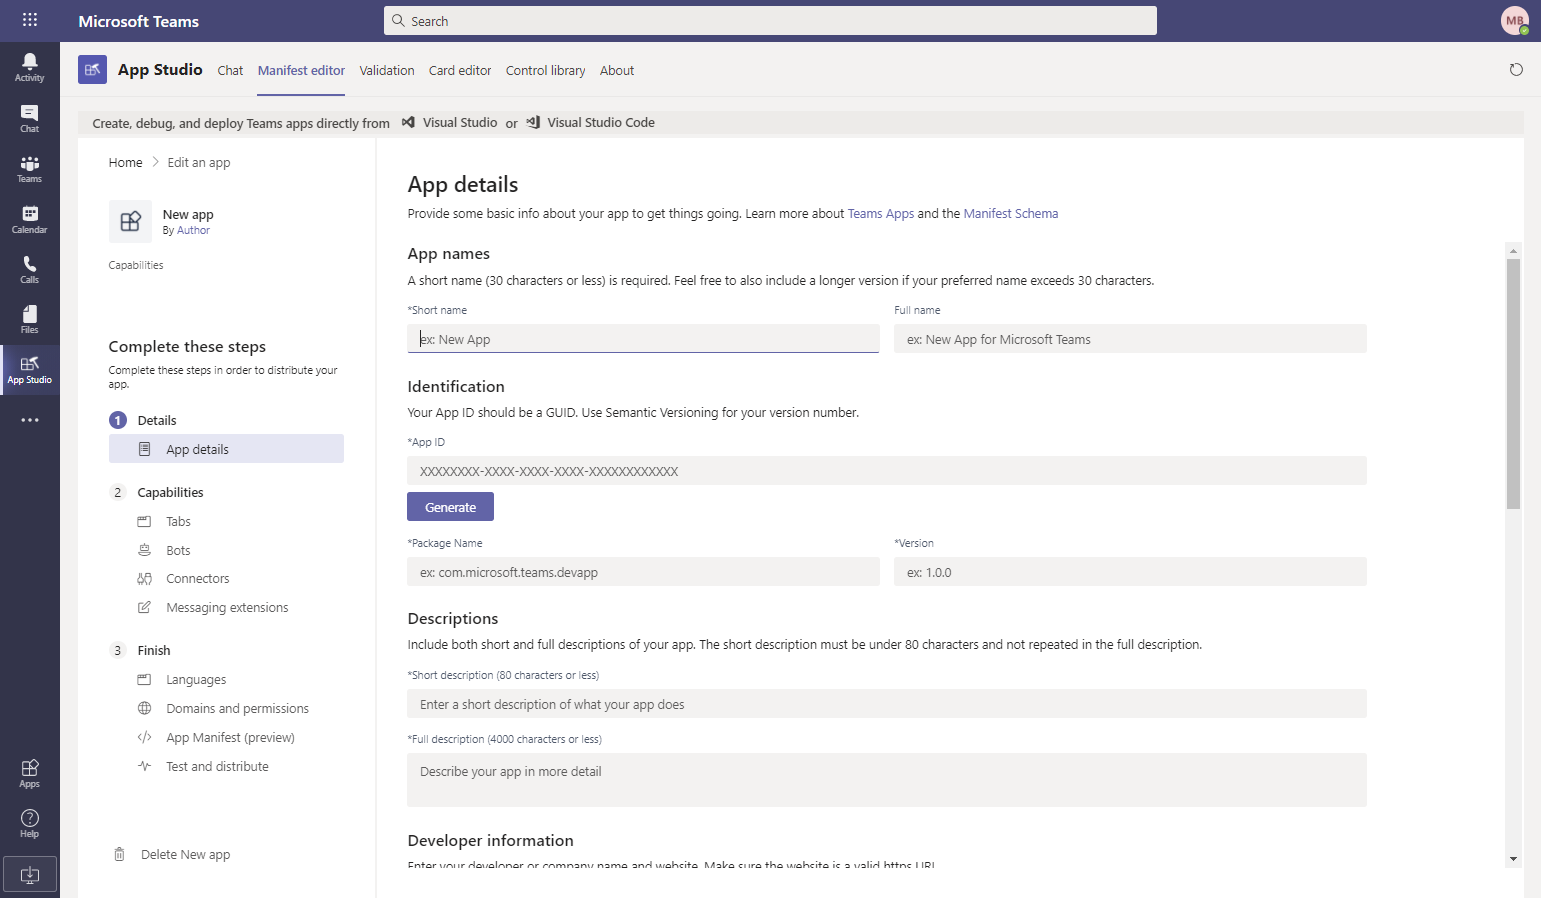
Click Create a new app, which will open the following view.

Go through all of the required fields. To add a tab to your application manifest, select the Tabs tab on the left. When configuring your tabs, you can use your localhost URLs, if you just want to run the applications in your local dev environment. You can also run them in debug mode, so you can properly debug your applications, also when running "inside" of Teams.
When you're done, select the Test and distribute tab on the left. On that page you will get errors and warnings, if there's something wrong with your manifest. You need to fix at least all errors before you can install, download or publish your application.
There's one thing you need to know before install your applications using the App Studio application. You need to enable side-loading for Teams applications in your tenant. This is a tenant-wide setting, which means that you need to be a global admin to set it.
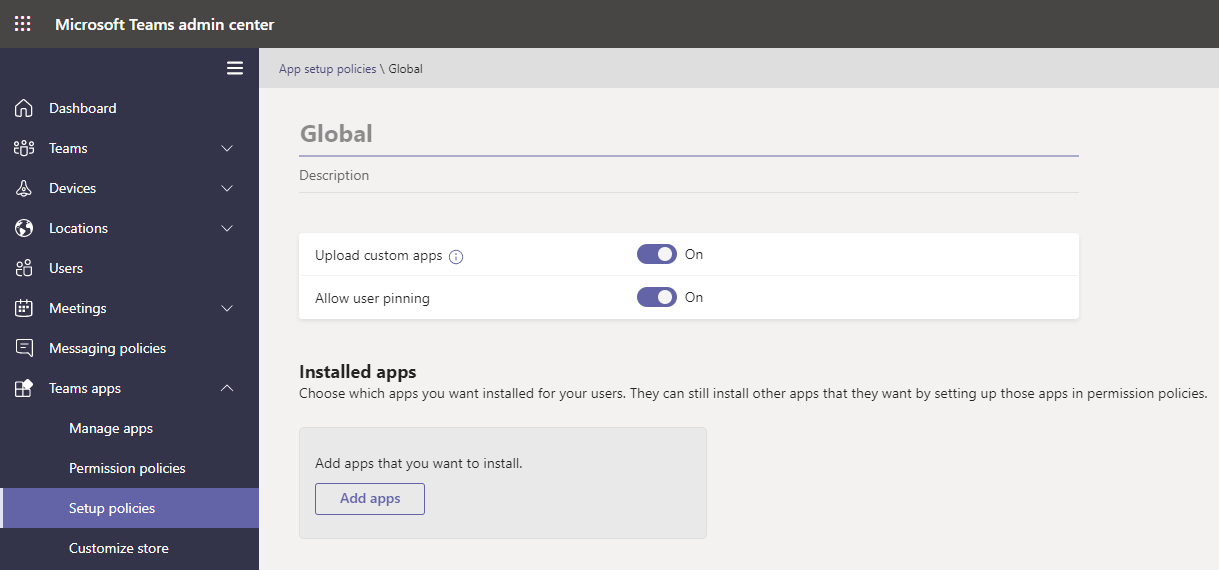
To do this, log in to the Microsoft 365 admin portal for your tenant, and navigate to the Teams Admin Center. Then, navigate to Teams apps / Setup policies, select the policy you want to allow side-loading for (for instance the default Global policy), and make sure that the Upload custom apps toggle is set to On.

Also, make sure that Custom apps are allowed under Teams apps / Permissions policies, and by selecting the policy you want to allow custom apps for.