-
Notifications
You must be signed in to change notification settings - Fork 4
3. Cropping
Lattice Lightsheet (LLS) datasets are quite large and thus if the area of interest is only a small portion of the image, then it does not make sense to process the entire dataset. napari-lattice enables efficient cropping, by utilizing user-defined ROIs from the deskewed image to crop the raw data and process only the region of interest. For the Zeiss lattice, after acquisition, a maximum intensity projection of the entire dataset is generated. This can be used as a reference. Alternatively, you can Preview Deskewed data and define ROIs using the shapes layer.
To perform cropping
- Click on the
Crop & Deskewtab. - Clicking on
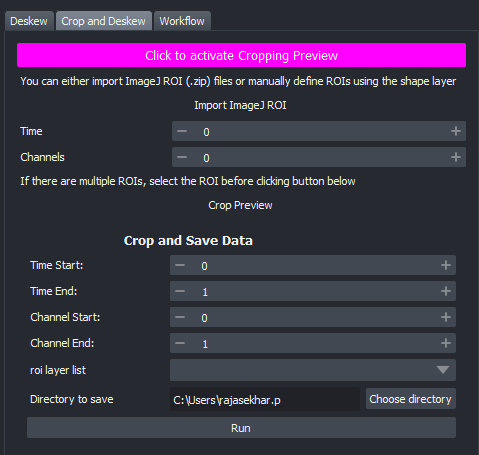
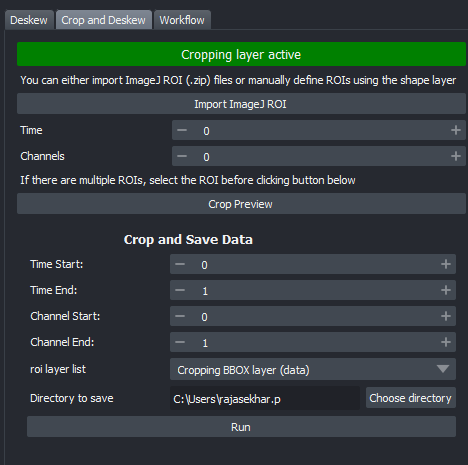
Click to activate Cropping Previewwill activate theImport ImageJ ROIandCrop Previewbuttons. This will also add a shapes layer for the ROIs or shapes.
| Crop & Deskew (initial) | Crop & Deskew (Activated) |
|---|---|
 |
 |
-
For cropping regions of interest on the deskewed image, you can either:
- draw the regions using shapes layer in napari AND/OR
- import ImageJ ROIs from a ImageJ ROI file (.zip) by clicking
Import ImageJ ROI.
-
You can use a combination of shapes and ImageJ ROIs if needed.
-
To preview only the cropped image, select the ROI and then click
Crop Preview. -
Once you're satisfied, you can select the range of channels and time points you'd like to crop and save under
Crop and Save Datasection. The files can be saved as h5 (BigDataViewer) or tiff.
-
With the Zeiss Lattice, the Maximum Intensity Projection (MIP) image generated at the end of the acquisition can be used to draw ROIs. If using Fiji/ImageJ, just note that the MIP image will need to be rotated 90 degrees to the left (-90 degrees) before drawing ROIs. If you have already drawn ROIs on the original image in Fiji and have the ROIManager file open, you can get the rotated ROIs:
- Duplicate a single slice.
- Overlay ROIs onto the image: Image -> Overlay -> From ROI Manager
- Rotate the image 90 degrees left (-90 degrees). Image -> Transform -> 90 degrees left
- Get the rotated ROIs back to the ROI Manager. Image -> Overlay -> To ROI Manager
-
The cropping functionality works by finding the inverse transform of the ROI from the deskewed image and extracting the corresponding data from the skewed or raw image. Only the extracted portion will be deskewed. This saves time and is low on memory compared to deskewing the entire image and then cropping. You can select the range of channels and time points you'd like to crop and save under
Crop and Save Datasection.
