Table of Contents
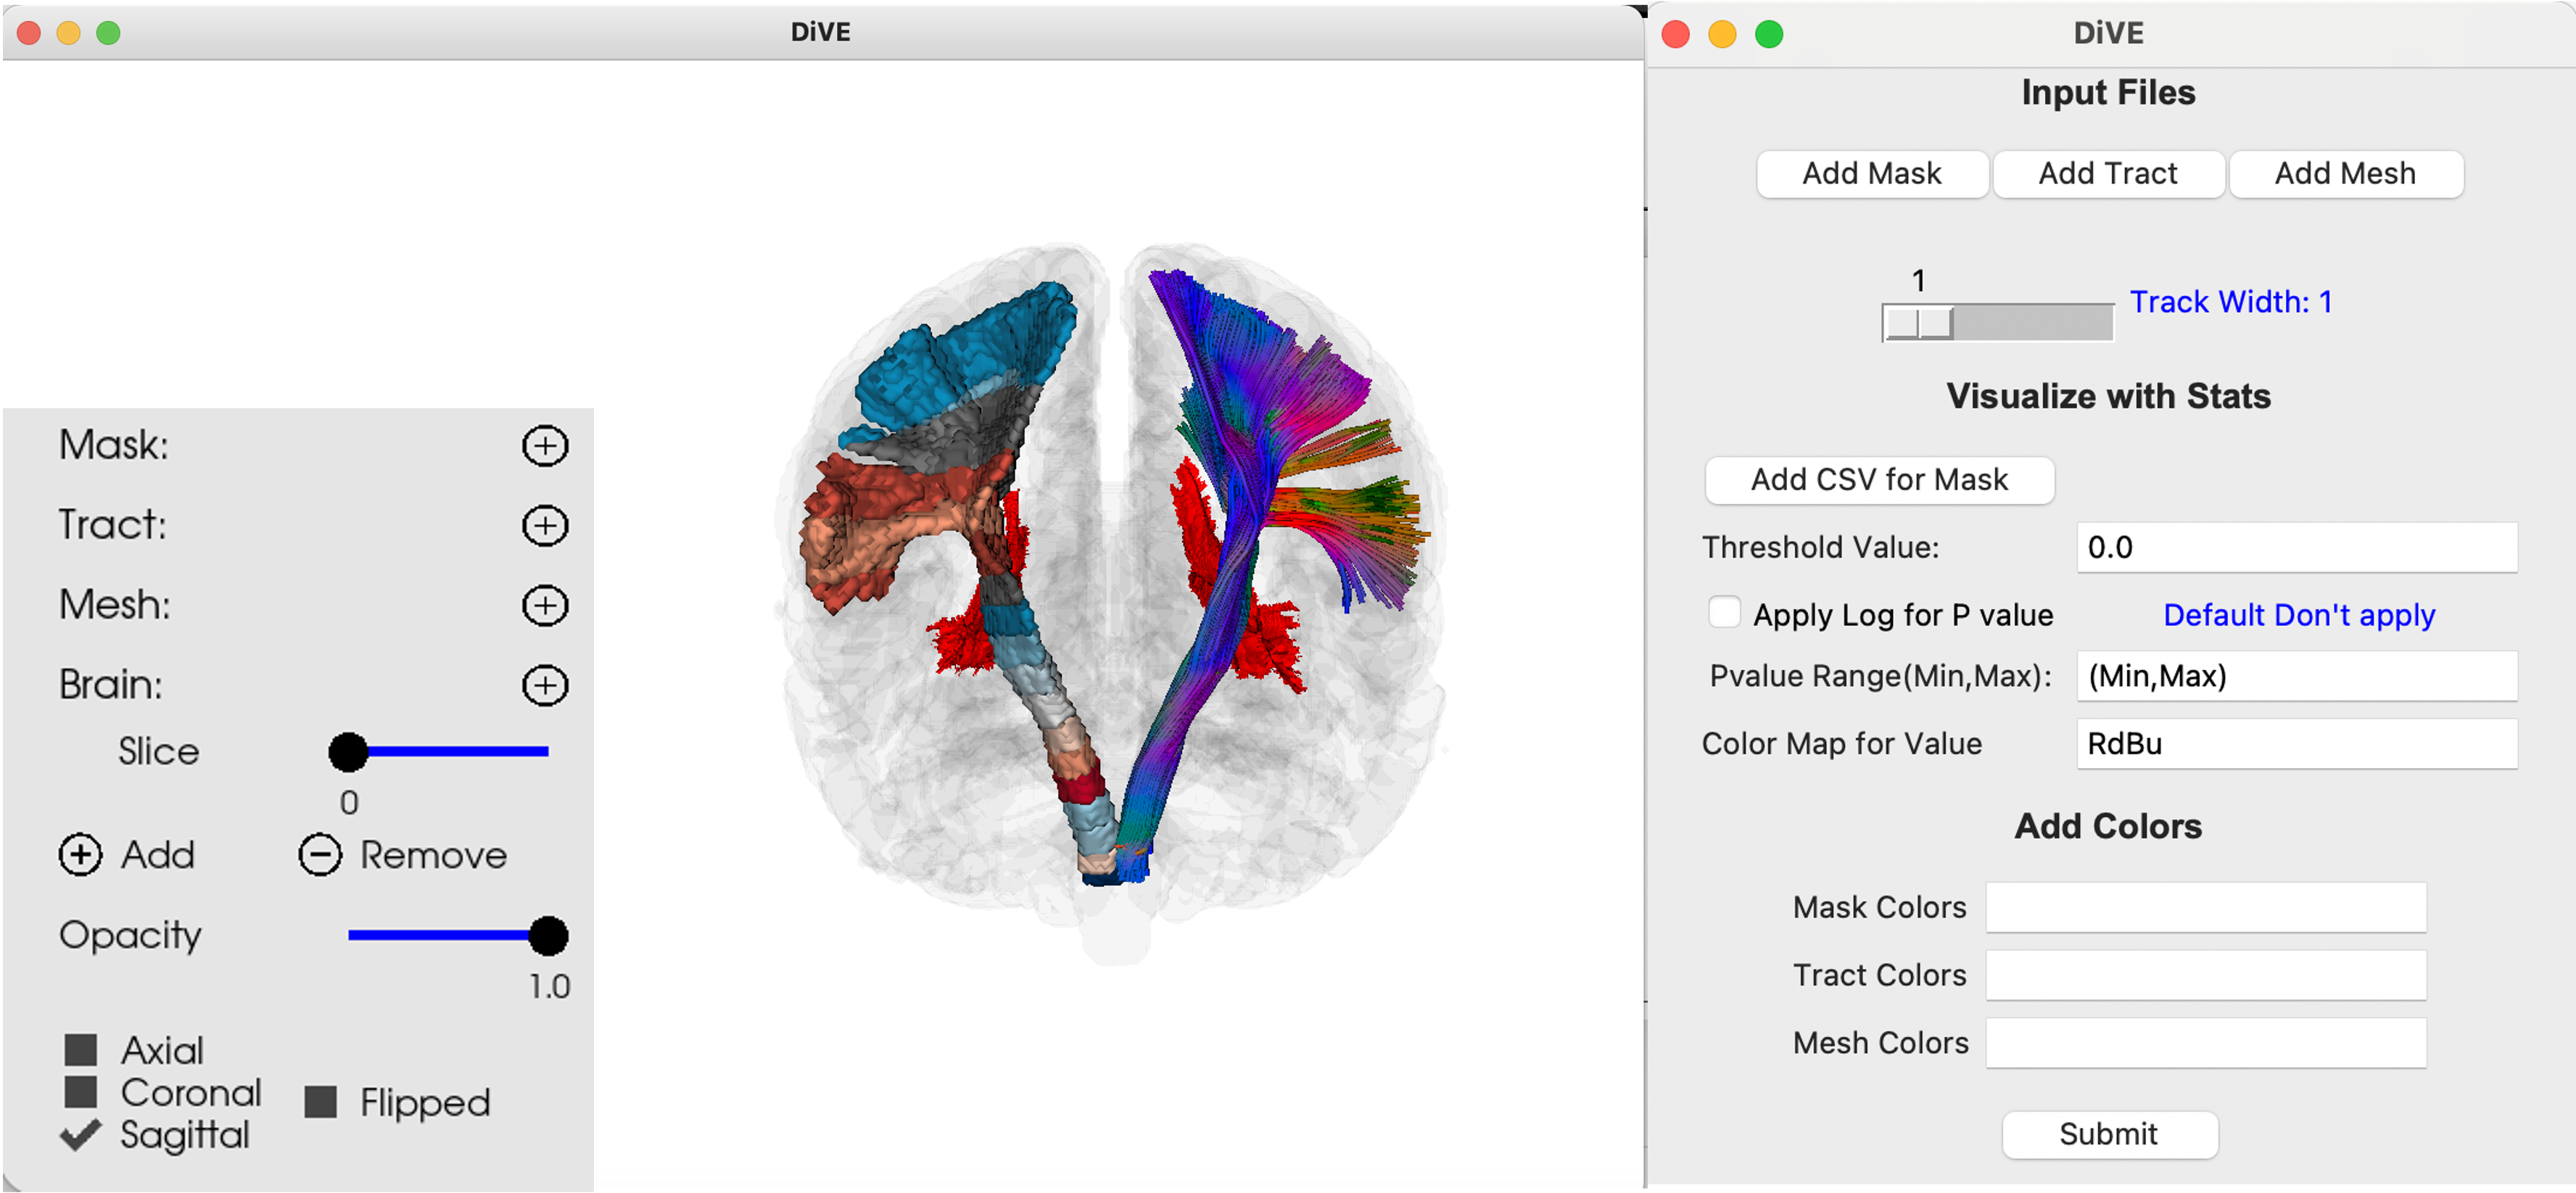
Diffusion Visualization and Explorer (DiVE) is a tool designed for visualizing medical imaging data. It allows users to visualize tractography in various formats (TRK, TCK, TRX, VTK), binary masks in NIfTI format, and meshes in VTK format. Users also have the flexibility to load multiple Regions of Interest (ROIs) in different combinations, whether they are exclusively of one type (mesh, mask, or tract) or a combination of types. Additionally, users can toggle between 3D visualization and saving the output by specifying a designated path.
This is an example of how you may give instructions on setting up your project locally. To get a local copy up and running follow these simple example steps.
pip install dive-mri- Choose Type: Use the type of ROI type (Mask/Mesh/Tract/Brain) to open the drop down having the names of all the files of that type, to select that required ROI.
- Change View: Click on the buttons to change the view to Sagittal/Coronal/Axial view.
- Choose Slice: Change the brain slice value based on the selected view (a brain_2d file is required to use this)
- Change Opacity (Streamlines, Mask, Mesh, Slice): Use the sliders to change the opacity of the file for a selected file.
- Add Button: To add more items, click the add button and choose the type of file you want to add.
- Remove Button: To remove a specific file, select it using the Choose type and then click this button.
Here are few example of how to use the code for specific features.
Rendering Tract/Mask/Mesh :
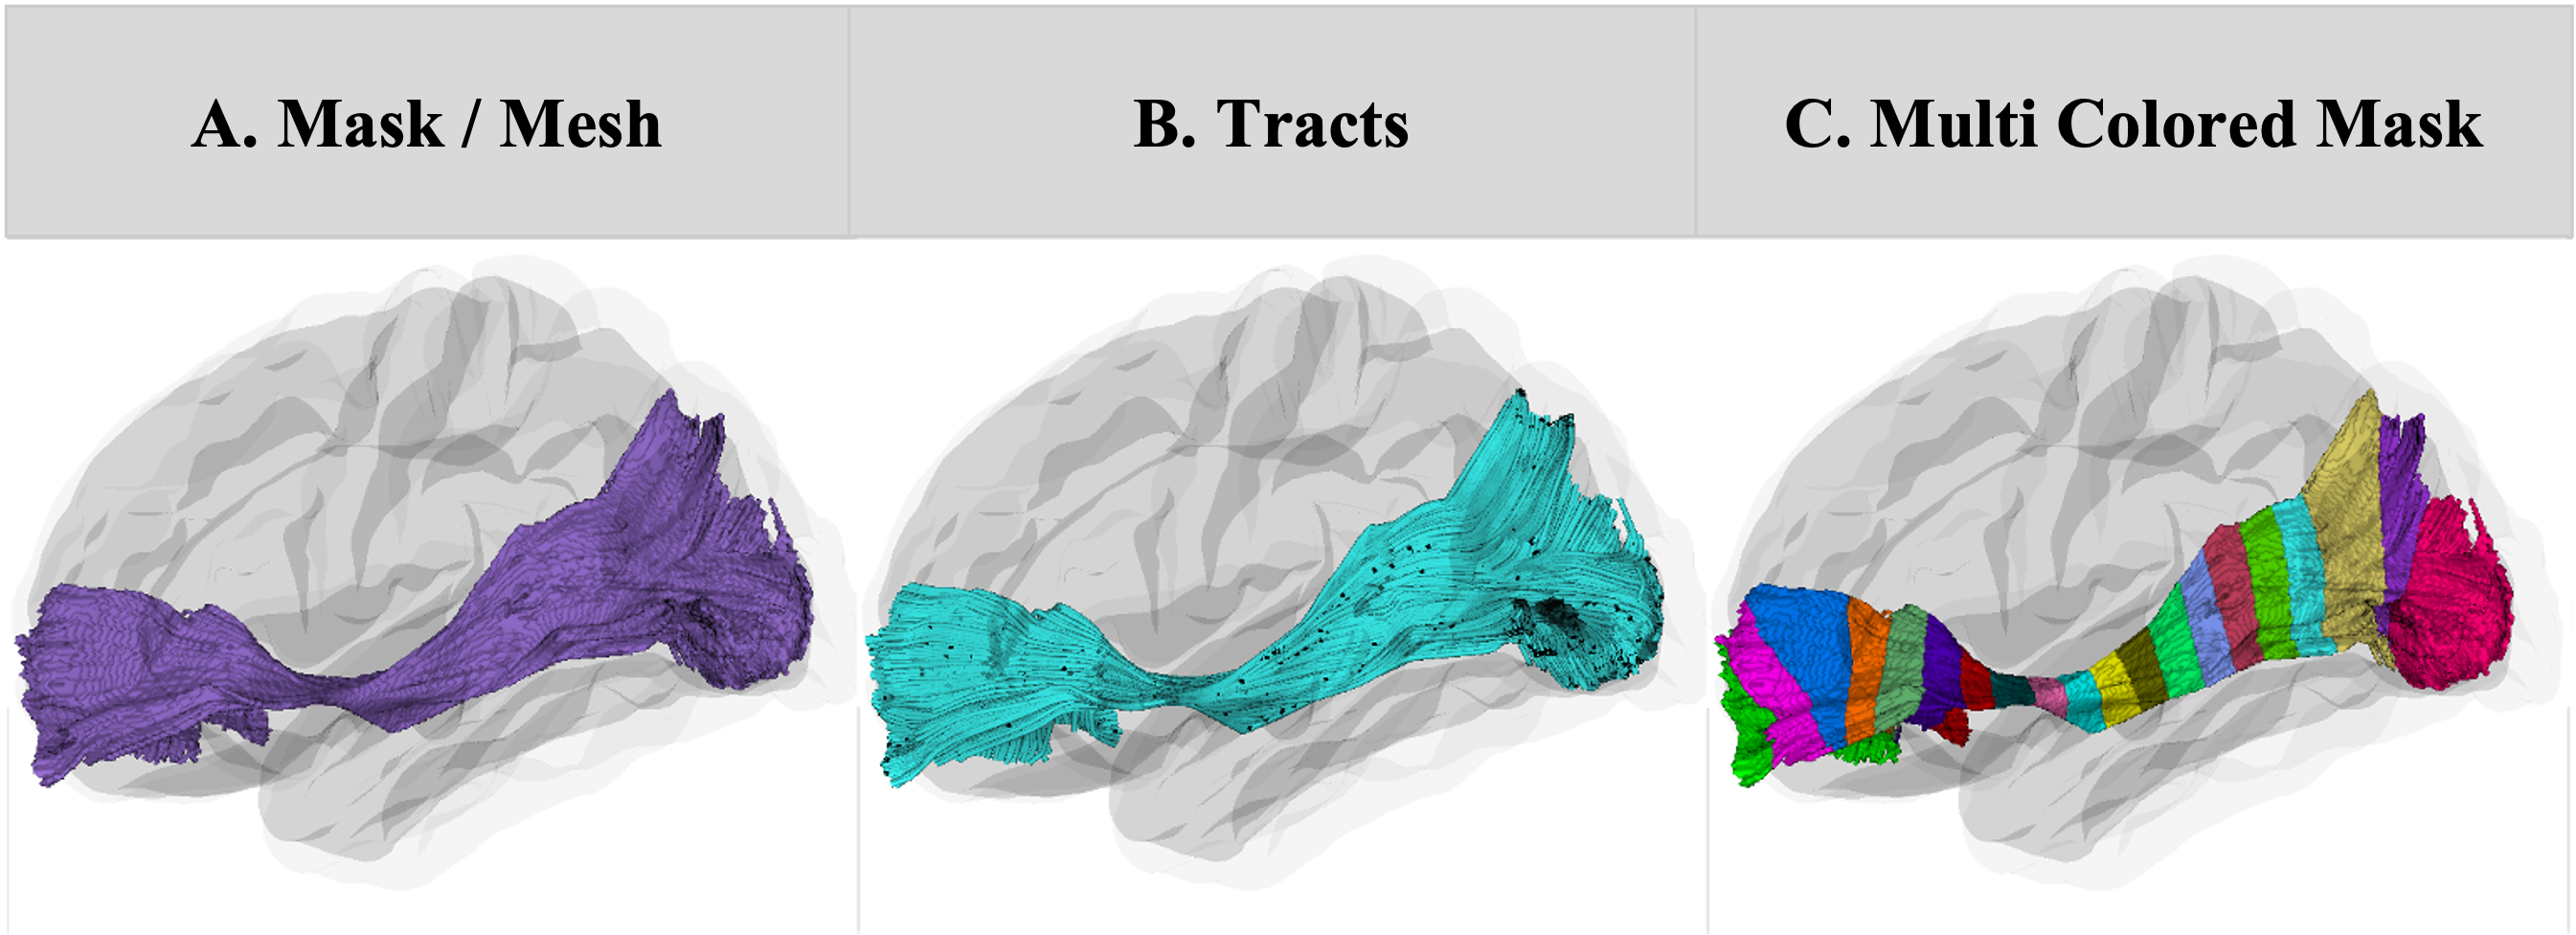
The user can give a 3D region of interest label image in NIFTI format and the tool will render it as a set of 3D contours (Figure A). Tract rendering can be conducted across all common formats (trk, tck, trx, vtk), with user defined coloring options, as well as available defaults (Figure B). Each fiber tract is displayed as tubes with a user-defined width. The tool applies either the color specified by the user or a random color for single labeled masks and chooses a set of distinct colors for multi-labeled masks using “distinctipy” or uses the colormap specified by the user (Figure C). DiVE also allows for the overlay of NIFTI masks and surface meshes on the fiber tracts, which can map scalar values to color or opacity, providing insights into tissue microstructure. The tool supports backgrounds using either a 3D glass brain or 2D slices. Visualization can be done in any stereotaxic space.
Note: Specific Use cases can be found in open Examples
Lobes - Siddharth Narula, Iyad Ba Gari, Neda Janahshad