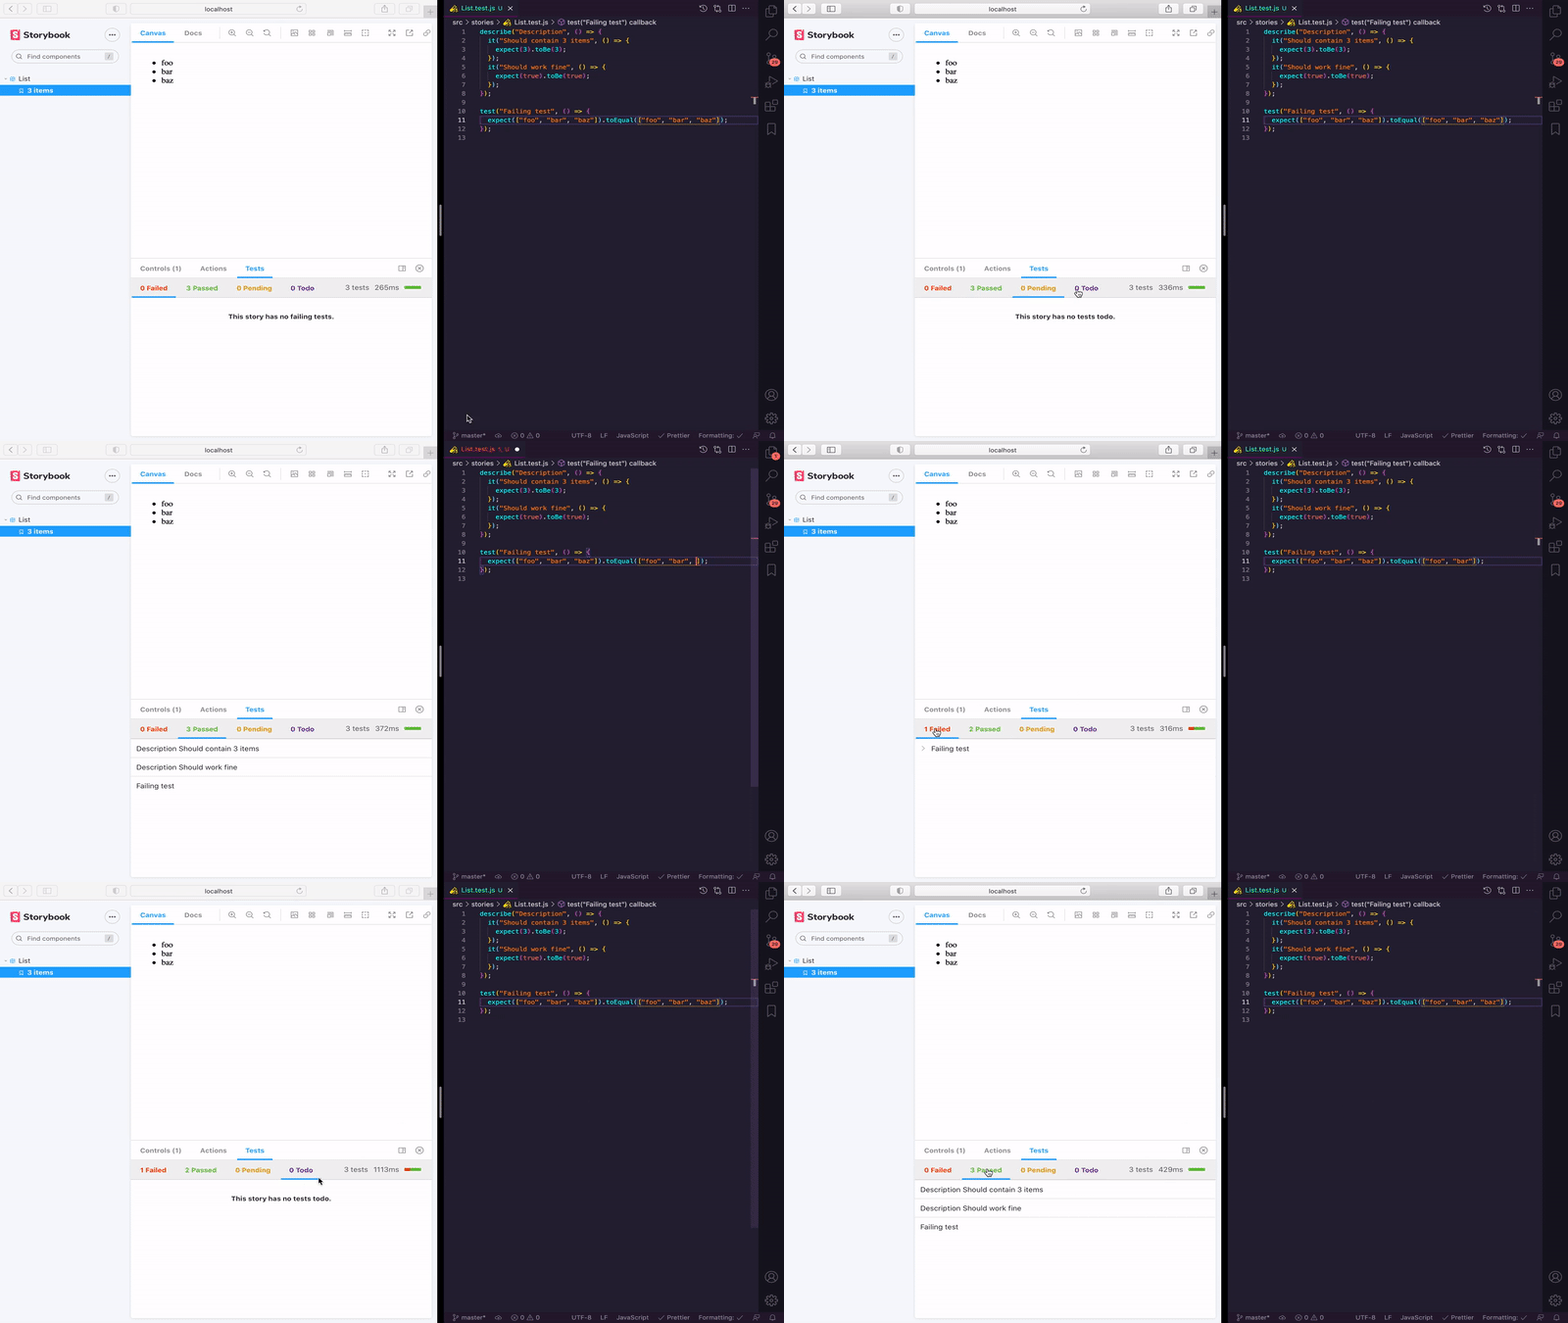
Storybook addon for inspecting Jest unit test results.
Check out the above Live Storybook.
Install this addon by adding the @storybook/addon-jest as a development dependency with:
npm install --save-dev @storybook/addon-jest
Or if you're using yarn as a package manager:
yarn add --dev @storybook/addon-jest
Register the addon in your .storybook/main.js:
module.exports = {
  addons: ['@storybook/addon-jest'],
};When running Jest, be sure to save the results in a JSON file:
"scripts": {
  "test:generate-output": "jest --json --outputFile=.jest-test-results.json"
}
You may want to add the result file to .gitignore, since it's a generated file:
.jest-test-results.json
But much like lockfiles and snapshots, checking-in generated files can have certain advantages as well. It's up to you. We recommend to do check in the test results file so starting Storybook from a clean git clone doesn't require running all tests first, but this can mean you'll encounter merge conflicts on this file in the future (re-generating this file is very similar to re-generating lockfiles and snapshots).
Ensure the generated test-results file exists before you start Storybook. During development, you will likely start Jest in watch-mode and so the JSON file will be re-generated every time code or tests change.
npm run test:generate-output -- --watchAnd in the jest config, add jest-test-results.json to modulePathIgnorePatterns to avoid an infinite loop.
modulePathIgnorePatterns: ['node_modules', 'jest-test-results.json'],This change will then be HMR (hot module reloaded) using webpack and displayed by this addon.
If you want to pre-run Jest automatically during development or a static build, you may need to consider that if your tests fail, the script receives a non-0 exit code and will exit.
You could create a prebuild:storybook npm script, which will never fail by appending || true:
"scripts": {
  "test:generate-output": "jest --json --outputFile=.jest-test-results.json || true",
  "test": "jest",
  "prebuild:storybook": "npm run test:generate-output",
  "build:storybook": "build-storybook -c .storybook -o build/",
  "predeploy": "npm run build:storybook",
  "deploy": "gh-pages -d build/",
}Assuming that you have already created a test file for your component (e.g., MyComponent.test.js).
In your story file, add a decorator to your story's default export to display the results:
// MyComponent.stories.js|jsx

import MyComponent from './MyComponent';

import results from '../.jest-test-results.json';

import { withTests } from '@storybook/addon-jest';

export default {
  component: MyComponent,
  title: 'MyComponent',
  decorators: [withTests({ results })],
};
You can also add multiple tests results within your story by including the jest parameter, for example:
// MyComponent.stories.js|jsx

import MyComponent from './MyComponent';

import results from '../.jest-test-results.json';

import { withTests } from '@storybook/addon-jest';

export default {
  component: MyComponent,
  title: 'MyComponent',
  decorators: [withTests({ results })],
};

const Template = (args) => <MyComponent {....args} />;

export const Default = Template.bind({});
Default.args = {
  text: 'Jest results in Storybook',
};
Default.parameters = {
  jest: ['MyComponent.test.js', 'MyOtherComponent.test.js']
};To avoid importing the results of the tests in each story, you can update
your .storybook/preview.js and include a decorator allowing you to display the results only for the stories that have the jest parameter defined:
// .storybook/preview.js

import { withTests } from '@storybook/addon-jest';

import results from '../.jest-test-results.json';

export const decorators = [
  withTests({
    results,
  }),
];
Then in your story file:
// MyComponent.stories.js|jsx

import MyComponent from './MyComponent';

export default {
  component: MyComponent,
  title: 'MyComponent',
};

const Template = (args) => <MyComponent {....args} />;

export const Default = Template.bind({});
Default.args={
  text: 'Jest results in Storybook',
};
Default.parameters = {
  jest: 'MyComponent.test.js',
};
The jest parameter will default to inferring from your story file name if not provided. For example, if your story file is MyComponent.stories.js,
then "MyComponent" will be used to find your test file results. It currently doesn't work in production environments.
You can disable the addon for a single story by setting the jest parameter to {disable: true}:
// MyComponent.stories.js|jsx

import MyComponent from './MyComponent';

export default {
  component: MyComponent,
  title: 'MyComponent',
};

const Template = (args) => <MyComponent {...args} />;

export const Default = Template.bind({});

Default.args = {
  text: 'Jest results in Storybook',
};
Default.parameters = {
  jest: { disable: true },
};Using this addon with Angular will require some additional configuration. You'll need to install and configure Jest with jest-preset-angular.
Then, in your .storybook/preview.js, you'll need to add a decorator with the following:
// .storybook/preview.js

import { withTests } from '@storybook/addon-jest';

import results from '../.jest-test-results.json';

export const decorators = [
  withTests({
    results,
    filesExt: '((\\.specs?)|(\\.tests?))?(\\.ts)?$',
  }),
];
Finally, in your story, you'll need to include the following:
// MyComponent.stories.ts

import type { Meta, StoryFn } from '@storybook/angular';

import MyComponent from './MyComponent.component';

export default {
  component: MyComponent,
  title: 'MyComponent',
} as Meta;

const Template: StoryFn<MyComponent> = (args: MyComponent) => ({
  props: args,
});

export const Default = Template.bind({});
Default.parameters = {
  jest: 'MyComponent.component',
};
Example here
- options.results: OBJECT jest output results. mandatory
- filesExt: STRING test file extension. optional. This allows you to write "MyComponent" and not "MyComponent.test.js". It will be used as regex to find your file results. Default value is
((\\.specs?)|(\\.tests?))?(\\.js)?$. That means it will match: MyComponent.js, MyComponent.test.js, MyComponent.tests.js, MyComponent.spec.js, MyComponent.specs.js...
- Add coverage
- Display nested test better (describe)
- Display the date of the test
- Add unit tests
- Add linting
- Split
All ideas and contributions are welcome.
MIT © 2017-present Renaud Tertrais
