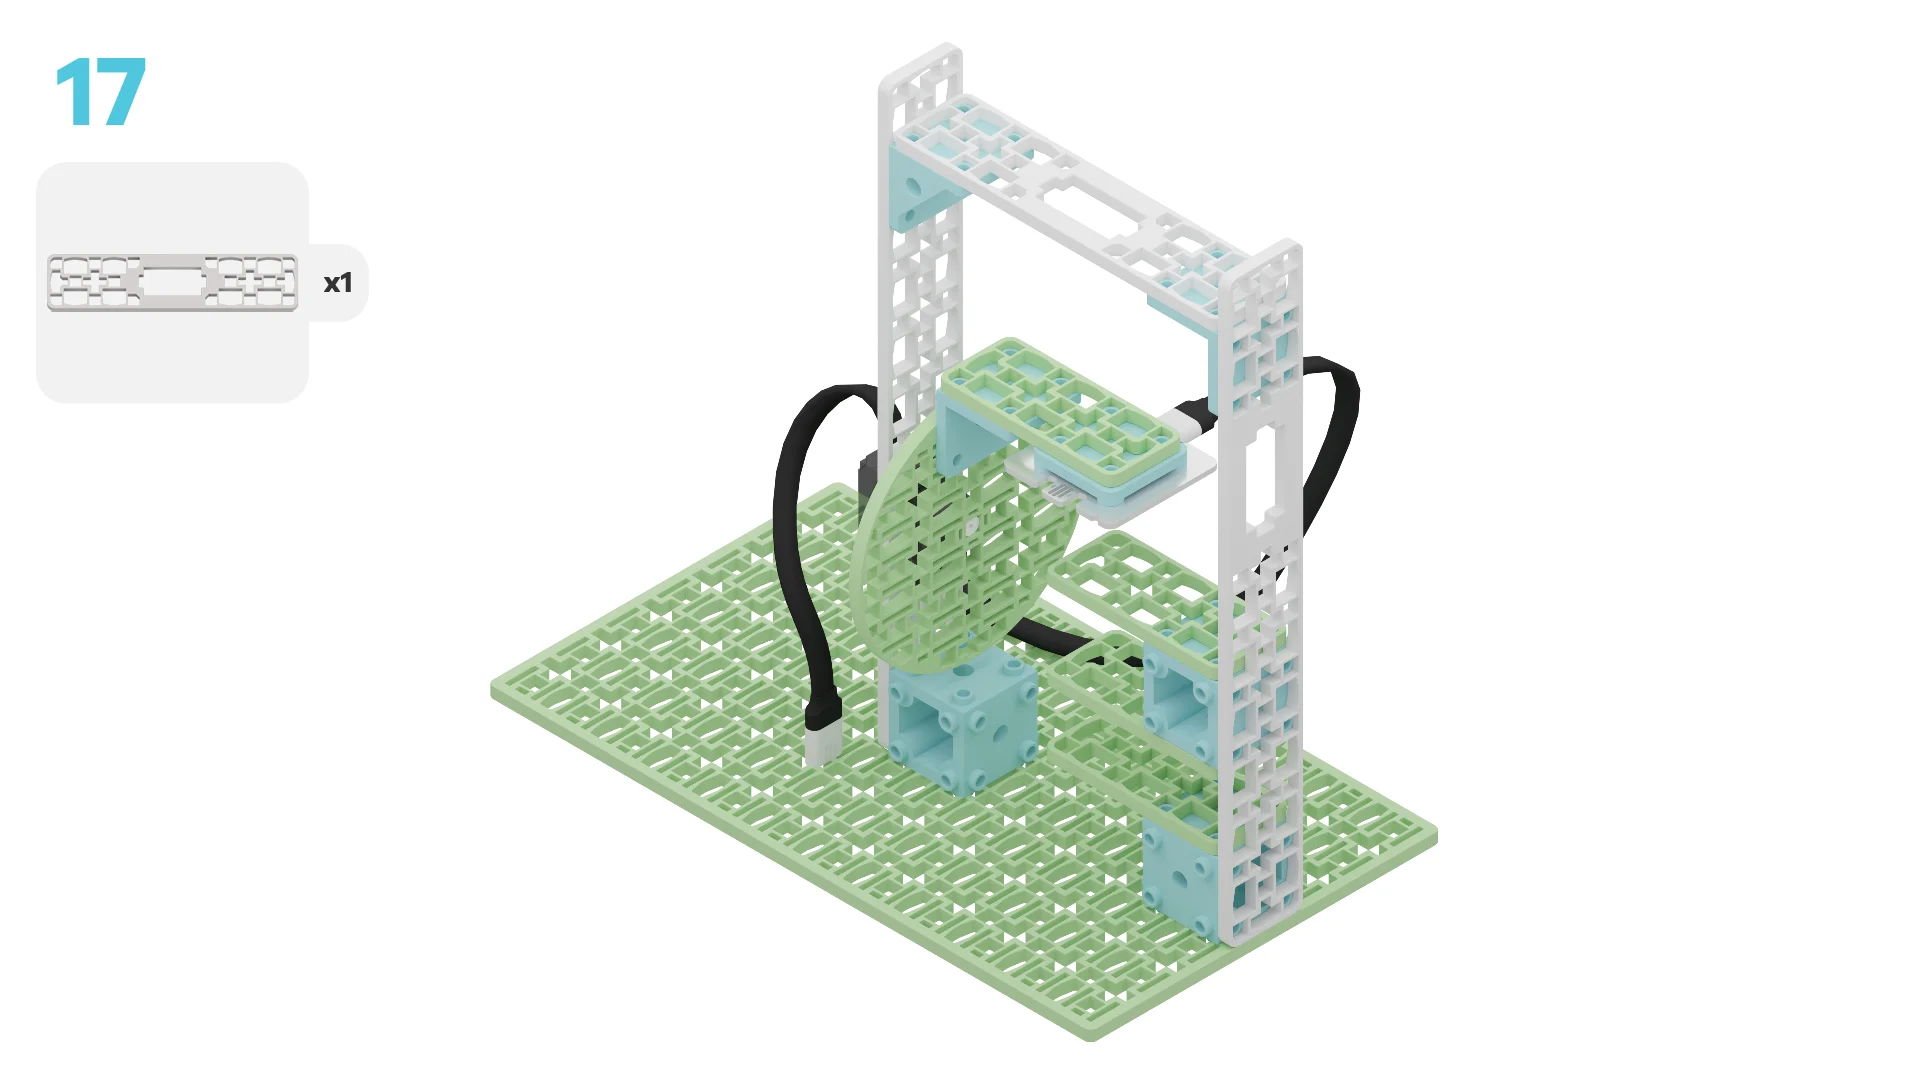
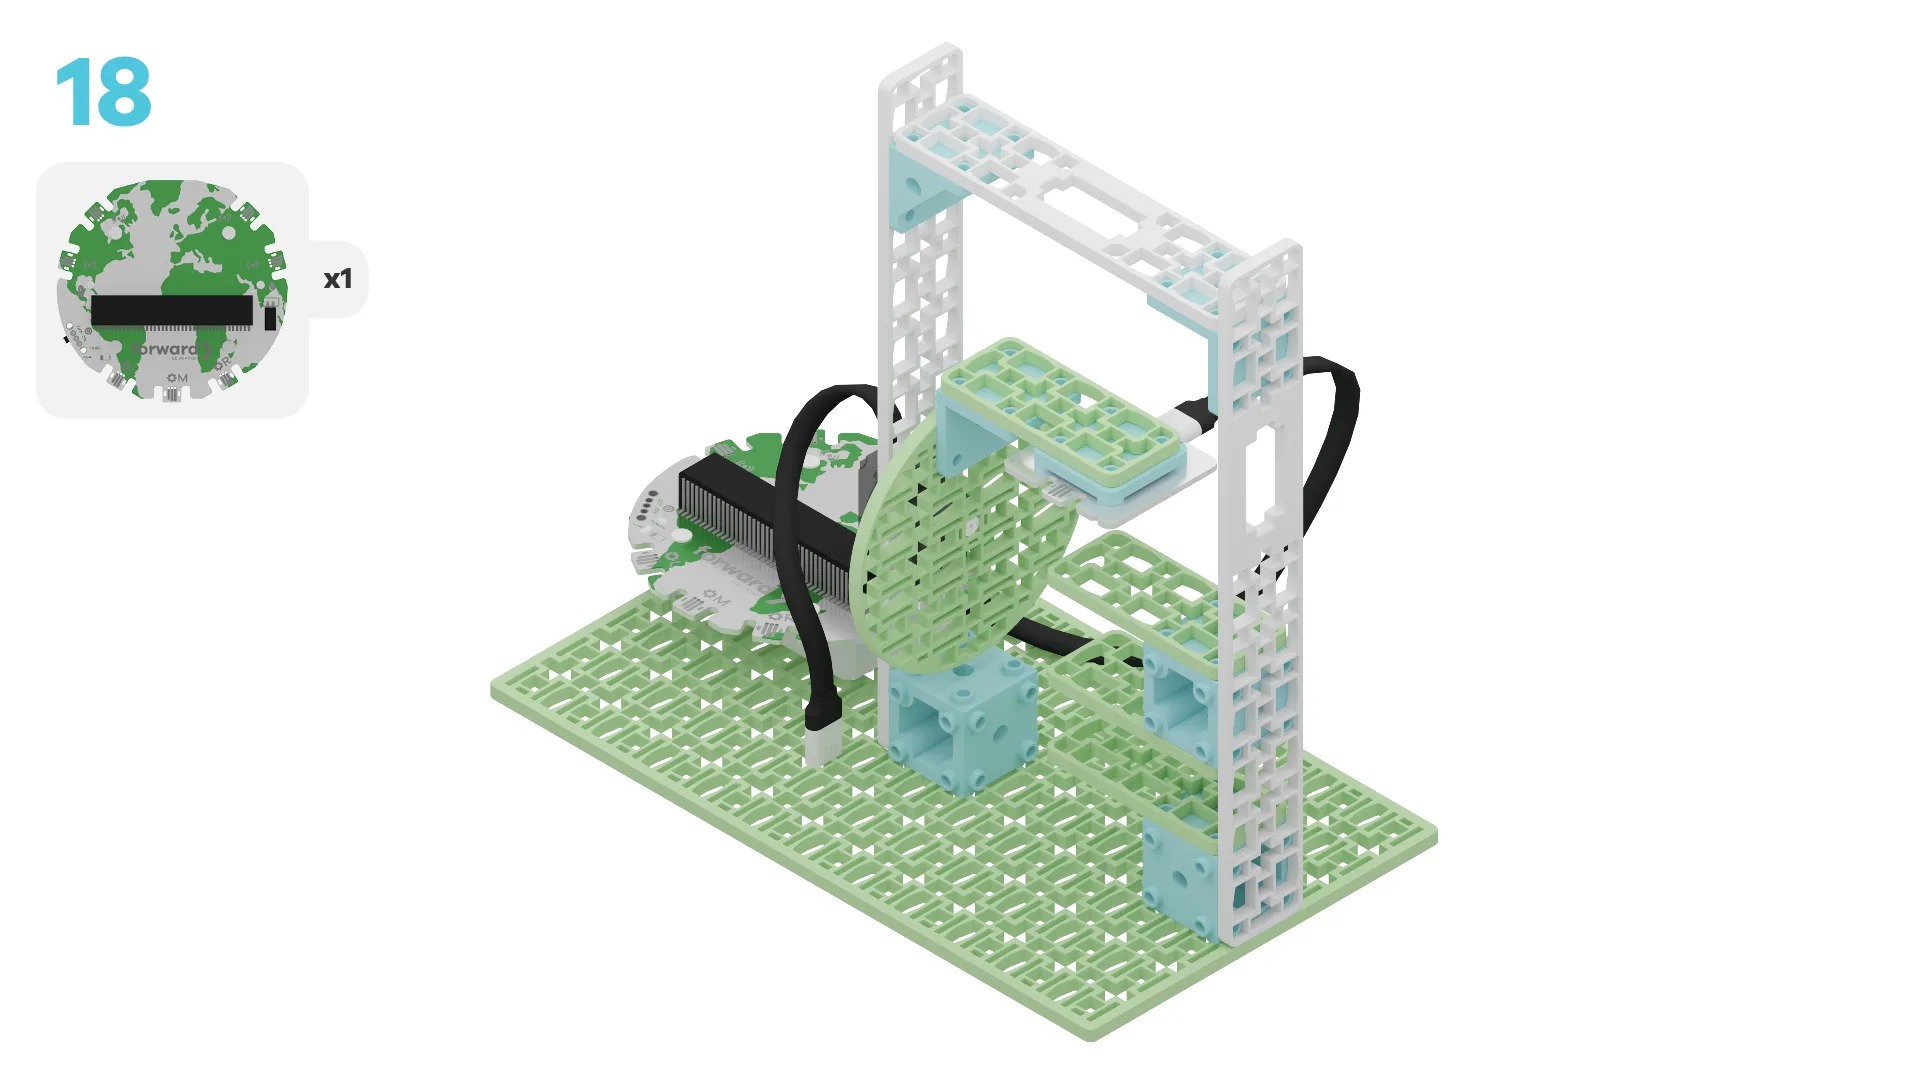
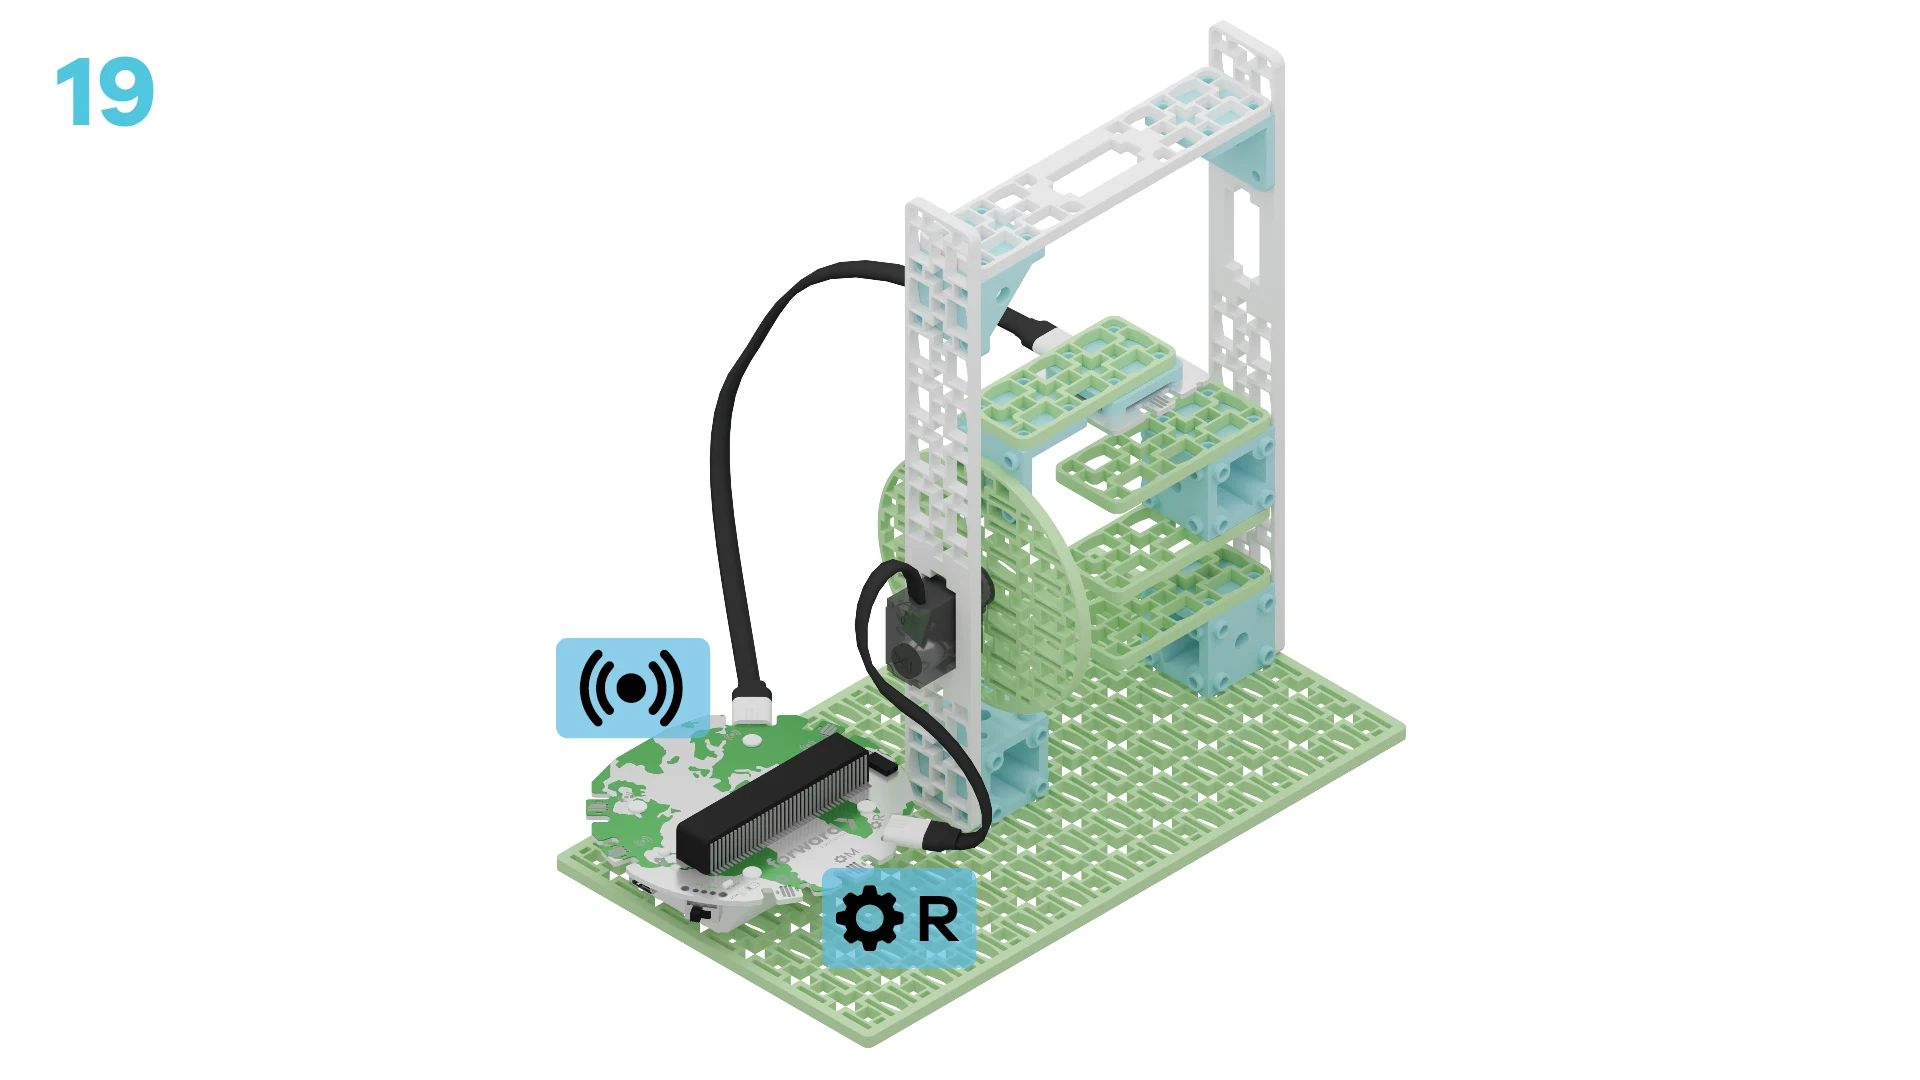
fwd-edu-breakout=github:climate-action-kits/pxt-fwd-edu/fwd-breakout
sonar=github:climate-action-kits/pxt-fwd-edu
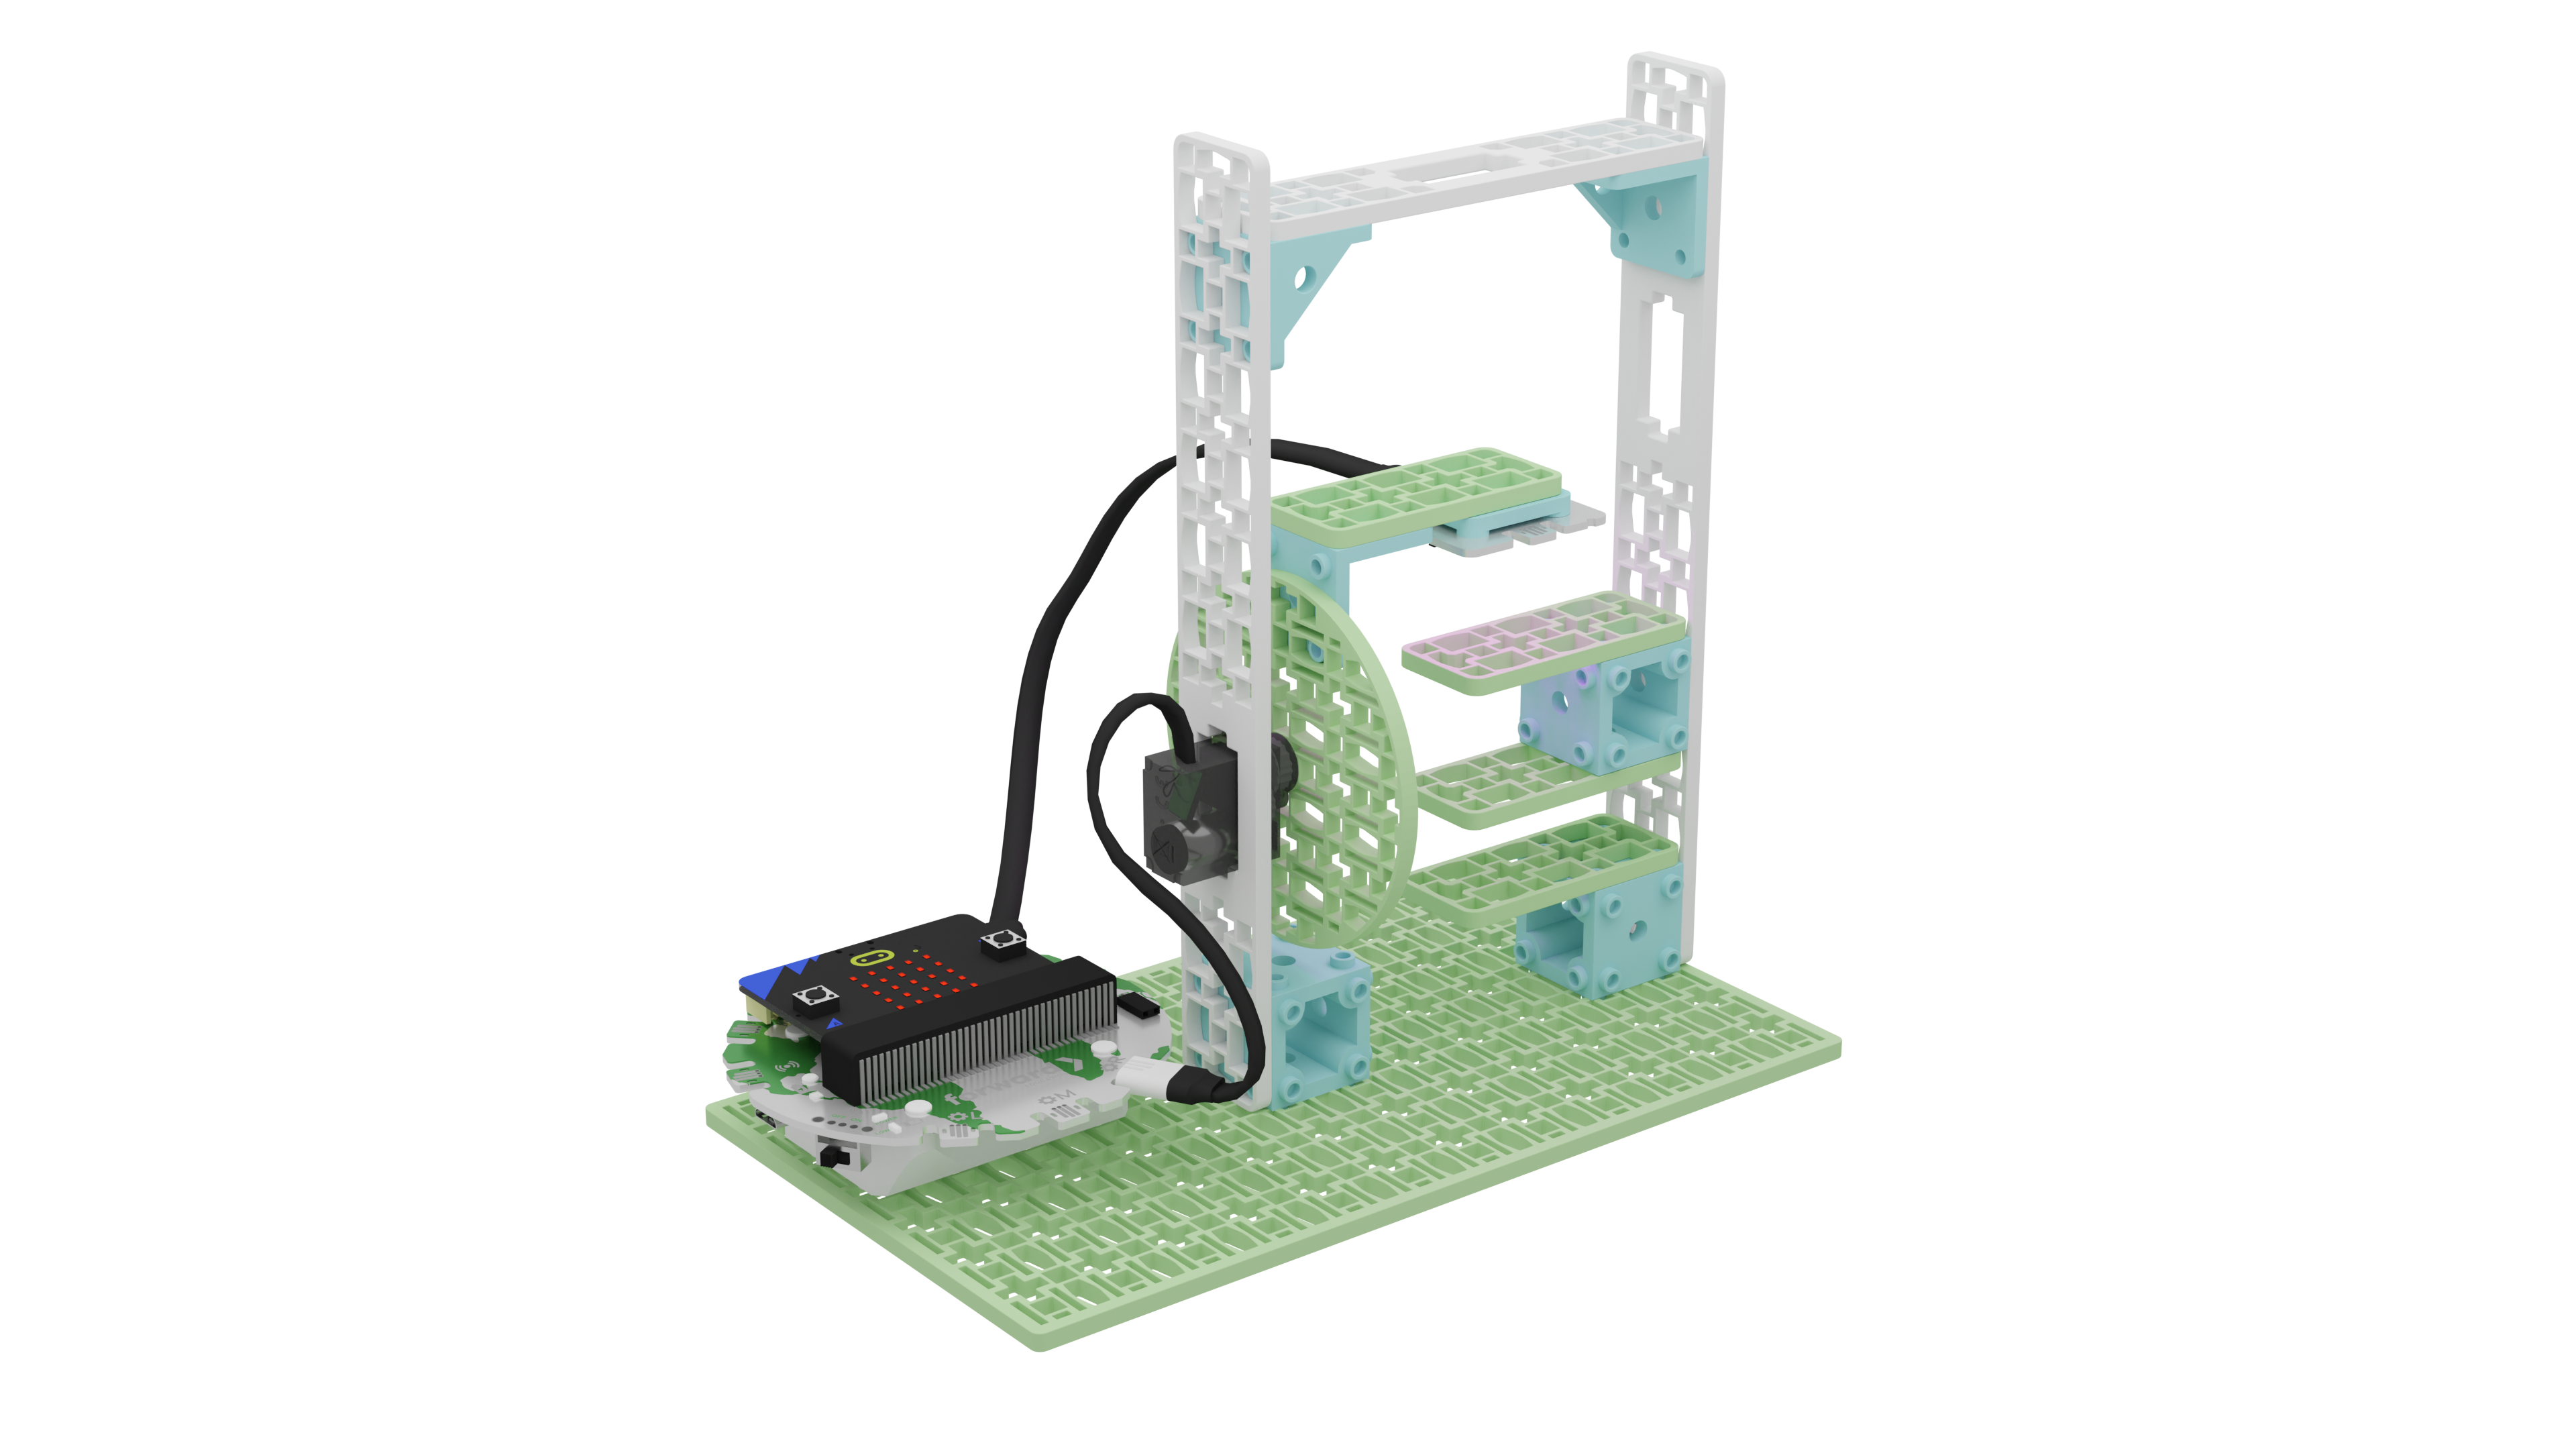
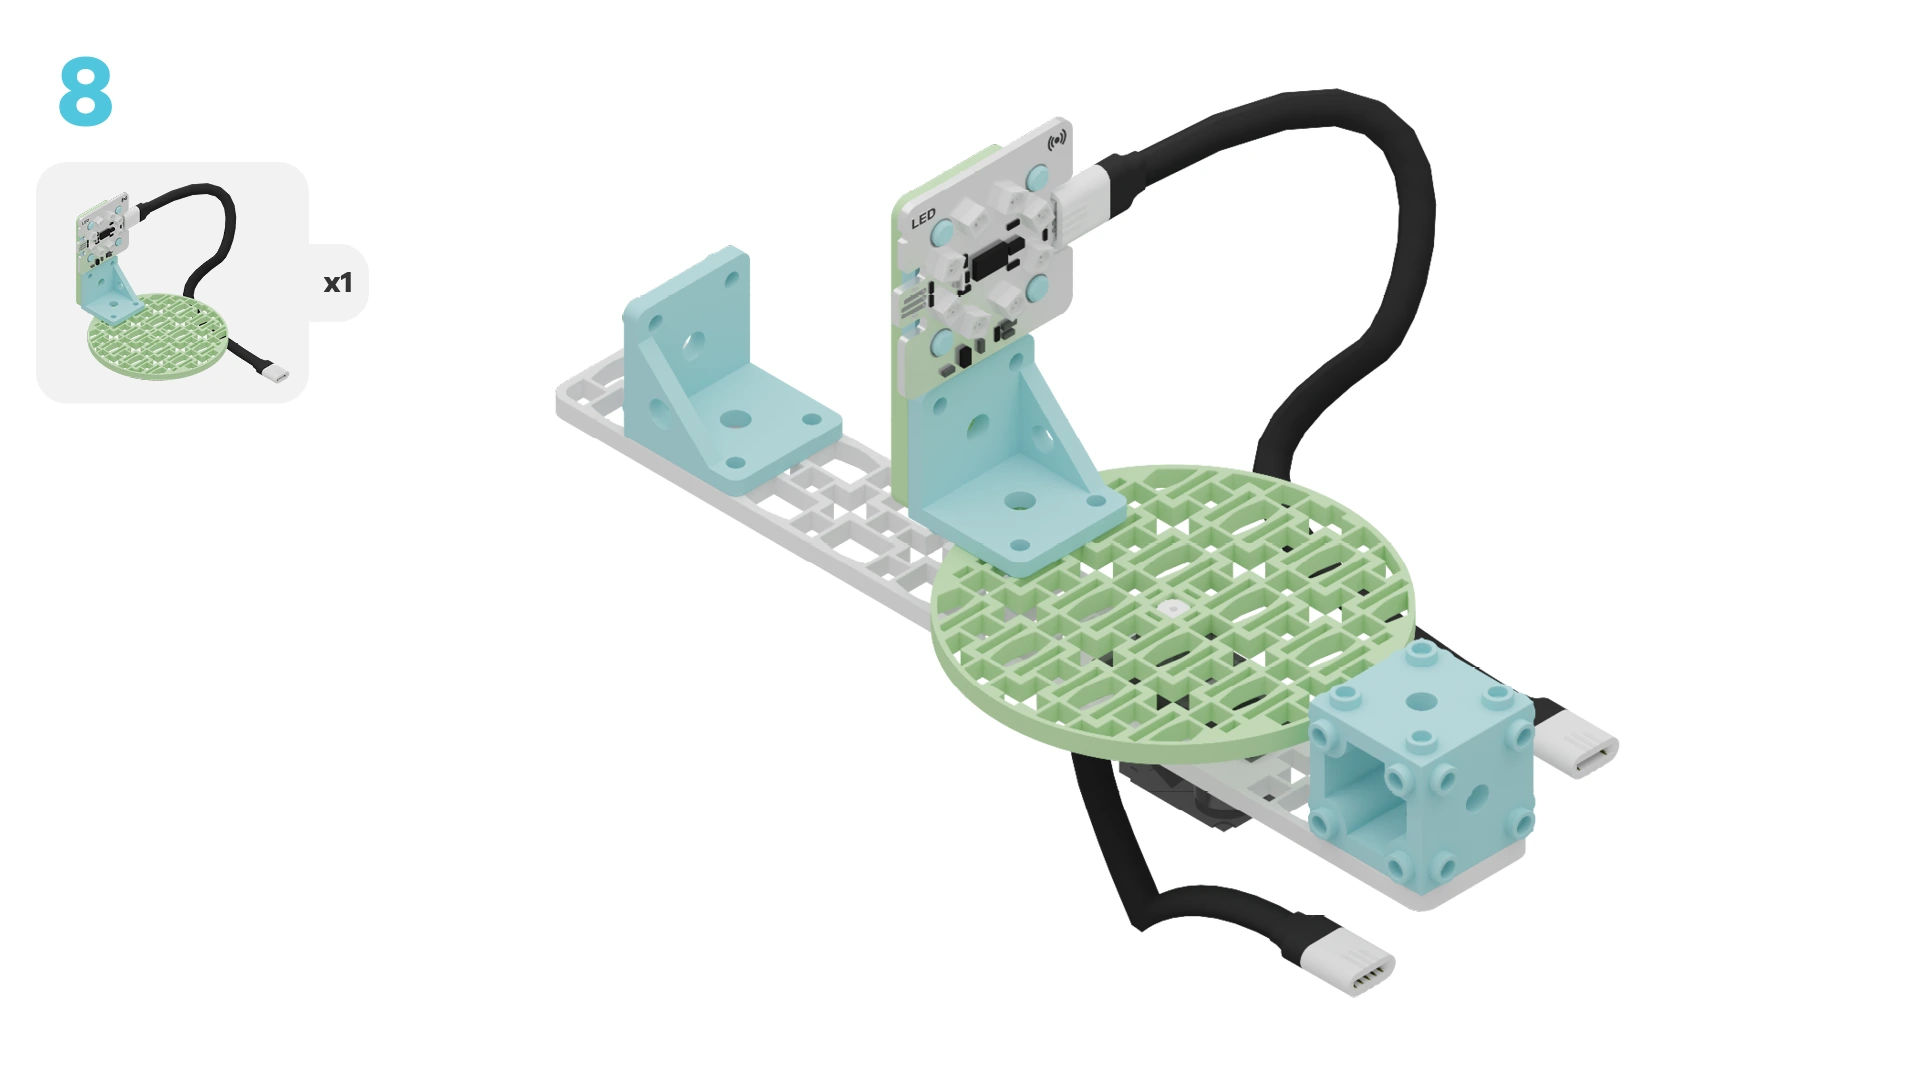
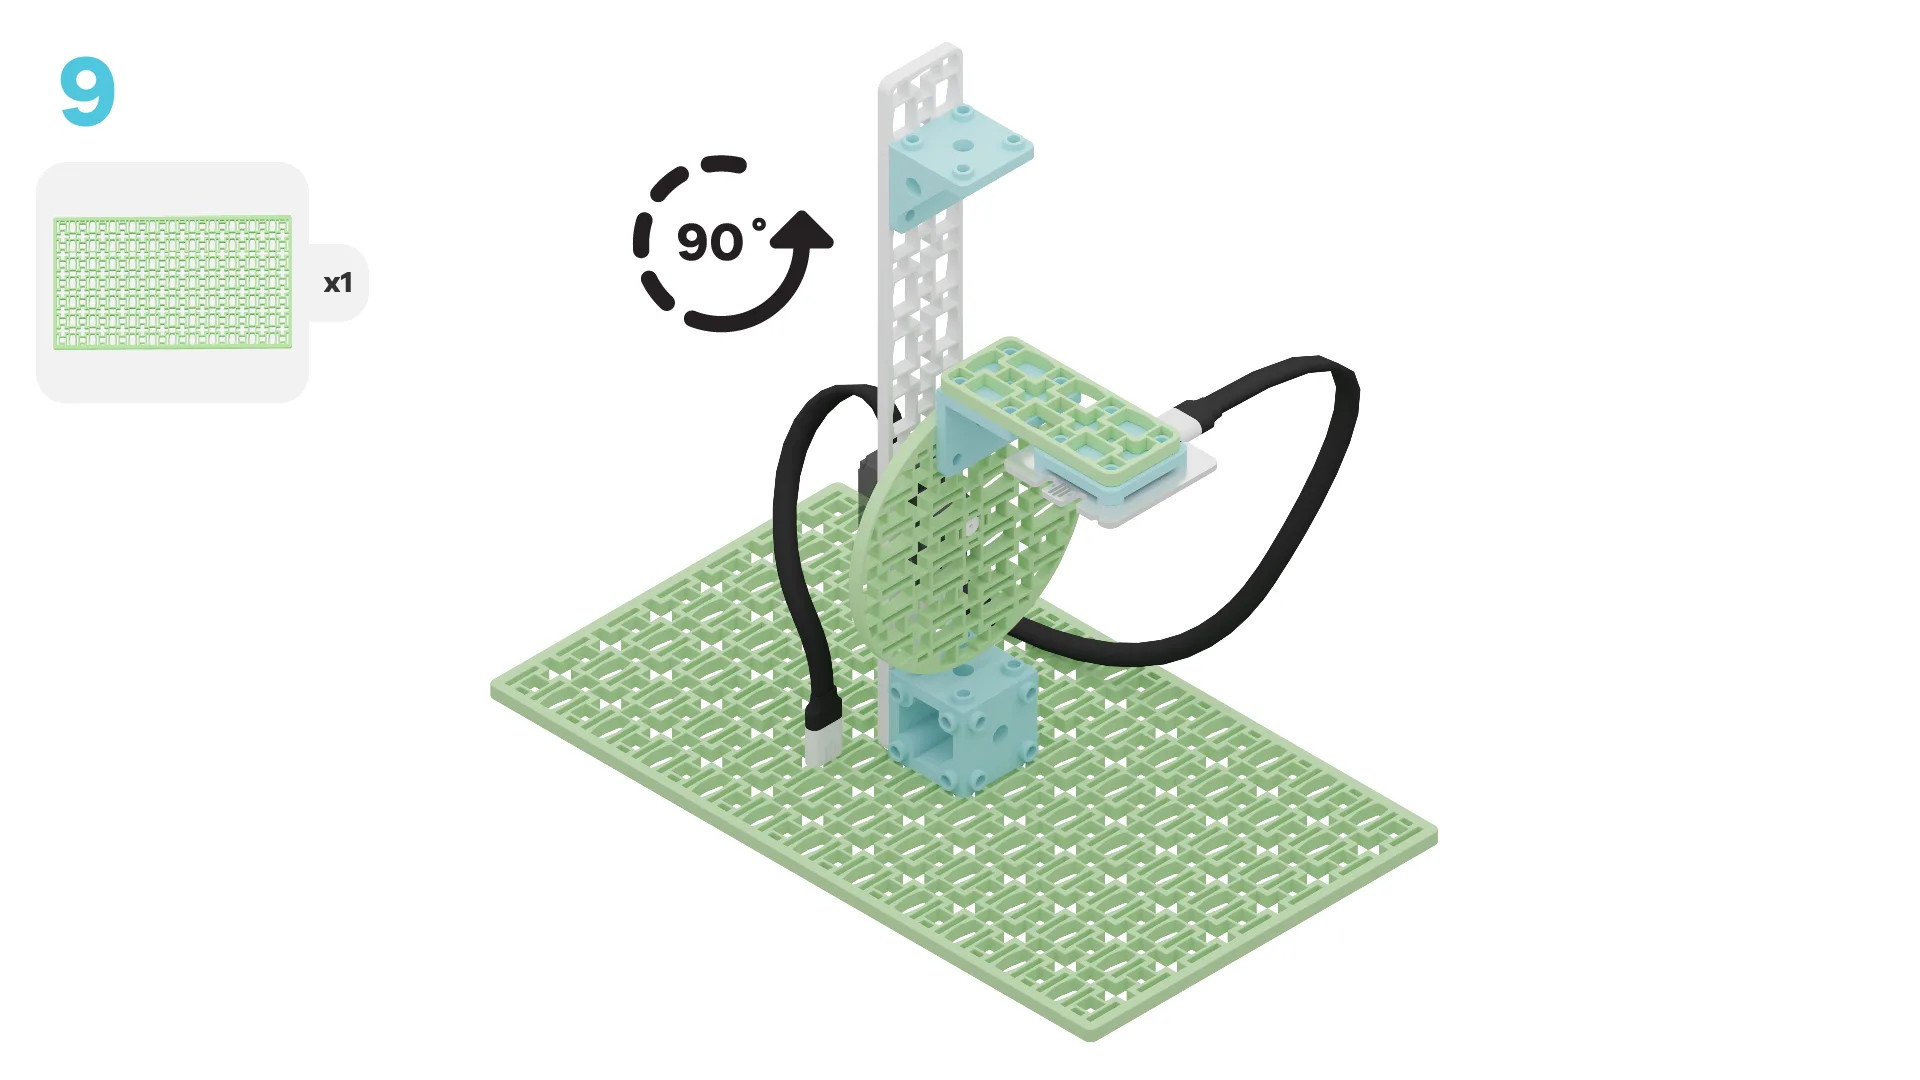
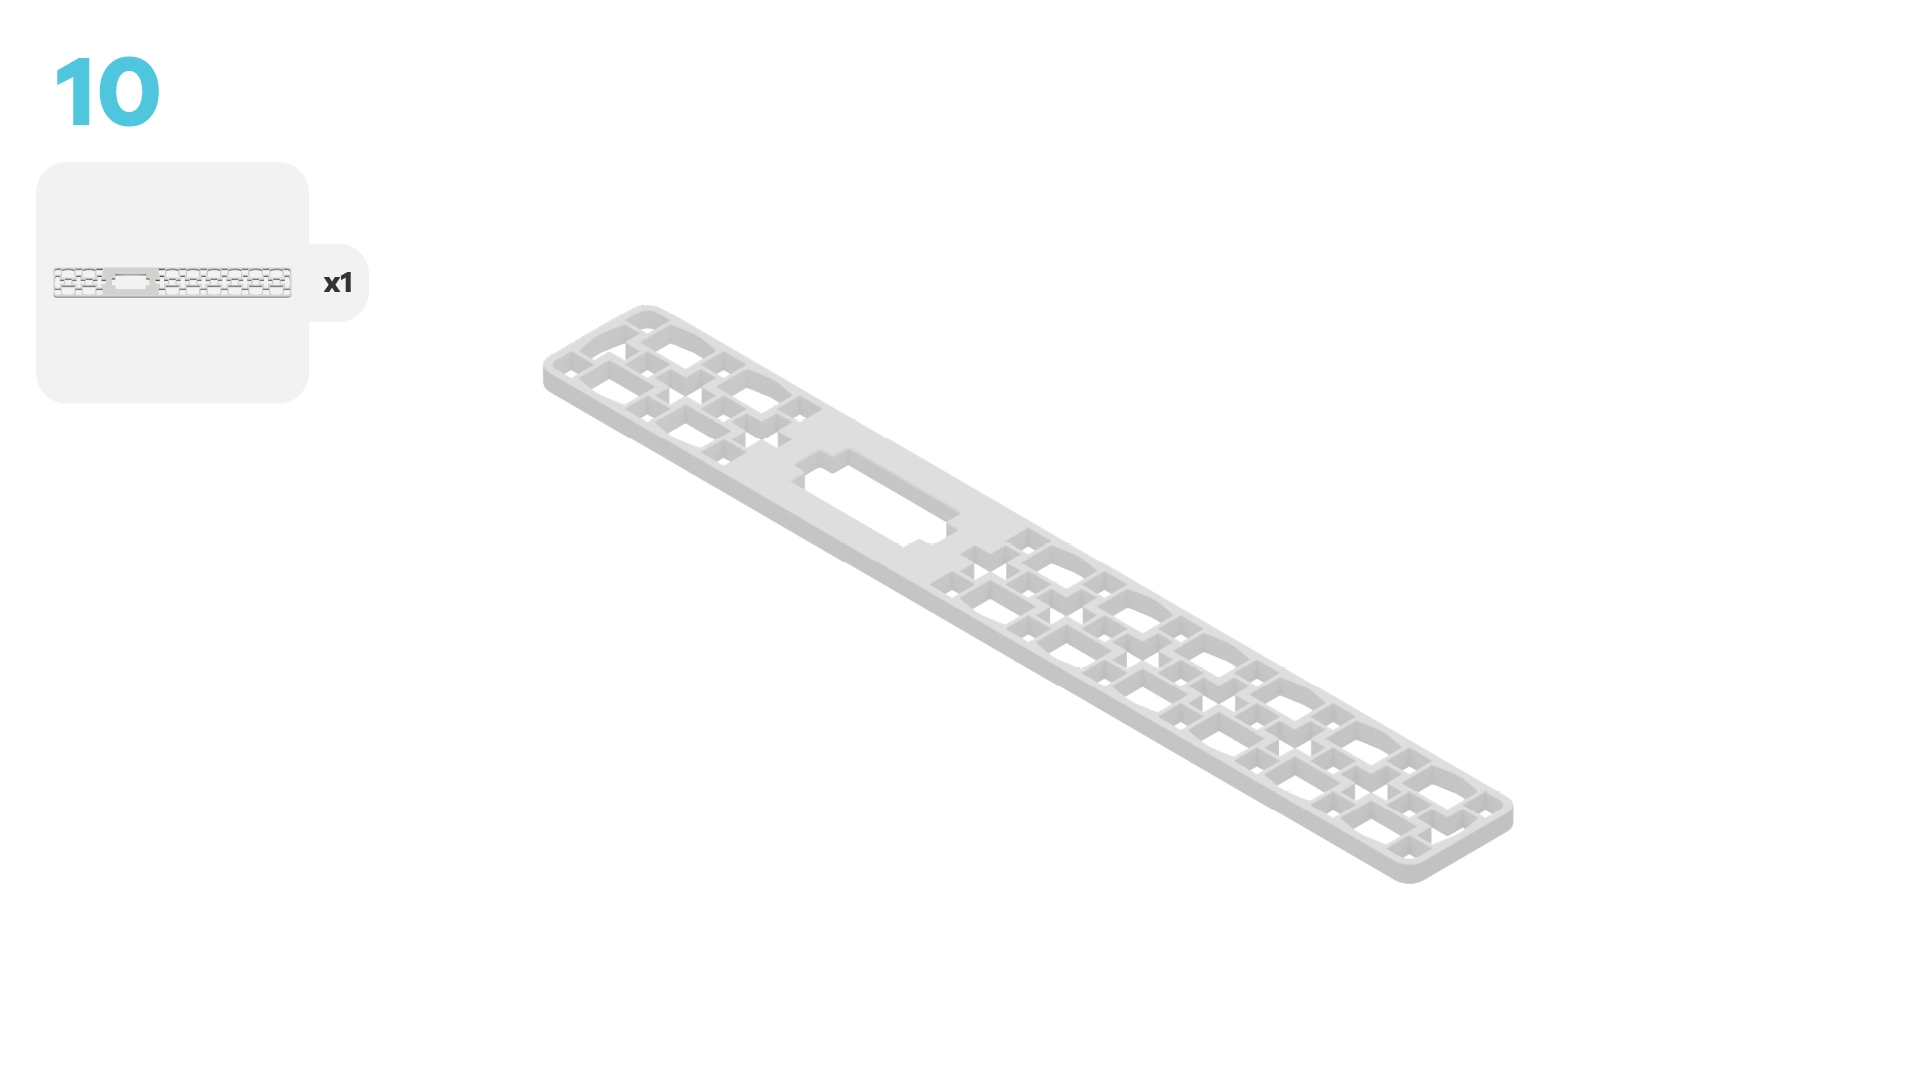
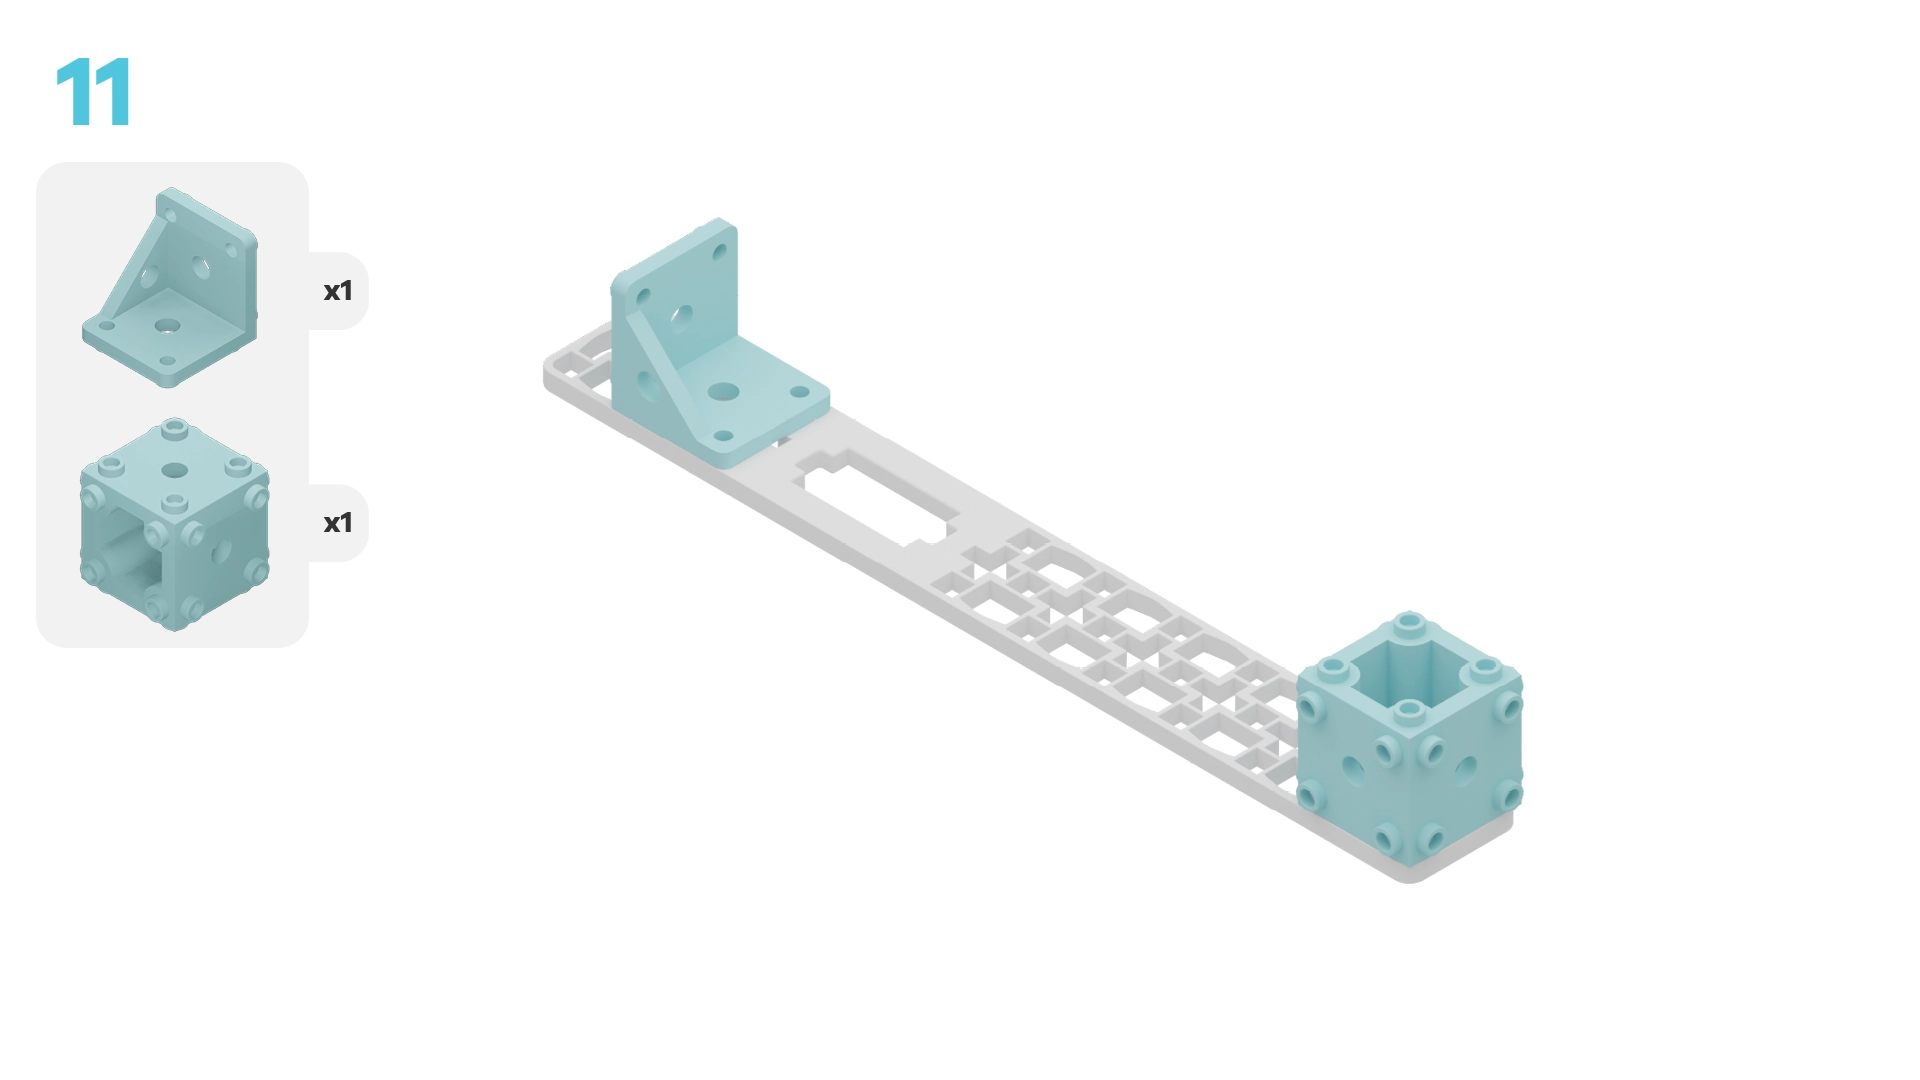
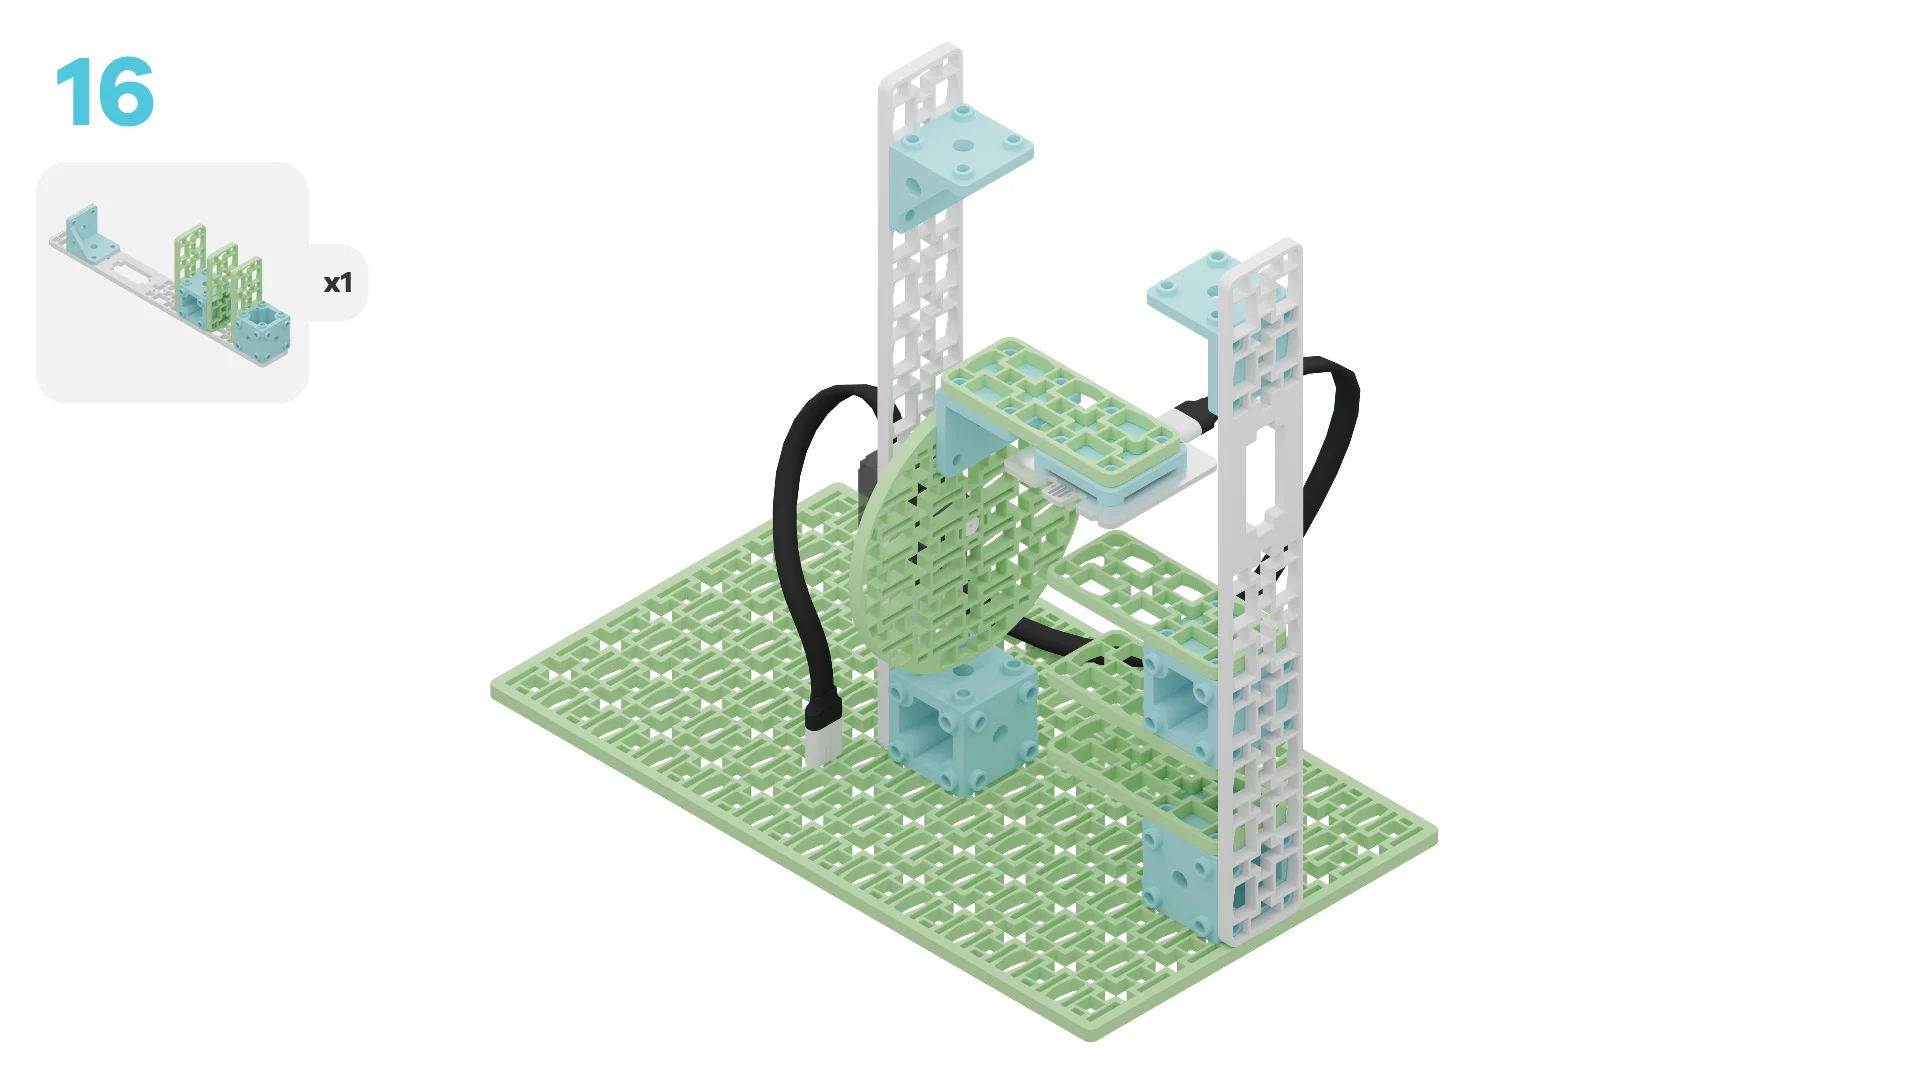
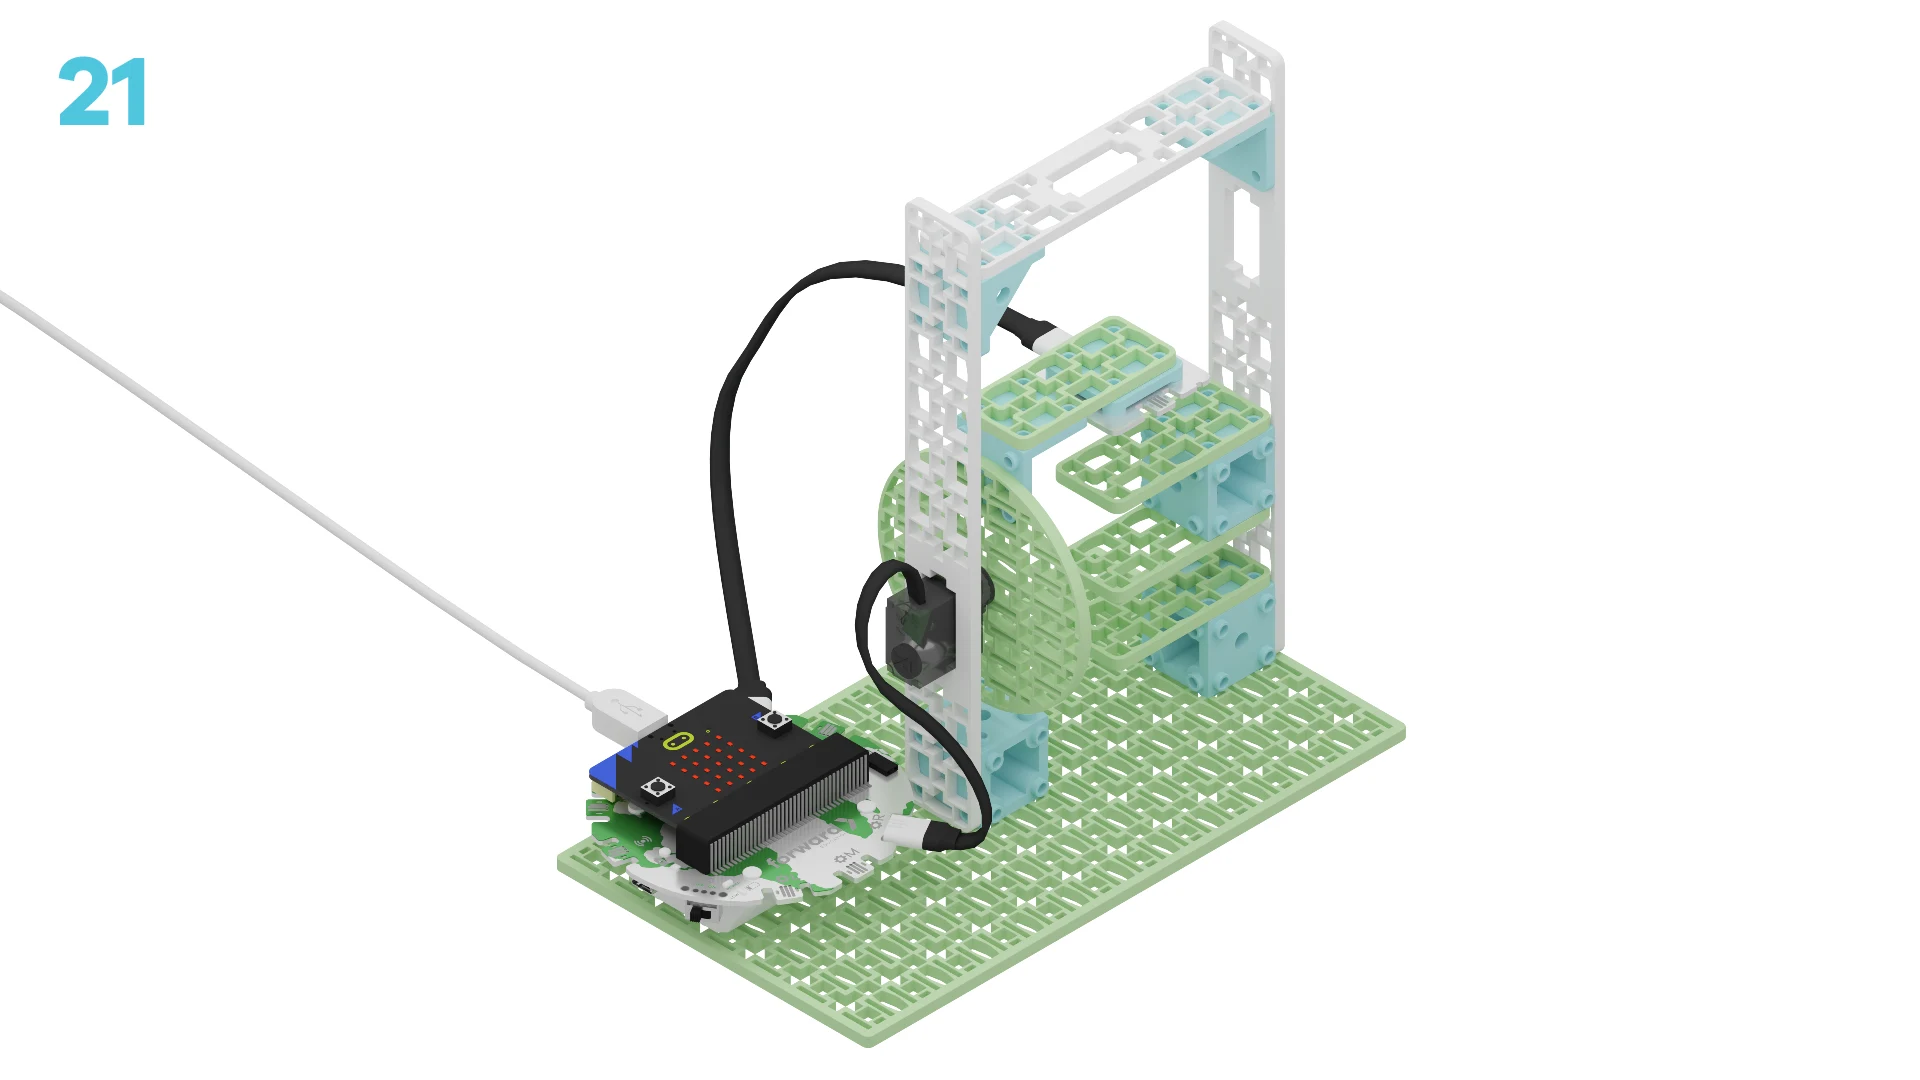
Let's create a vertical farm prototype! We are going to do this in 4 parts:
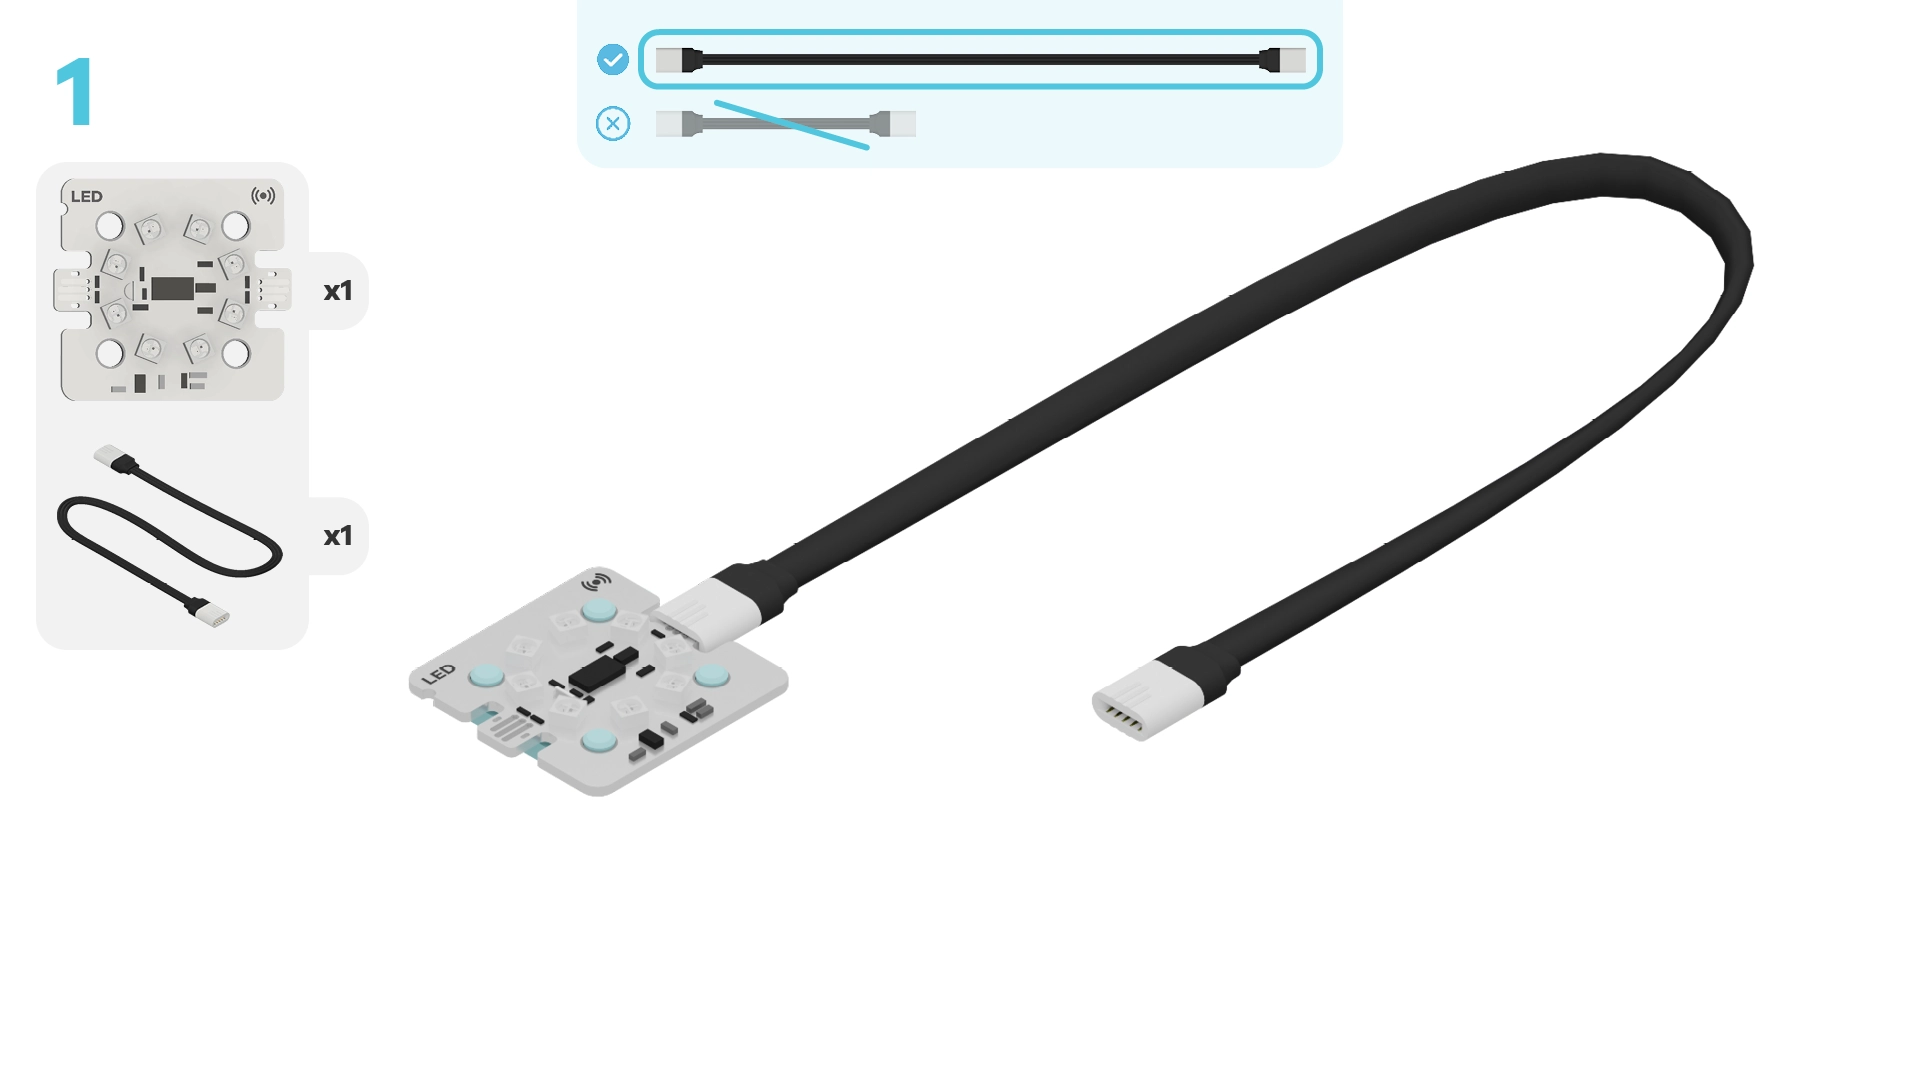
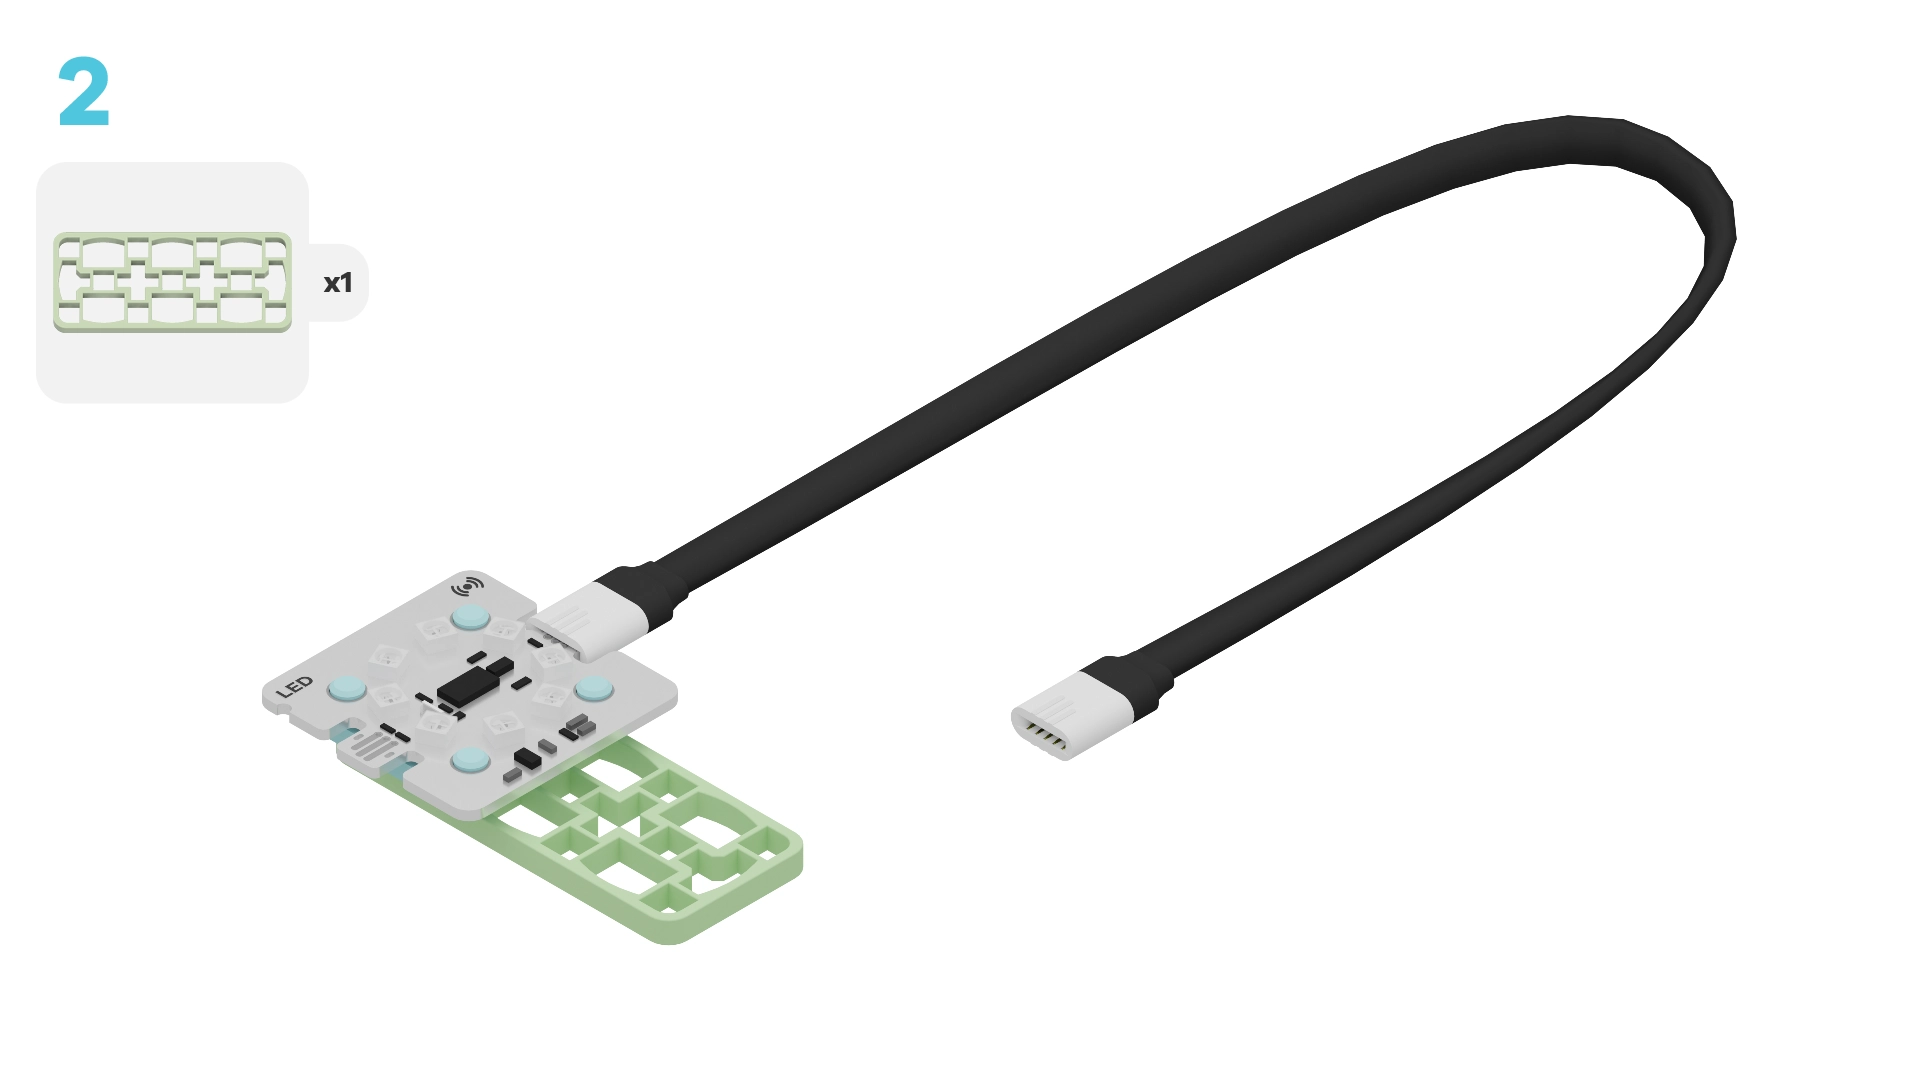
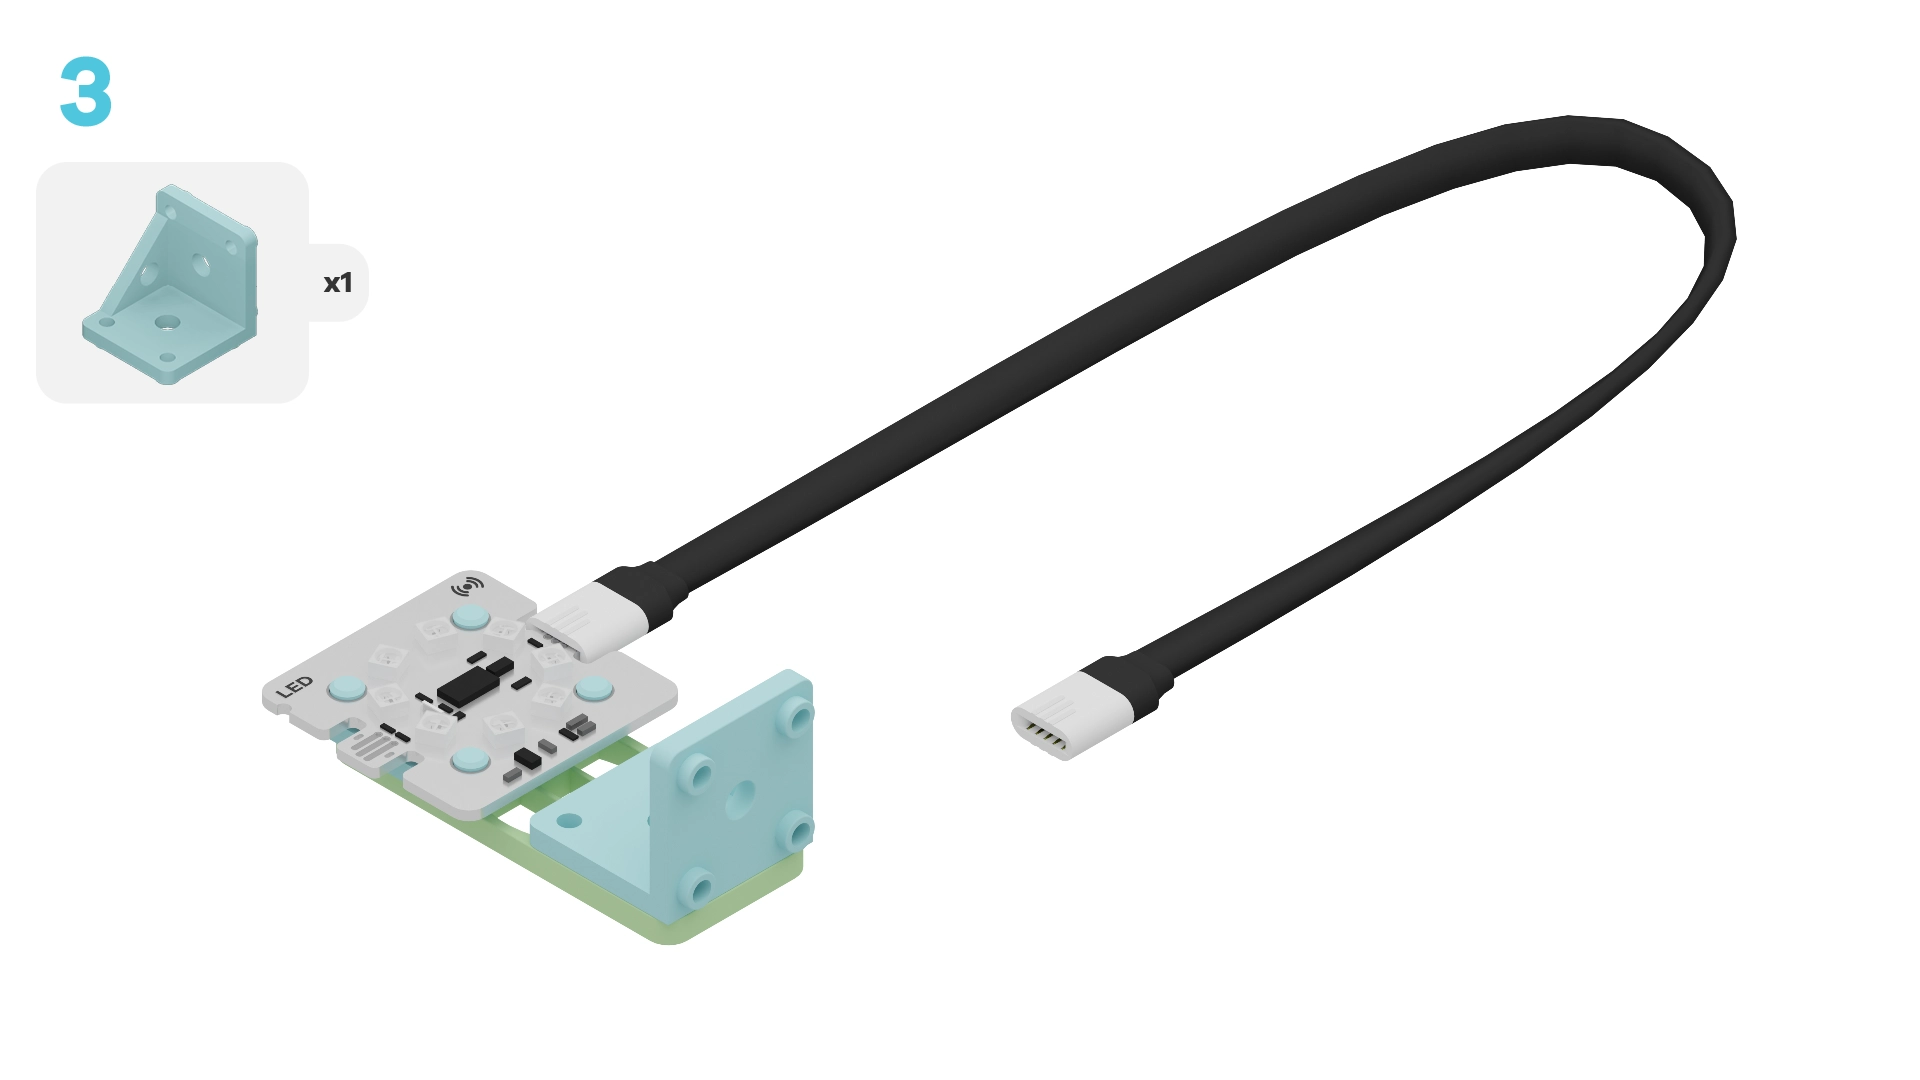
- Build our vertical farm
- Add code to bring it to life
- Modify the code to learn how it works
- Complete a challenge to care for even more plant species in our farm
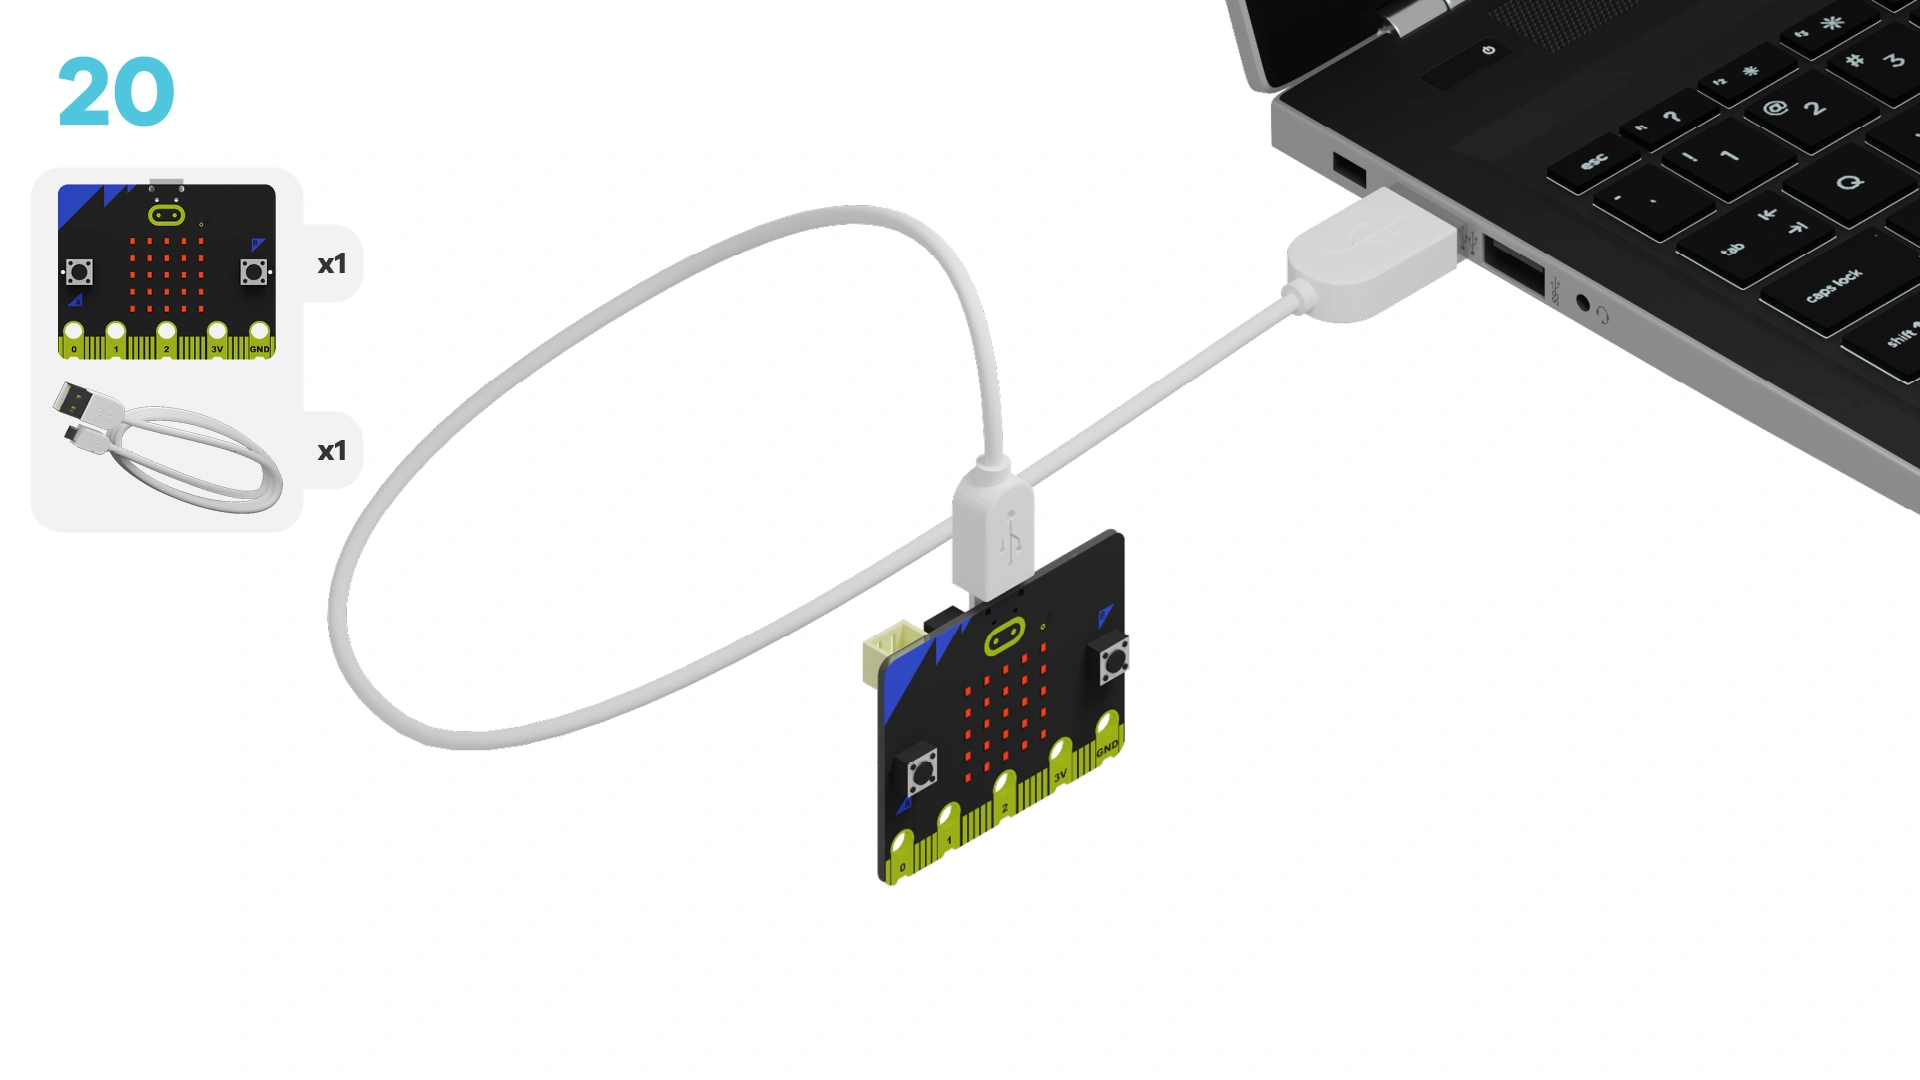
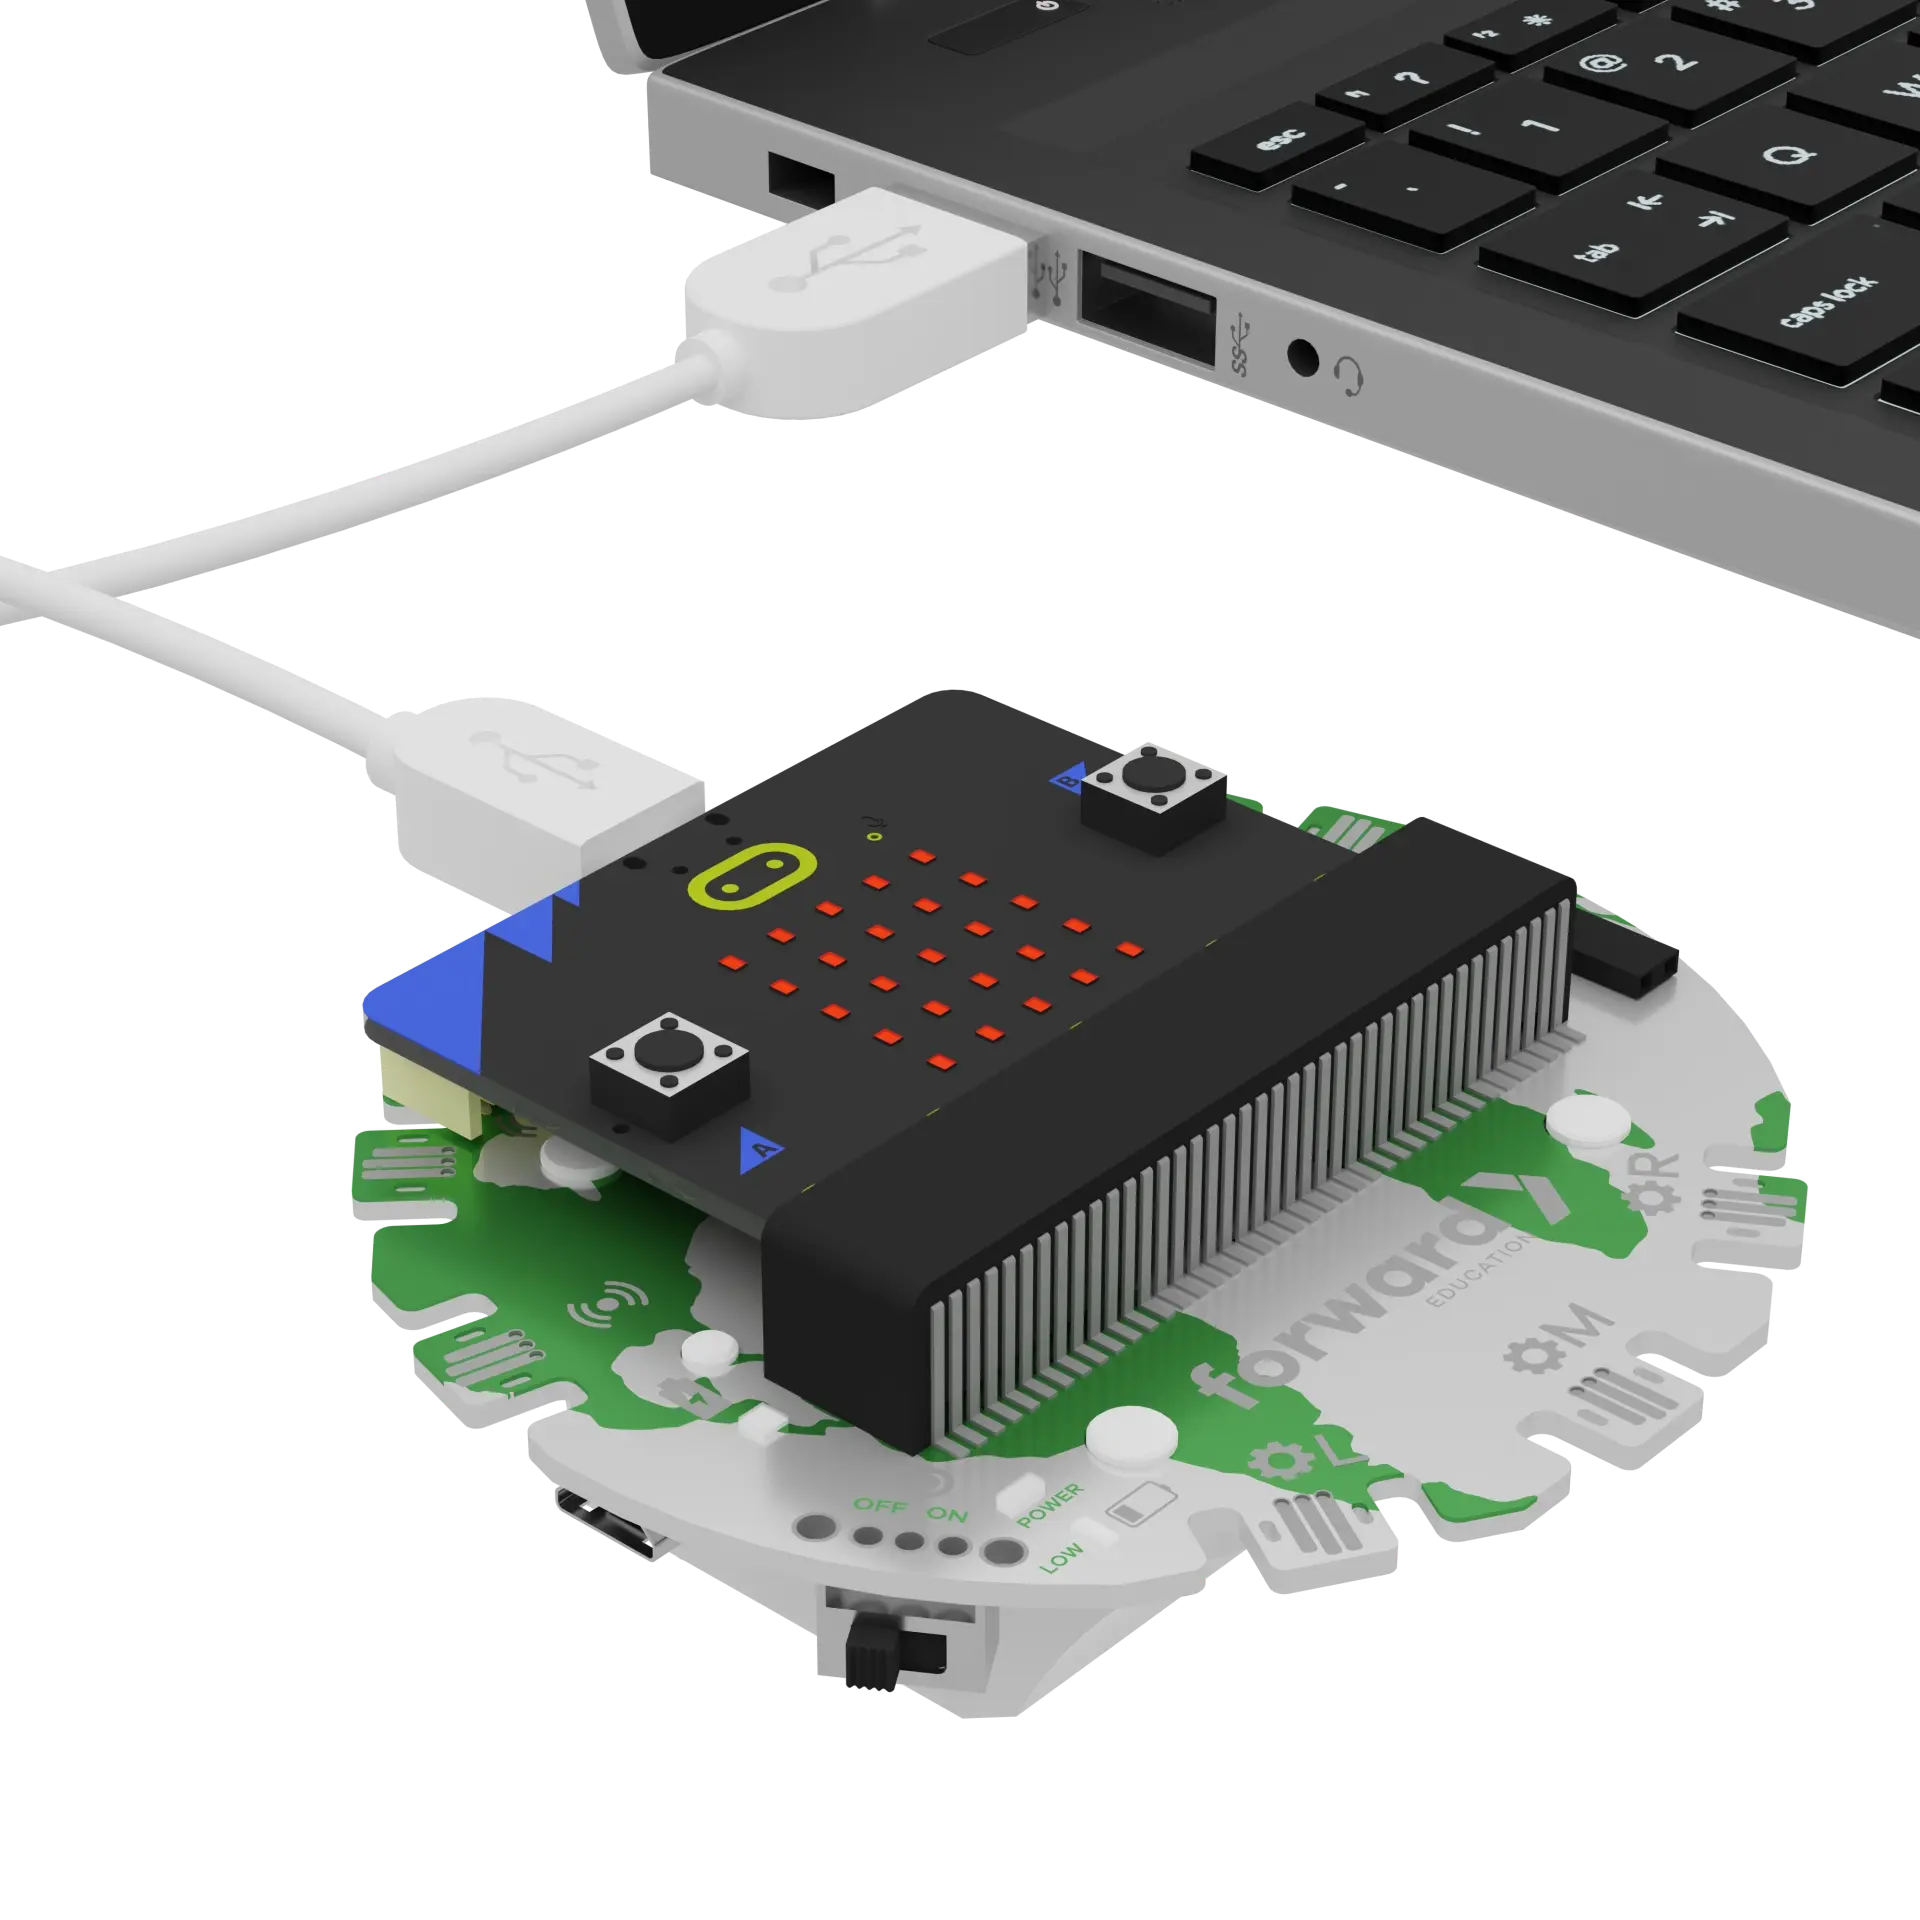
We need to connect our project to the computer to make it come to life with code!
The code will be the instructions that tell our micro:bit what to do.
function lightPlant (location: number, colour: number) {
    fwdMotors.leftServo.fwdSetAngleAndWait(location)
    basic.showLeds(`
        # . # . #
        . # # # .
        # # # # #
        . # # # .
        # . # . #
        `)
    fwdSensors.ledRing.fwdSetAllPixelsColour(colour)
    basic.pause(5000)
    fwdSensors.ledRing.fwdSetAllPixelsColour(0x000000)
    basic.clearScreen()
    fwdMotors.leftServo.fwdSetAngleAndWait(0)
    basic.pause(5000)
}
input.onButtonPressed(Button.A, function () {
    lightPlant(10, 16711680)
})
input.onButtonPressed(Button.B, function () {
    lightPlant(60, 255)
})
input.onButtonPressed(Button.AB, function () {
    lightPlant(120, 16777215)
})
fwdMotors.leftServo.fwdSetAngleAndWait(0)
IMPORTANT! Make sure your Climate Action Kit Breakout Board is turned on and your micro:bit is plugged into your computer.
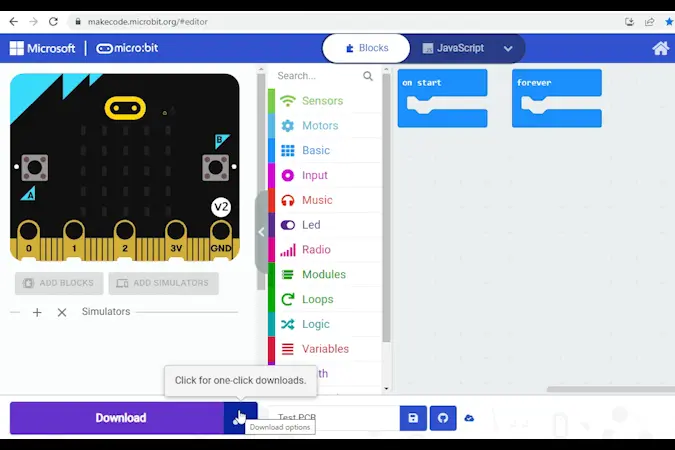
Click the three dots beside the |Download| button, then click on Connect Device. Next, follow the steps to pair your micro:bit.
Click the |Download| button to download the code to your project.
We are ready to modify our vertical farm prototype!
Tips
- Follow the instructions at the top of the screen.
- When you are ready for more information, click 'Tell me more!'
- If you need help with the code, click the lightbulb!
- Don't forget to
|Download|and test out any changes you make!
Let’s start by testing out our vertical farm. What happens when you press A? B? A+B?
Note: Wait 5 seconds between each button press.
~hint Tell me more! No matter which button you press (A, B, or A+B):
- The LED arm moves to a specific row of plants.
- The micro:bit shows a sun icon on its LED display.
- The LED ring changes to a specific colour for about 5 seconds.
- The LED ring turns off.
- The micro:bit’s LED display goes blank.
- The LED arm moves back to where it started.
This sequence of output represents the lighting treatment for the plants in our vertical farm! The row and LED colour change with each button because the plants on the top, middle, and bottom rows need different types of LED grow lights. hint~
Look at the code we’ve given your vertical farm.
There is a function called ||functions:lightPlant|| that has all the steps needed for plant light treatment.
~hint Tell me more!
- A function is a block of reusable code that completes one specific job or action.
- It’s important to name your function clearly based on what it does. This makes our code easier to understand. hint~
function lightPlant (location: number, colour: number) {
    fwdMotors.leftServo.fwdSetAngleAndWait(location)
    basic.showLeds(`
        # . # . #
        . # # # .
        # # # # #
        . # # # .
        # . # . #
        `)
    fwdSensors.ledRing.fwdSetAllPixelsColour(colour)
    basic.pause(5000)
    fwdSensors.ledRing.fwdSetAllPixelsColour(0x000000)
    basic.clearScreen()
    fwdMotors.leftServo.fwdSetAngleAndWait(0)
    basic.pause(5000)
}
When we want the micro:bit to use the code in our function, we must call it.
In this project, we use or call the ||functions:plantLight|| function 3 different times: ||input:on button A pressed||, ||input:on button B pressed||, and ||input:on button A+B pressed||.
// @hide
function lightPlant (location: number, colour: number) {
    fwdMotors.leftServo.fwdSetAngleAndWait(location)
    basic.showLeds(`
        # . # . #
        . # # # .
        # # # # #
        . # # # .
        # . # . #
        `)
    fwdSensors.ledRing.fwdSetAllPixelsColour(colour)
    basic.pause(5000)
    fwdSensors.ledRing.fwdSetAllPixelsColour(0x000000)
    basic.clearScreen()
    fwdMotors.leftServo.fwdSetAngleAndWait(0)
    basic.pause(5000)
}

input.onButtonPressed(Button.A, function () {
    lightPlant(10, 16711680)
})
input.onButtonPressed(Button.B, function () {
    lightPlant(60, 255)
})
input.onButtonPressed(Button.AB, function () {
    lightPlant(120, 16777215)
})
Each ||functions:call|| block has a couple different numbers. What do you think these numbers mean?
Change the first number in the ||functions:call|| block under ||input:on button A pressed|| to something between ‘10’ and ‘60’. Then, re-download your code and test it out! What happened?
~hint Tell me more!
- When A is pressed, the LED arm now moves to a new location.
- This number controls the angle of the positional servo motor and will affect which row our LED arm can reach in the vertical farm stack. hint~
// @hide
function lightPlant (location: number, colour: number) {
    fwdMotors.leftServo.fwdSetAngleAndWait(location)
    basic.showLeds(`
        # . # . #
        . # # # .
        # # # # #
        . # # # .
        # . # . #
        `)
    fwdSensors.ledRing.fwdSetAllPixelsColour(colour)
    basic.pause(5000)
    fwdSensors.ledRing.fwdSetAllPixelsColour(0x000000)
    basic.clearScreen()
    fwdMotors.leftServo.fwdSetAngleAndWait(0)
    basic.pause(5000)
}

input.onButtonPressed(Button.A, function () {
    lightPlant(30, 16711680)
})
Change the second number in the ||functions:call|| block under ||input:on button A pressed||.
Re-download your code and test it out! What happened? Test a few different numbers if you are unsure.
~hint Tell me more!
- This number controls the colour of the LEDs on the LED ring.
- When A is pressed, the LED ring no longer turns red. It is a new colour.
- You can choose a specific colour by going to Google’s colour picker and clicking the colour you’d like. Copy the HEX code (e.g. #00ffff for cyan). Write ‘0x00ffff’ in the second space in the
||functions:call lightPlant||block and it will automatically convert to a number. hint~
// @hide
function lightPlant (location: number, colour: number) {
    fwdMotors.leftServo.fwdSetAngleAndWait(location)
    basic.showLeds(`
        # . # . #
        . # # # .
        # # # # #
        . # # # .
        # . # . #
        `)
    fwdSensors.ledRing.fwdSetAllPixelsColour(colour)
    basic.pause(5000)
    fwdSensors.ledRing.fwdSetAllPixelsColour(0x000000)
    basic.clearScreen()
    fwdMotors.leftServo.fwdSetAngleAndWait(0)
    basic.pause(5000)
}

input.onButtonPressed(Button.A, function () {
    lightPlant(30, 65535)
})
Change both numbers back to their original values: ‘10’ and ‘16711680’.
// @hide
function lightPlant (location: number, colour: number) {
    fwdMotors.leftServo.fwdSetAngleAndWait(location)
    basic.showLeds(`
        # . # . #
        . # # # .
        # # # # #
        . # # # .
        # . # . #
        `)
    fwdSensors.ledRing.fwdSetAllPixelsColour(colour)
    basic.pause(5000)
    fwdSensors.ledRing.fwdSetAllPixelsColour(0x000000)
    basic.clearScreen()
    fwdMotors.leftServo.fwdSetAngleAndWait(0)
    basic.pause(5000)
}


input.onButtonPressed(Button.A, function () {
    lightPlant(10, 16711680)
})
The placeholders in the ||functions:lightPlant|| function (||variables:location|| and ||variables:colour||) are called parameters.
Each time we call our function, we need to provide real numbers for each parameter. These numbers are the ones written in the ||functions:call lightPlant|| blocks and are called arguments. The function will automatically replace the parameters with the arguments when it runs.
// @highlight
function lightPlant (location: number, colour: number) {
    // @highlight
    fwdMotors.leftServo.fwdSetAngleAndWait(location)
    basic.showLeds(`
        # . # . #
        . # # # .
        # # # # #
        . # # # .
        # . # . #
        `)
    // @highlight
    fwdSensors.ledRing.fwdSetAllPixelsColour(colour)
    basic.pause(5000)
    fwdSensors.ledRing.fwdSetAllPixelsColour(0x000000)
    basic.clearScreen()
    fwdMotors.leftServo.fwdSetAngleAndWait(0)
    basic.pause(5000)
}

input.onButtonPressed(Button.A, function () {
    // @highlight
    lightPlant(10, 16711680)
})
Imagine a vertical farm with many different plants, each in a different row with its own lighting needs. We’d want to save all that information somewhere, right?
In coding, we can use data structures to organize and store data on our plants. One type of data structure is a list. Lists let us store a collection of items in a specific order. Today, we are going to create two lists to save the data we have on plant location and LED colour.
Let’s create a list called ‘location’ to store the "address" of each plant in our vertical farm.
Click ||arrays:Arrays|| and drag the ||variables:set list to|| block into the workspace. Press the down arrow beside ||variables:list|| and select ‘New variable’ to name your list ‘location’.
Transfer the location arguments from our ||functions:call|| blocks into this list. Remember, the order is important!
let location = [10, 60, 120]
Let’s create a list called ‘colour’ to store the LED colour required for each plant in our vertical farm.
Click ||arrays:Arrays|| and drag the ||variables:set list to|| block into the workspace. Press the down arrow beside ||variables:list|| and select ‘New variable’ to name your list 'colour'.
Transfer the colour arguments from our ||functions:call|| blocks into this list. Use the same order you did for the ||variables:location|| list.
let colour = [16711680, 255, 16777215]
Add both ||variables:set list to|| blocks to the ||basic:on start|| block.
fwdMotors.leftServo.fwdSetAngleAndWait(0)
let location = [10, 60, 120]
let colour = [16711680, 255, 16777215]
Now, let's change the function so it pulls data directly from our lists.
Drag two ||variables:list|| ||arrays:get value at 0|| blocks from the ||arrays:Array|| category into the workspace. Drag and drop them into the function, replacing the ||variables:location|| and ||variables:colour|| parameters.
~hint Tell me more!
- This block allows you to pull a specific number from your list. More on this shortly! hint~
function lightPlant (location: number, colour: number) {
    // @highlight
    fwdMotors.leftServo.fwdSetAngleAndWait(list[0])
    basic.showLeds(`
        # . # . #
        . # # # .
        # # # # #
        . # # # .
        # . # . #
        `)
    // @highlight
    fwdSensors.ledRing.fwdSetAllPixelsColour(list[0])
    basic.pause(5000)
    fwdSensors.ledRing.fwdSetAllPixelsColour(0x000000)
    basic.clearScreen()
    fwdMotors.leftServo.fwdSetAngleAndWait(0)
    basic.pause(5000)
}
In the ||fwdMotors:set leftServo to|| block, select the down arrow next to ||variables:list|| and replace with ||variables:location||.
In the ||fwdSensors:set all ledRing LEDs to|| block, select the down arrow next to ||variables:list|| and replace with ||variables:colour||.
~hint Tell me more!
- This is how we can clarify that we want these two blocks to pull data from our
||variables:location||and||variables:colour||lists. - Note: You may notice an error message, but it will be resolved in the next couple steps. hint~
function lightPlant (location: any[], colour: any[]) {
    // @highlight
    fwdMotors.leftServo.fwdSetAngleAndWait(location[0])
    basic.showLeds(`
        # . # . #
        . # # # .
        # # # # #
        . # # # .
        # . # . #
        `)
    // @highlight
    fwdSensors.ledRing.fwdSetAllPixelsColour(colour[0])
    basic.pause(5000)
    fwdSensors.ledRing.fwdSetAllPixelsColour(0x000000)
    basic.clearScreen()
    fwdMotors.leftServo.fwdSetAngleAndWait(0)
    basic.pause(5000)
}
So, we've added our lists to the function, but the micro:bit still doesn't know which number to pull from each.
Thankfully, lists are ordered! We can use a concept known as index to target a specific number in each list. In most programming languages, the first item in a list has an index of 0, the second item has an index of 1, and so on.
~hint Tell me more! Today, we have stored the data in this order:
- Data for plants in the top row in our farm is always the first number in our lists (aka index 0).
- Data for plants in the middle row in our farm is always the second number in our lists (aka index 1).
- Data for plants in the bottom row in our farm is always the third number in our lists (aka index 2). hint~
Since each row is linked to a specific index, the ||variables:index|| can be our new parameter.
Right click on the function block and click ‘Edit Function’. Delete the ‘colour’ parameter by clicking on it and selecting the trash can that appears. Rename the ‘location’ parameter ‘index’.
// @highlight
function lightPlant (index: number) {
    fwdMotors.leftServo.fwdSetAngleAndWait(location[0])
    basic.showLeds(`
        # . # . #
        . # # # .
        # # # # #
        . # # # .
        # . # . #
        `)
    fwdSensors.ledRing.fwdSetAllPixelsColour(colour[0])
    basic.pause(5000)
    fwdSensors.ledRing.fwdSetAllPixelsColour(0x000000)
    basic.clearScreen()
    fwdMotors.leftServo.fwdSetAngleAndWait(0)
    basic.pause(5000)
}
Drag ||variables:index|| from the function block and add it to both ||arrays:get value at 0|| blocks.
This is how we tell the micro:bit to pull the location and colour data for the top row of plants (index = 0), middle row of plants (index = 1), or bottom row of plants (index = 2).
function lightPlant (index: number) {
    // @highlight
    fwdMotors.leftServo.fwdSetAngleAndWait(location[index])
    basic.showLeds(`
        # . # . #
        . # # # .
        # # # # #
        . # # # .
        # . # . #
        `)
    // @highlight
    fwdSensors.ledRing.fwdSetAllPixelsColour(colour[index])
    basic.pause(5000)
    fwdSensors.ledRing.fwdSetAllPixelsColour(0x000000)
    basic.clearScreen()
    fwdMotors.leftServo.fwdSetAngleAndWait(0)
    basic.pause(5000)
}
Finally, we must update our ||functions:call|| blocks to reflect these changes.
When we press A, we want to light the plants on the top row of our vertical farm. What value should we use for ||variables:index|| in the ||functions:call lightPlant|| under ||input:on button A pressed||?
~hint Tell me more!
- Data for the top row plants is always the first item in our lists. This means we can access it by using index 0. hint~
// @hide
function lightPlant (index: number) {
    let list: number[] = []
    fwdMotors.leftServo.fwdSetAngleAndWait(location[index])
    basic.showLeds(`
        # . # . #
        . # # # .
        # # # # #
        . # # # .
        # . # . #
        `)
    fwdSensors.ledRing.fwdSetAllPixelsColour(colour[index])
    basic.pause(5000)
    fwdSensors.ledRing.fwdSetAllPixelsColour(0x000000)
    basic.clearScreen()
    fwdMotors.leftServo.fwdSetAngleAndWait(0)
    basic.pause(5000)
}

input.onButtonPressed(Button.A, function () {
    lightPlant(0)
})
What argument should we use for ||variables:index|| in the ||functions:call lightPlant|| block under ||input:on button B pressed||? ||input:On button A+B pressed||?
~hint Tell me more!
- When we press B, we want to light the plants on the middle row of our vertical farm. Data for this row of plants is always stored at index 1.
- When we press A+B, we want to light the plants on the bottom row of our vertical farm. Data for this row of plants is always stored at index 2.
- Each row of plants we add to our build would increase the length of our lists by one! hint~
// @hide
function lightPlant (index: number) {
    let list: number[] = []
    fwdMotors.leftServo.fwdSetAngleAndWait(location[index])
    basic.showLeds(`
        # . # . #
        . # # # .
        # # # # #
        . # # # .
        # . # . #
        `)
    fwdSensors.ledRing.fwdSetAllPixelsColour(colour[index])
    basic.pause(5000)
    fwdSensors.ledRing.fwdSetAllPixelsColour(0x000000)
    basic.clearScreen()
    fwdMotors.leftServo.fwdSetAngleAndWait(0)
    basic.pause(5000)
}

input.onButtonPressed(Button.B, function () {
    lightPlant(1)
})
input.onButtonPressed(Button.AB, function () {
    lightPlant(2)
})
Download your code to test it out! What do you notice?
~hint Tell me more!
- The plant treatments should be the same as they were at the start of the activity; however, in the backend, we now have a way to store our plant data in an organized way. hint~
Right now, all plants are treated for 5 seconds. In reality, some plants might thrive with different lengths of light exposure. For example, in order to flower, long-day plants need longer light exposure than short-day plants!
Assume each row of plants has the following requirements:
- Top row: 5 seconds of LED exposure
- Middle row: 10 seconds of LED exposure
- Bottom row: 7 seconds of LED exposure
Let’s further customize our lighting treatment to incorporate this data!
Create a new list to store the data on lighting duration.
~hint Tell me more!
- Be sure to convert seconds (s) to milliseconds (ms) by multiplying by 1000. hint~
fwdMotors.leftServo.fwdSetAngleAndWait(0)
location = [10, 60, 120]
colour = [16711680, 255, 16777215]
// @highlight
let duration = [5000, 10000, 7000]
Modify the ||functions:plantLight|| function so it uses this data.
~hint Tell me more!
- We will add a
||variables:duration||||arrays:get value at||||variables:index||block to the first||basic:pause (ms)||block in our function. - Since this
||basic:pause||block comes immediately after the||fwdSensors:set all ledRing LEDs to||block, is will impact how long the LED lights remain on. - Re-download and test your code! hint~
function lightPlant (index: number) {
    fwdMotors.leftServo.fwdSetAngleAndWait(location[index])
    basic.showLeds(`
        # . # . #
        . # # # .
        # # # # #
        . # # # .
        # . # . #
        `)
    fwdSensors.ledRing.fwdSetAllPixelsColour(colour[index])
    // @highlight
    basic.pause(duration[index])
    fwdSensors.ledRing.fwdSetAllPixelsColour(0x000000)
    basic.clearScreen()
    fwdMotors.leftServo.fwdSetAngleAndWait(0)
    basic.pause(5000)
}
Some species of plants require more intense or bright light than others.
How might we customize the brightness of our LED lights?
~hint Tell me more!
- Create another list called
||variables:brightness||. - Add a
||fwdSensors:set ledRing brightness to||block right before the first||fwdSensors:set all ledRing LEDs to||block in the main function. - Make sure the
||fwdSensors:set ledRing brightness to||block pulls data from the||variables:brightness||list. hint~
fwdMotors.leftServo.fwdSetAngleAndWait(0)
location = [10, 60, 120]
colour = [16711680, 255, 16777215]
duration = [5000, 10000, 7000]
// @highlight
brightness = [10, 1, 5]

function lightPlant (index: number) {
    fwdMotors.leftServo.fwdSetAngleAndWait(location[index])
    basic.showLeds(`
        # . # . #
        . # # # .
        # # # # #
        . # # # .
        # . # . #
        `)
    // @highlight
    fwdSensors.ledRing.fwdSetBrightness(brightness[index])
    fwdSensors.ledRing.fwdSetAllPixelsColour(colour[index])
    basic.pause(duration[index])
    fwdSensors.ledRing.fwdSetAllPixelsColour(0x000000)
    basic.clearScreen()
    fwdMotors.leftServo.fwdSetAngleAndWait(0)
    basic.pause(5000)
}
Are there any parts of the code you still don't understand? This is your time to explore!
~hint Tell me more! Follow these steps:
- Find a part of the code you'd like to learn more about
- Make a single change to this block (or remove it entirely)
- Download the new code
- Test it out and observe what changed
- Repeat hint~
You've completed the activity!
Think about something in this project that challenged you.
How did you overcome this challenge? How did that make you feel?
In the next step, you can click the |Done| button to finish the tutorial.
