fwd-edu-breakout=github:climate-action-kits/pxt-fwd-edu/fwd-breakout
ledRing=github:climate-action-kits/pxt-fwd-edu
let pumpStop = 0
let pumpStart = 0
input.onButtonPressed(Button.A, function () {
    pumpStart = input.runningTime()
    while (fwdSensors.soilMoisture1.fwdIsMoistureLevelPastThreshold(50, fwdSensors.ThresholdDirection.Under)) {
        fwdMotors.pump.fwdTimedRun(500)
        basic.pause(500)
    }
    pumpStop = input.runningTime()
})
input.onButtonPressed(Button.B, function () {
    basic.showLeds(`
        # # # # #
        # . # . #
        # . # # #
        # . . . #
        # # # # #
        `)
    basic.clearScreen()
    basic.showNumber(Math.round((pumpStop - pumpStart) / 1000))
    basic.pause(2000)
    basic.clearScreen()
})
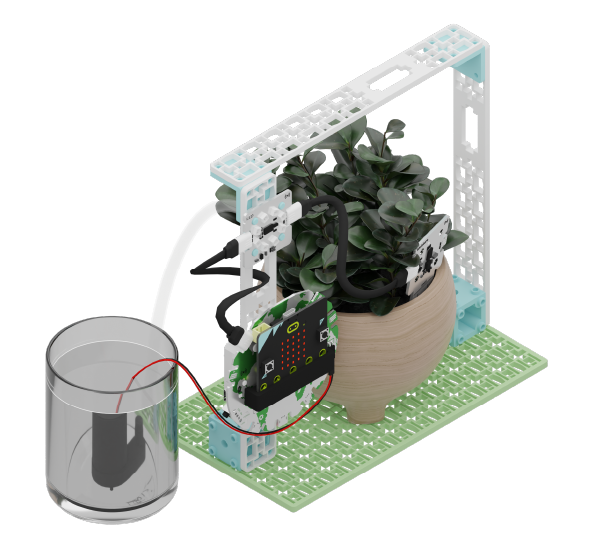
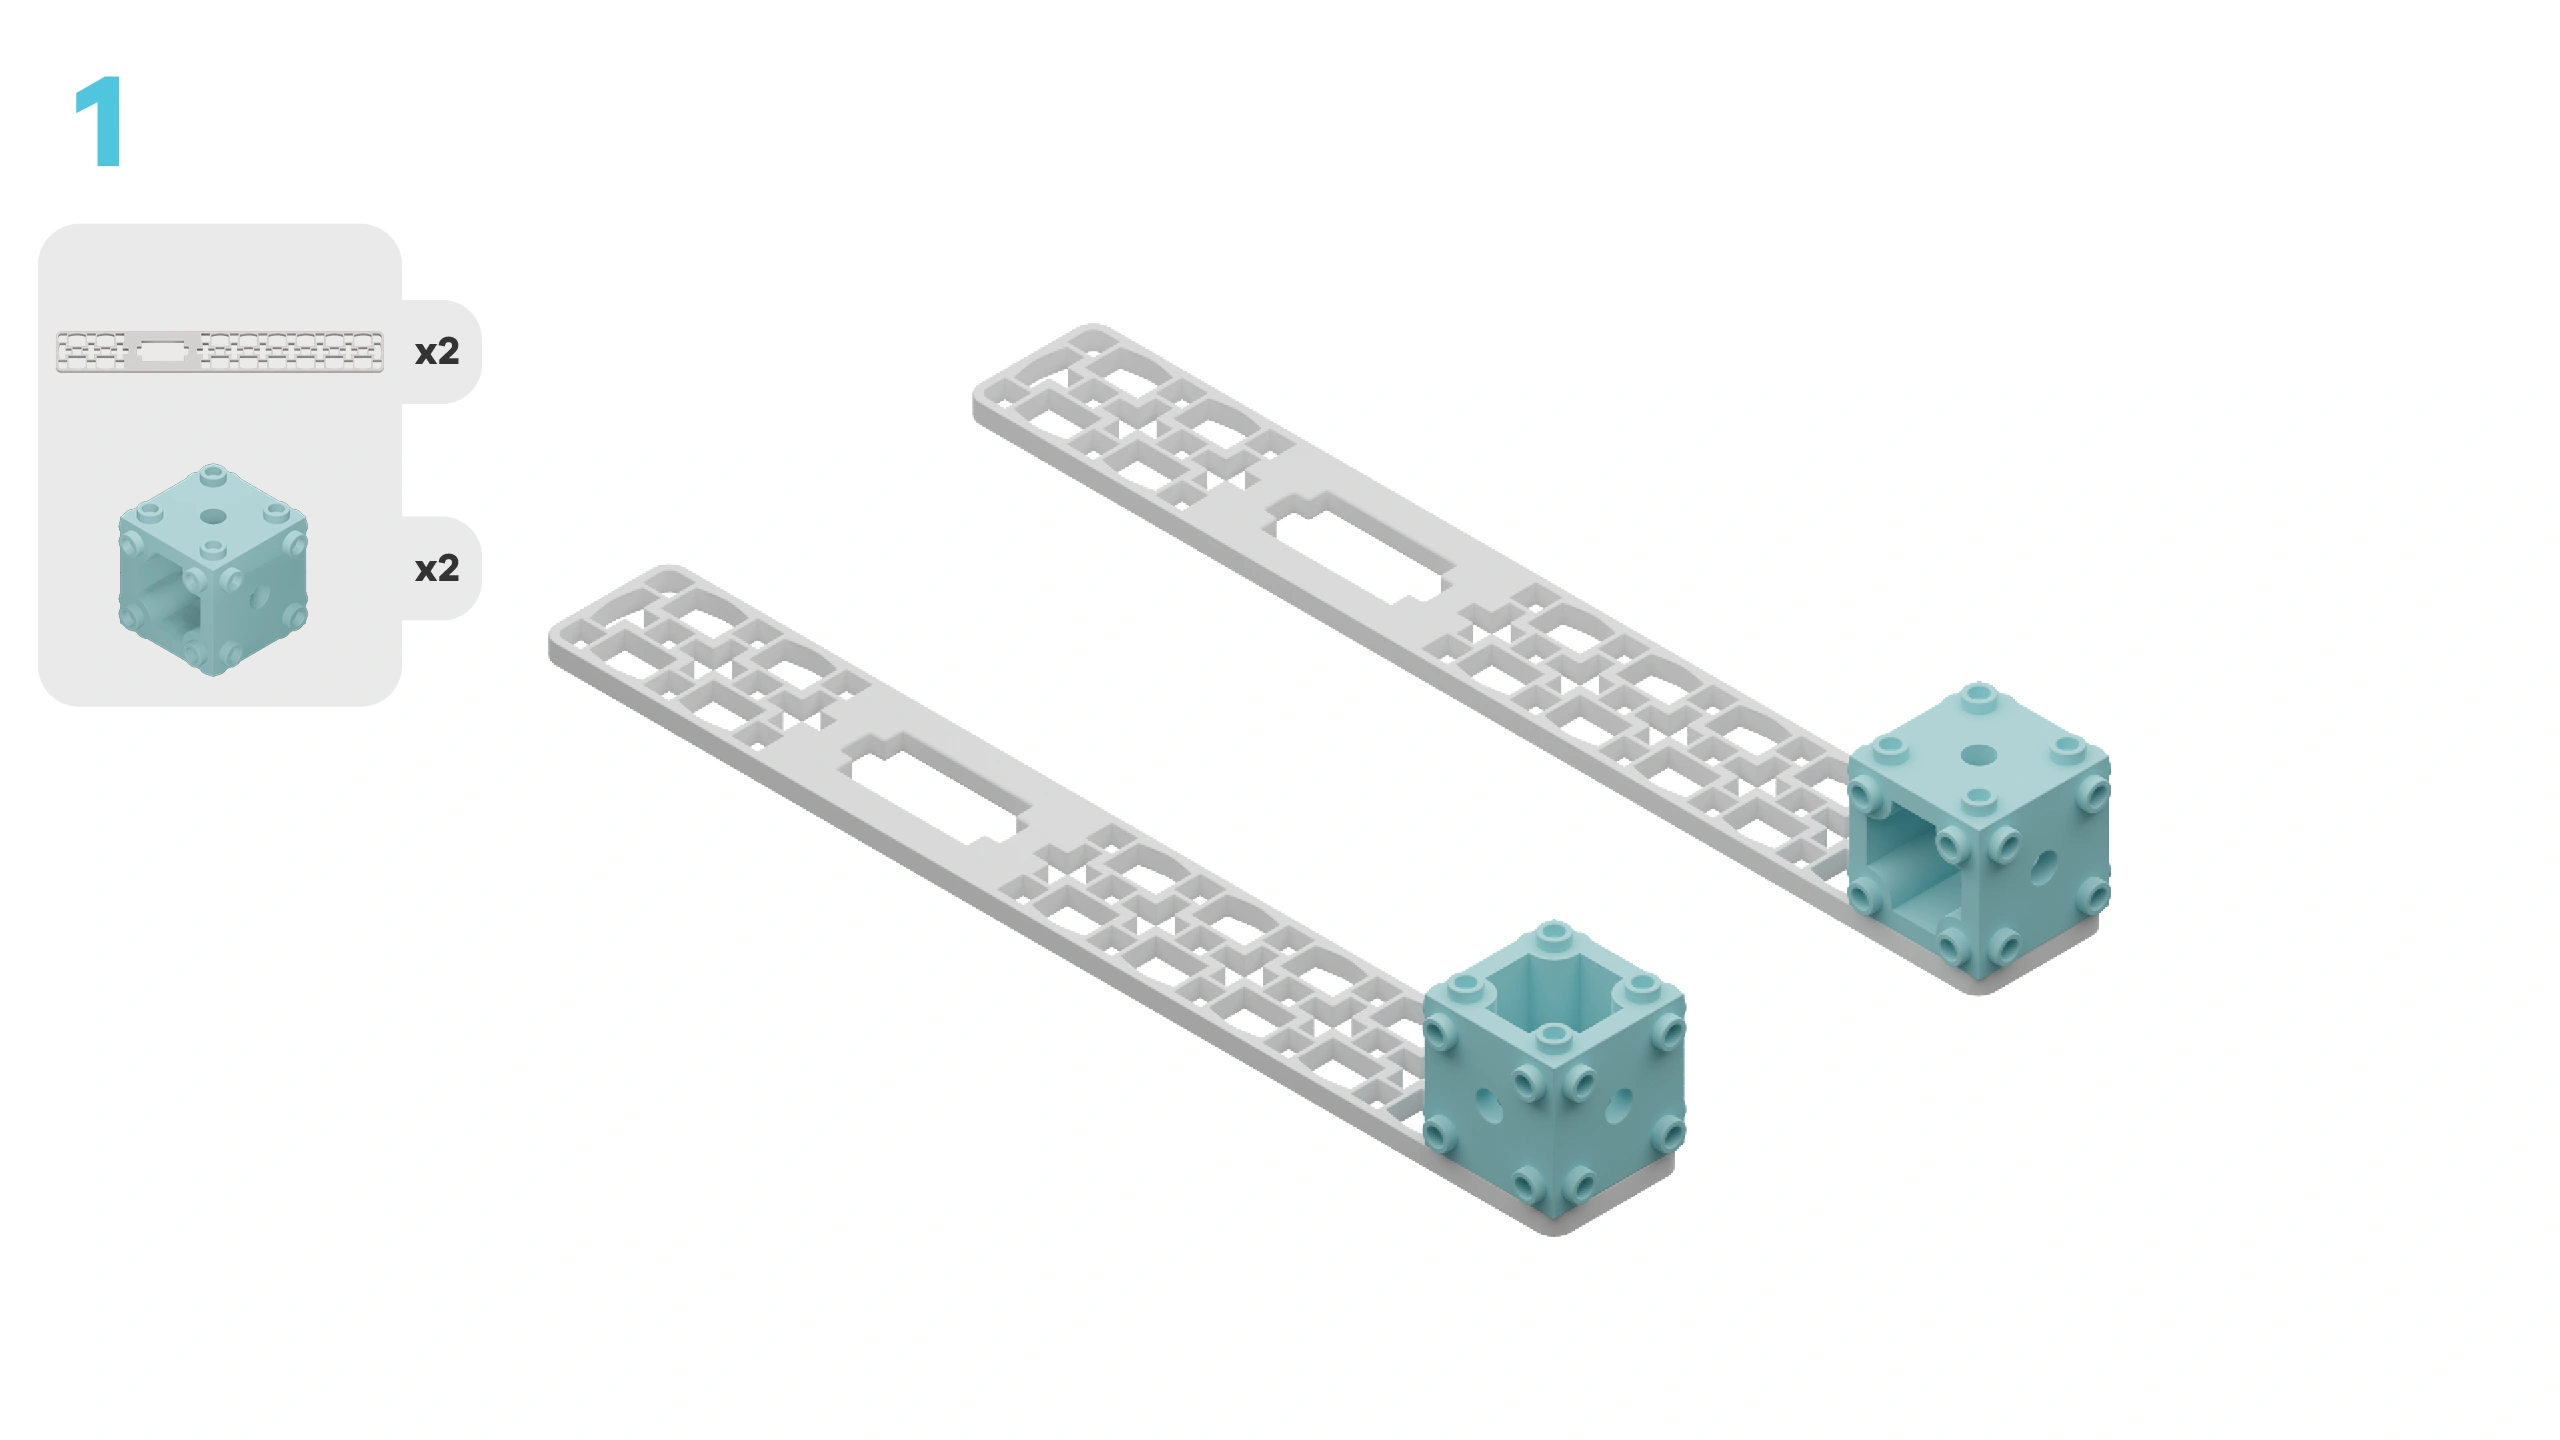
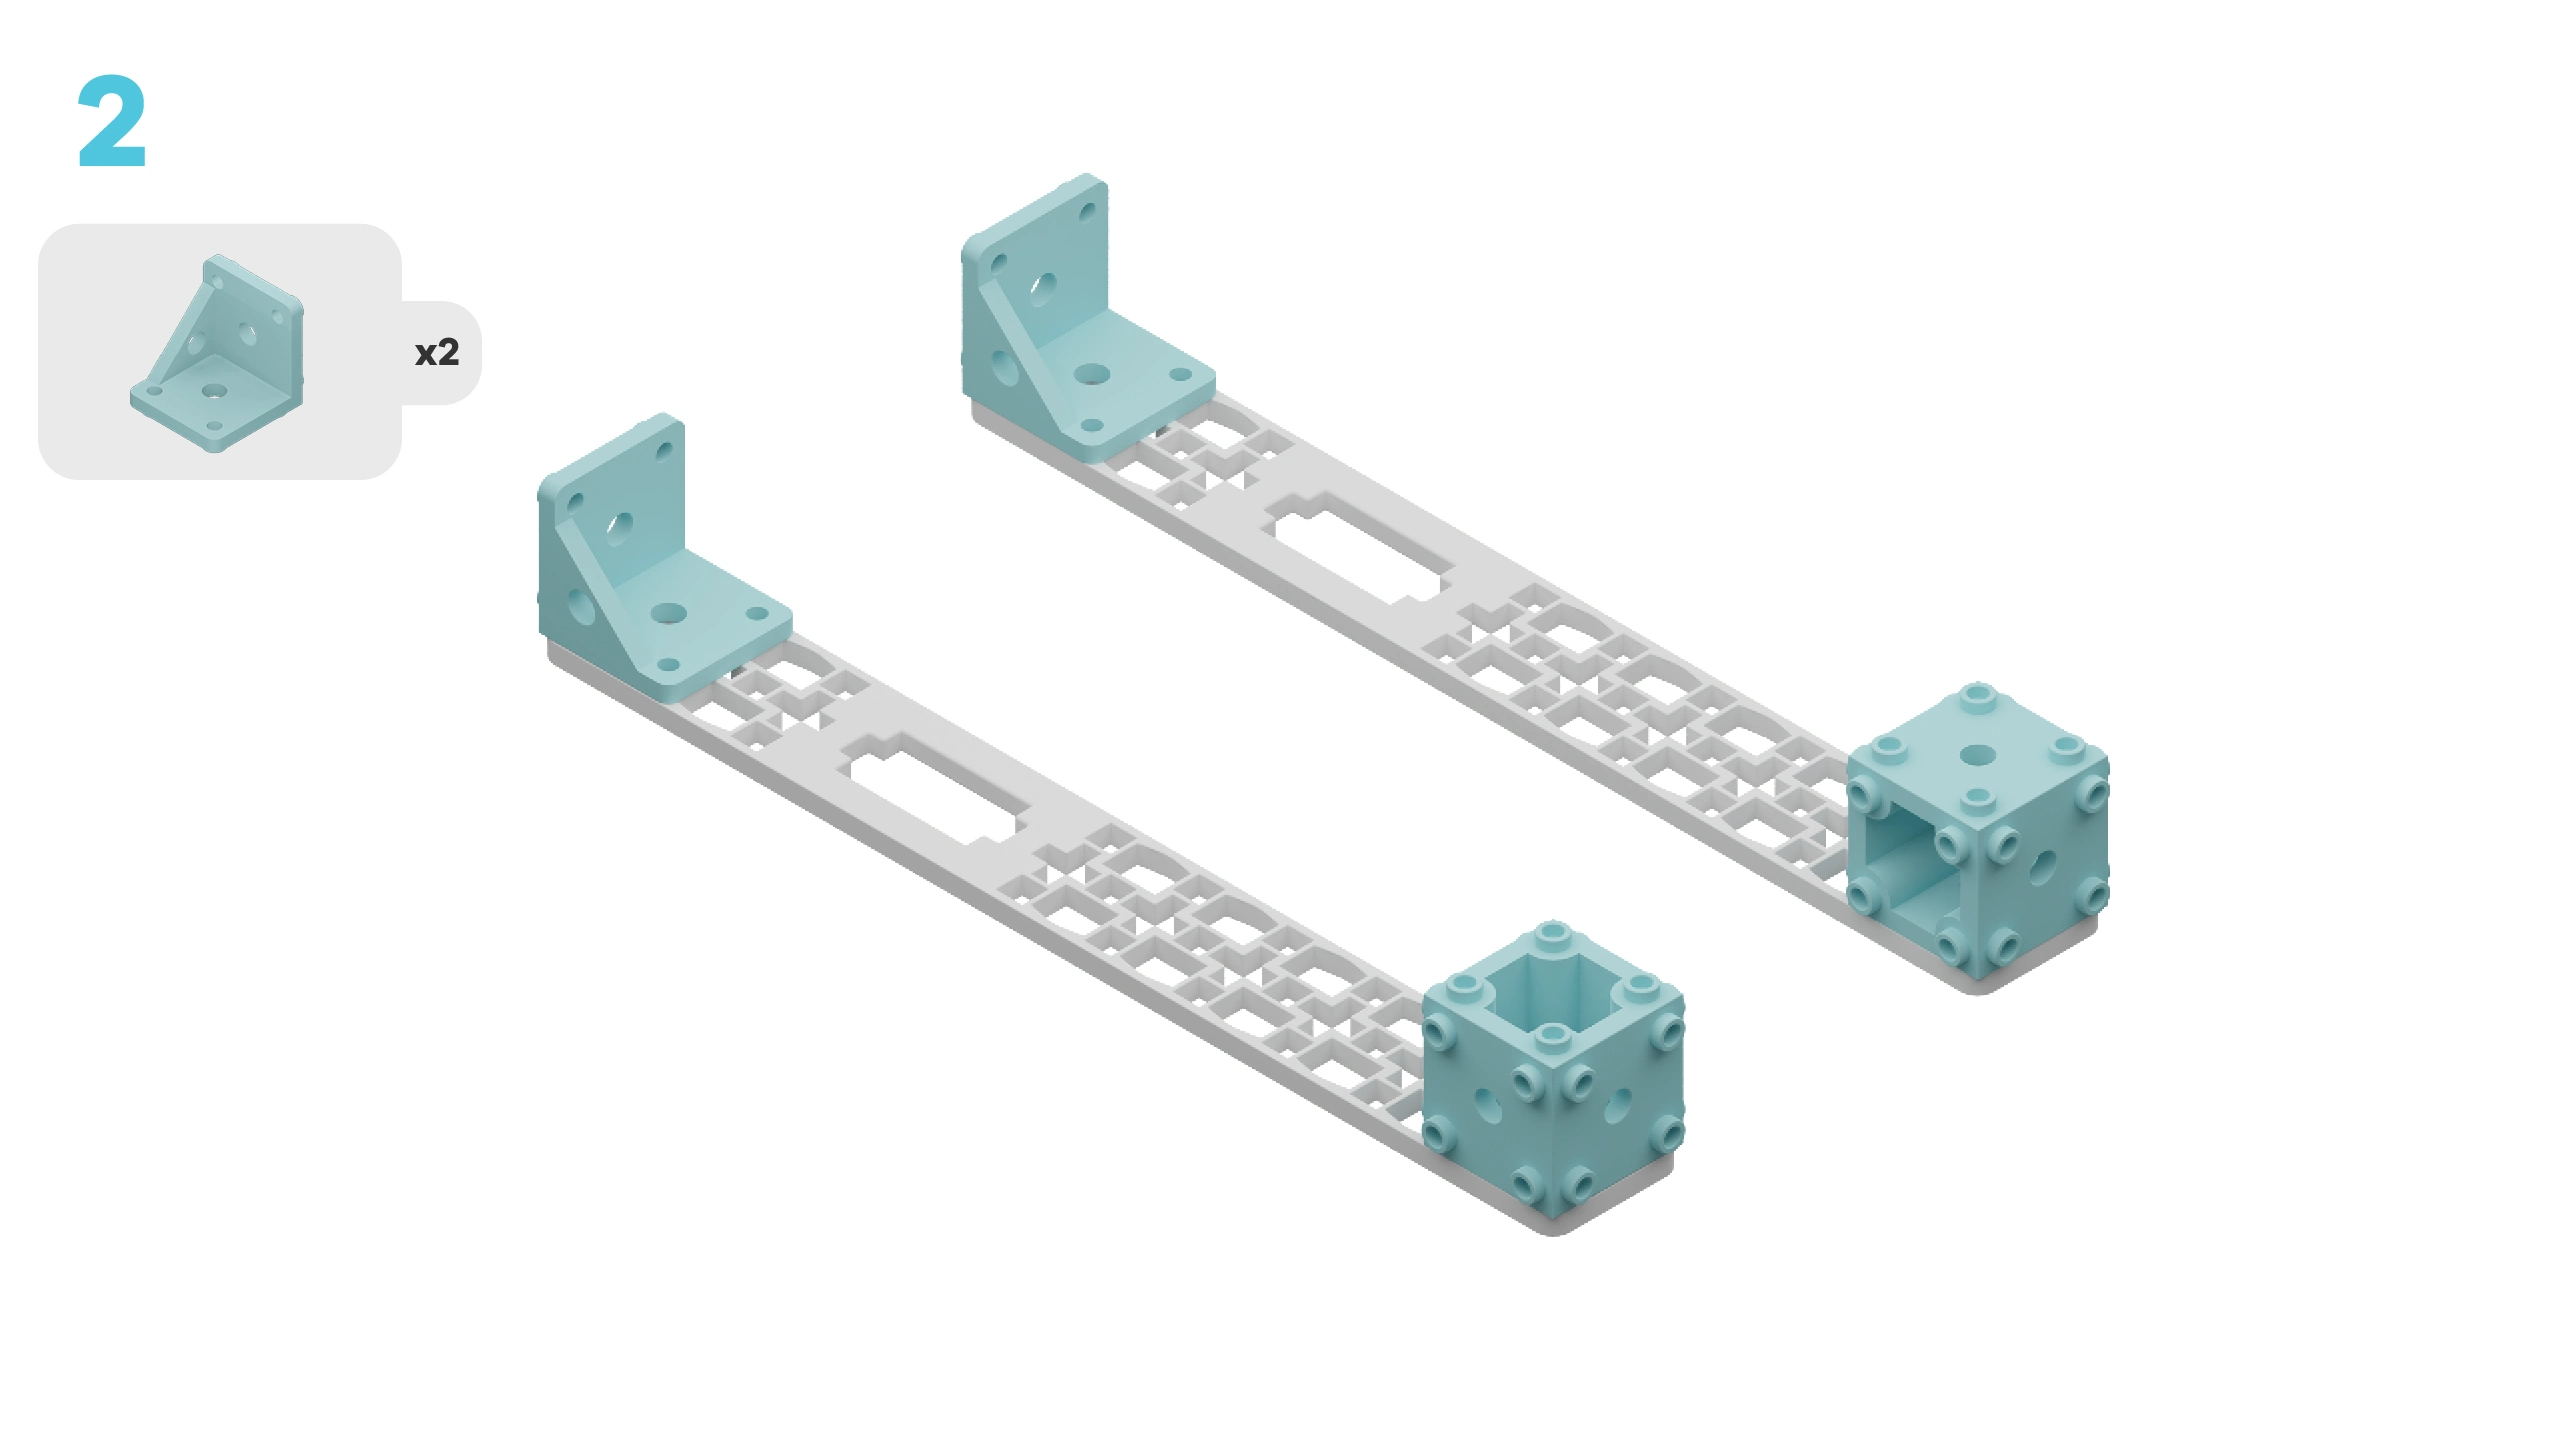
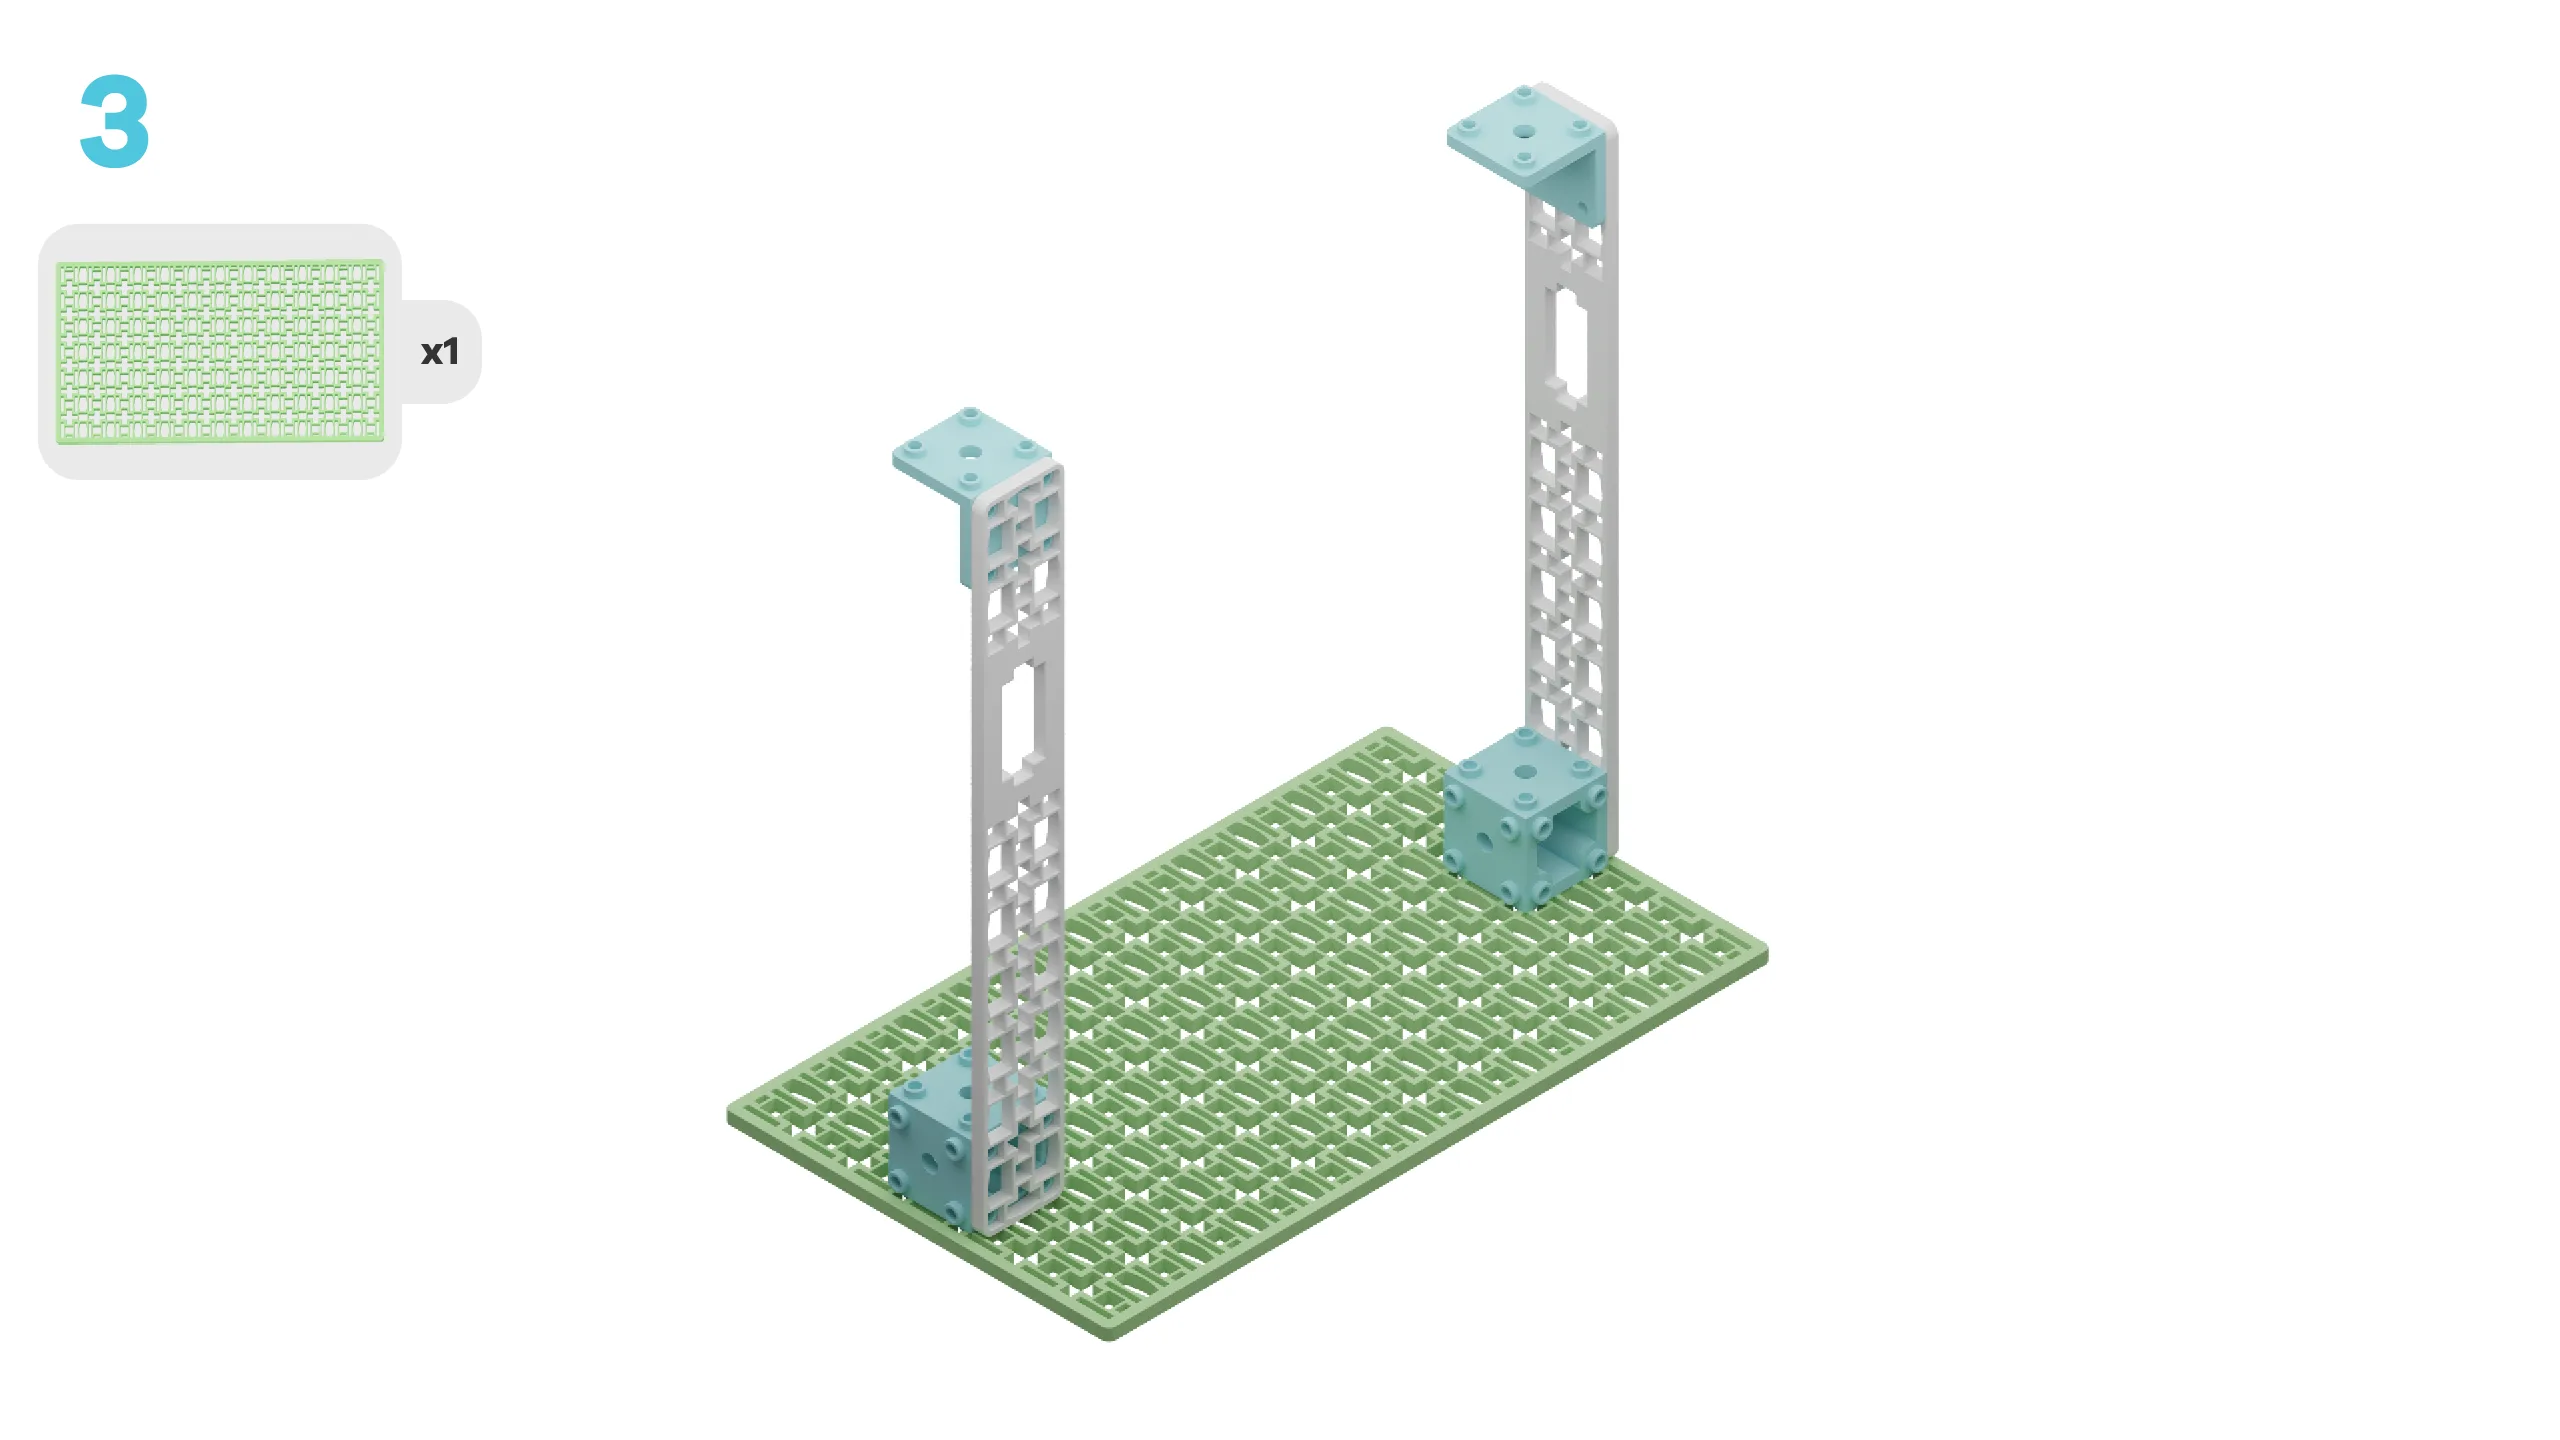
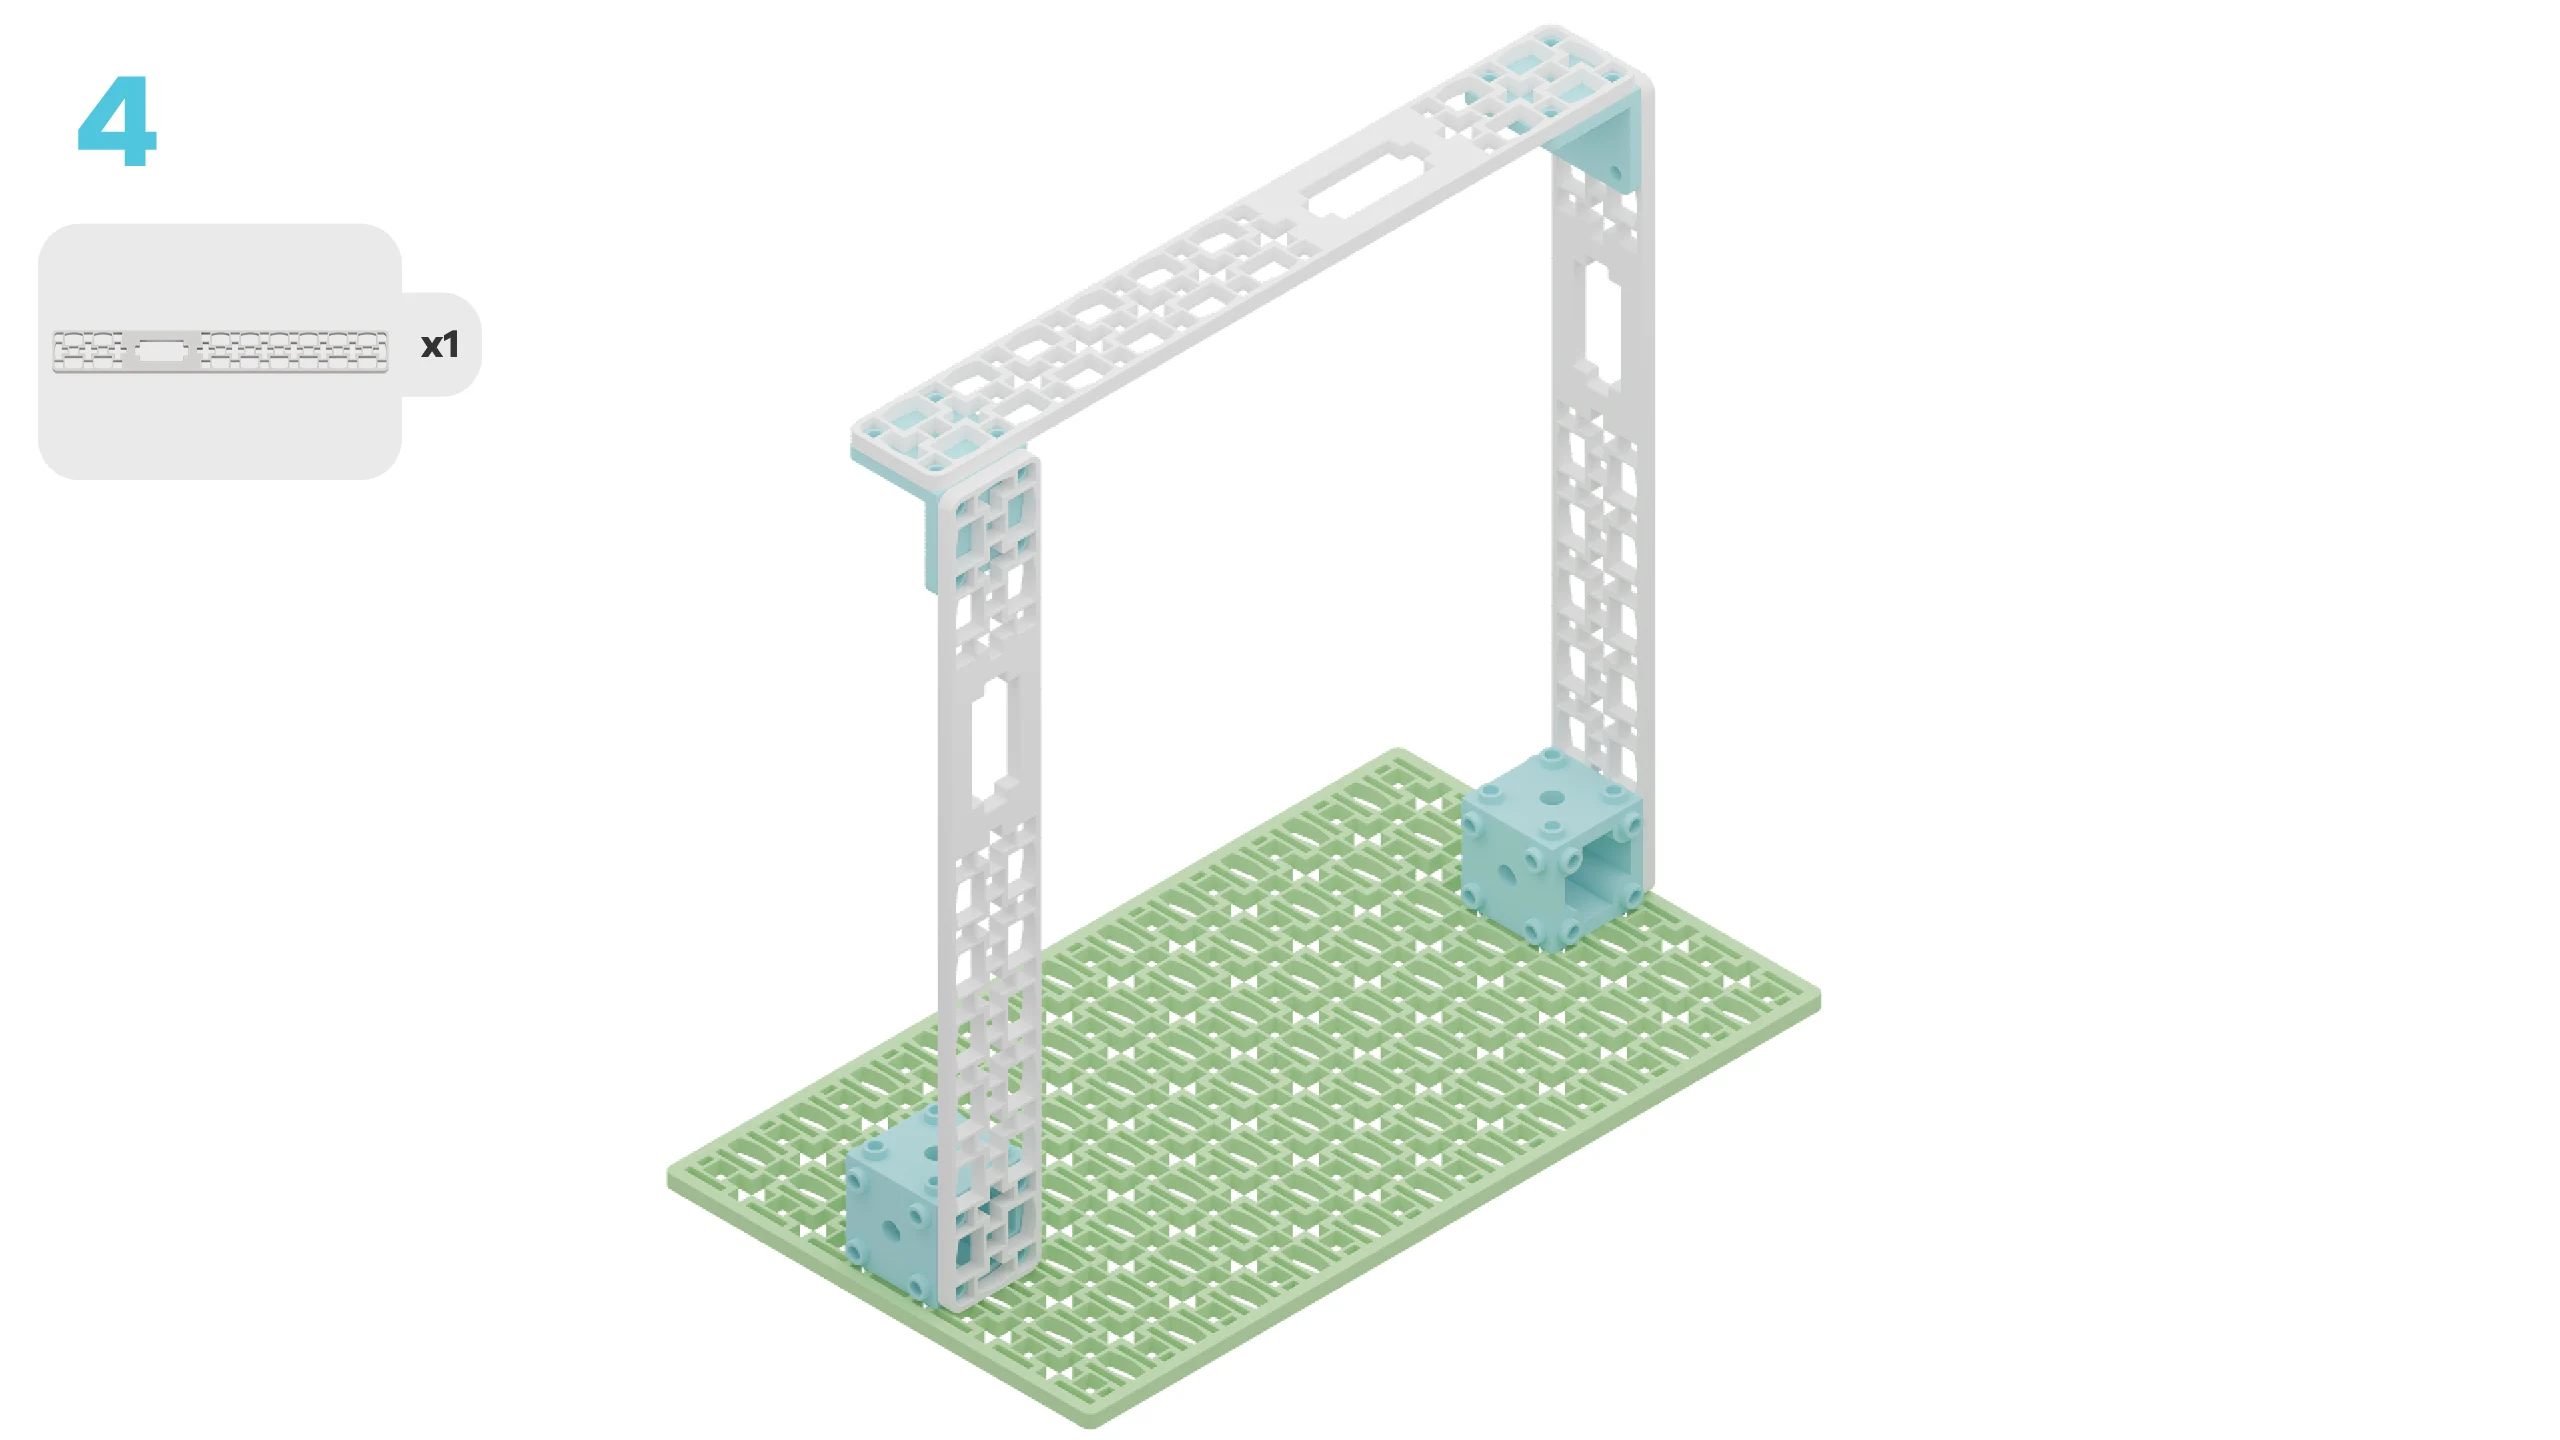
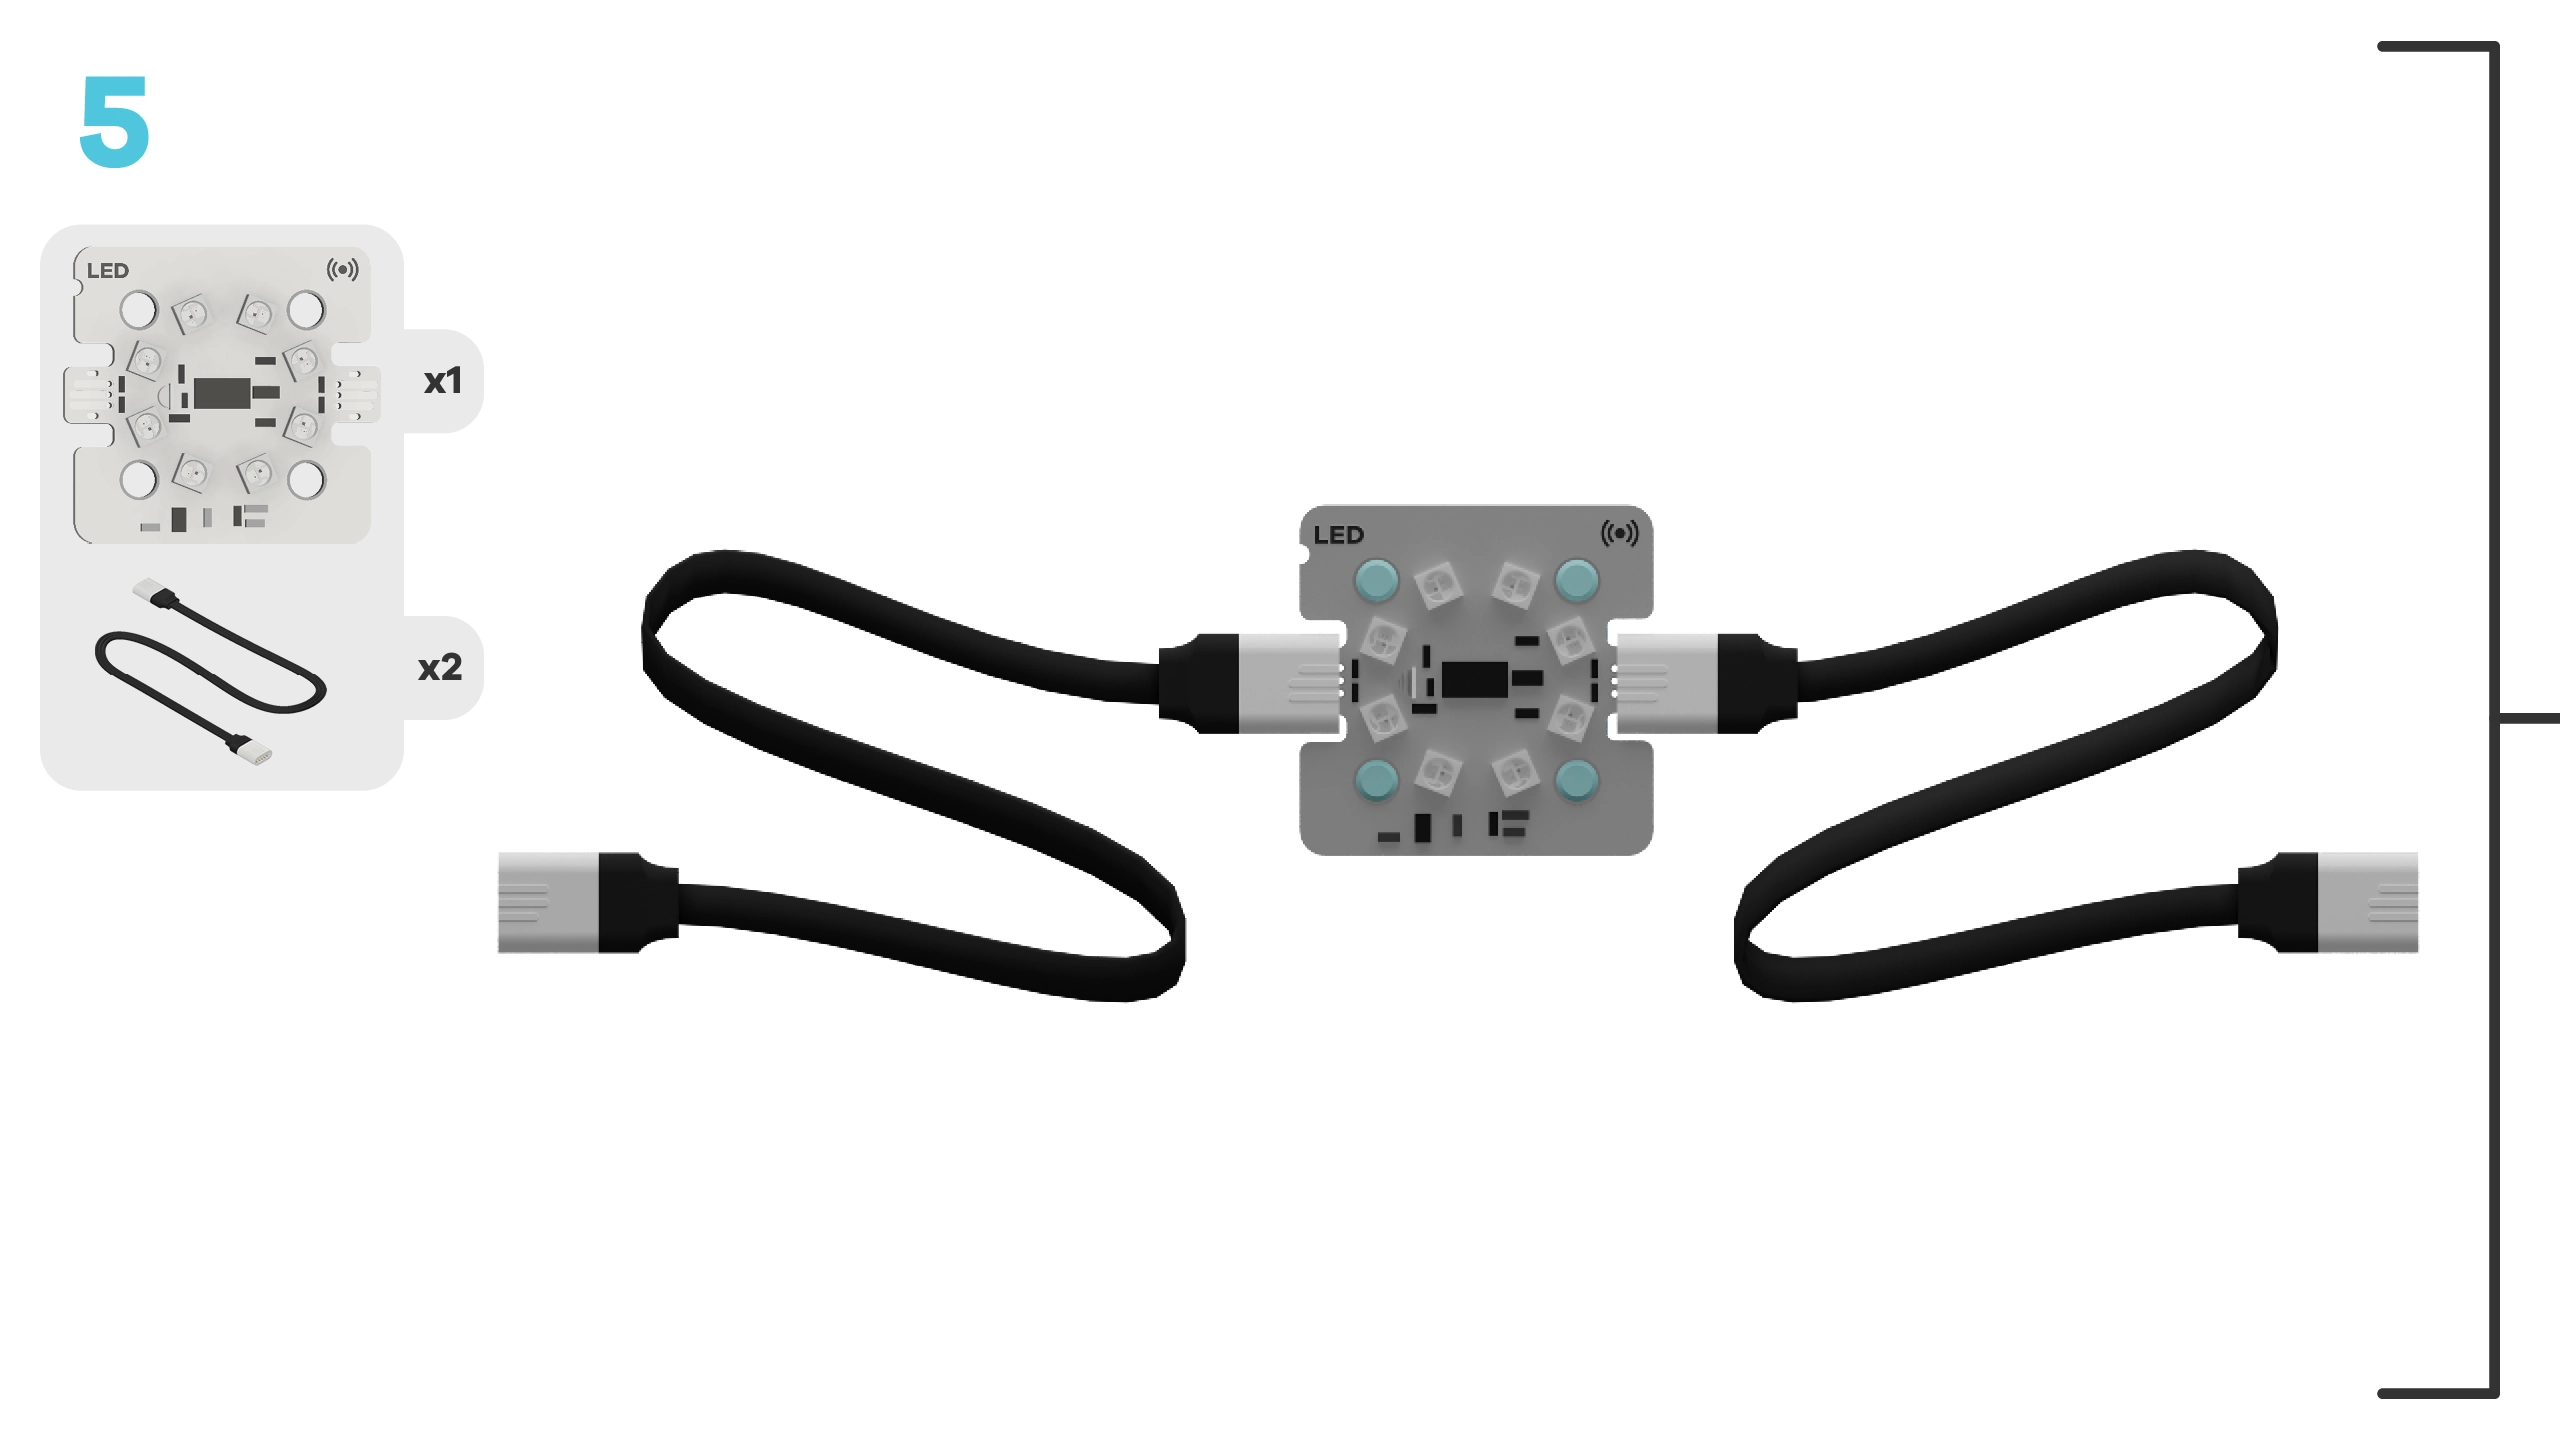
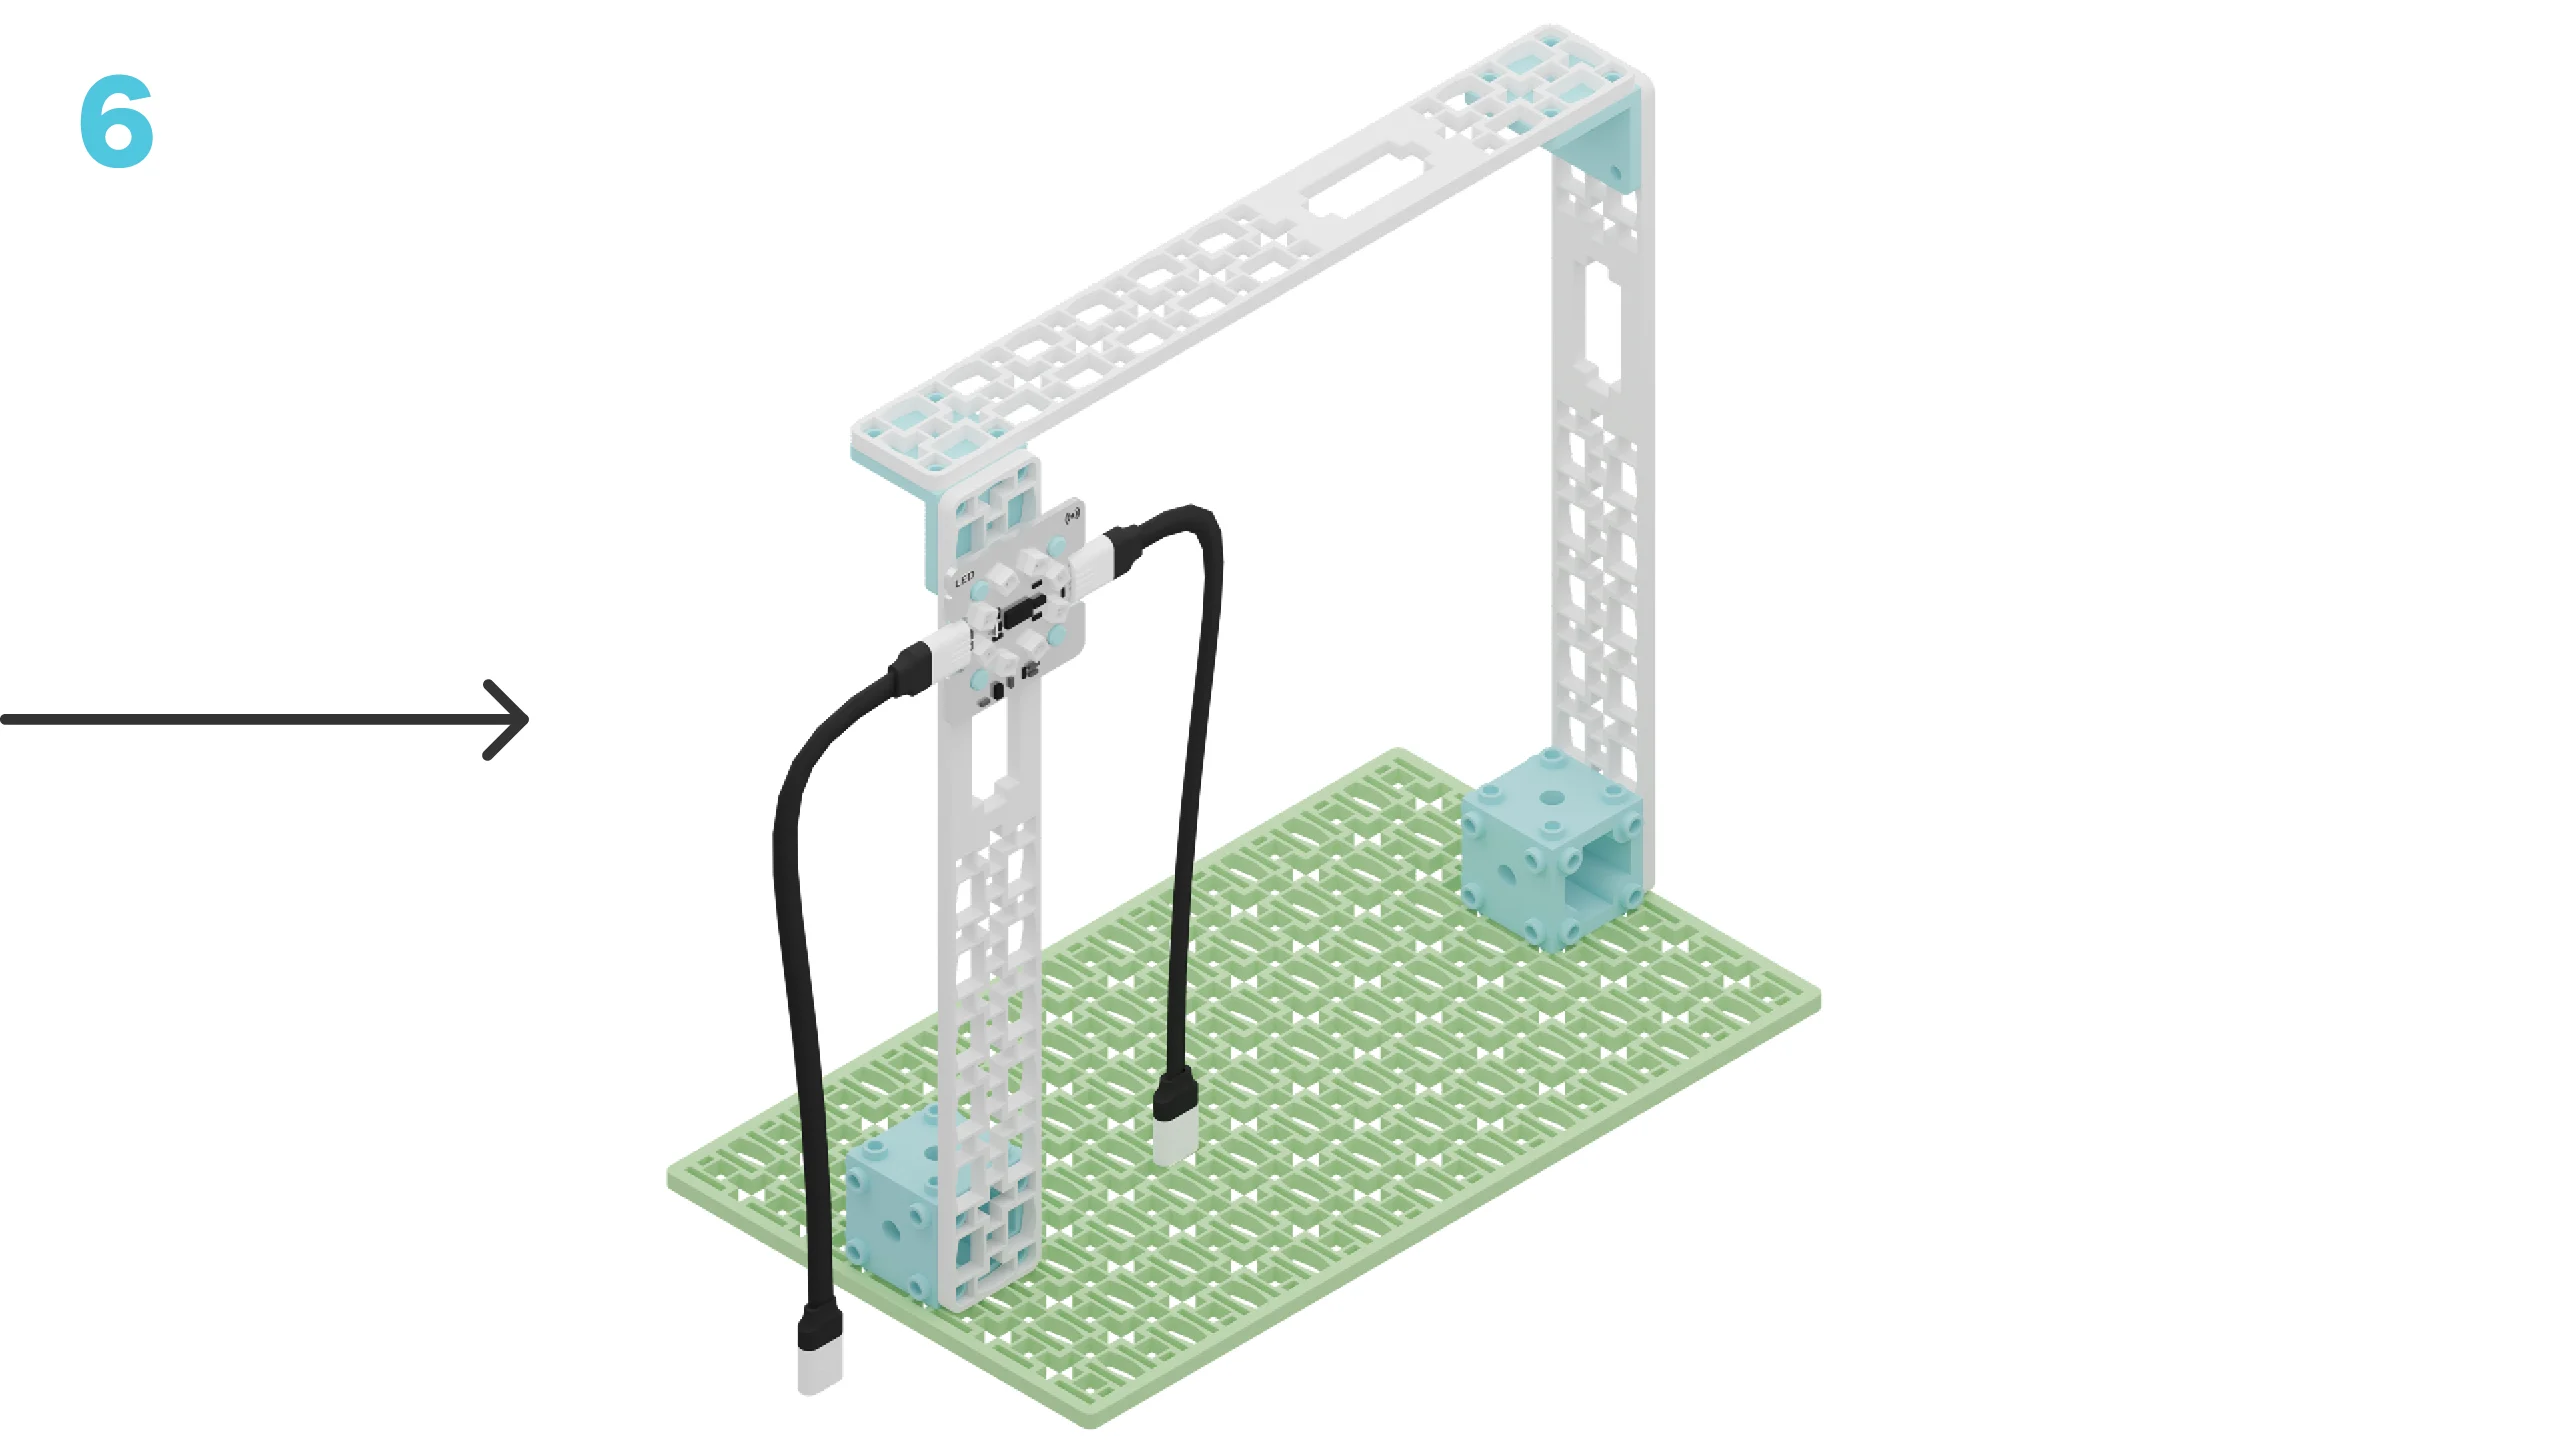
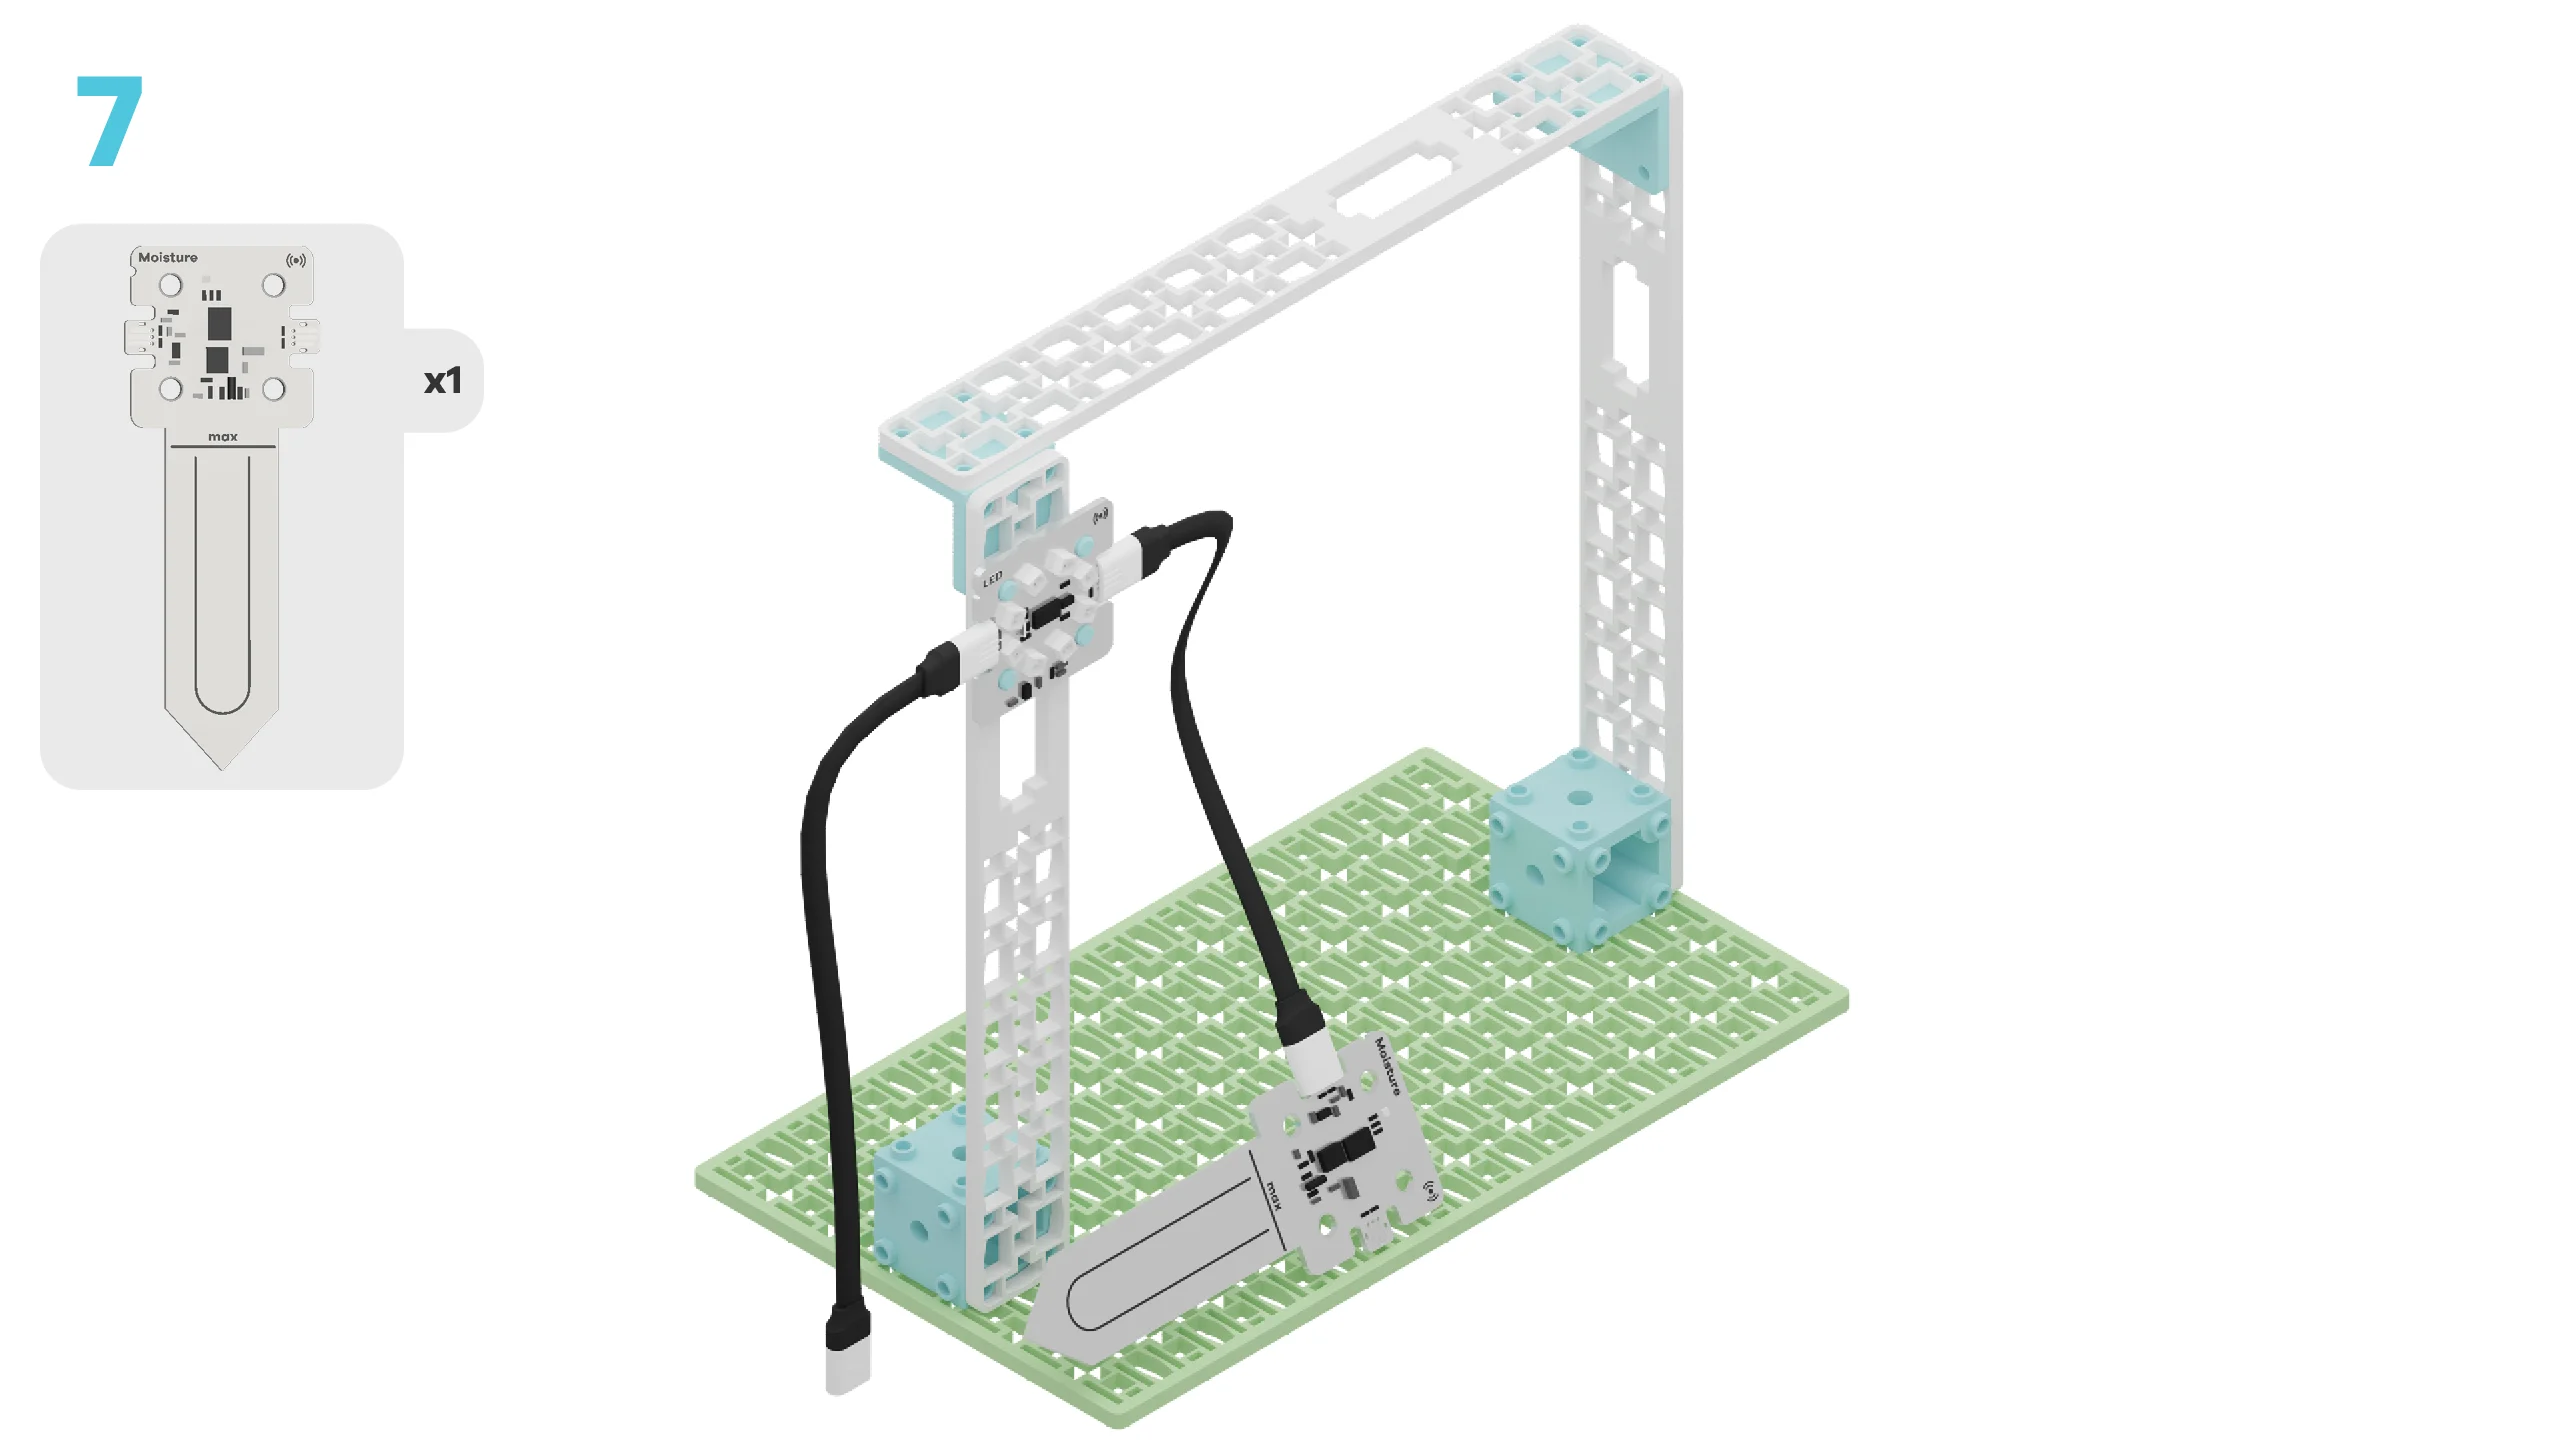
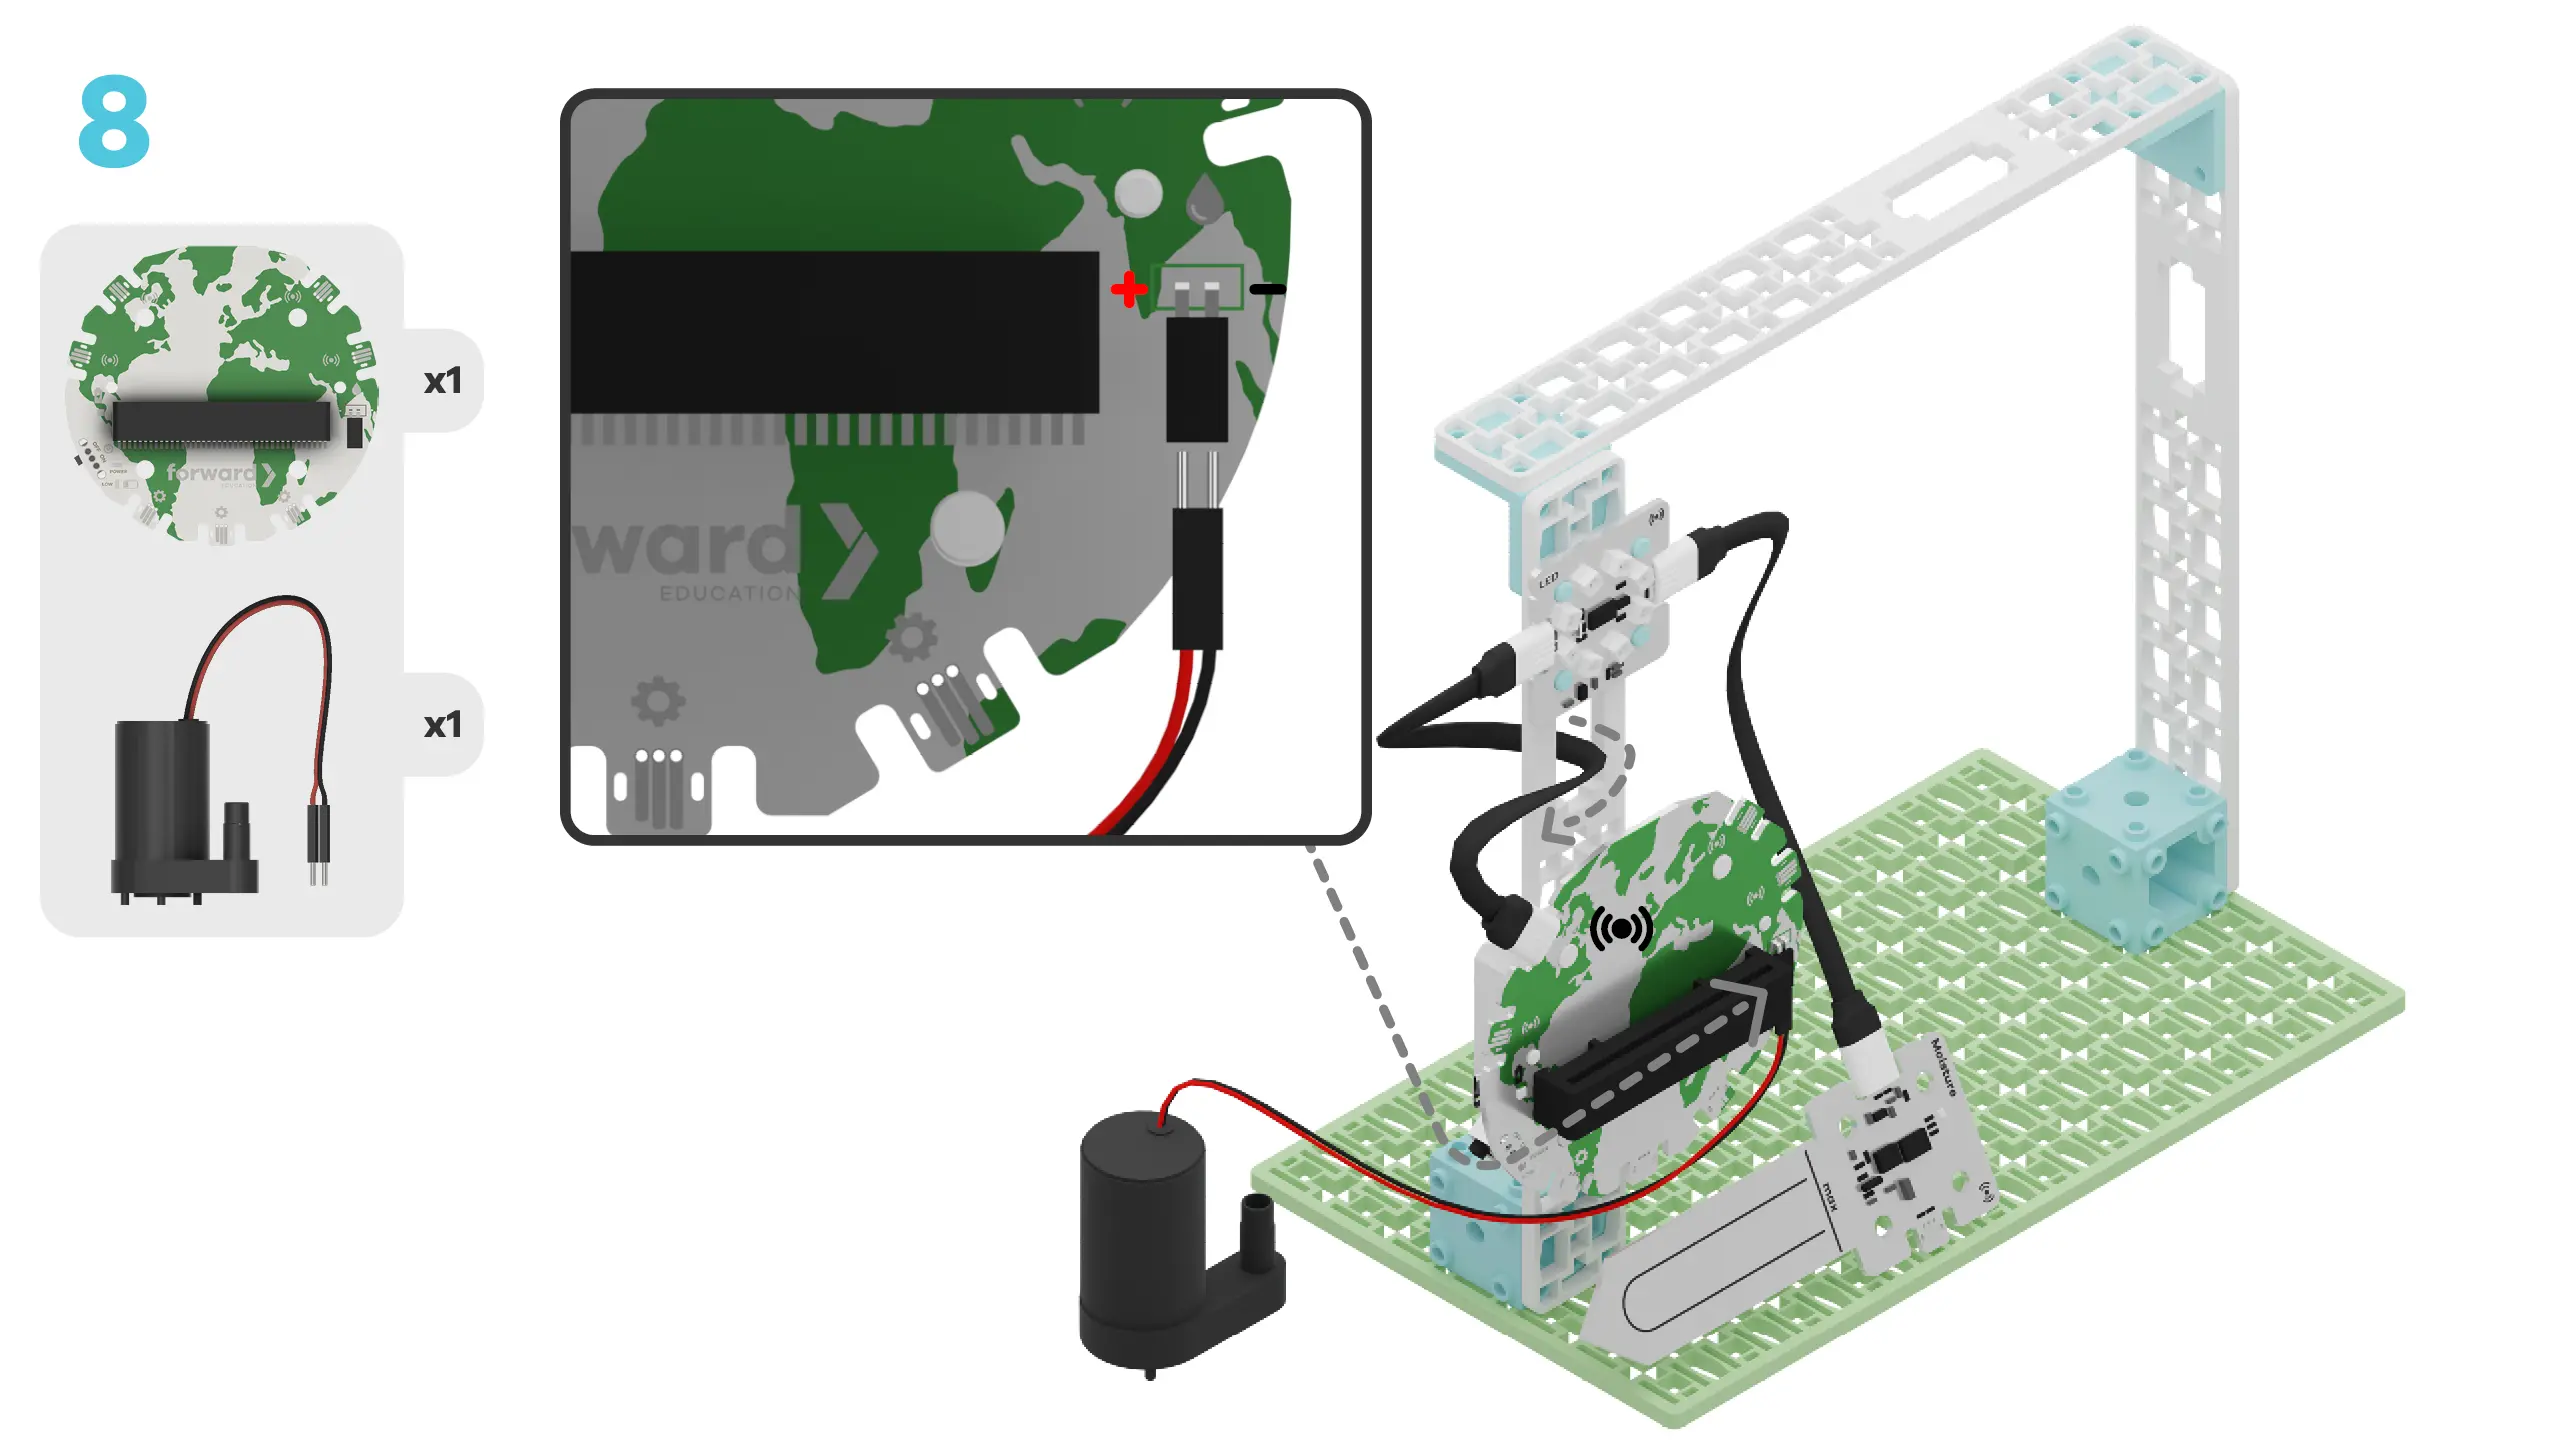
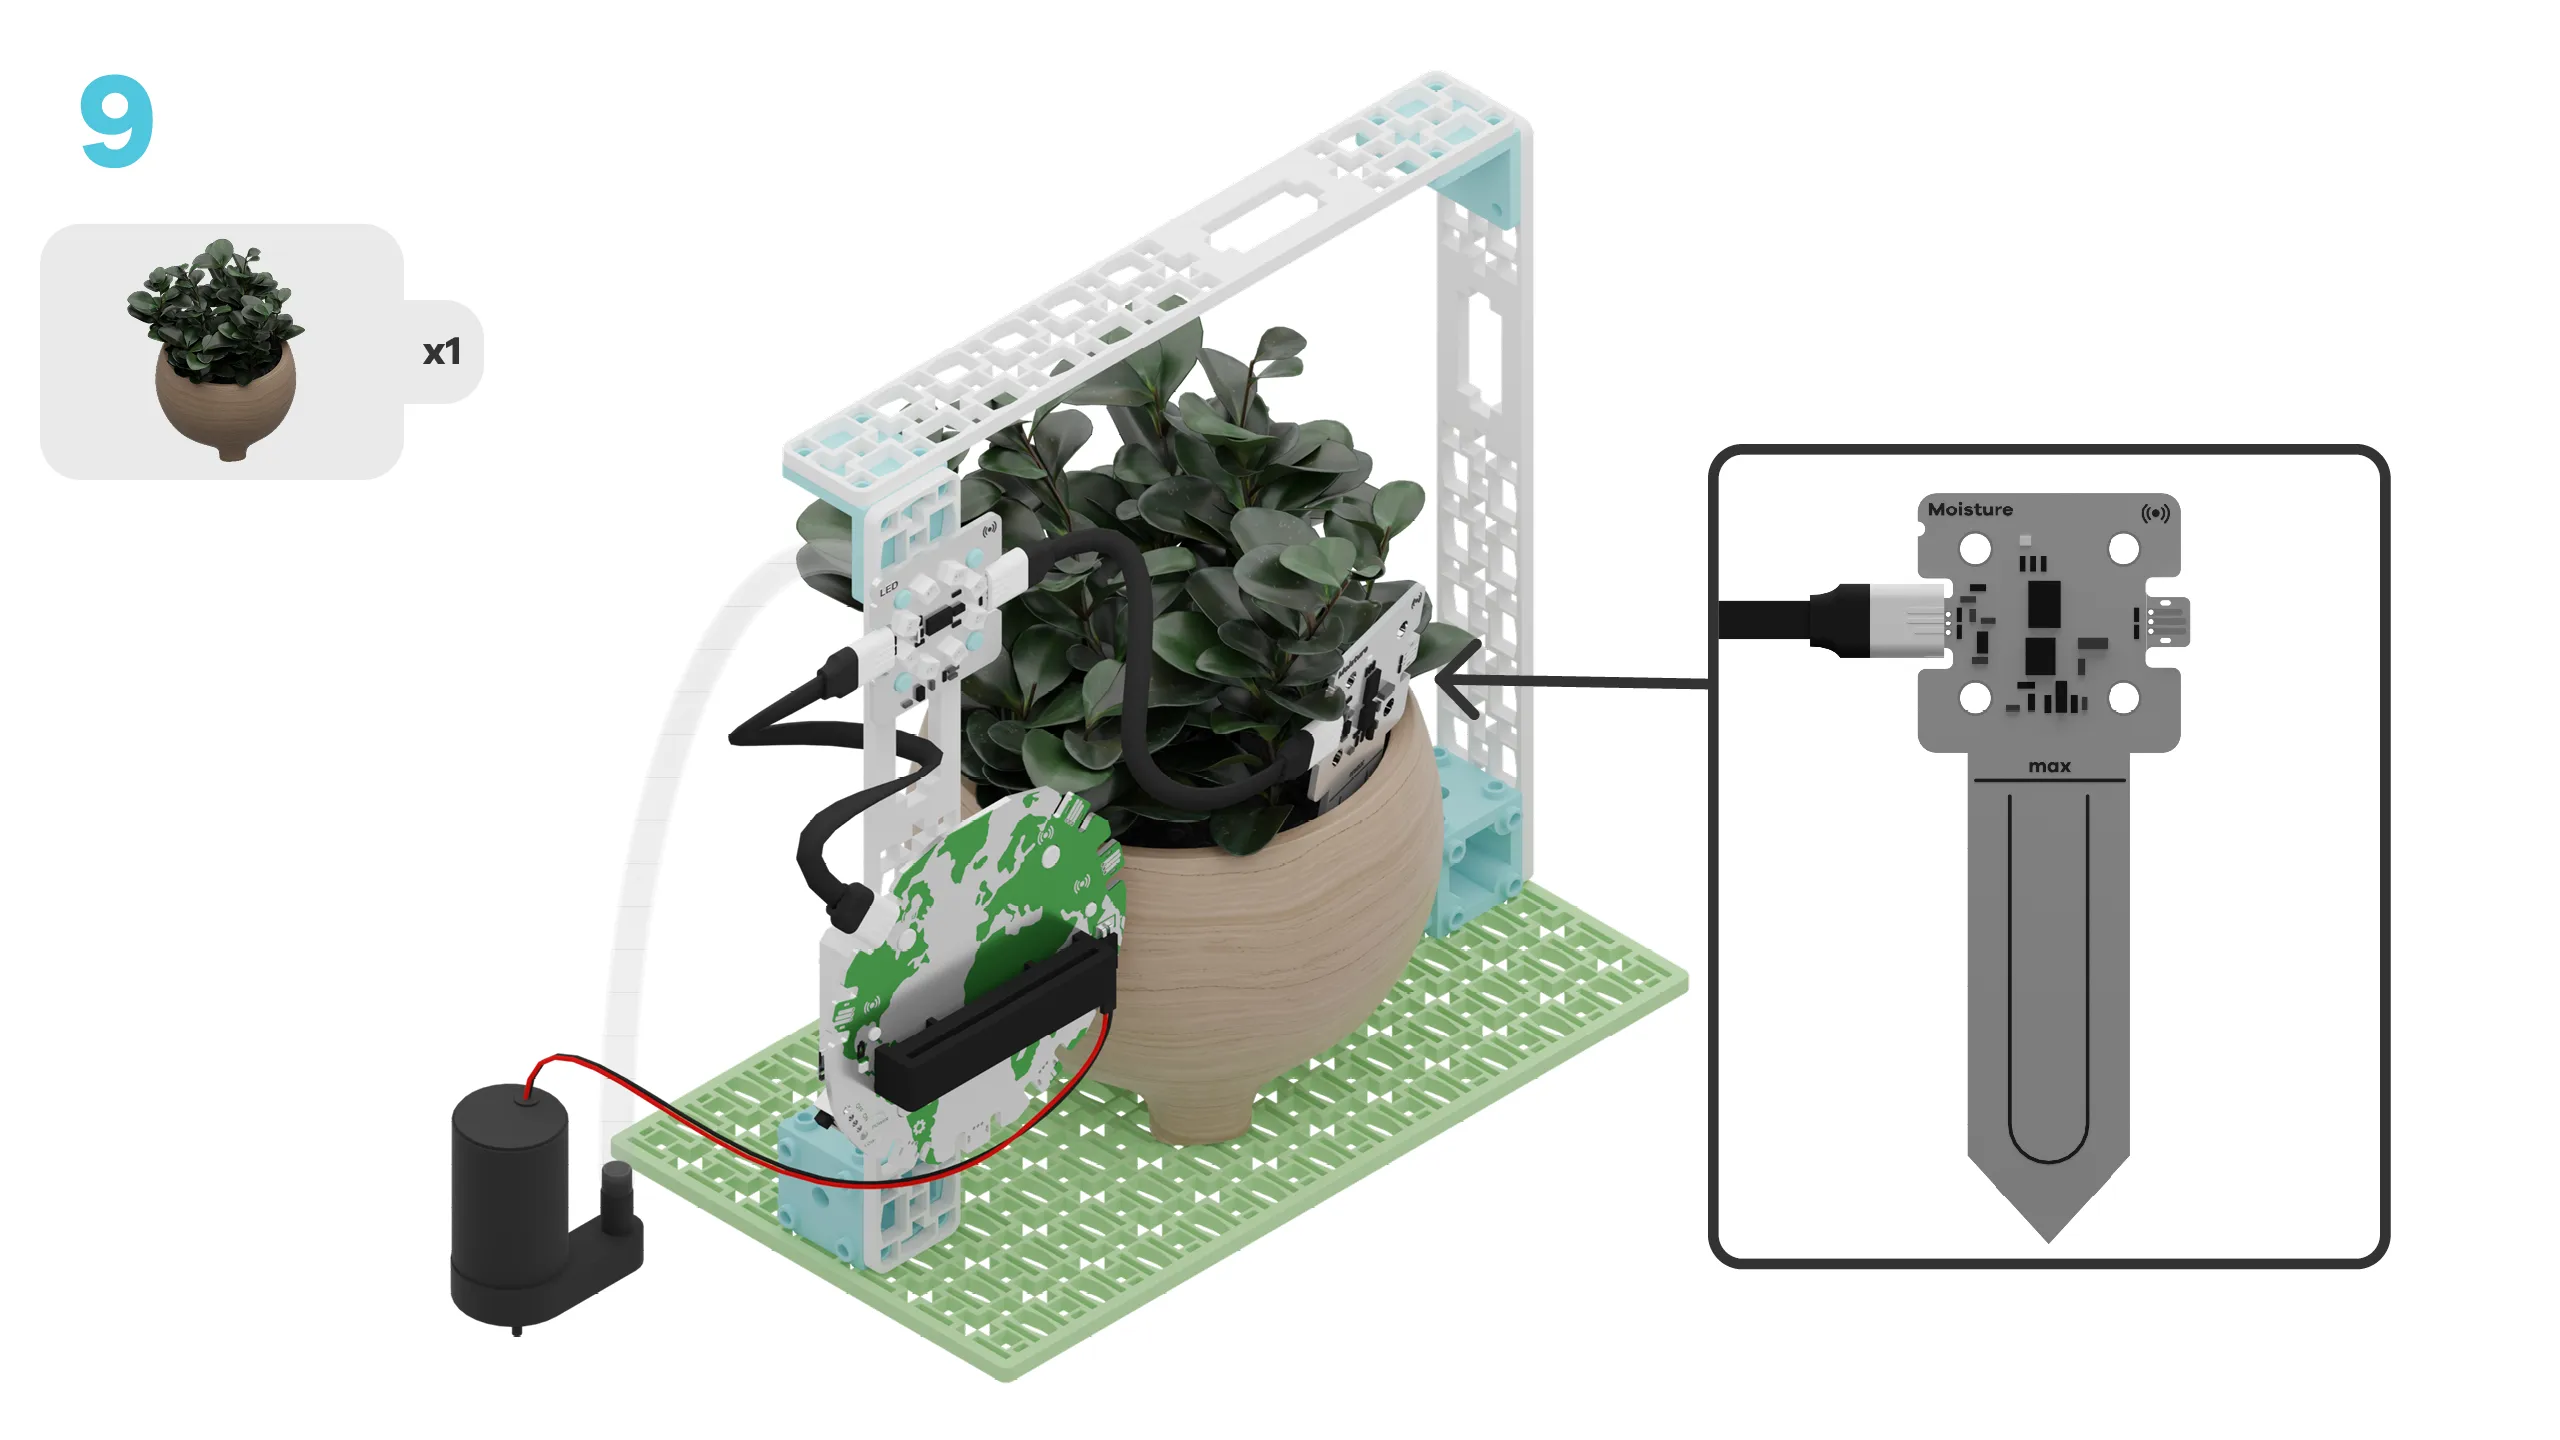
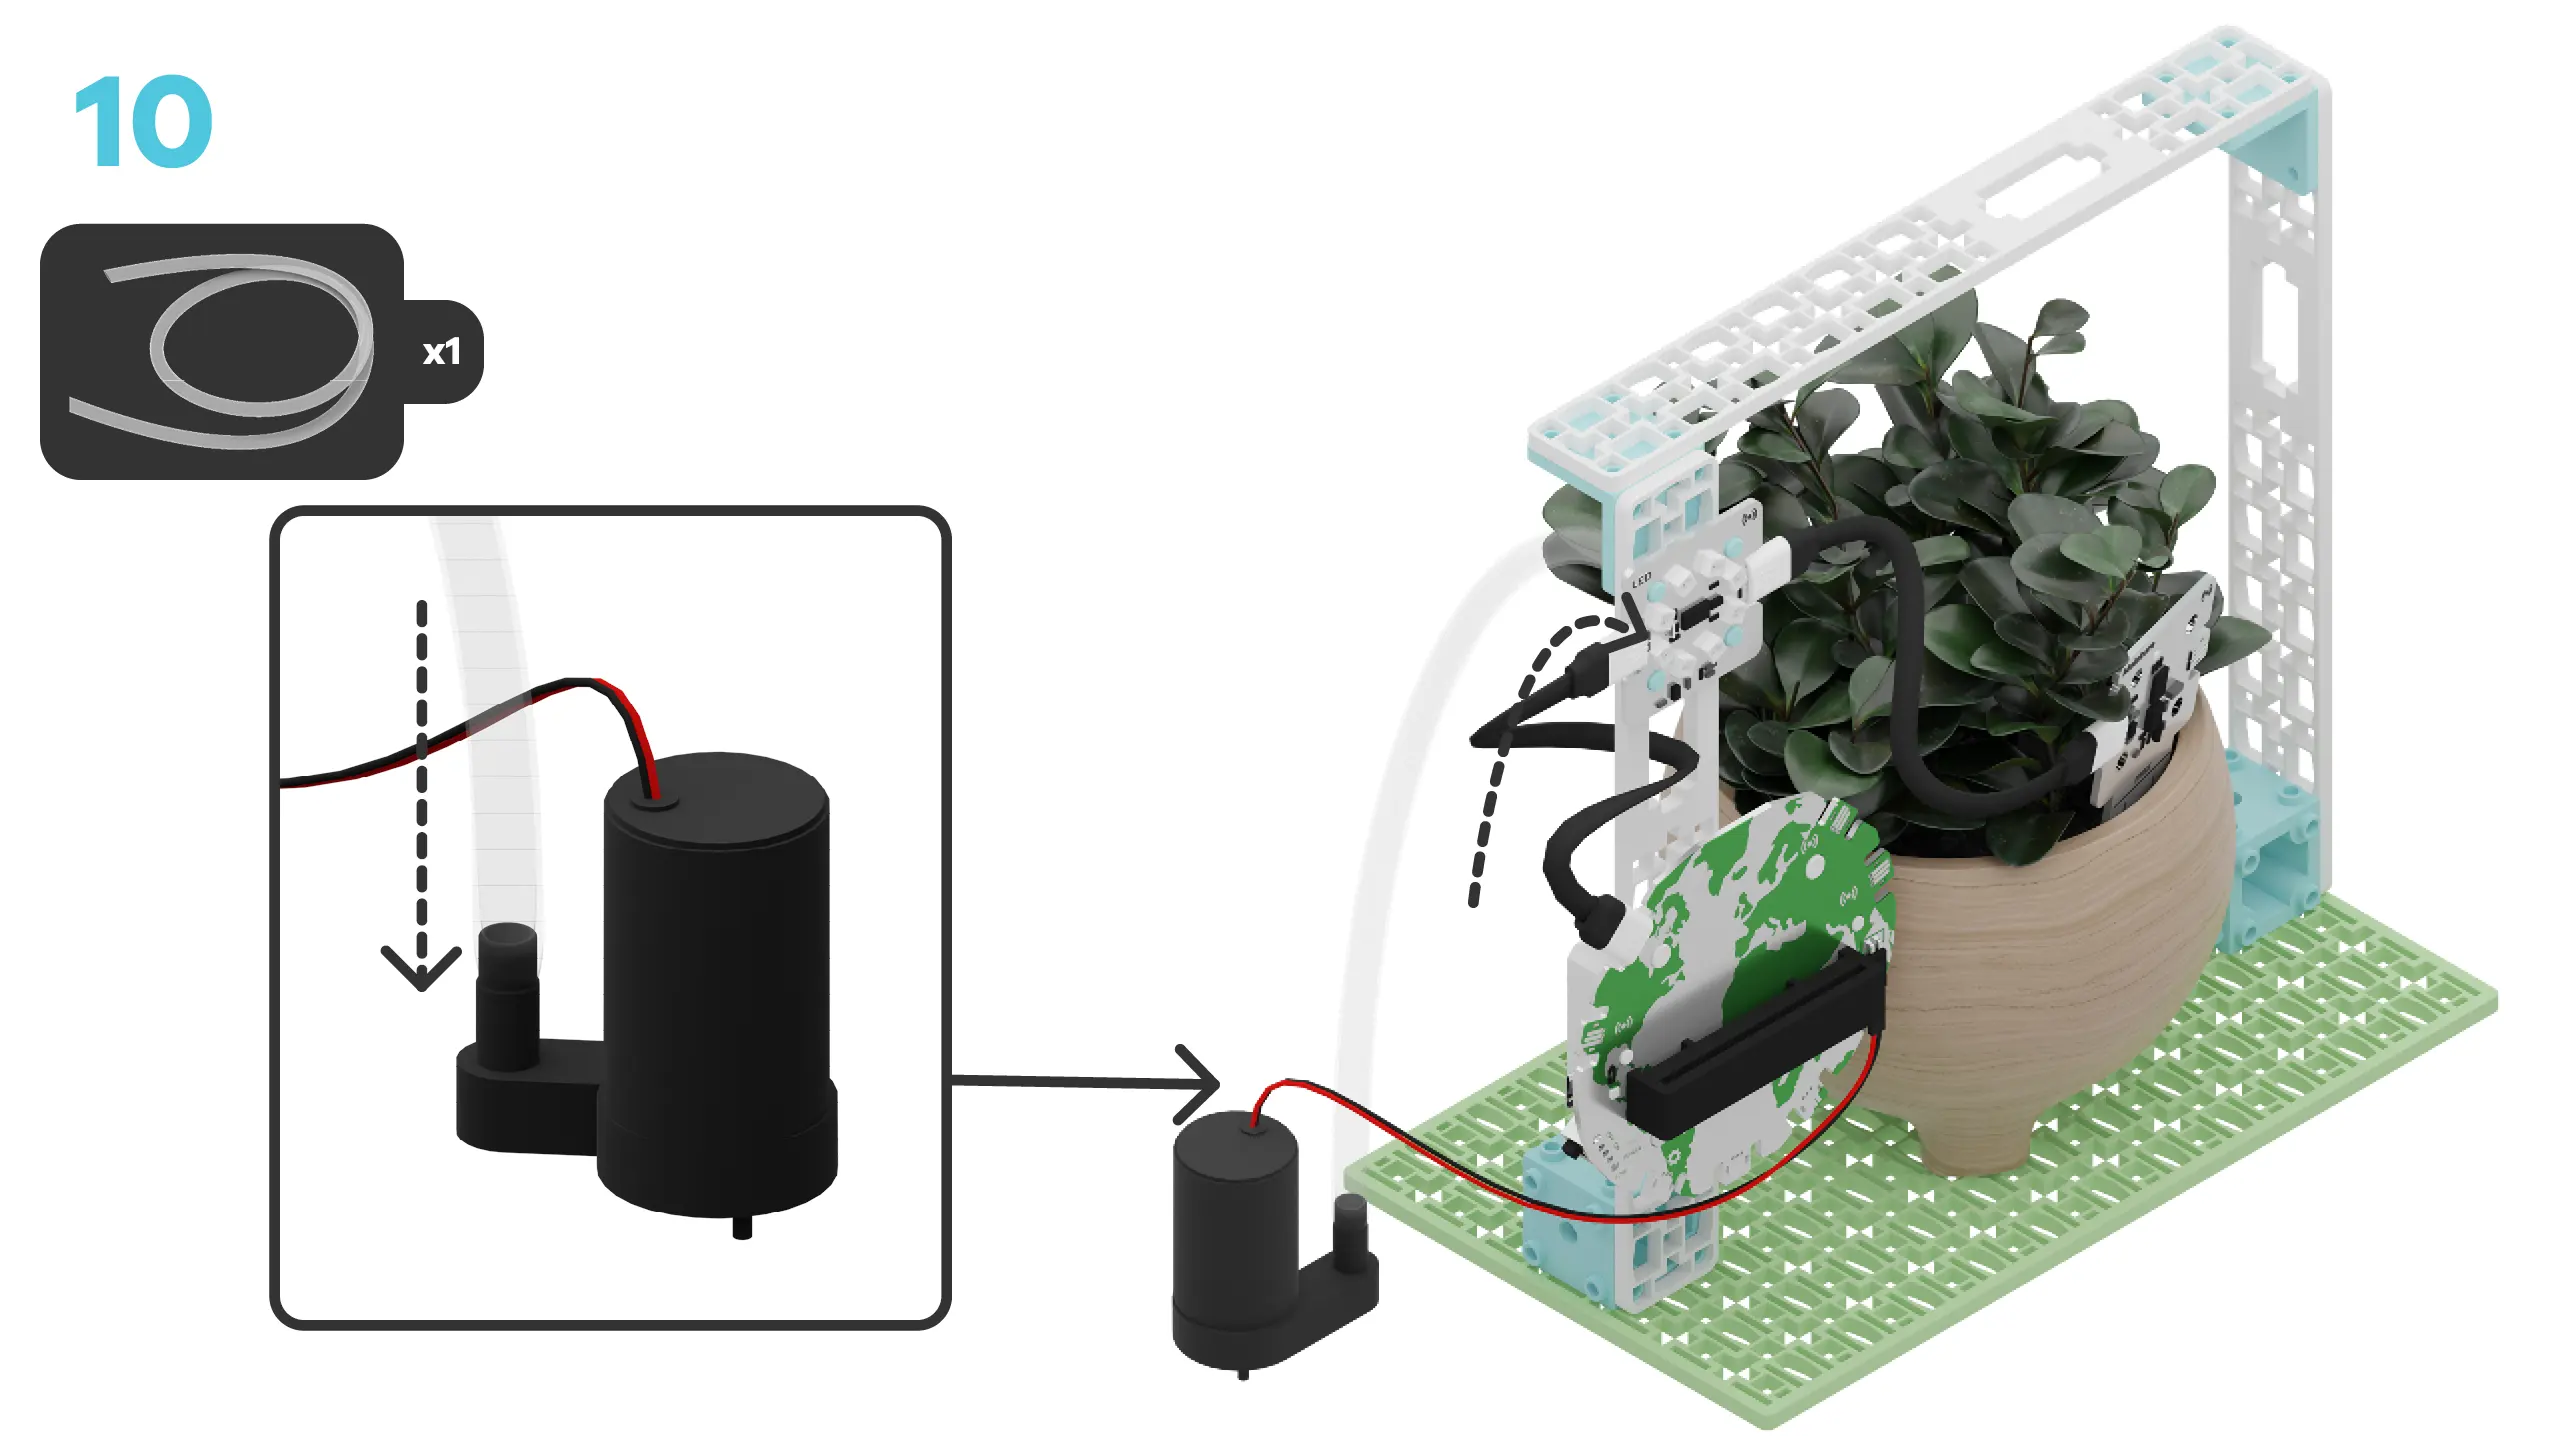
Let's build a smart hydroponic farming system! We are going to do this in 4 parts:
- Build our smart farming system
- Add code to bring it to life
- Modify the code to learn how it works
- Complete a challenge to improve our farming system
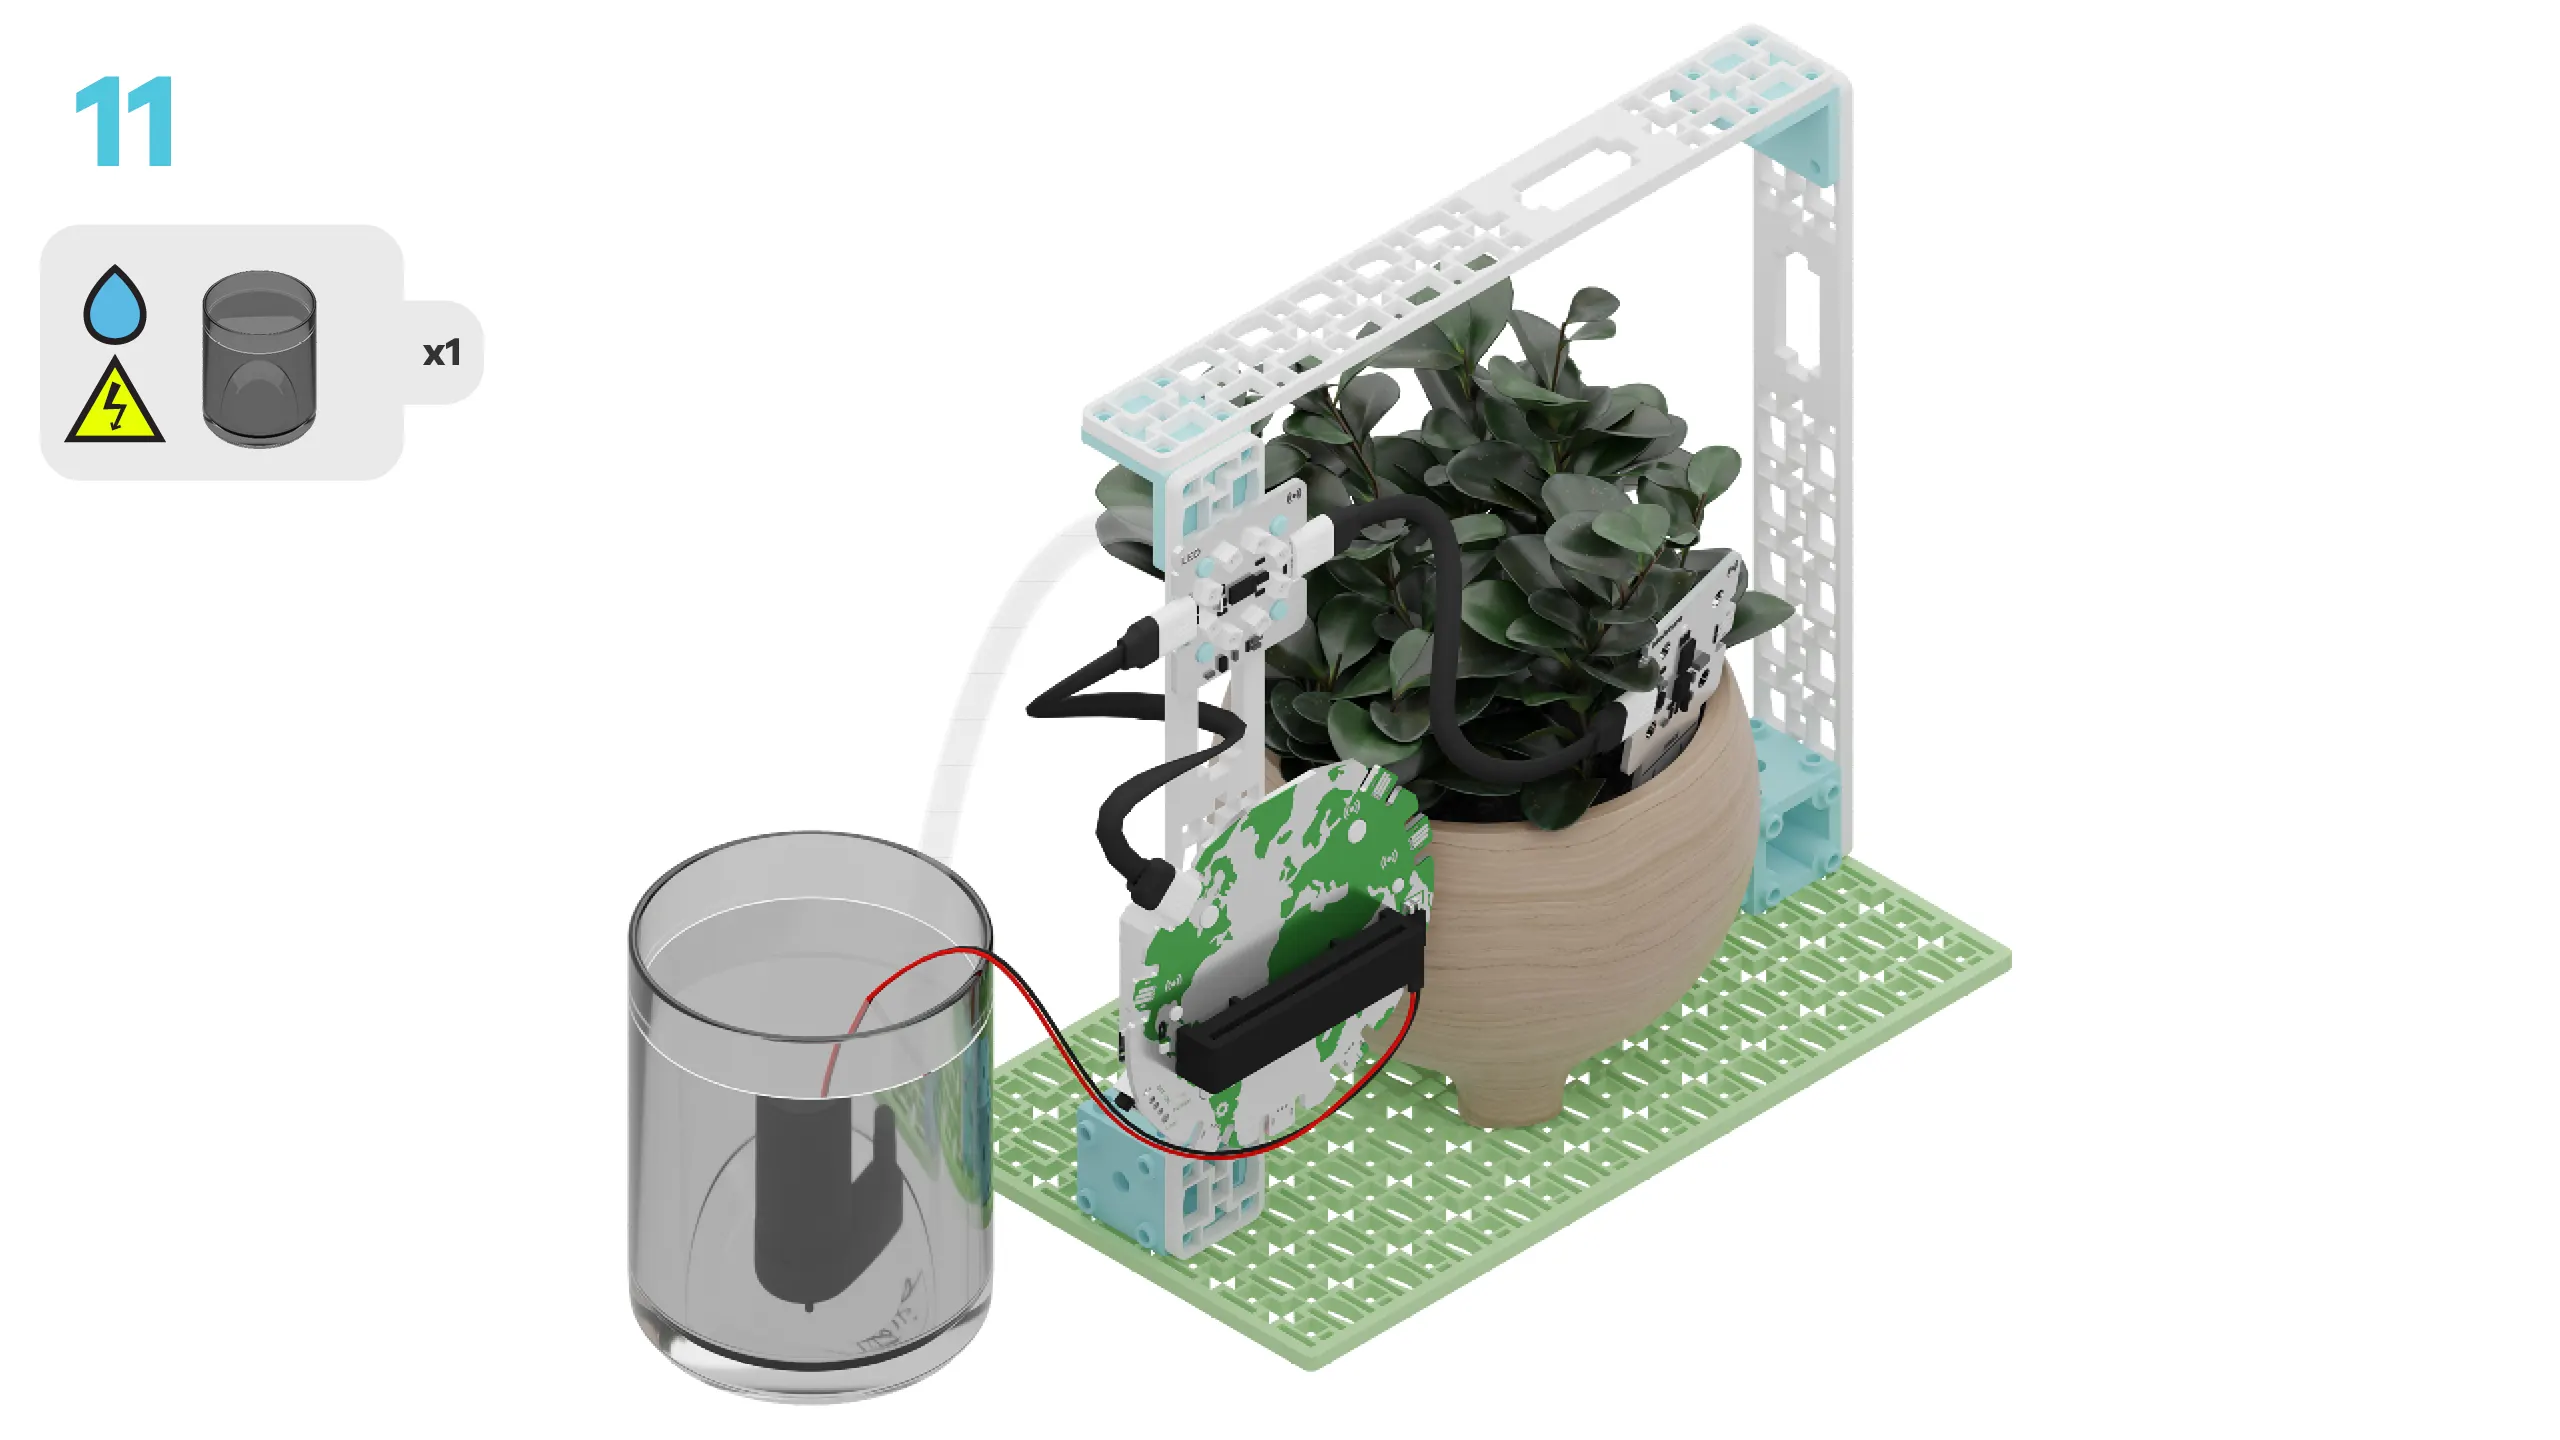
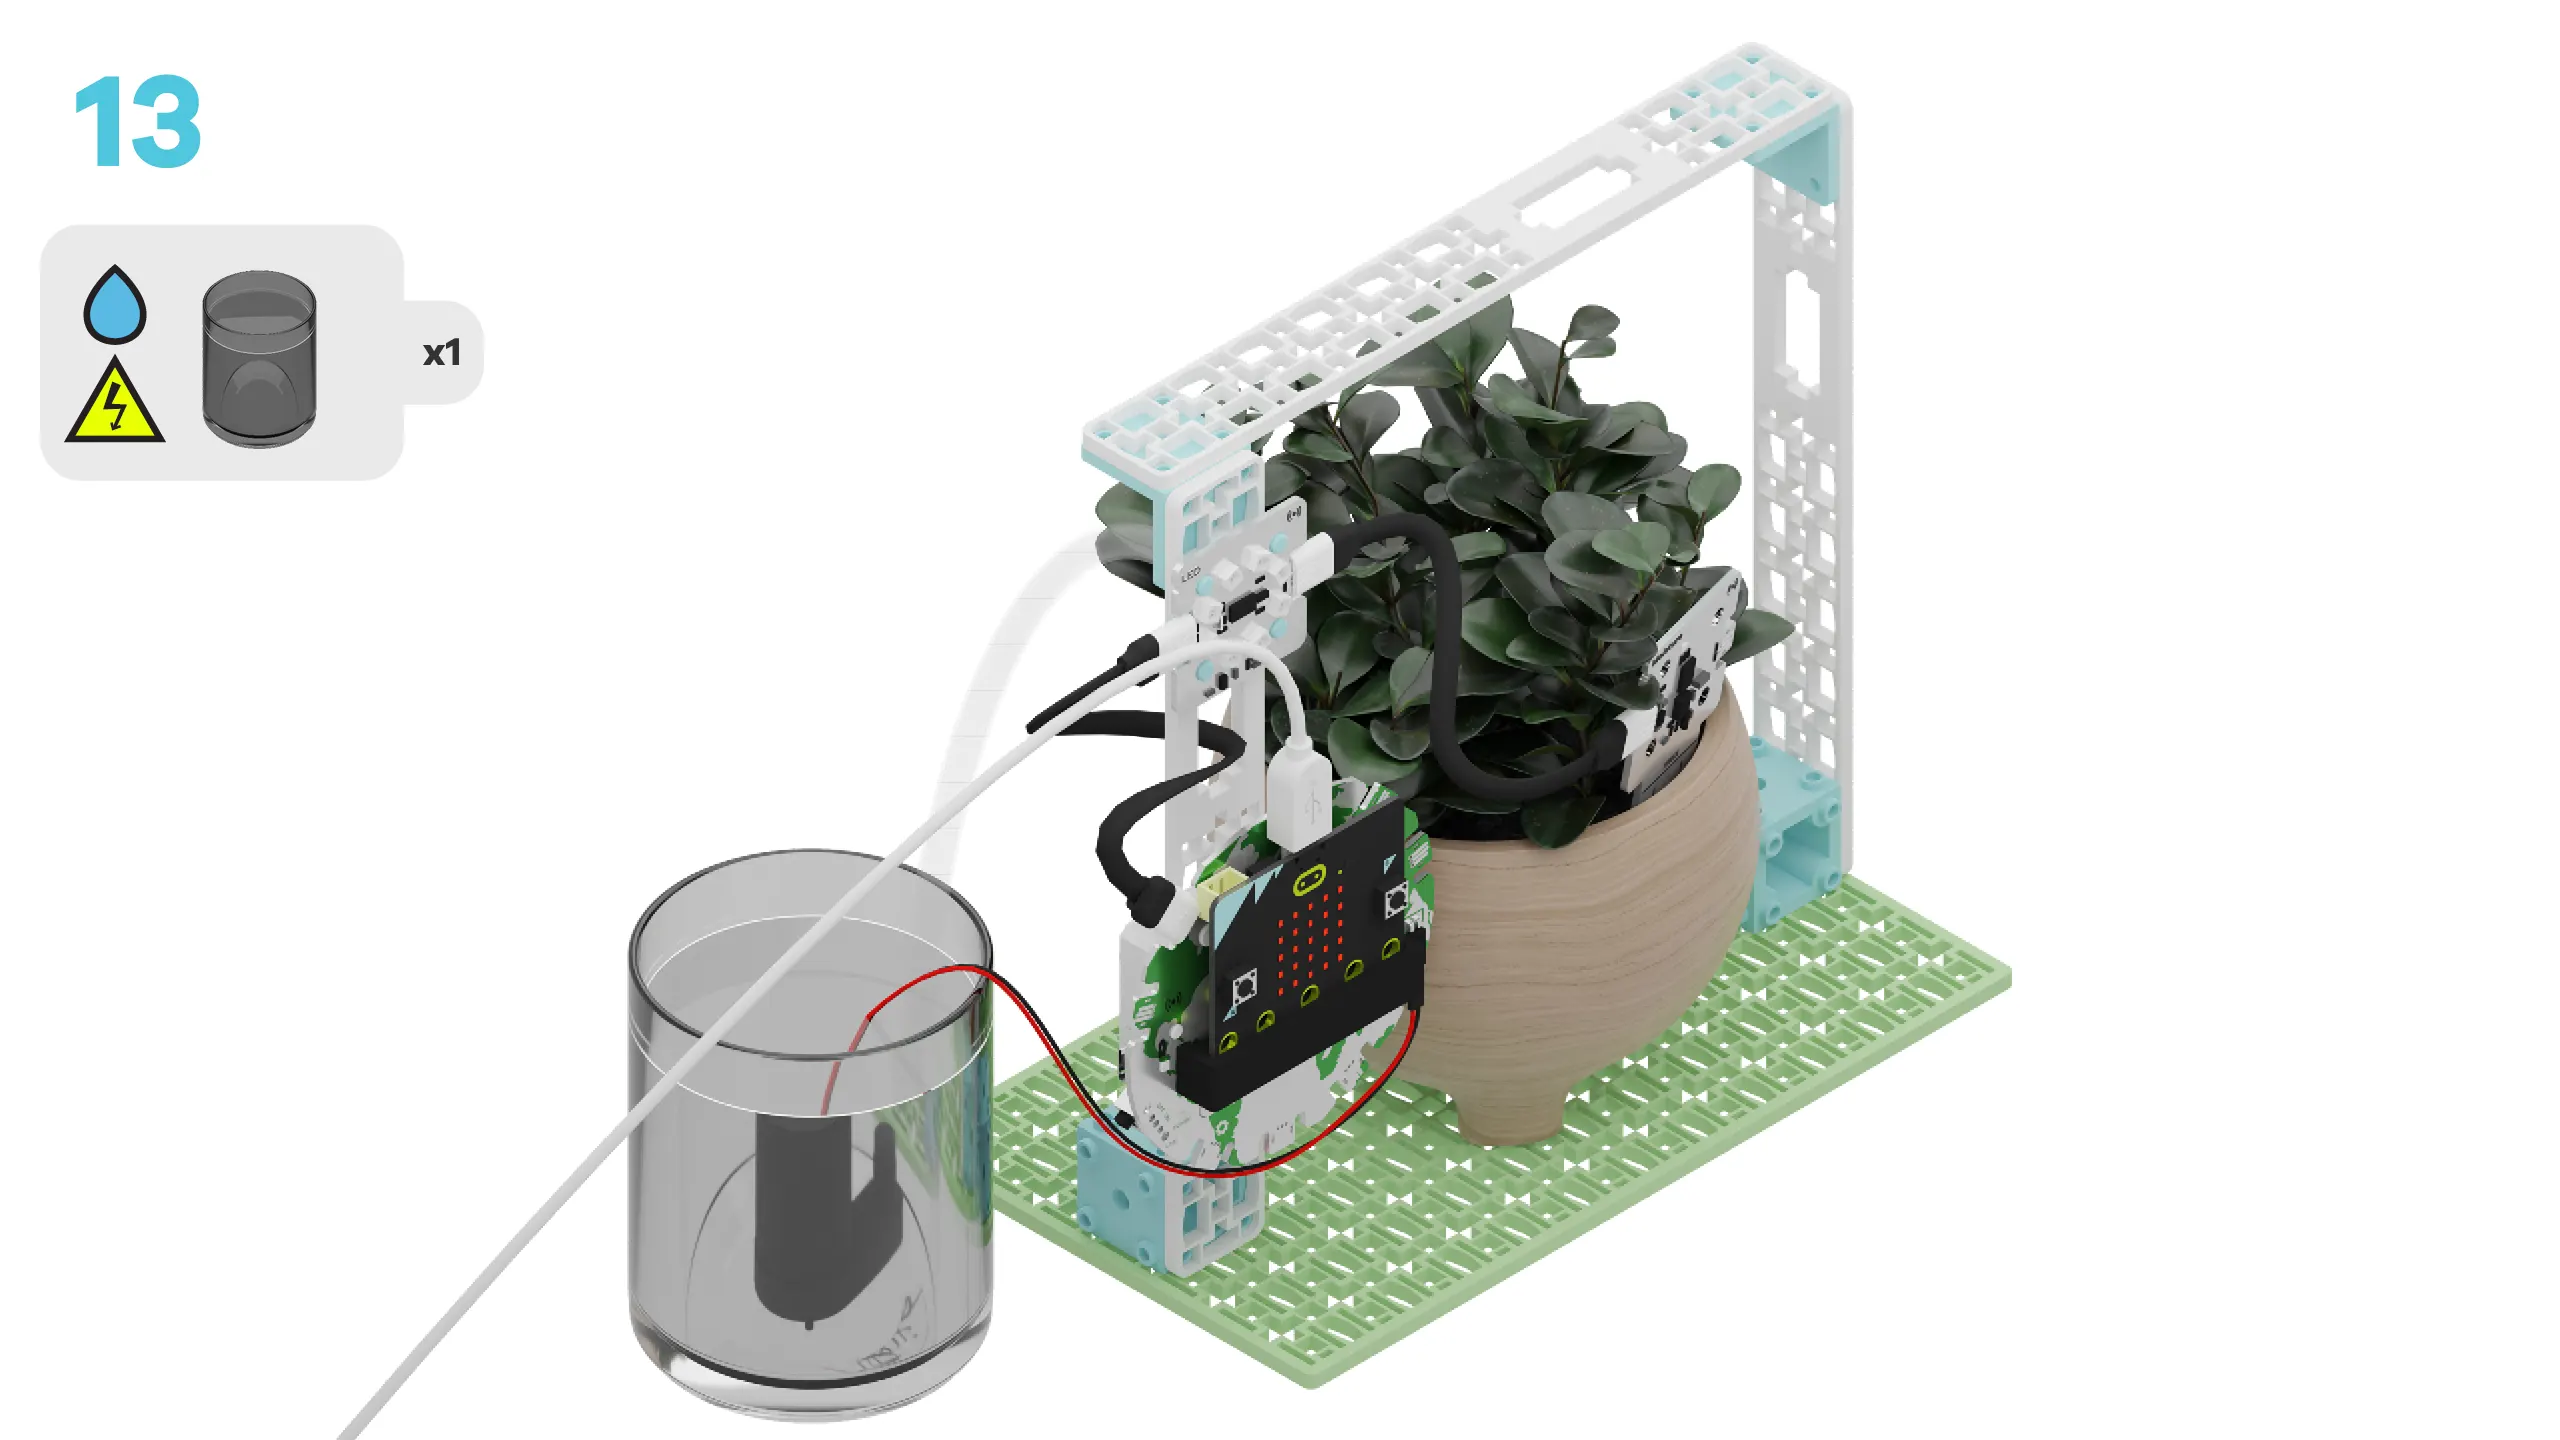
Note: For now, you may place the moisture sensor in an empty cup.
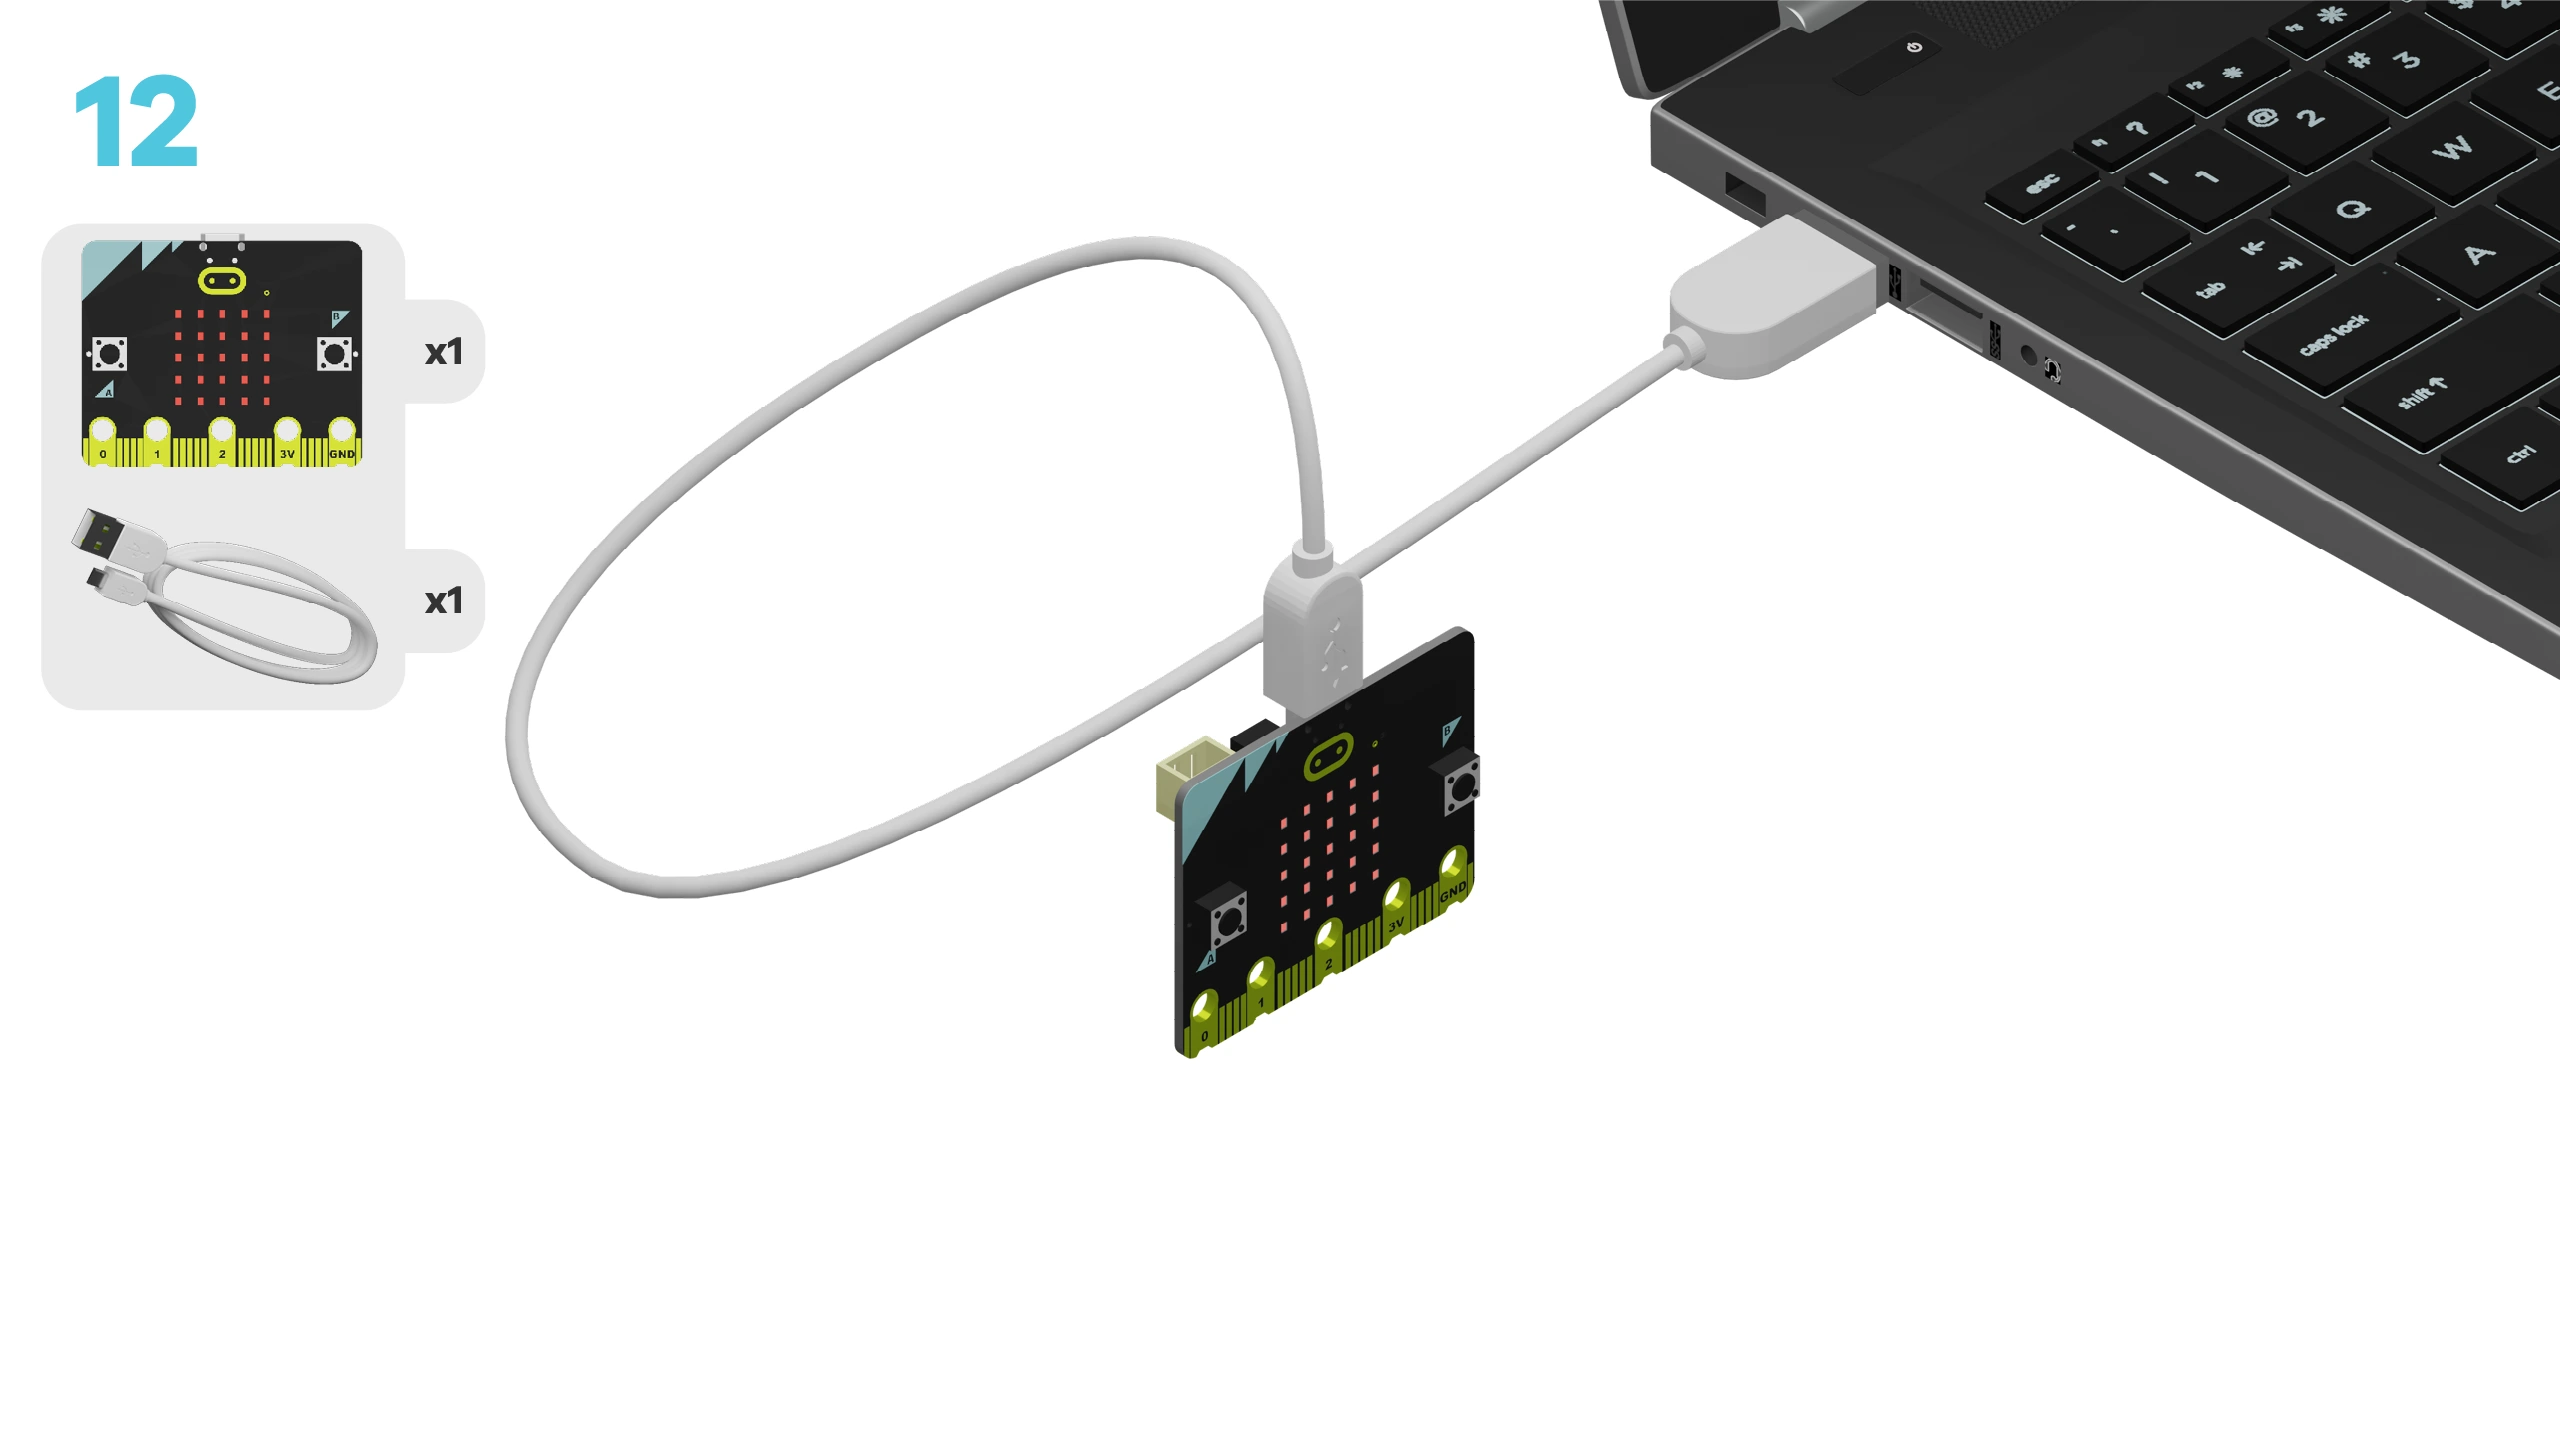
We need to connect our project to the computer to make it come to life with code!
The code will be the instructions that tell our micro:bit what to do.
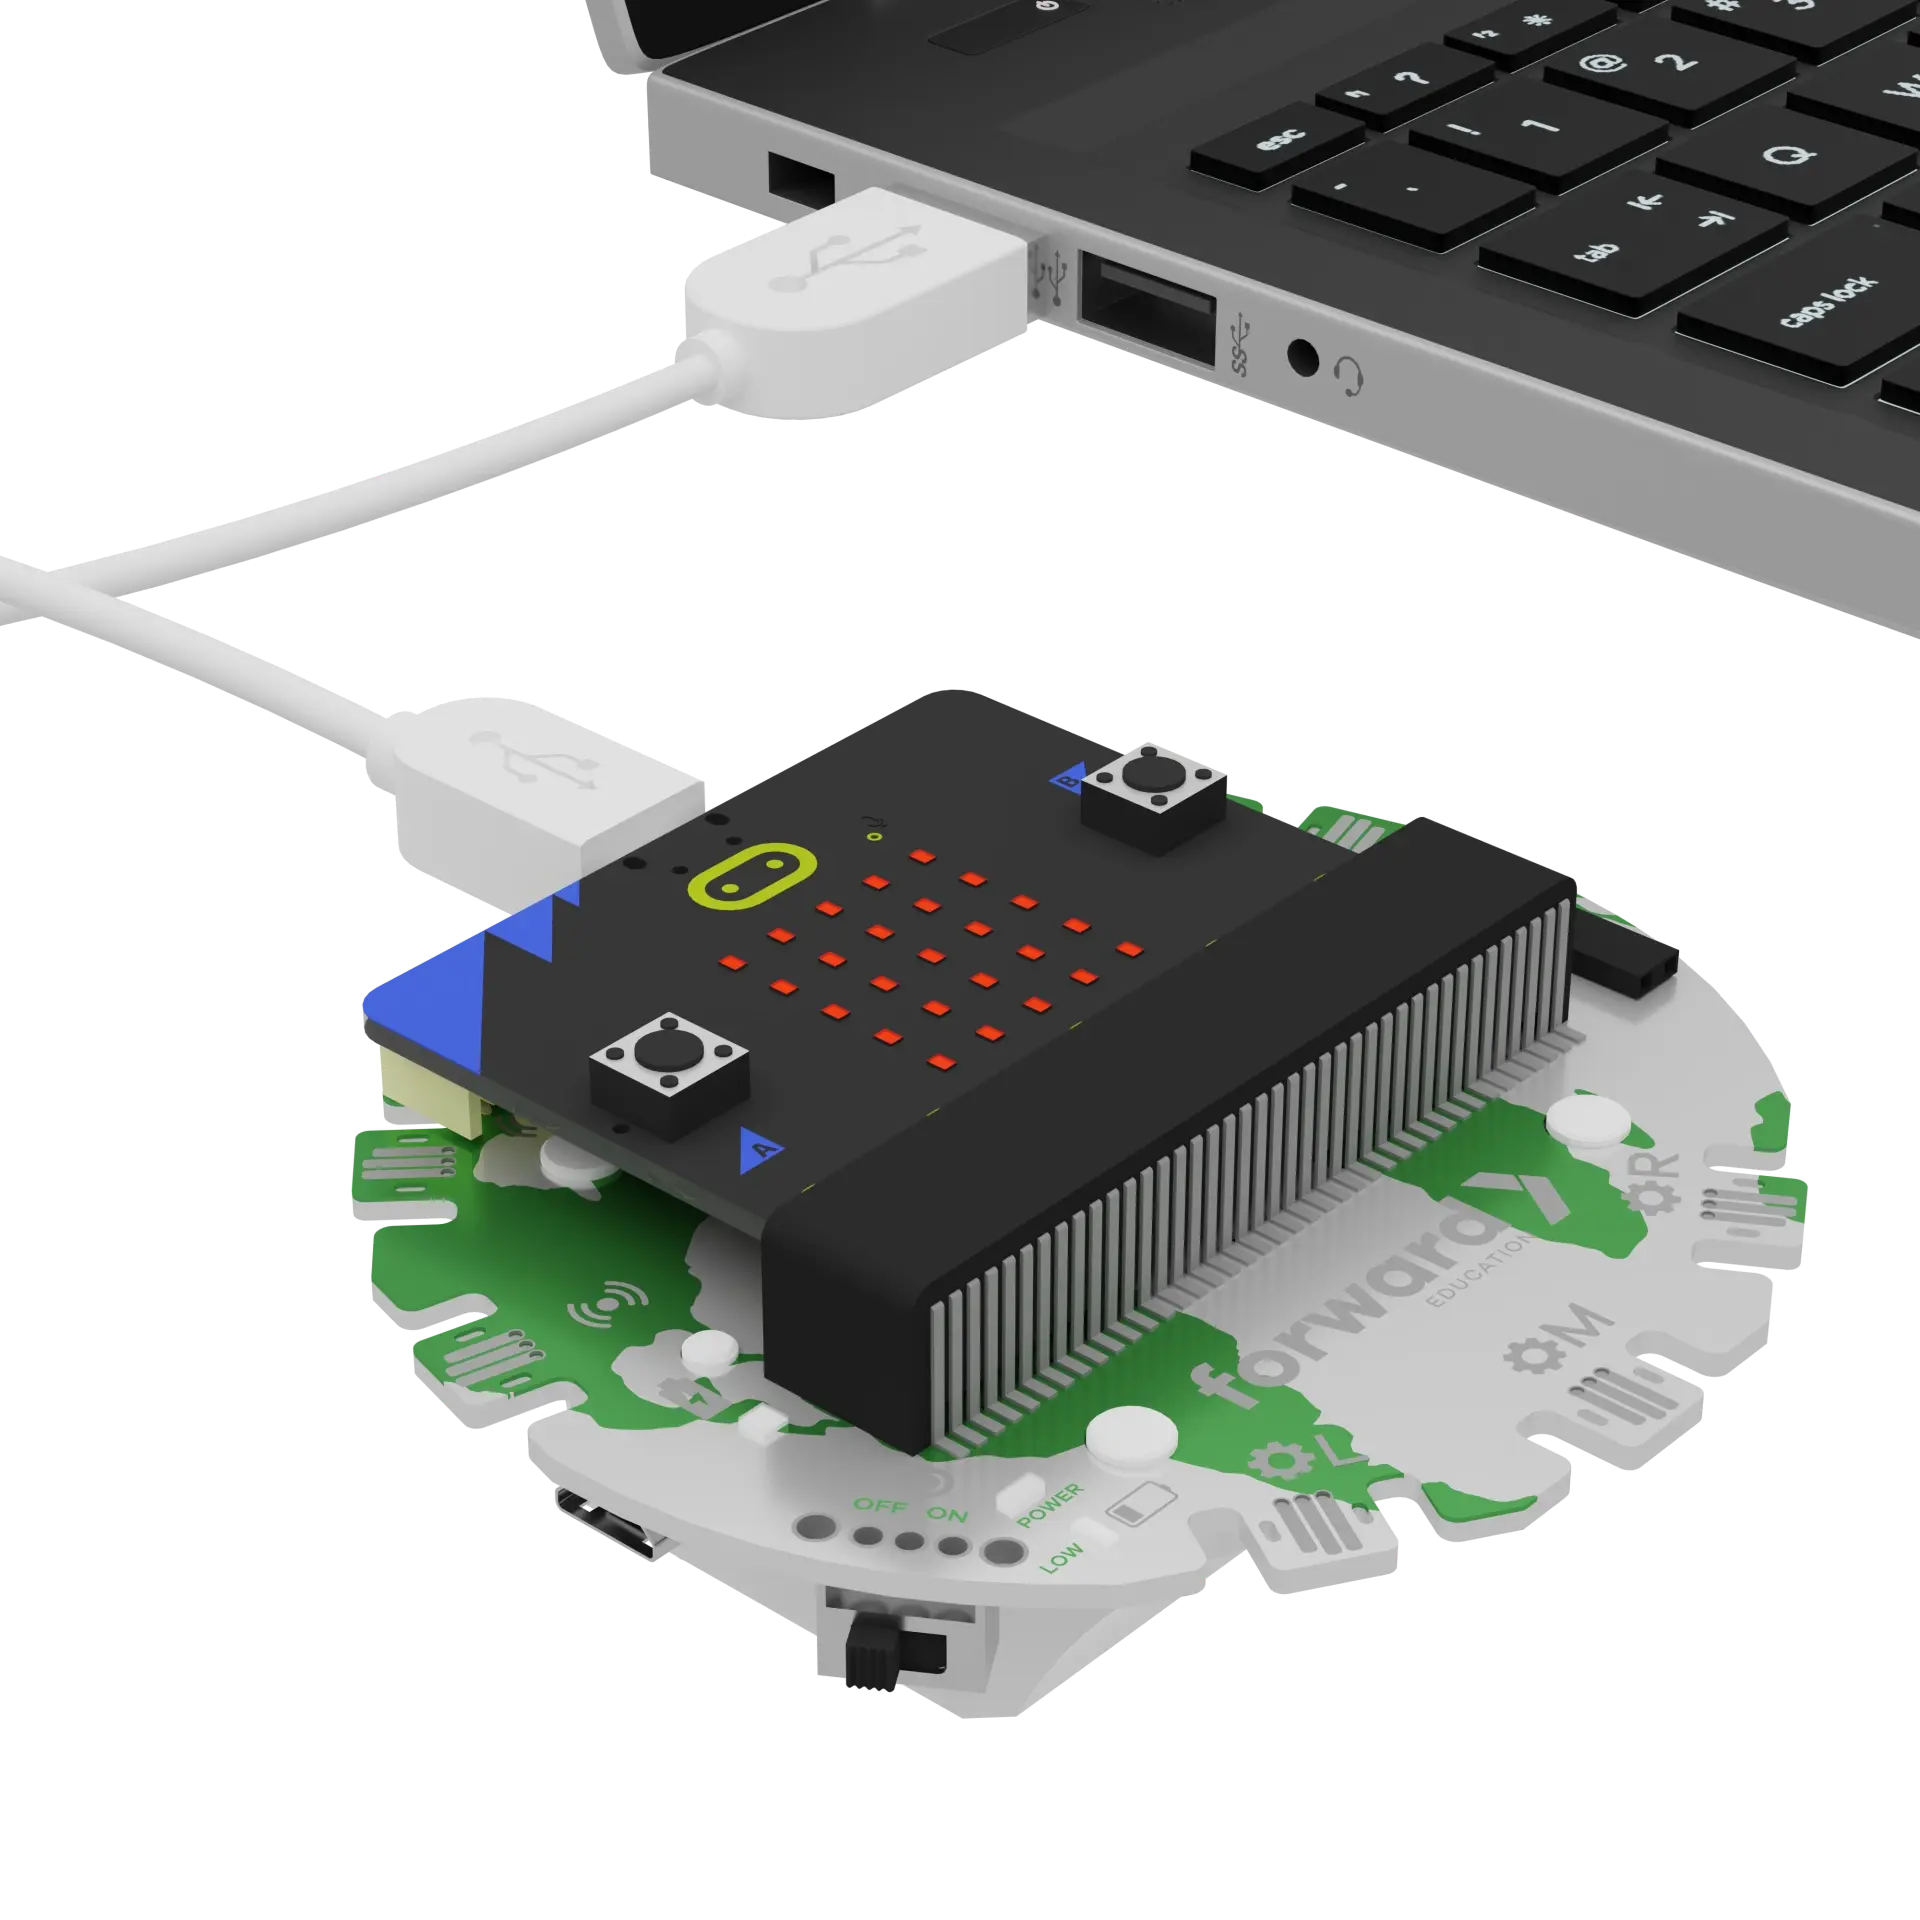
IMPORTANT! Make sure your Climate Action Kit Breakout Board is turned on and your micro:bit is plugged into your computer.
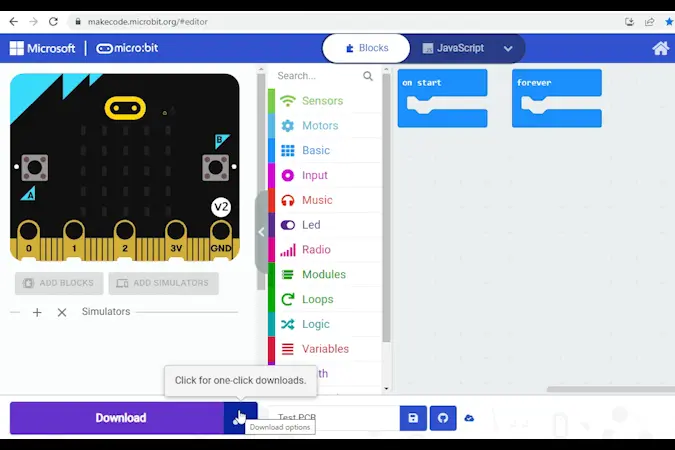
Click the three dots beside the |Download| button, and click on Connect Device. Next, follow the steps to pair your micro:bit.
Click the |Download| button to download the starter code.
We are ready to modify the code of our smart farming system!
Tips
- Follow the instructions at the top of the screen.
- Whenever you are ready for more information, click ‘Tell me more!’
- If you need help with the code, click the lightbulb!
- Remember to re-download any changes you make to the code!
Let’s take a look at the instructions (aka the code!) that we’ve added to our smart farming system. Think about the following questions:
- When do you think the water pump will turn on? When will it turn off?
- What happens when you press B?
Let’s test it out! Make sure the pump is in a cup with water, the moisture sensor is in an empty cup, and the tubing is secure.
Press A and watch what happens! Were your predictions right?
~hint Tell me more!
- Pressing A is an event that triggers the code below it in order.
- As long as the moisture level remains below 50%, the pump stays on to water the plant. We do this using a
||loops:while||loop. A||loops:while||loop repeats a series of instructions until a certain condition is met. - When the moisture level reaches 50% or more, the code after the
||loops:while||loop is executed, so the pump turns off. hint~
    while (fwdSensors.soilMoisture1.fwdIsMoistureLevelPastThreshold(50, fwdSensors.ThresholdDirection.Under)) {
        // @highlight
        fwdMotors.pump.fwdTimedRun(500)
        basic.pause(500)
    }
Once the pump has stopped, press B. What happened? Was your prediction right?
~hint Tell me more!
- When you press B, you see a clock on the micro:bit’s LEDs. Then, you see a number.
- The number is how long the pump was running (in seconds).
- This was calculated by keeping track of the time the pump turned on and off using
||variables:Variables||. We subtracted the||variables:pumpStart||time from the||variables:pumpStop||time and divided it by 1000 to convert to seconds. hint~
let pumpStart = 0
let pumpStop = 0
input.onButtonPressed(Button.A, function () {
    // @highlight
    pumpStart = input.runningTime()
    while (fwdSensors.soilMoisture1.fwdIsMoistureLevelPastThreshold(50, fwdSensors.ThresholdDirection.Under)) {
        fwdMotors.pump.fwdTimedRun(500)
        basic.pause(500)
    }
    // @highlight
    pumpStop = input.runningTime()
})
input.onButtonPressed(Button.B, function () {
    basic.showLeds(`
        # # # # #
        # . # . #
        # . # # #
        # . . . #
        # # # # #
        `)
    basic.clearScreen()
    // @highlight
    basic.showNumber(Math.round((pumpStop - pumpStart) / 1000))
    basic.pause(2000)
    basic.clearScreen()
})
What do you think will happen if you liftthe bottom part of your moisture sensor back out of the water and hold it there? Try it now.
Was this what you expected?
~hint Tell me more!
- You might have noticed that nothing happened! That’s because the
||loops:while||loop is within the||input:on A pressed||block. - This means the sensor only checks the moisture once when is A pressed. hint~
let pumpStart = 0
let pumpStop = 0
// @highlight
input.onButtonPressed(Button.A, function () {
    pumpStart = input.runningTime()
    // @highlight
    while (fwdSensors.soilMoisture1.fwdIsMoistureLevelPastThreshold(50, fwdSensors.ThresholdDirection.Under)) {
        fwdMotors.pump.fwdTimedRun(500)
        basic.pause(500)
    }
    pumpStop = input.runningTime()
})
We want our smart farming system to automatically check the moisture levels regularly. Try moving this segment of code into a ||basic:forever|| loop from the ||basic:Basic|| category. Download the new code.
Now move the bottom of the moisture sensor in and out of the water. What has changed? What happens when you press B?
~hint Tell me more!
- The sensor is now measuring moisture levels constantly. The pump should start any time the moisture is below 50%.
- Using a
||basic:forever||loop breaks the pump timer, though. If you press B, you’ll only ever see ‘0’ on the LEDs. Why do you think this is happening? - Can you think of another loop we could use instead of
||basic:forever||that might not break the timer? hint~
let pumpStop = 0
let pumpStart = 0
// @highlight
basic.forever(function () {
    pumpStart = input.runningTime()
    while (fwdSensors.soilMoisture1.fwdIsMoistureLevelPastThreshold(50, fwdSensors.ThresholdDirection.Under)) {
        fwdMotors.pump.fwdTimedRun(500)
        basic.pause(500)
    }
    pumpStop = input.runningTime()
})
Let's try moving the code into an ||loops: every 500 ms|| loop. Let's say we want to check the moisture every 2 minutes. How many milliseconds is that?
Try out your new code!
~hint Tell me more!
- Change '500 ms' to '120000 ms' to run the loop every 2 minutes. hint~
let pumpStop = 0
let pumpStart = 0
// @highlight
loops.everyInterval(120000, function () {
    pumpStart = input.runningTime()
    while (fwdSensors.soilMoisture1.fwdIsMoistureLevelPastThreshold(50, fwdSensors.ThresholdDirection.Under)) {
        fwdMotors.pump.fwdTimedRun(500)
        basic.pause(500)
    }
    pumpStop = input.runningTime()
})
Waiting for 2 minutes to see if the watering system starts again might be a bit stressful. We can’t really tell if the code is still working unless we stand around and watch. That's not very useful for a farmer and defeats the purpose of this being an automated system.
Let’s add some sounds and visuals to tell our farmer where we are in the program. This will improve the user experience and reassure them that the farming system is still doing its job.
First, let’s use a sound to tell the user that the main loop has started. Go to the ||music:Music|| category and drag the ||music:play tone middle C for 1 beat until done|| block into the workspace.
Where should we place this block?
~hint Tell me more!
- This block should be the first block under the
||loops:every 120000 ms||loop. - Now every time the sensor is about to check the moisture level, the user will hear a beep. hint~
let pumpStop = 0
let pumpStart = 0
loops.everyInterval(120000, function () {
    // @highlight
    music.play(music.tonePlayable(262, music.beat(BeatFraction.Whole)), music.PlaybackMode.UntilDone)
    pumpStart = input.runningTime()
    while (fwdSensors.soilMoisture1.fwdIsMoistureLevelPastThreshold(50, fwdSensors.ThresholdDirection.Under)) {
        fwdMotors.pump.fwdTimedRun(500)
        basic.pause(500)
    }
    pumpStop = input.runningTime()
})
Next, let’s use the LED ring to show that watering is in progress. Go to the ||fwdSensors:Sensors|| category and drag the ||fwdSensors:set ledRing ‘0’ to red|| and ||fwdSensors:rotate ledRing pattern by ‘1’|| block into the workspace.
~hint Tell me more!
- The
||fwdSensors:set ledRing '0' to red||block will light up a single LED on the LED ring. - The
||fwdSensors:rotate ledRing pattern by '1'||block will turn off the current LED and light up the one to its right. hint~
Your goal is to have the red dot move around the LED ring while the plant is being watered. Where should you place these two blocks to make this happen?
Try it out now. Don’t forget to download your code to test your changes.
~hint Tell me more!
- We want the single LED to light up at the start of the main loop -
||loops:every 120000ms||. Place this block under the||music:play tone||block. - To make the lit LED move around the LED ring during watering, we will add the
||fwdSensors:rotate ledRing pattern by '1'||block inside the||loops:while||loop. - What happens if you place both blocks inside the
||loops:while||loop? Test it out! hint~
let pumpStop = 0
let pumpStart = 0
loops.everyInterval(120000, function () {
    music.play(music.tonePlayable(262, music.beat(BeatFraction.Whole)), music.PlaybackMode.UntilDone)
    // @highlight
    fwdSensors.ledRing.fwdSetPixelColour(0, 0xff0000)
    pumpStart = input.runningTime()
    while (fwdSensors.soilMoisture1.fwdIsMoistureLevelPastThreshold(50, fwdSensors.ThresholdDirection.Under)) {
        fwdMotors.pump.fwdTimedRun(500)
        basic.pause(500)
        // @highlight
        fwdSensors.ledRing.fwdRotate(1)
    }
    pumpStop = input.runningTime()
})
Once the plant has been successfully watered, we want to change all LEDs on the LED ring to green.
What block should you use for this and where should it be placed within the code?
~hint Tell me more!
- To set all LEDs on the LED ring to green after the plant has been watered, add the
||fwdSensors:set all ledRing LEDs to green||block at the very bottom of our code. hint~
let pumpStop = 0
let pumpStart = 0
loops.everyInterval(120000, function () {
    music.play(music.tonePlayable(262, music.beat(BeatFraction.Whole)), music.PlaybackMode.UntilDone)
    fwdSensors.ledRing.fwdSetPixelColour(0, 0xff0000)
    pumpStart = input.runningTime()
    while (fwdSensors.soilMoisture1.fwdIsMoistureLevelPastThreshold(50, fwdSensors.ThresholdDirection.Under)) {
        fwdMotors.pump.fwdTimedRun(500)
        basic.pause(500)
        fwdSensors.ledRing.fwdRotate(1)
    }
    pumpStop = input.runningTime()
    // @highlight
    fwdSensors.ledRing.fwdSetAllPixelsColour(0x00ff00)
})
You might notice now that the LEDs stay green on the second round of the main loop. We can adjust this by adding a ||fwdSensors:set all ledRing LEDs to black|| block.
~hint Tell me more!
- This resets the LEDs to black for each iteration of the main loop. hint~
let pumpStop = 0
let pumpStart = 0
loops.everyInterval(120000, function () {
    music.play(music.tonePlayable(262, music.beat(BeatFraction.Whole)), music.PlaybackMode.UntilDone)
    // @highlight
    fwdSensors.ledRing.fwdSetAllPixelsColour(0x000000)
    fwdSensors.ledRing.fwdSetPixelColour(0, 0xff0000)
    pumpStart = input.runningTime()
    // @collapsed
    while (fwdSensors.soilMoisture1.fwdIsMoistureLevelPastThreshold(50, fwdSensors.ThresholdDirection.Under)) {
        fwdMotors.pump.fwdTimedRun(500)
        basic.pause(500)
        fwdSensors.ledRing.fwdRotate(1)
    }
    pumpStop = input.runningTime()
    fwdSensors.ledRing.fwdSetAllPixelsColour(0x00ff00)
})
Are there any parts of the code you still don’t understand? This is your time to explore!
~hint Tell me more! Follow these steps:
- Find a part of the code you’d like to learn more about
- Make a single change to this block
- Download the new code
- Test it out and observe what changed
- Repeat! hint~
You've completed the activity!
Think about something in this project that challenged you.
How did you overcome the challenge? How did that make you feel?
In the next step, you can click the |Done| button to finish the tutorial.
