fwd-edu-breakout=github:climate-action-kits/pxt-fwd-edu/fwd-breakout
sonar=github:climate-action-kits/pxt-fwd-edu
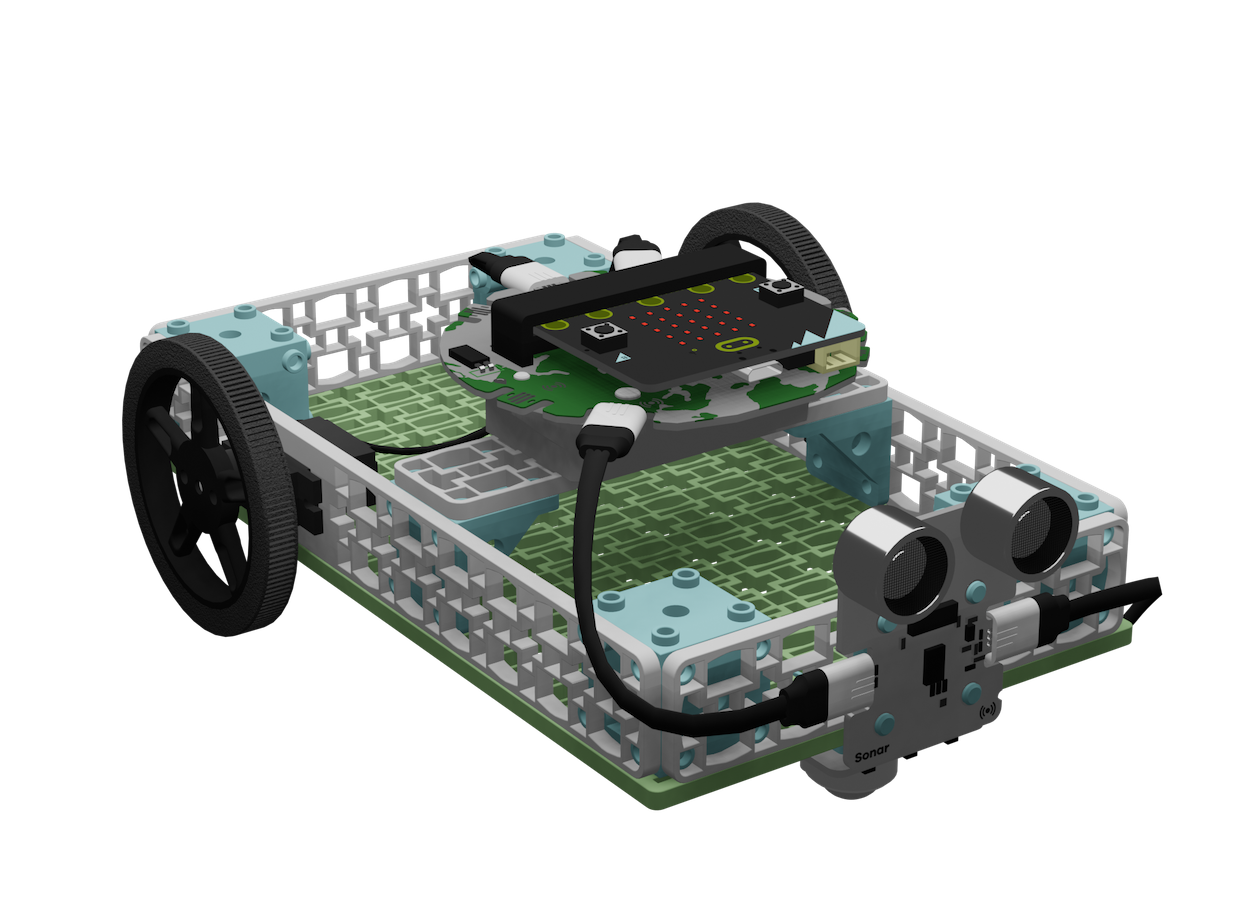
Let's build an electric vehicle! We are going to do this in 4 parts:
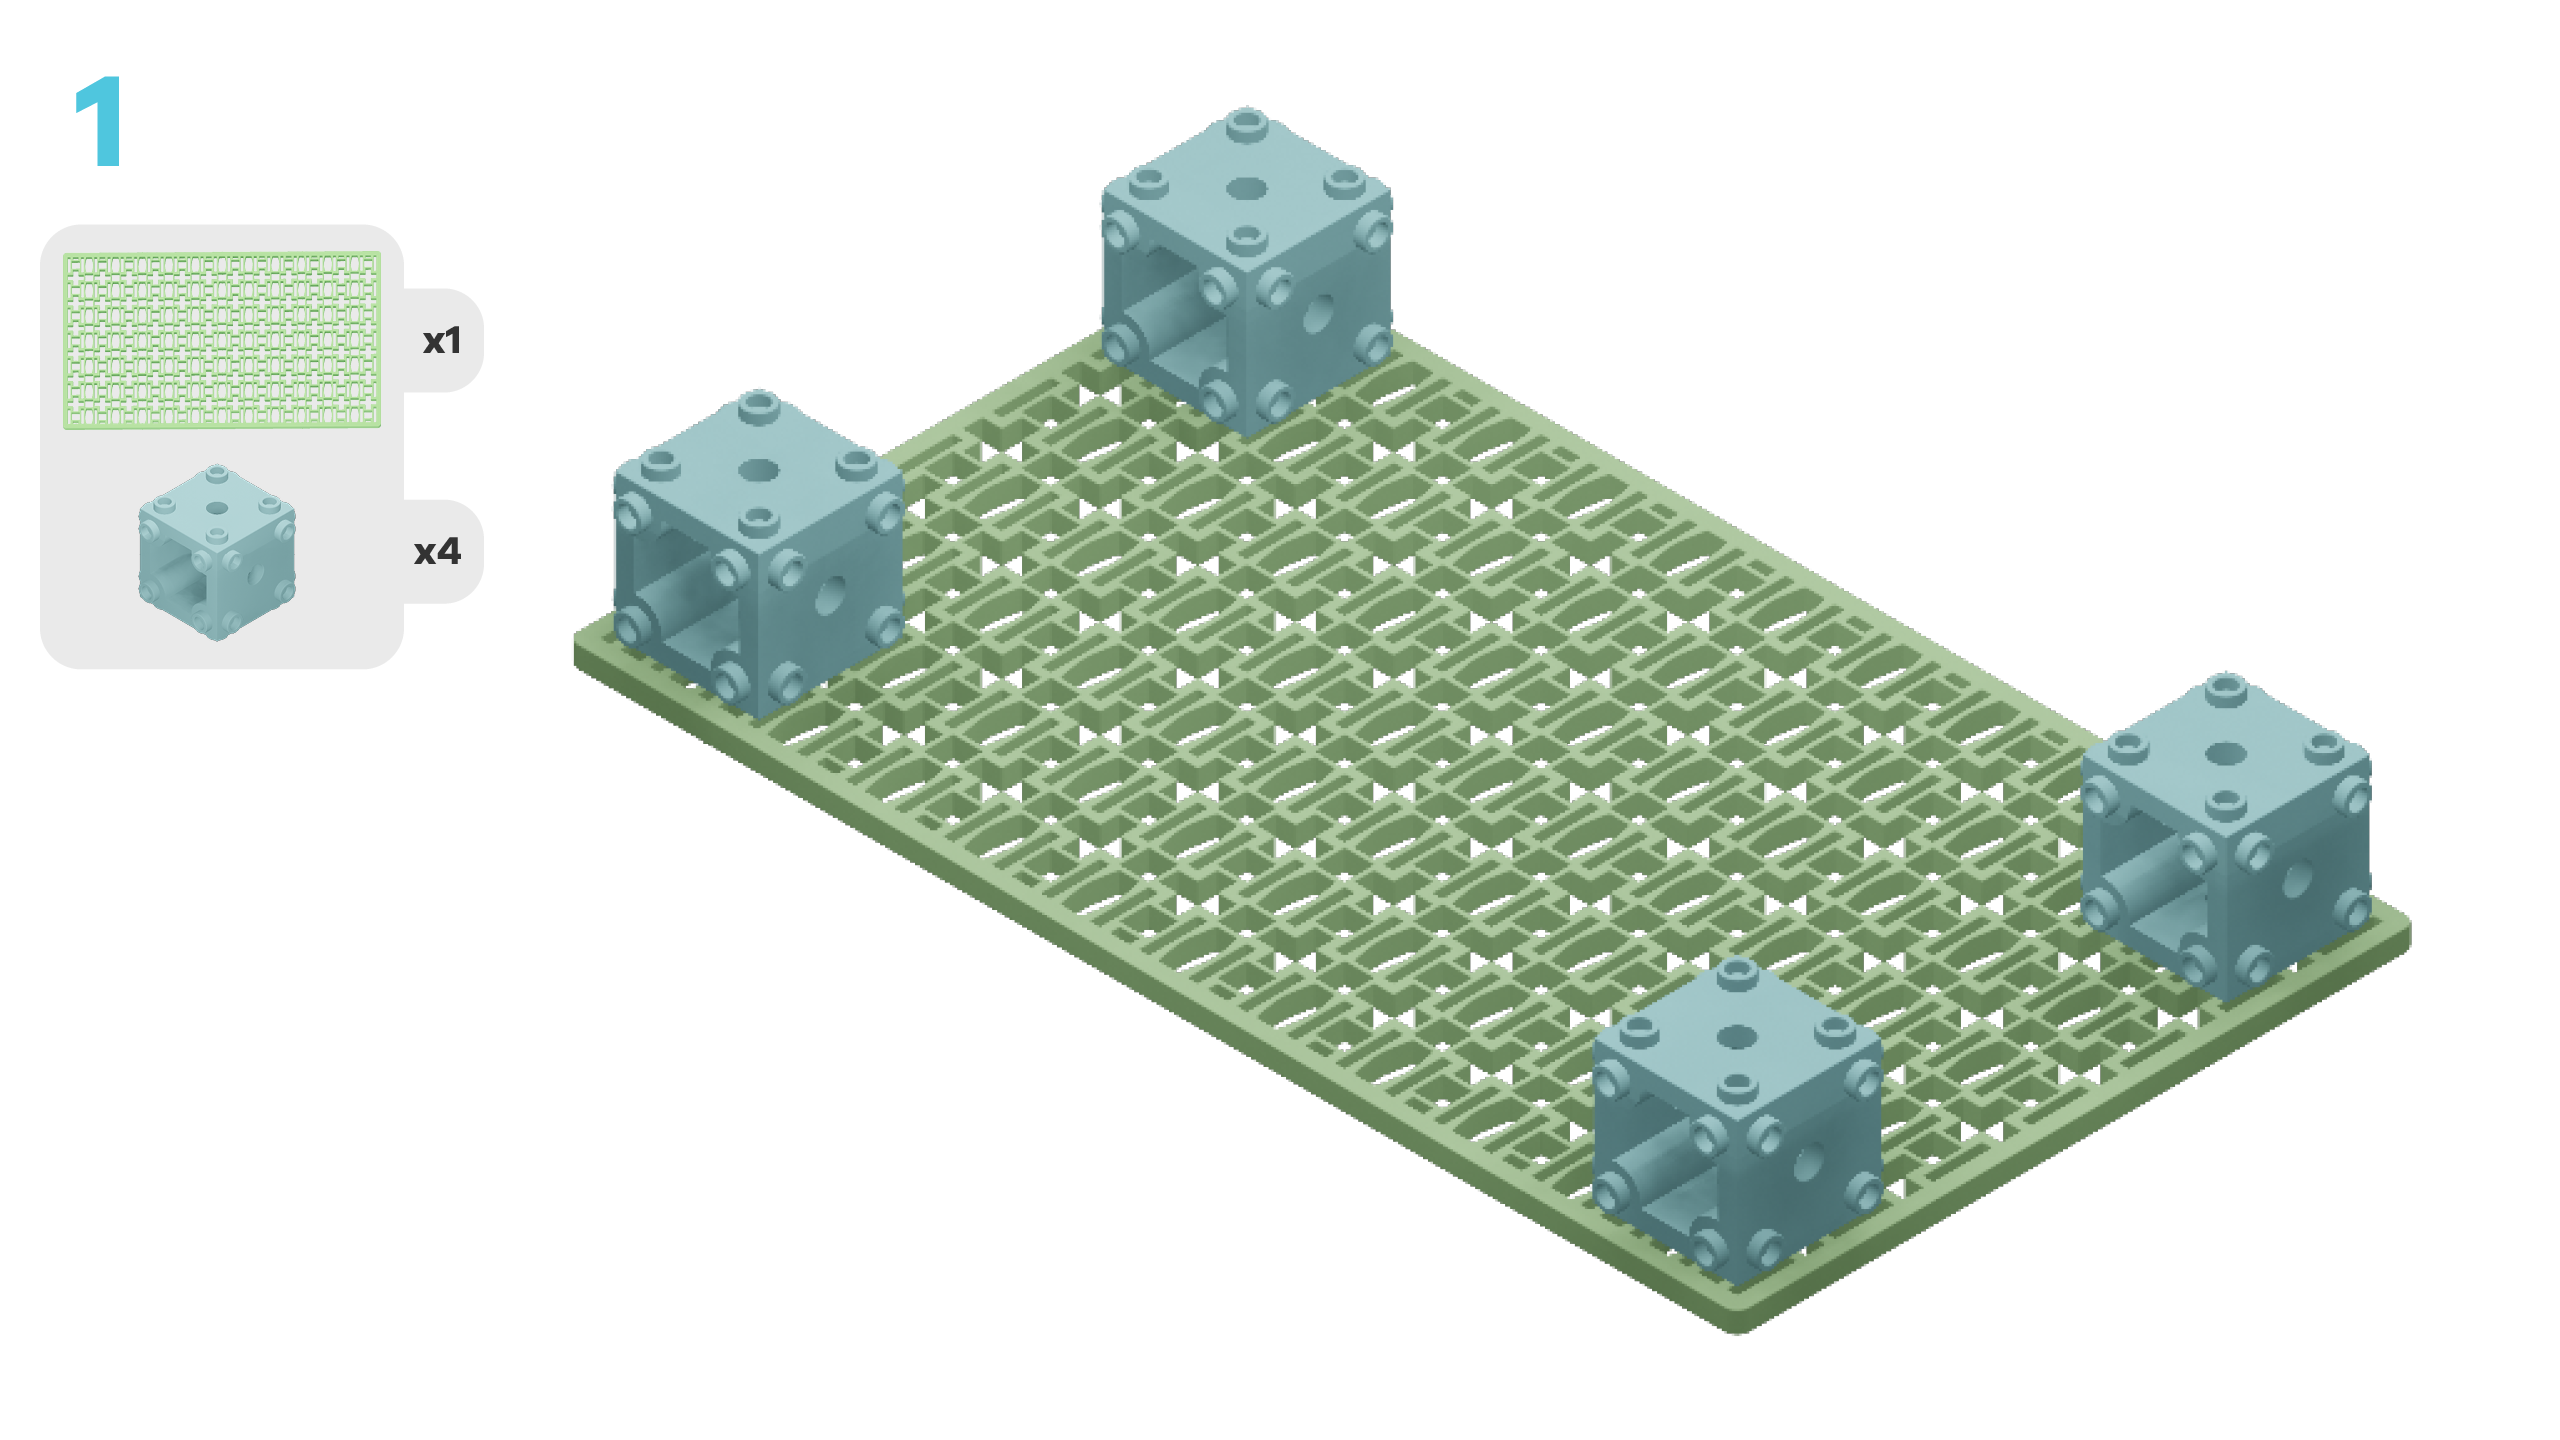
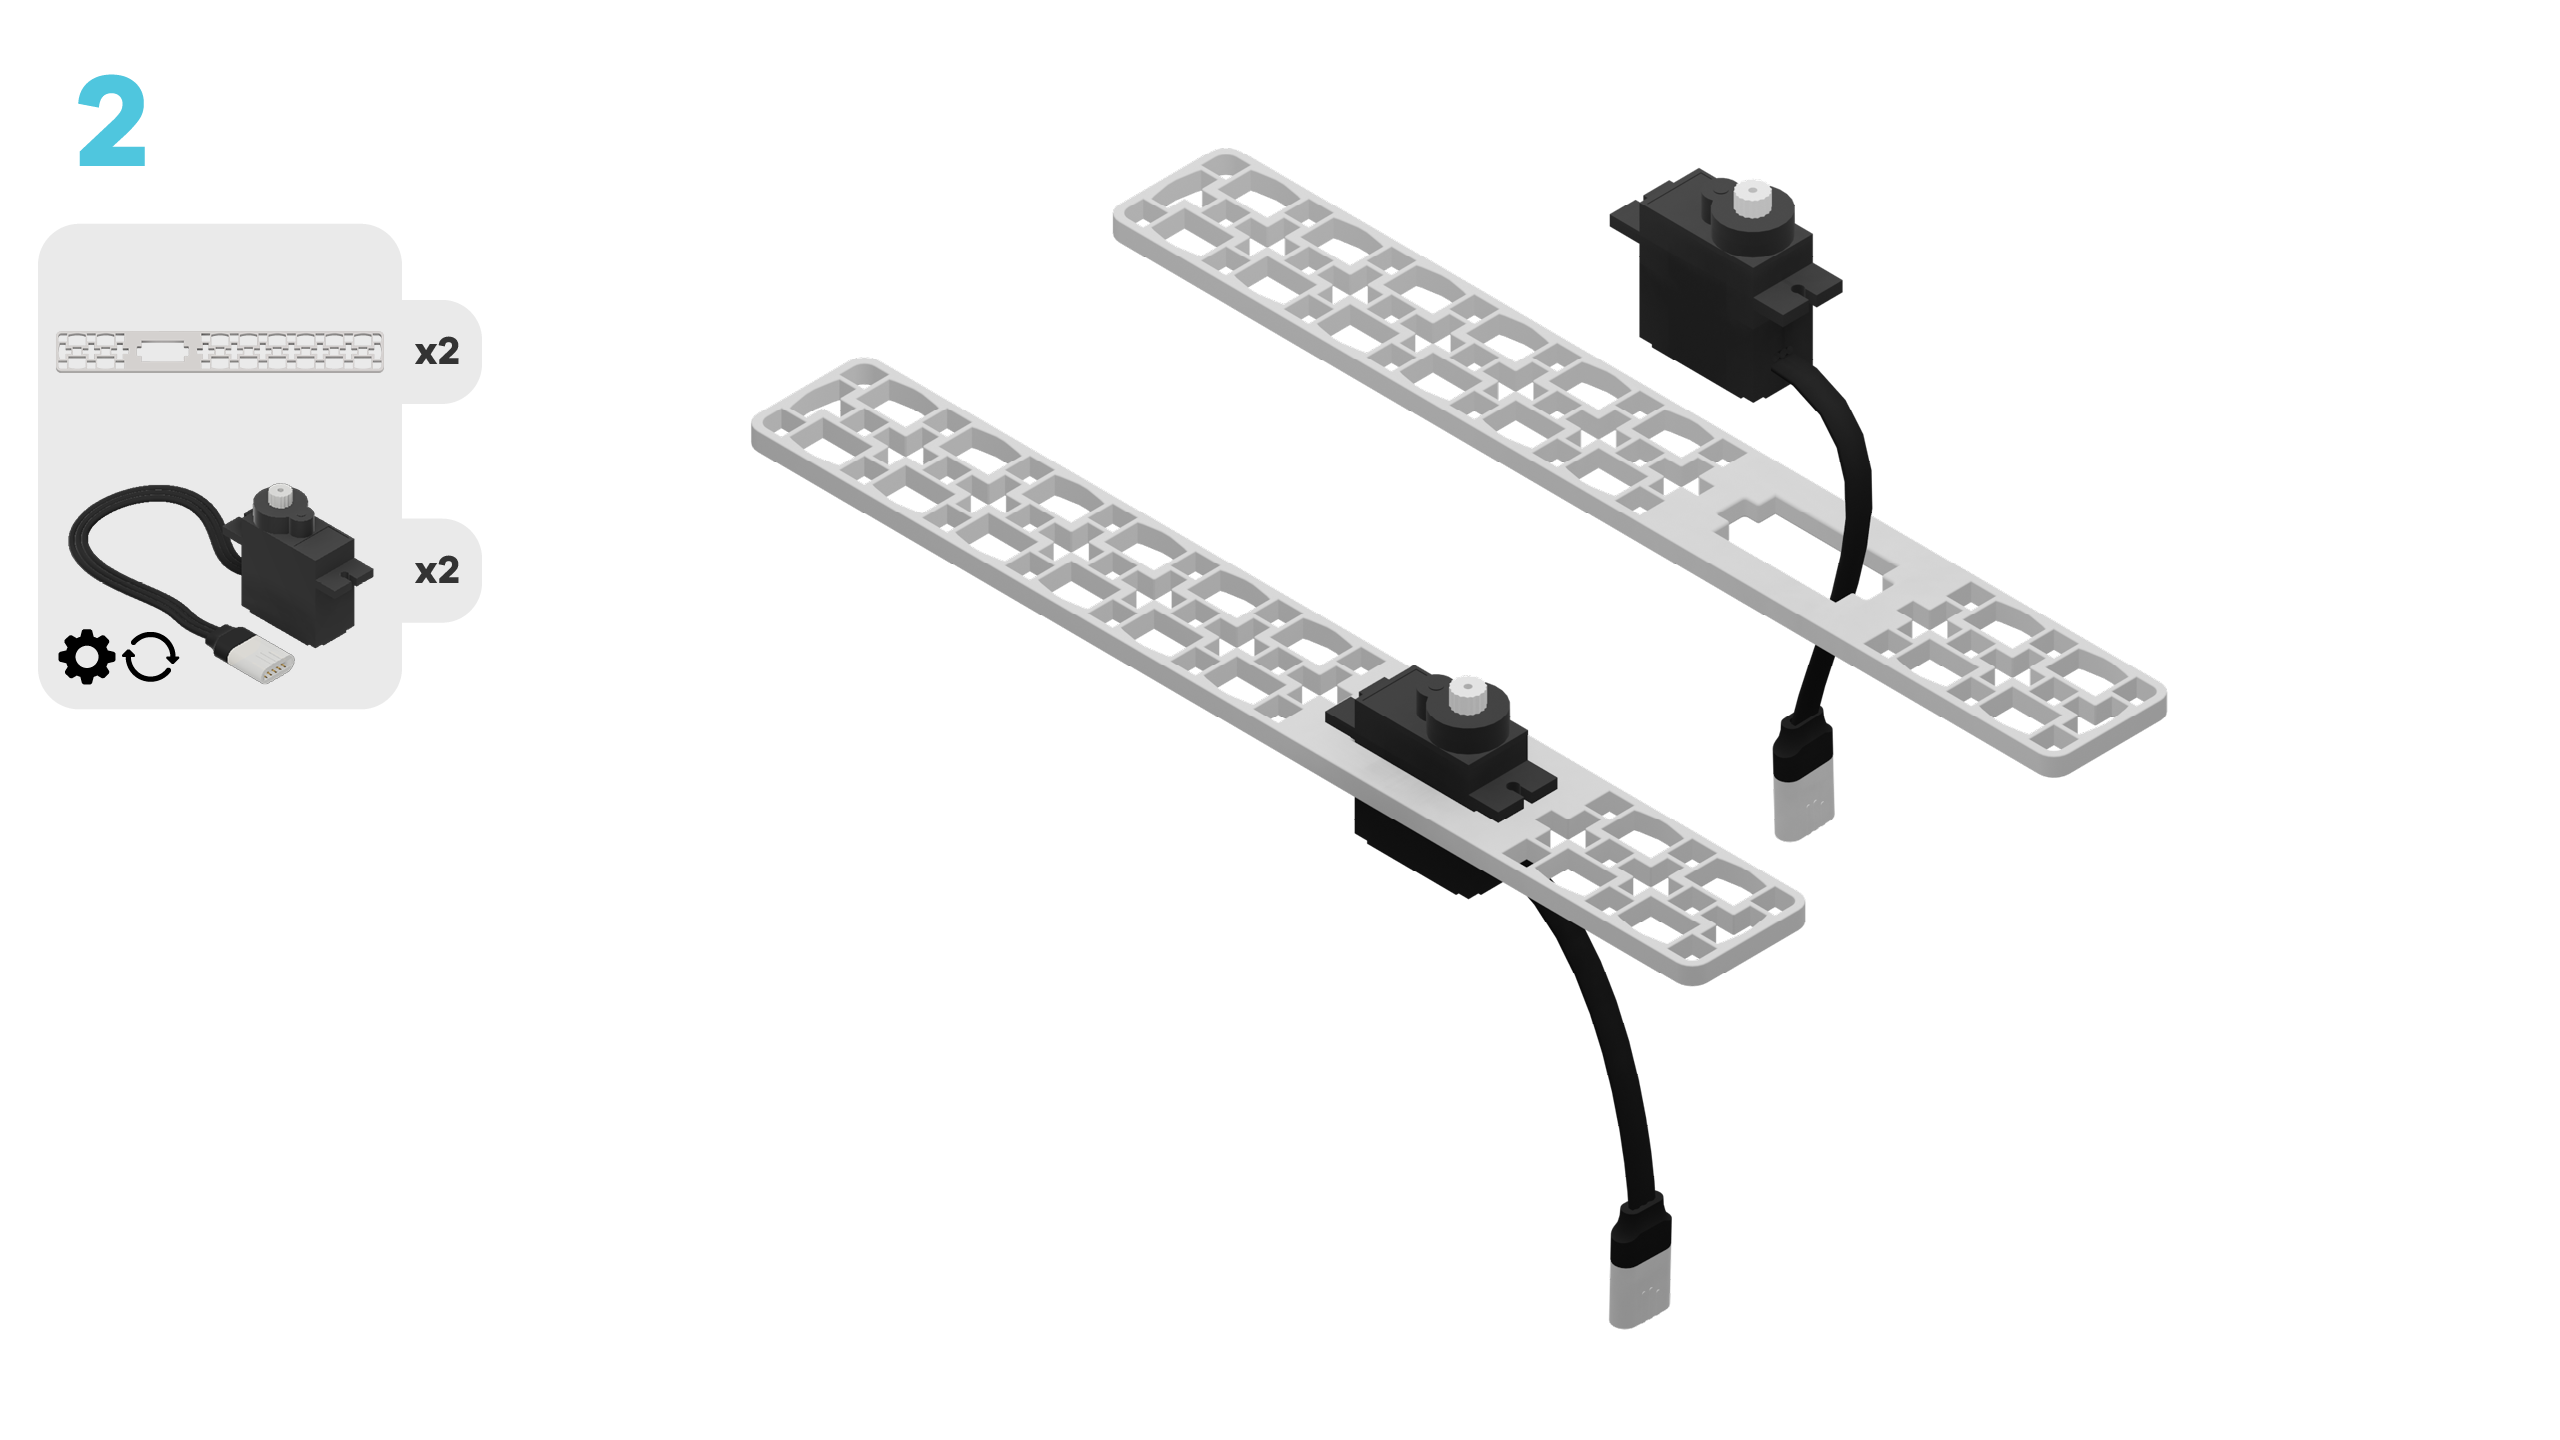
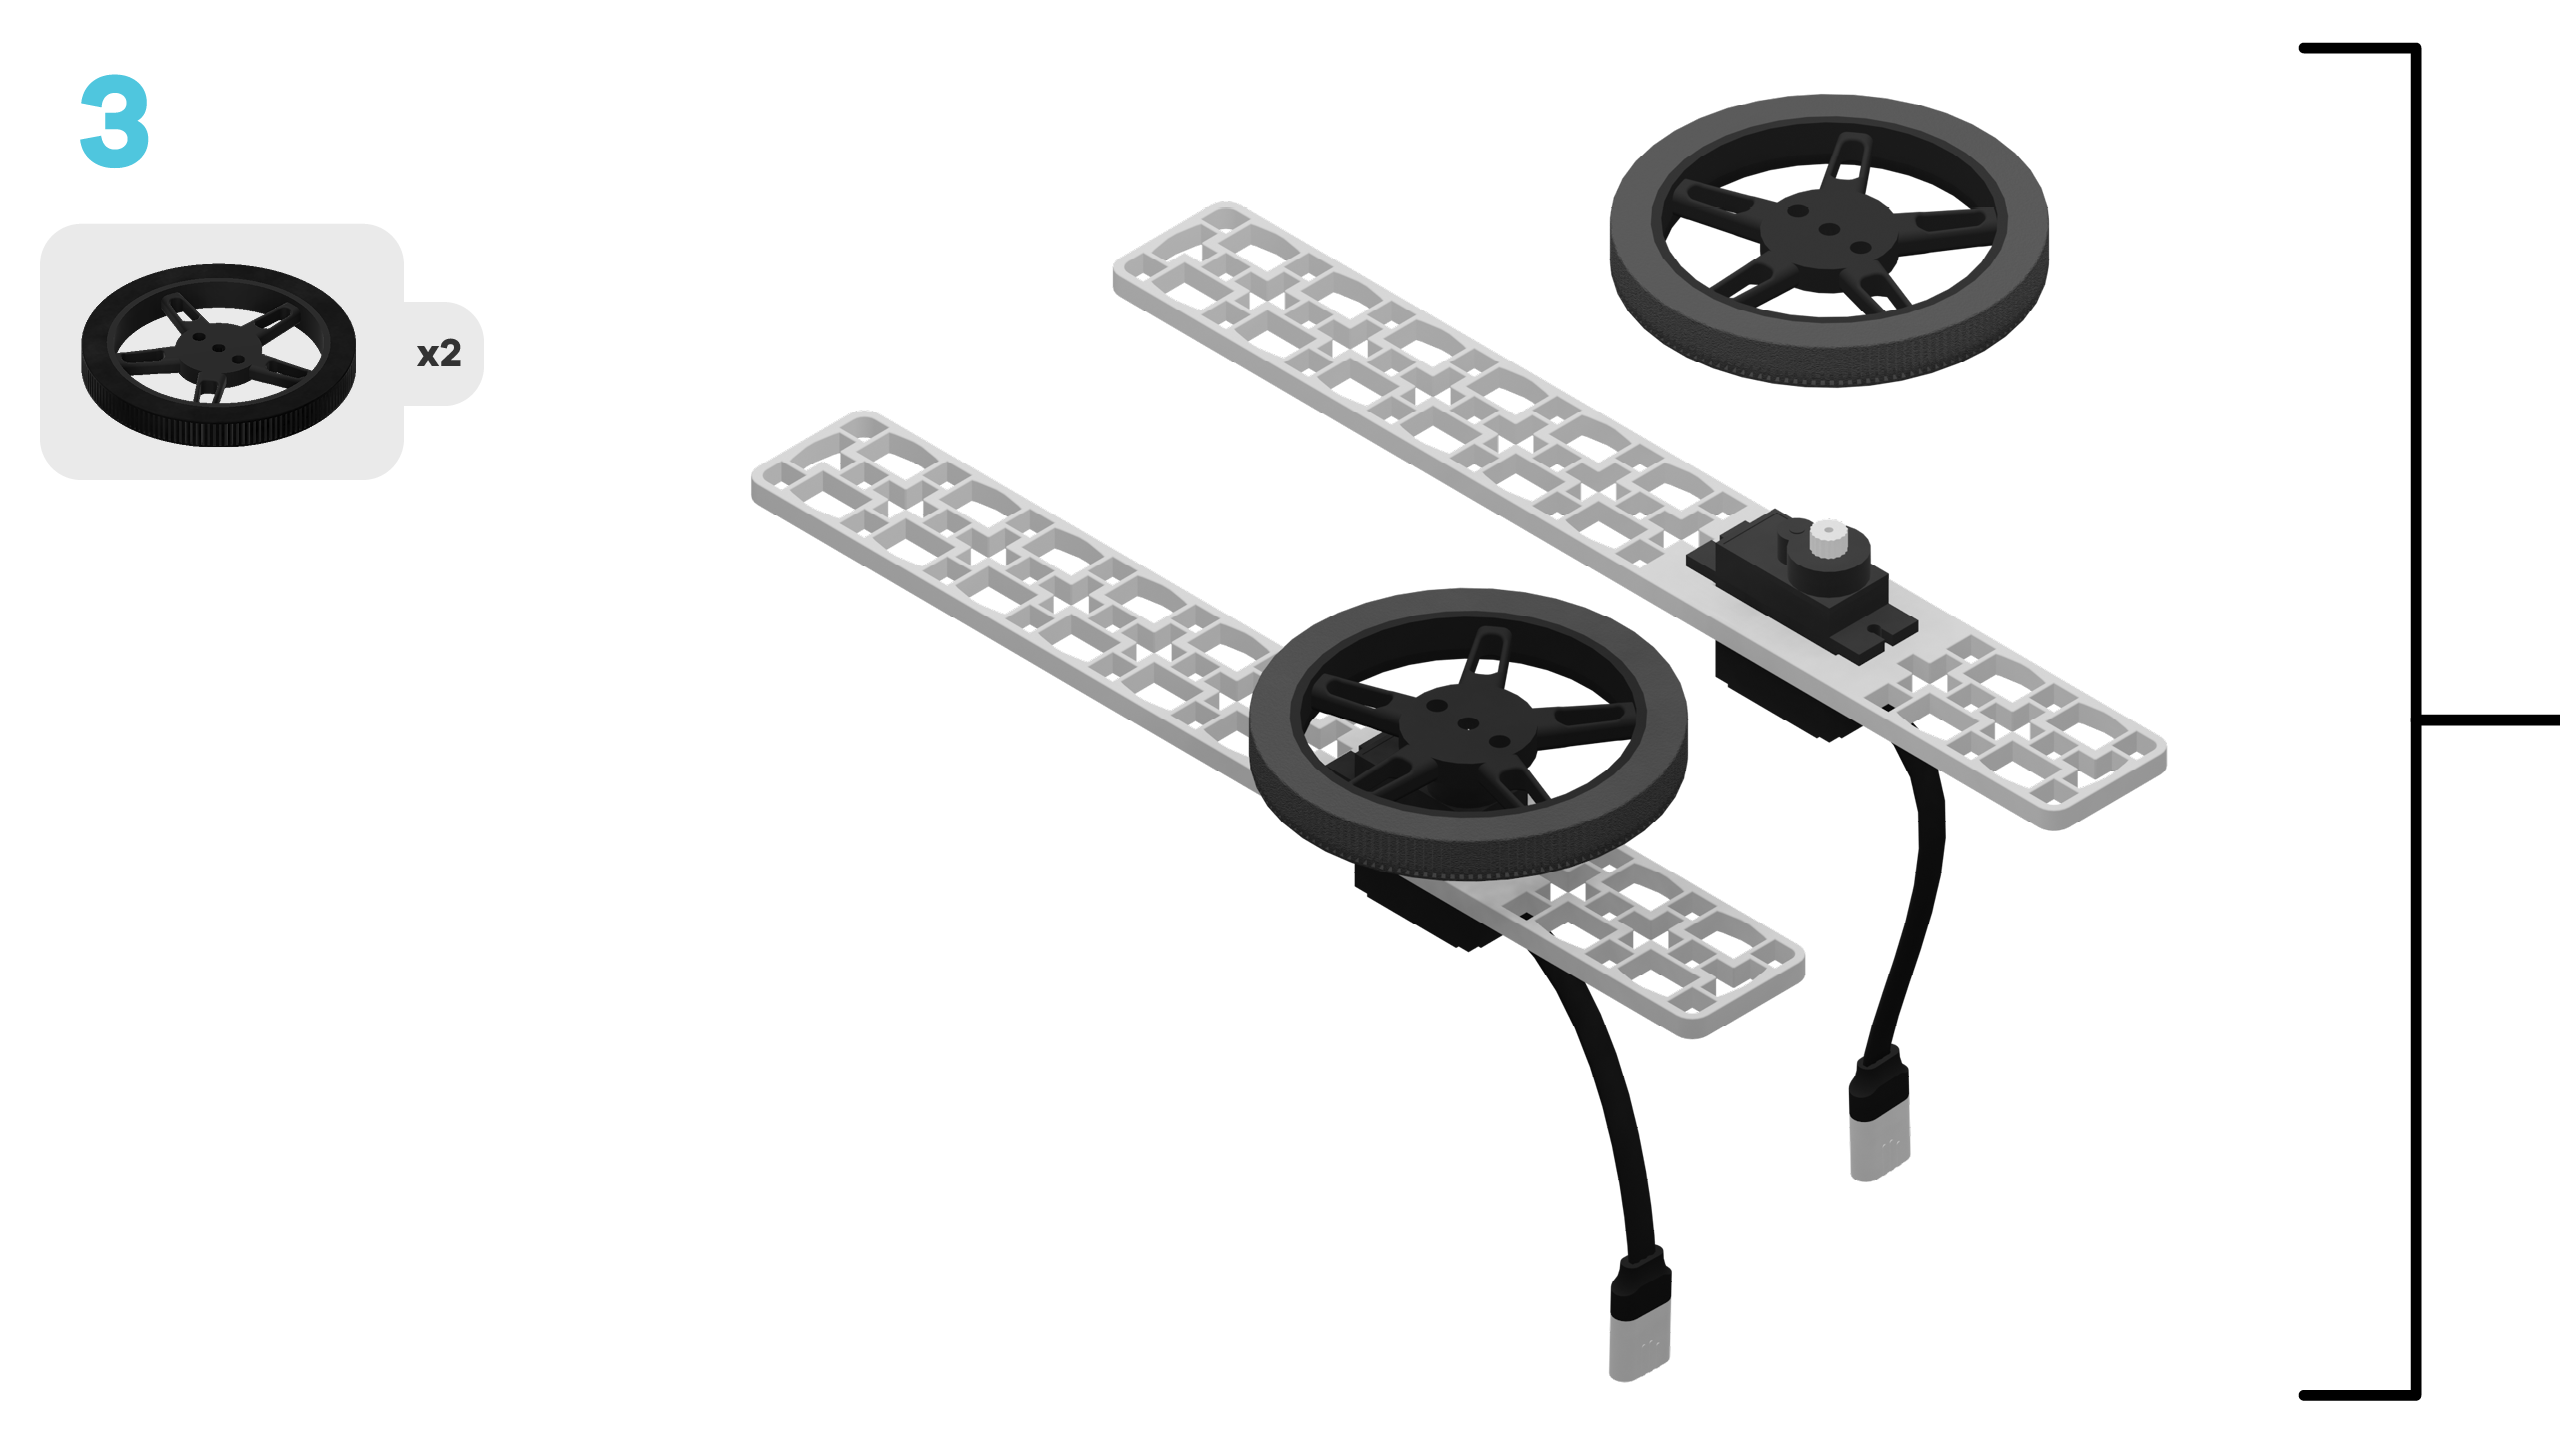
- Build our electric vehicle
- Add code to make it move
- Modify the code to learn how it works
- Complete a challenge to improve our electric vehicle
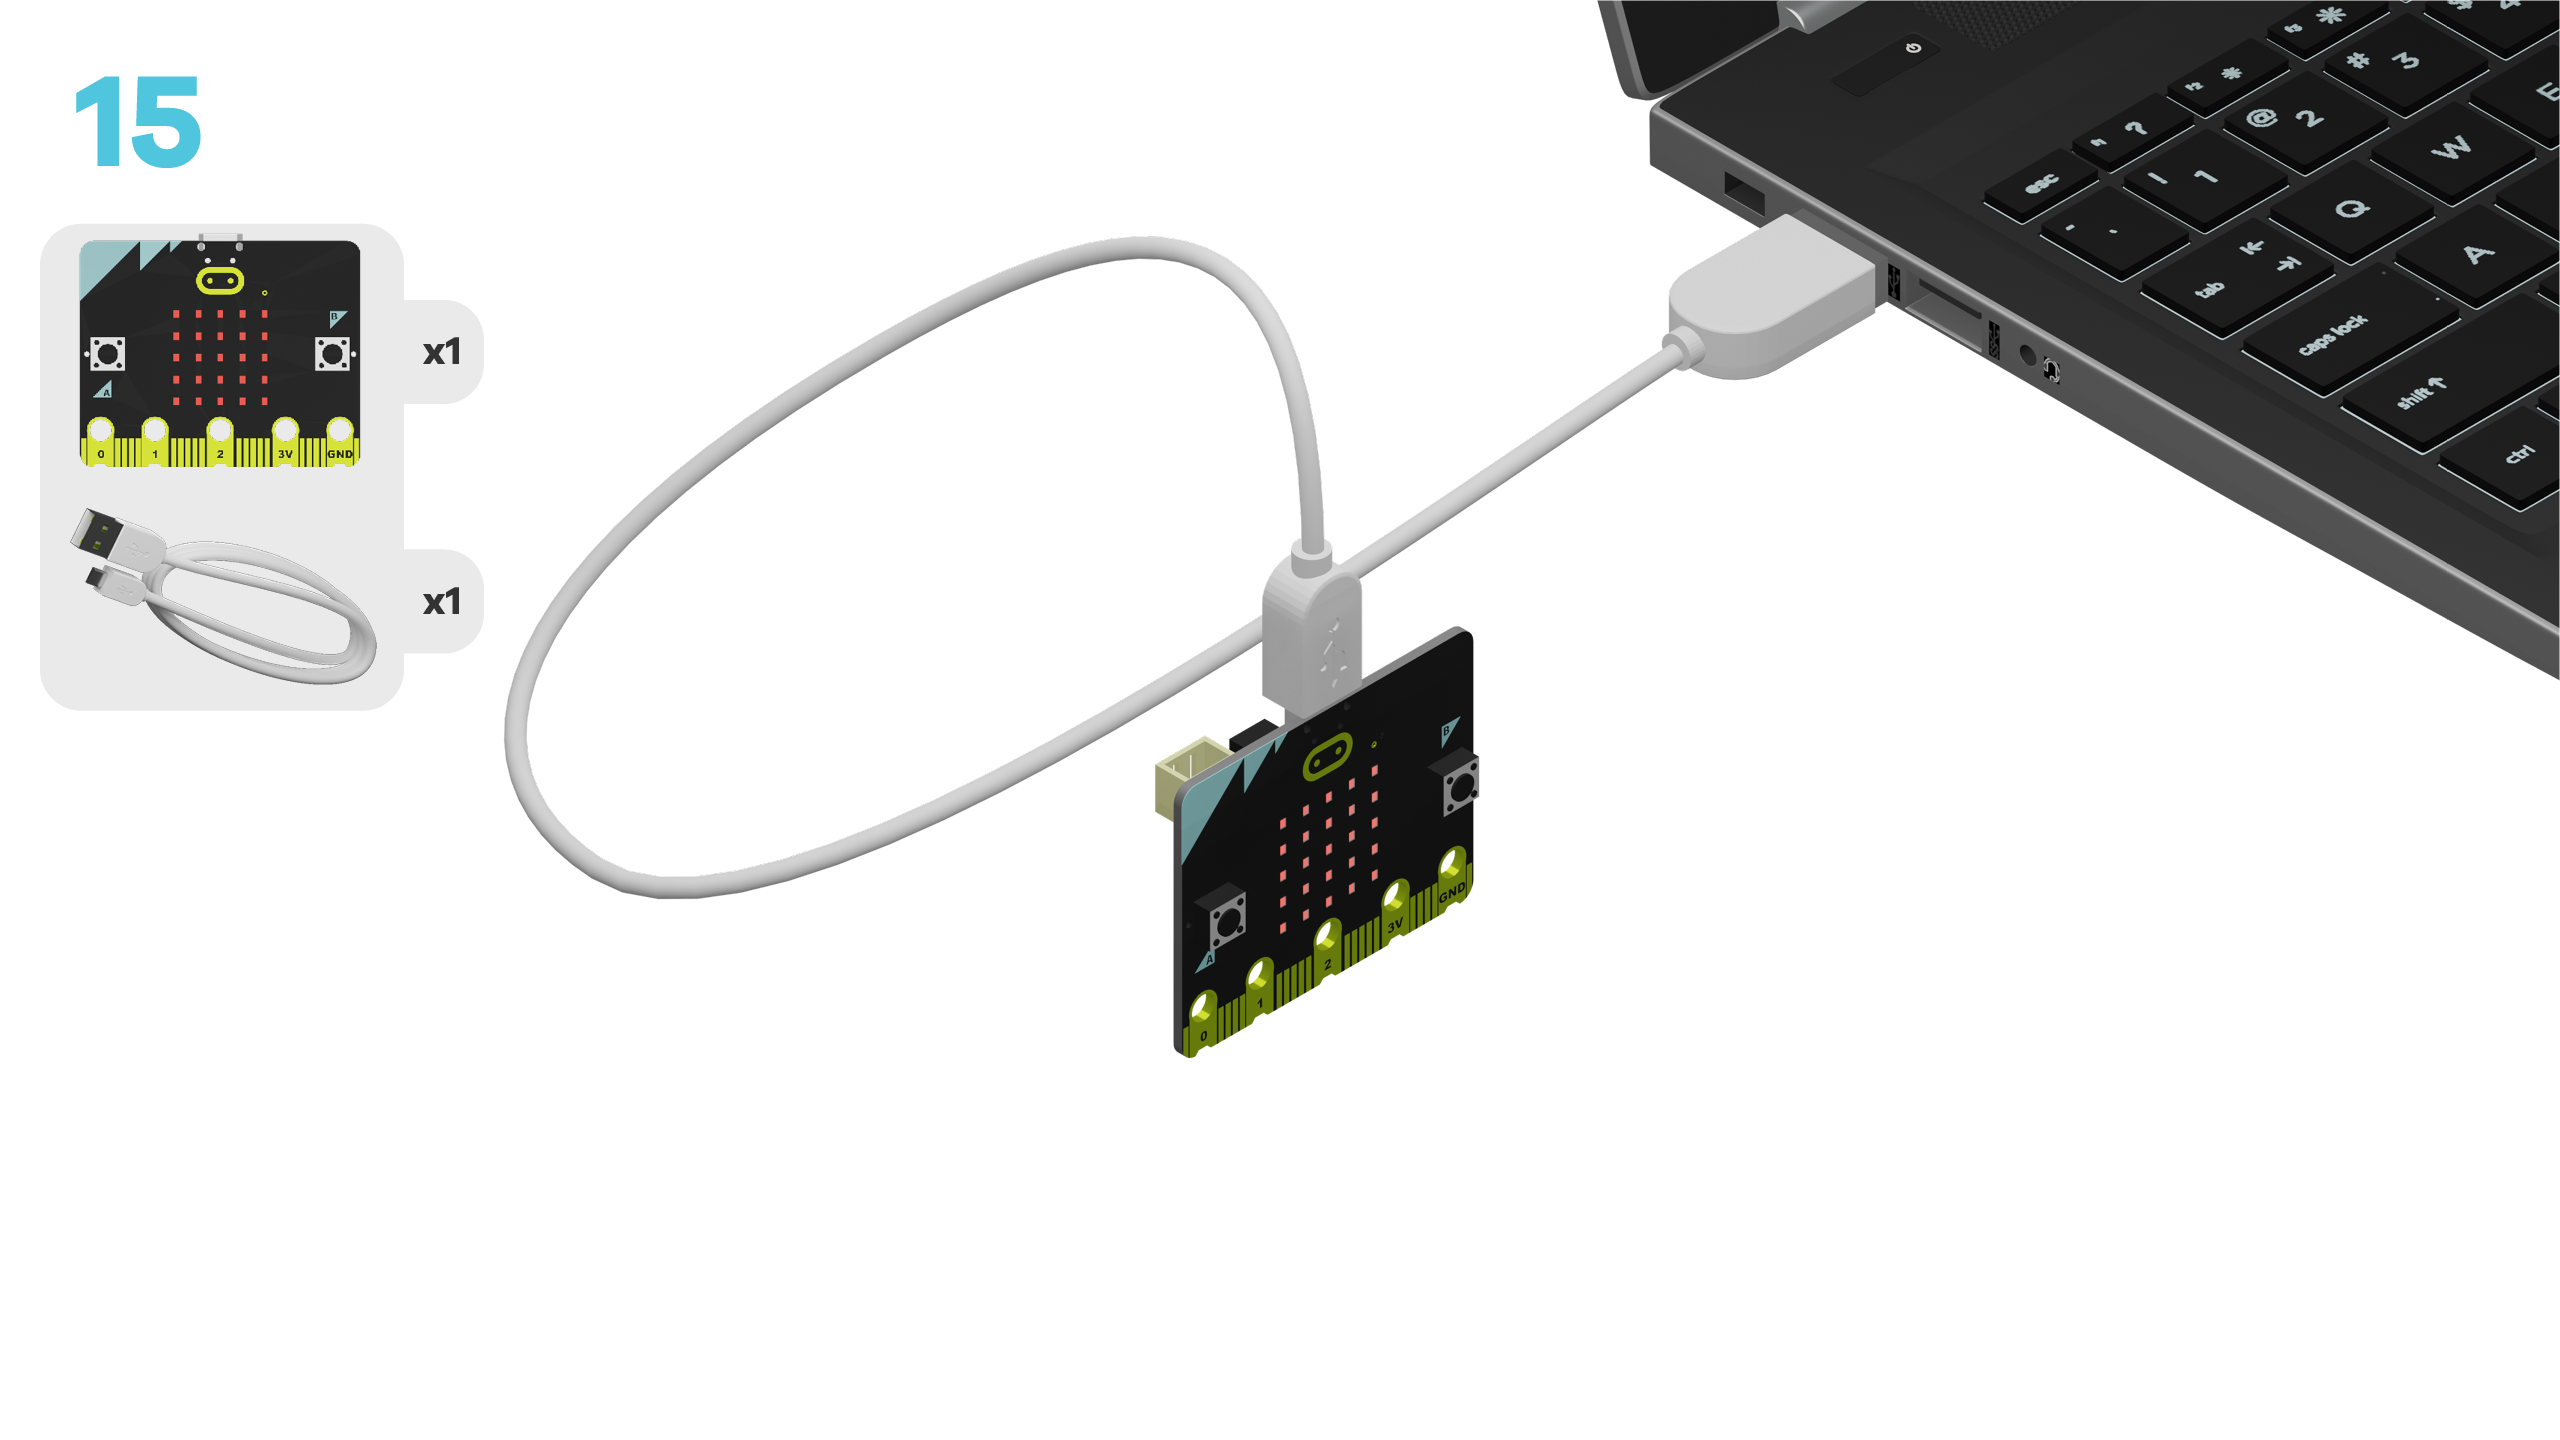
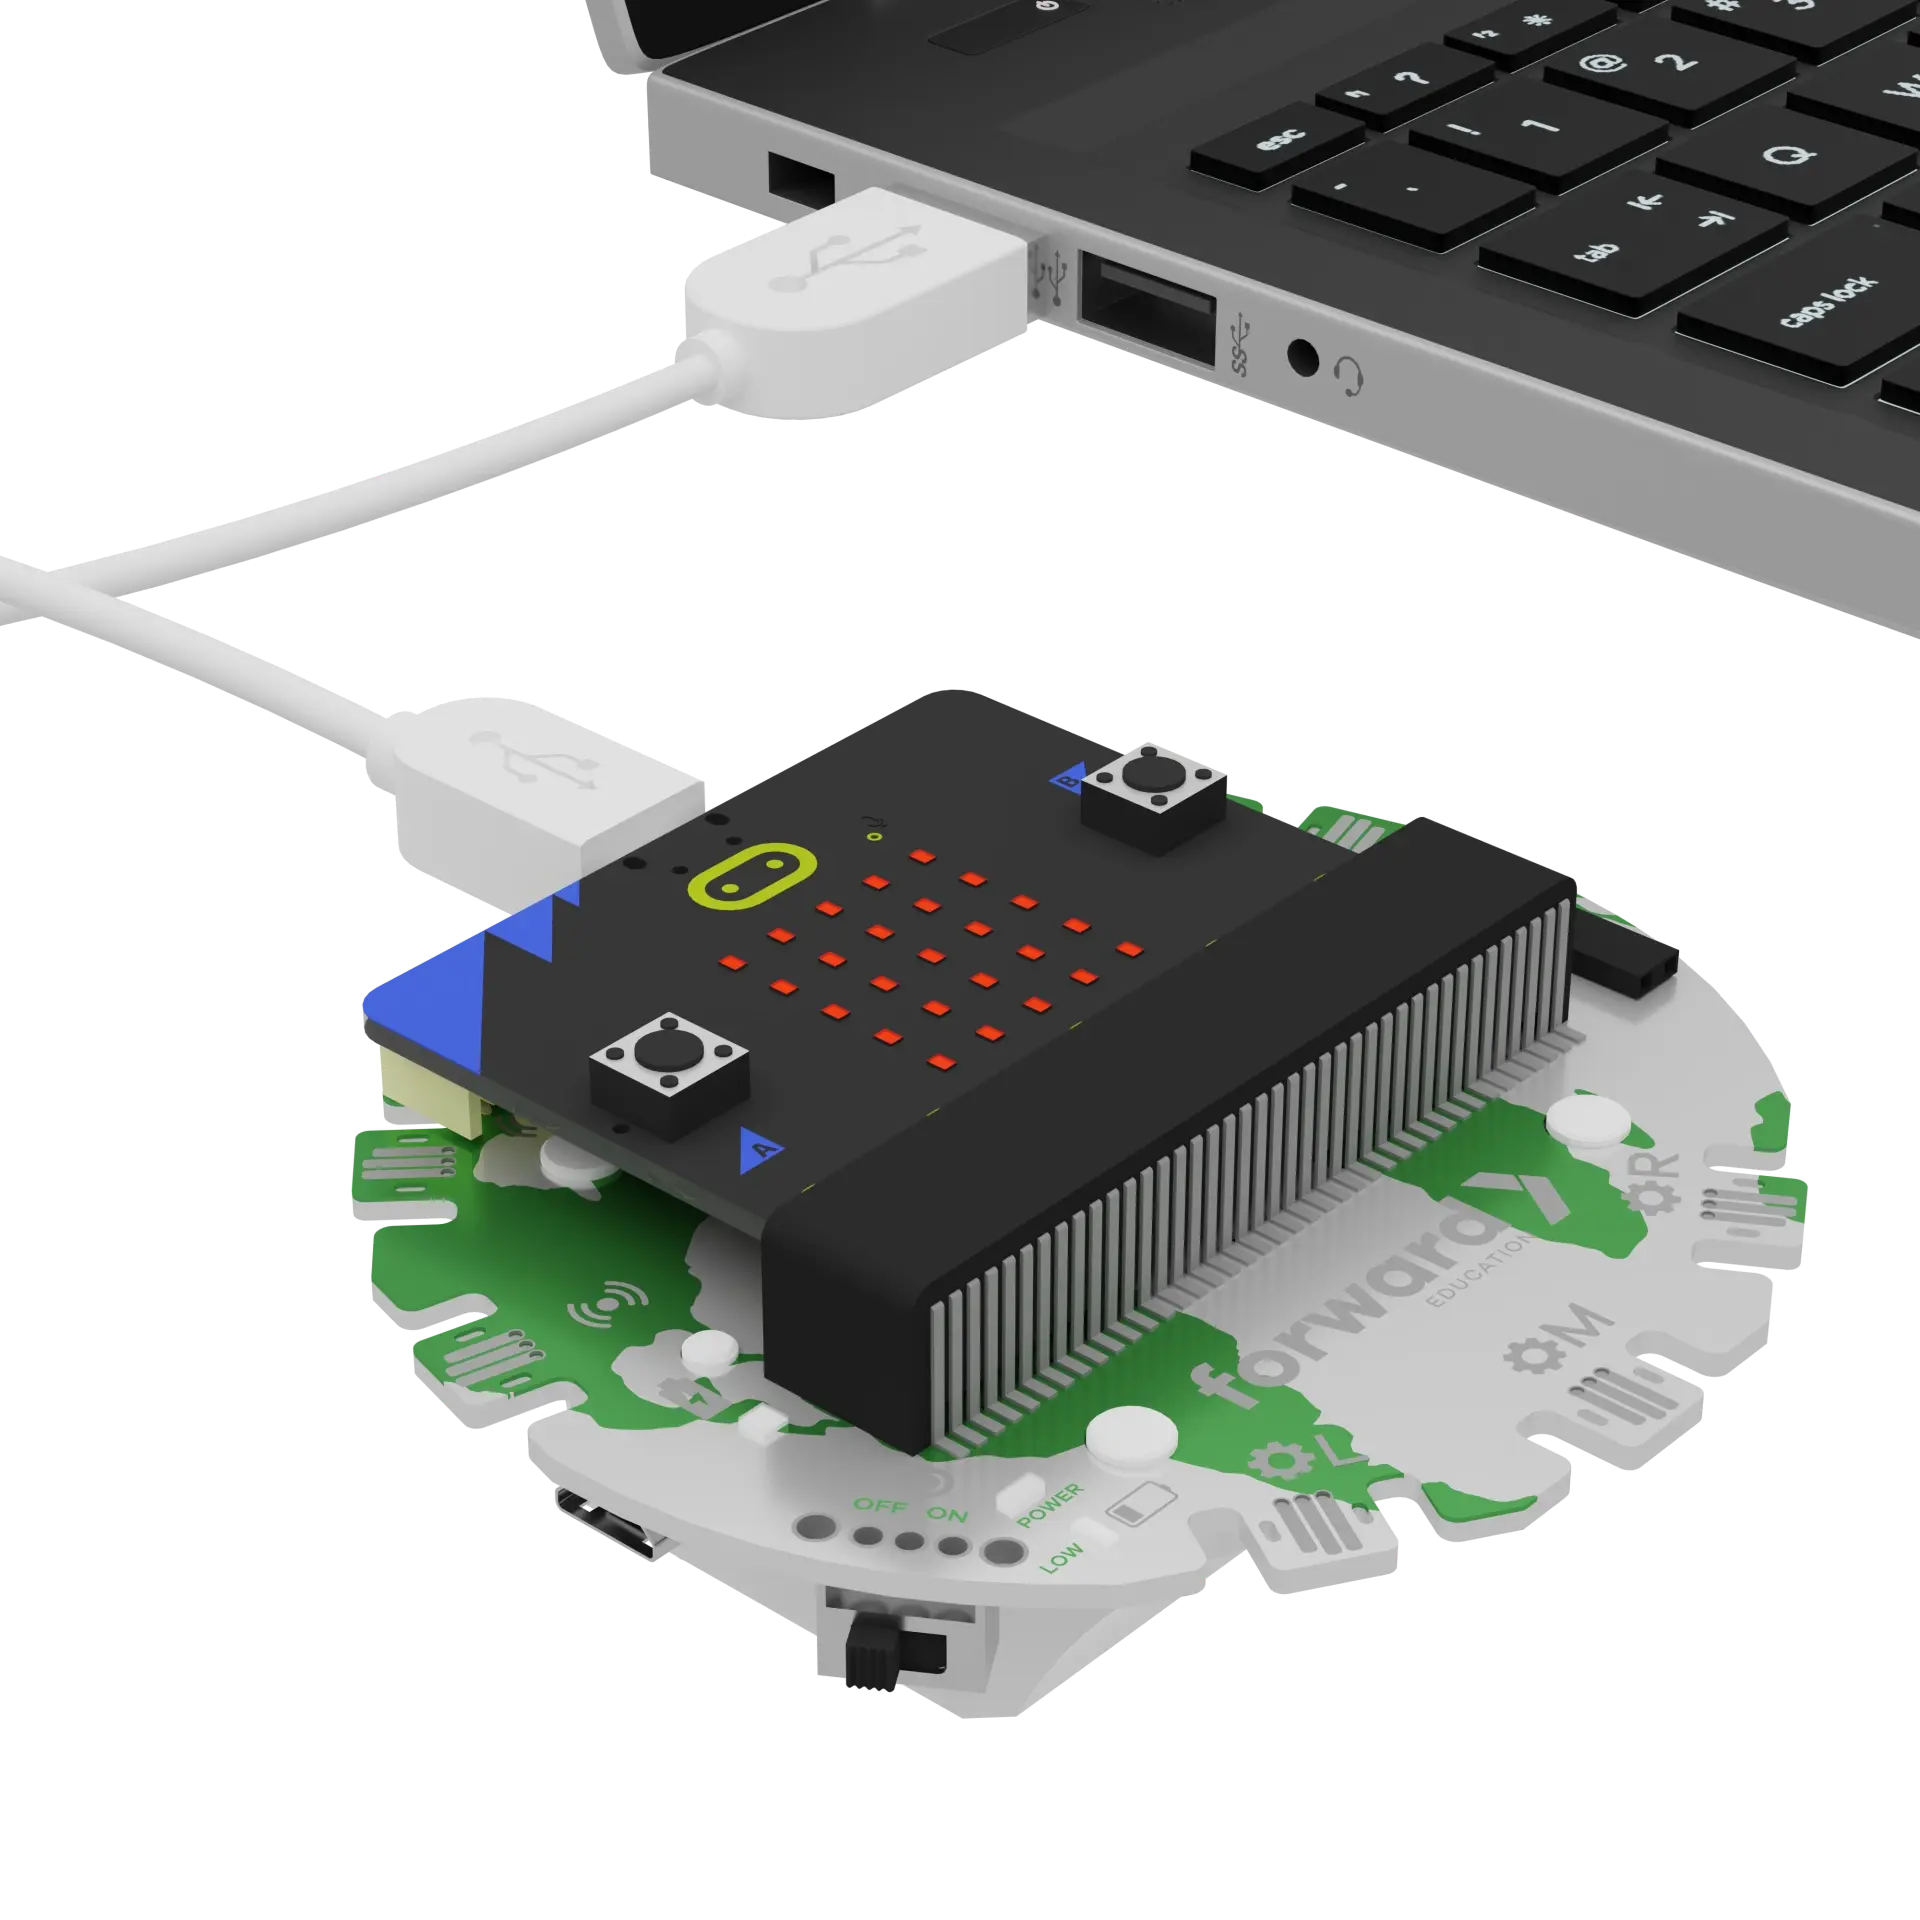
We need to connect our project to the computer to make it come to life with code!
The code will be the instructions that tell our micro:bit what to do.
IMPORTANT! Make sure your Climate Action Kit Breakout Board is turned on and your micro:bit is plugged into your computer.
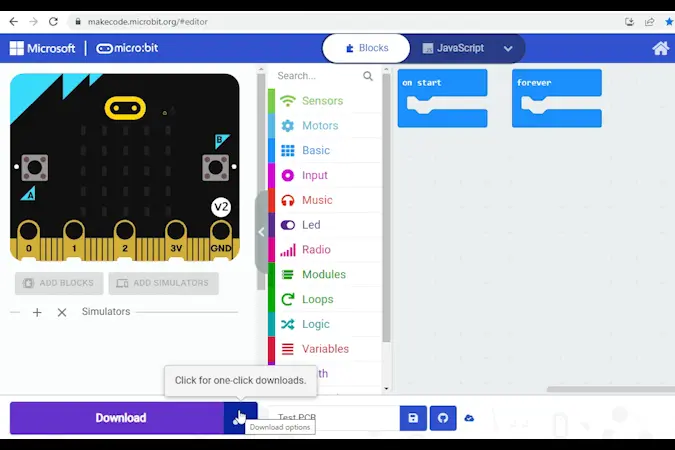
Click the three dots beside the |Download| button, then click on Connect Device. Follow the steps to pair your micro:bit.
Click the |Download| button to download the starter code to your project.
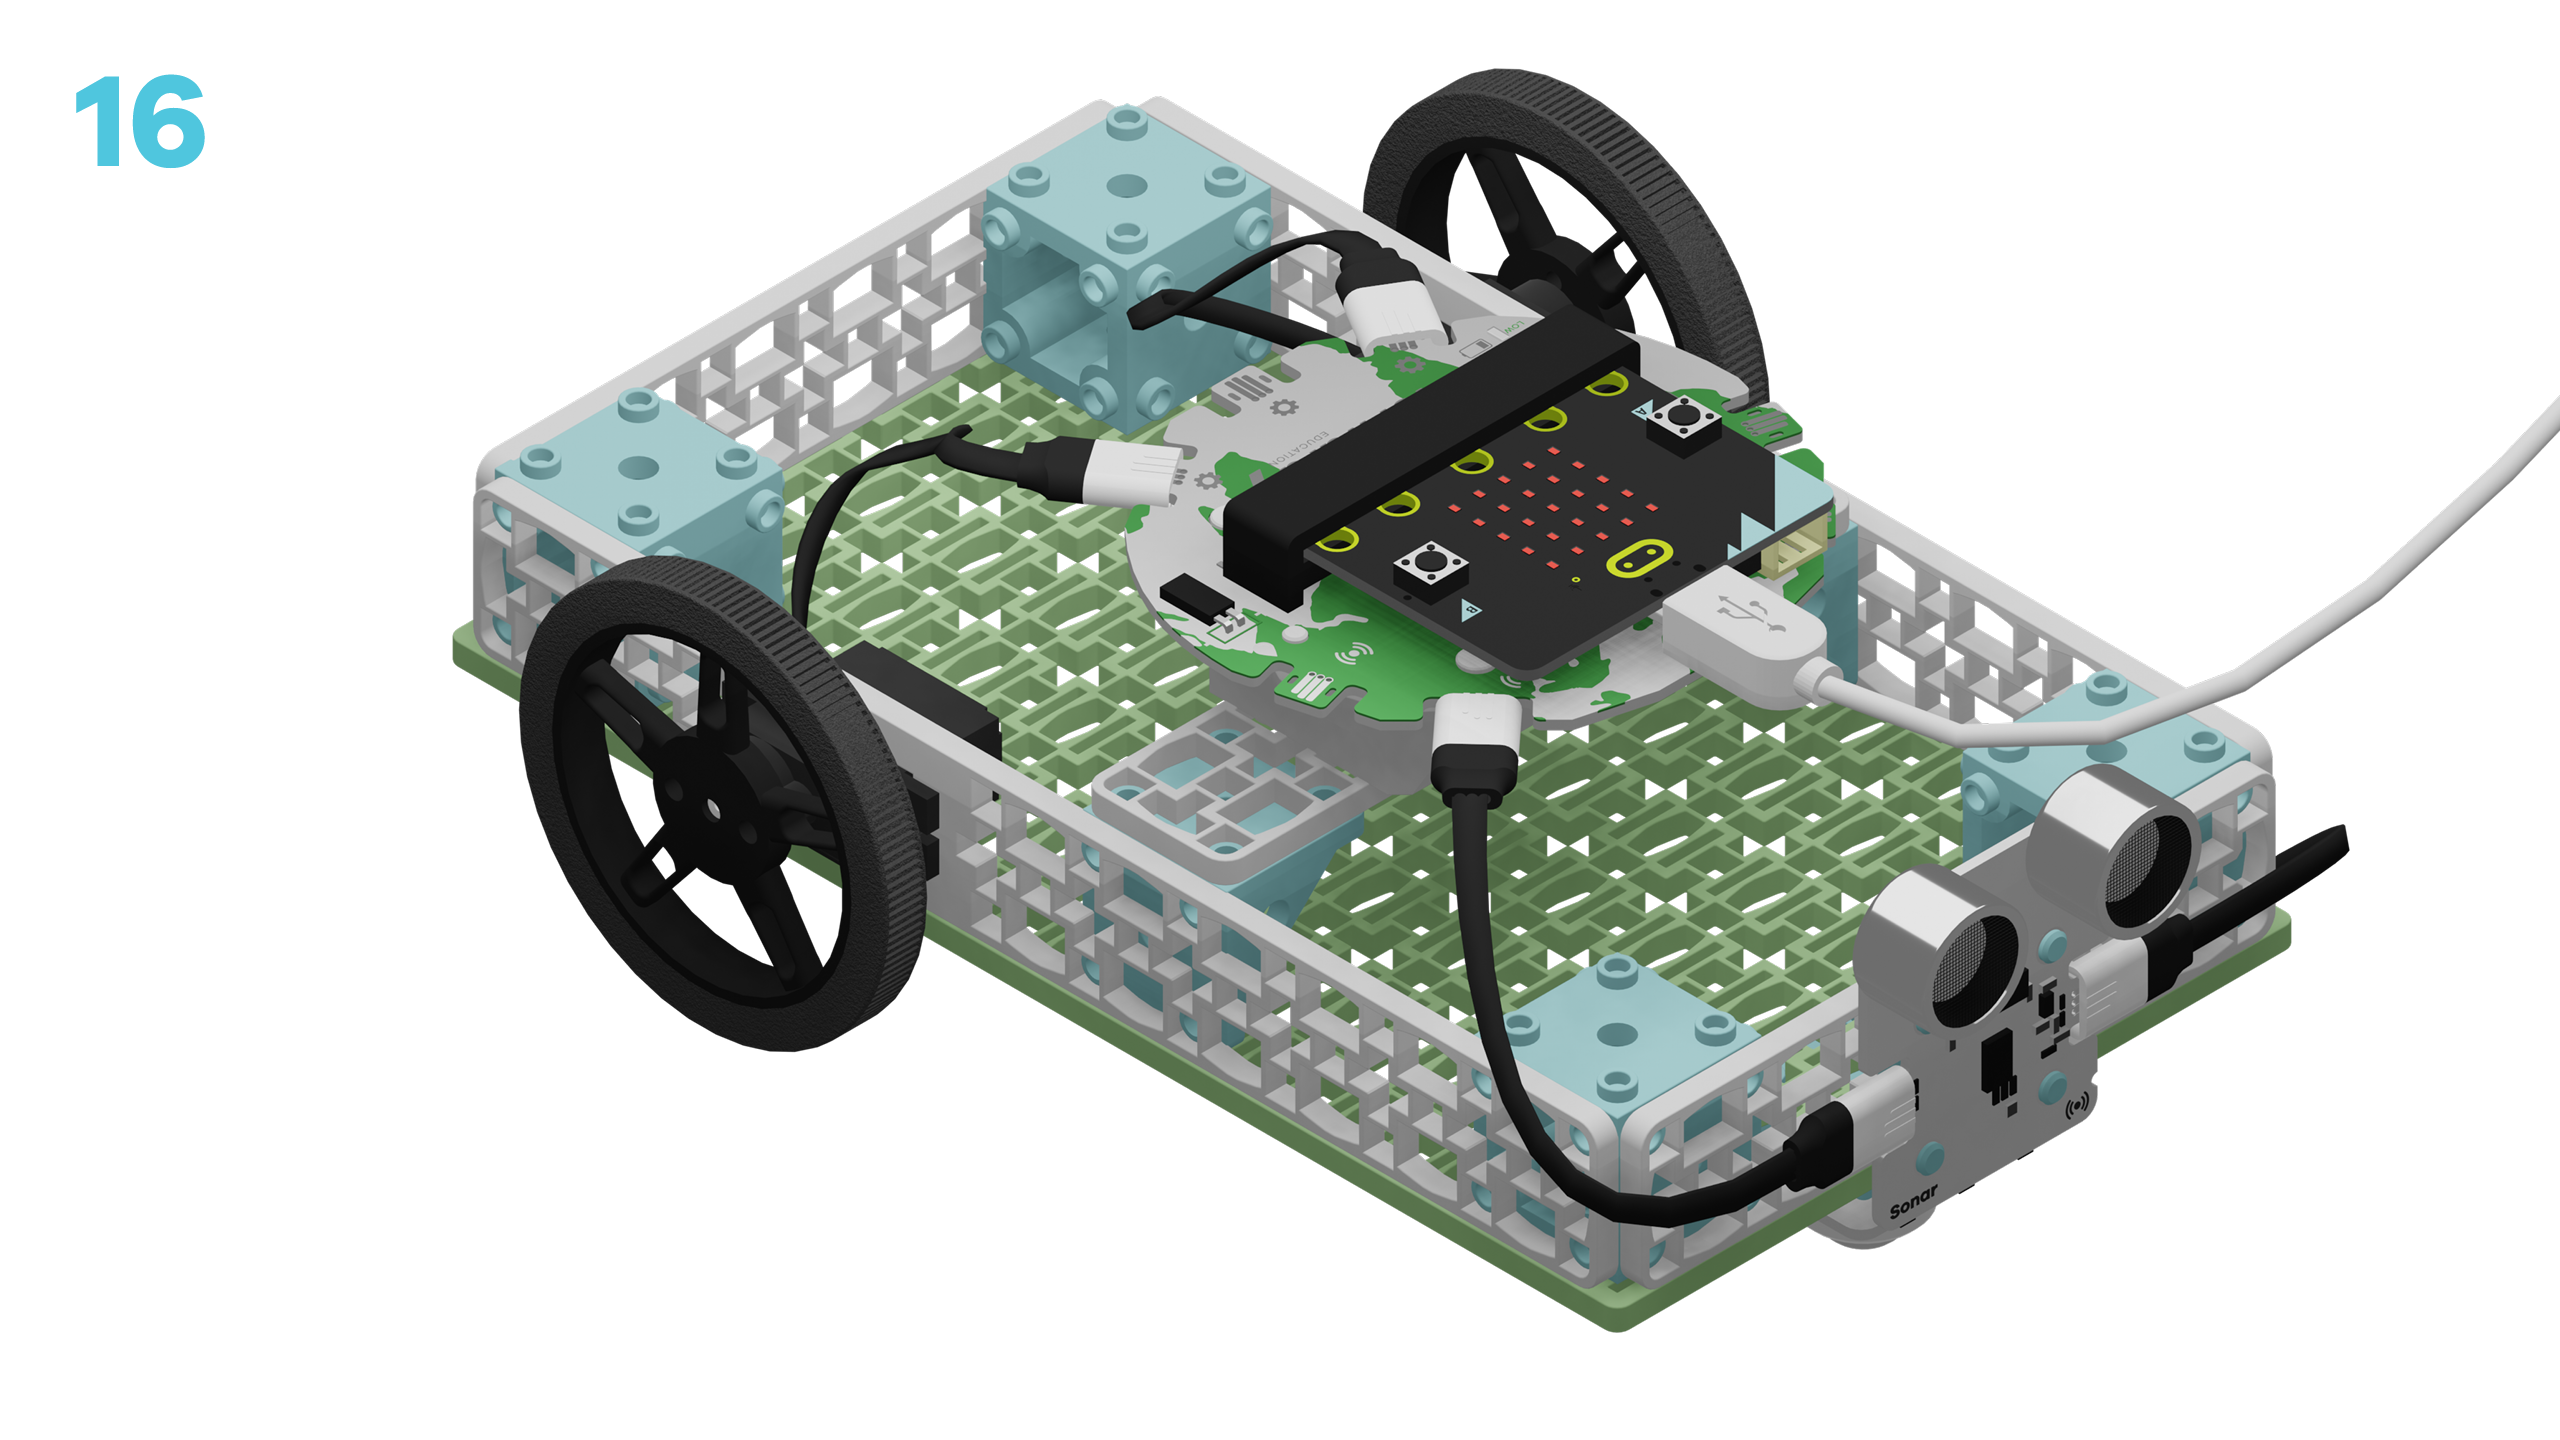
Note: You may want to prop your electric vehicle up on something so it doesn't drive away while still connected to the computer.
We are now ready to modify our electric vehicle.
Tutorial Tips
As you go through the next steps:
- Follow the instructions at the top of the screen.
- When you are ready for more information, click 'Tell me more!'
- If you need help with the code, click the lightbulb!
- Be sure to
|Download|any modified code to your micro:bit to test it out.
input.onButtonPressed(Button.A, function () {
    IsDrivingEnabled = true
})
input.onButtonPressed(Button.B, function () {
    IsDrivingEnabled = false
})
let IsDrivingEnabled = false
fwdMotors.setupDriving(
fwdMotors.leftServo,
fwdMotors.rightServo,
-35
)
basic.forever(function () {
    if (IsDrivingEnabled) {
        if (fwdSensors.sonar1.fwdDistancePastThreshold(0.5, fwdSensors.ThresholdDirection.Under)) {
            fwdMotors.turn(15)
        } else {
            fwdMotors.drive(fwdMotors.DrivingDirection.Forward, 50)
        }
    } else {
        fwdMotors.stop()
    }
})
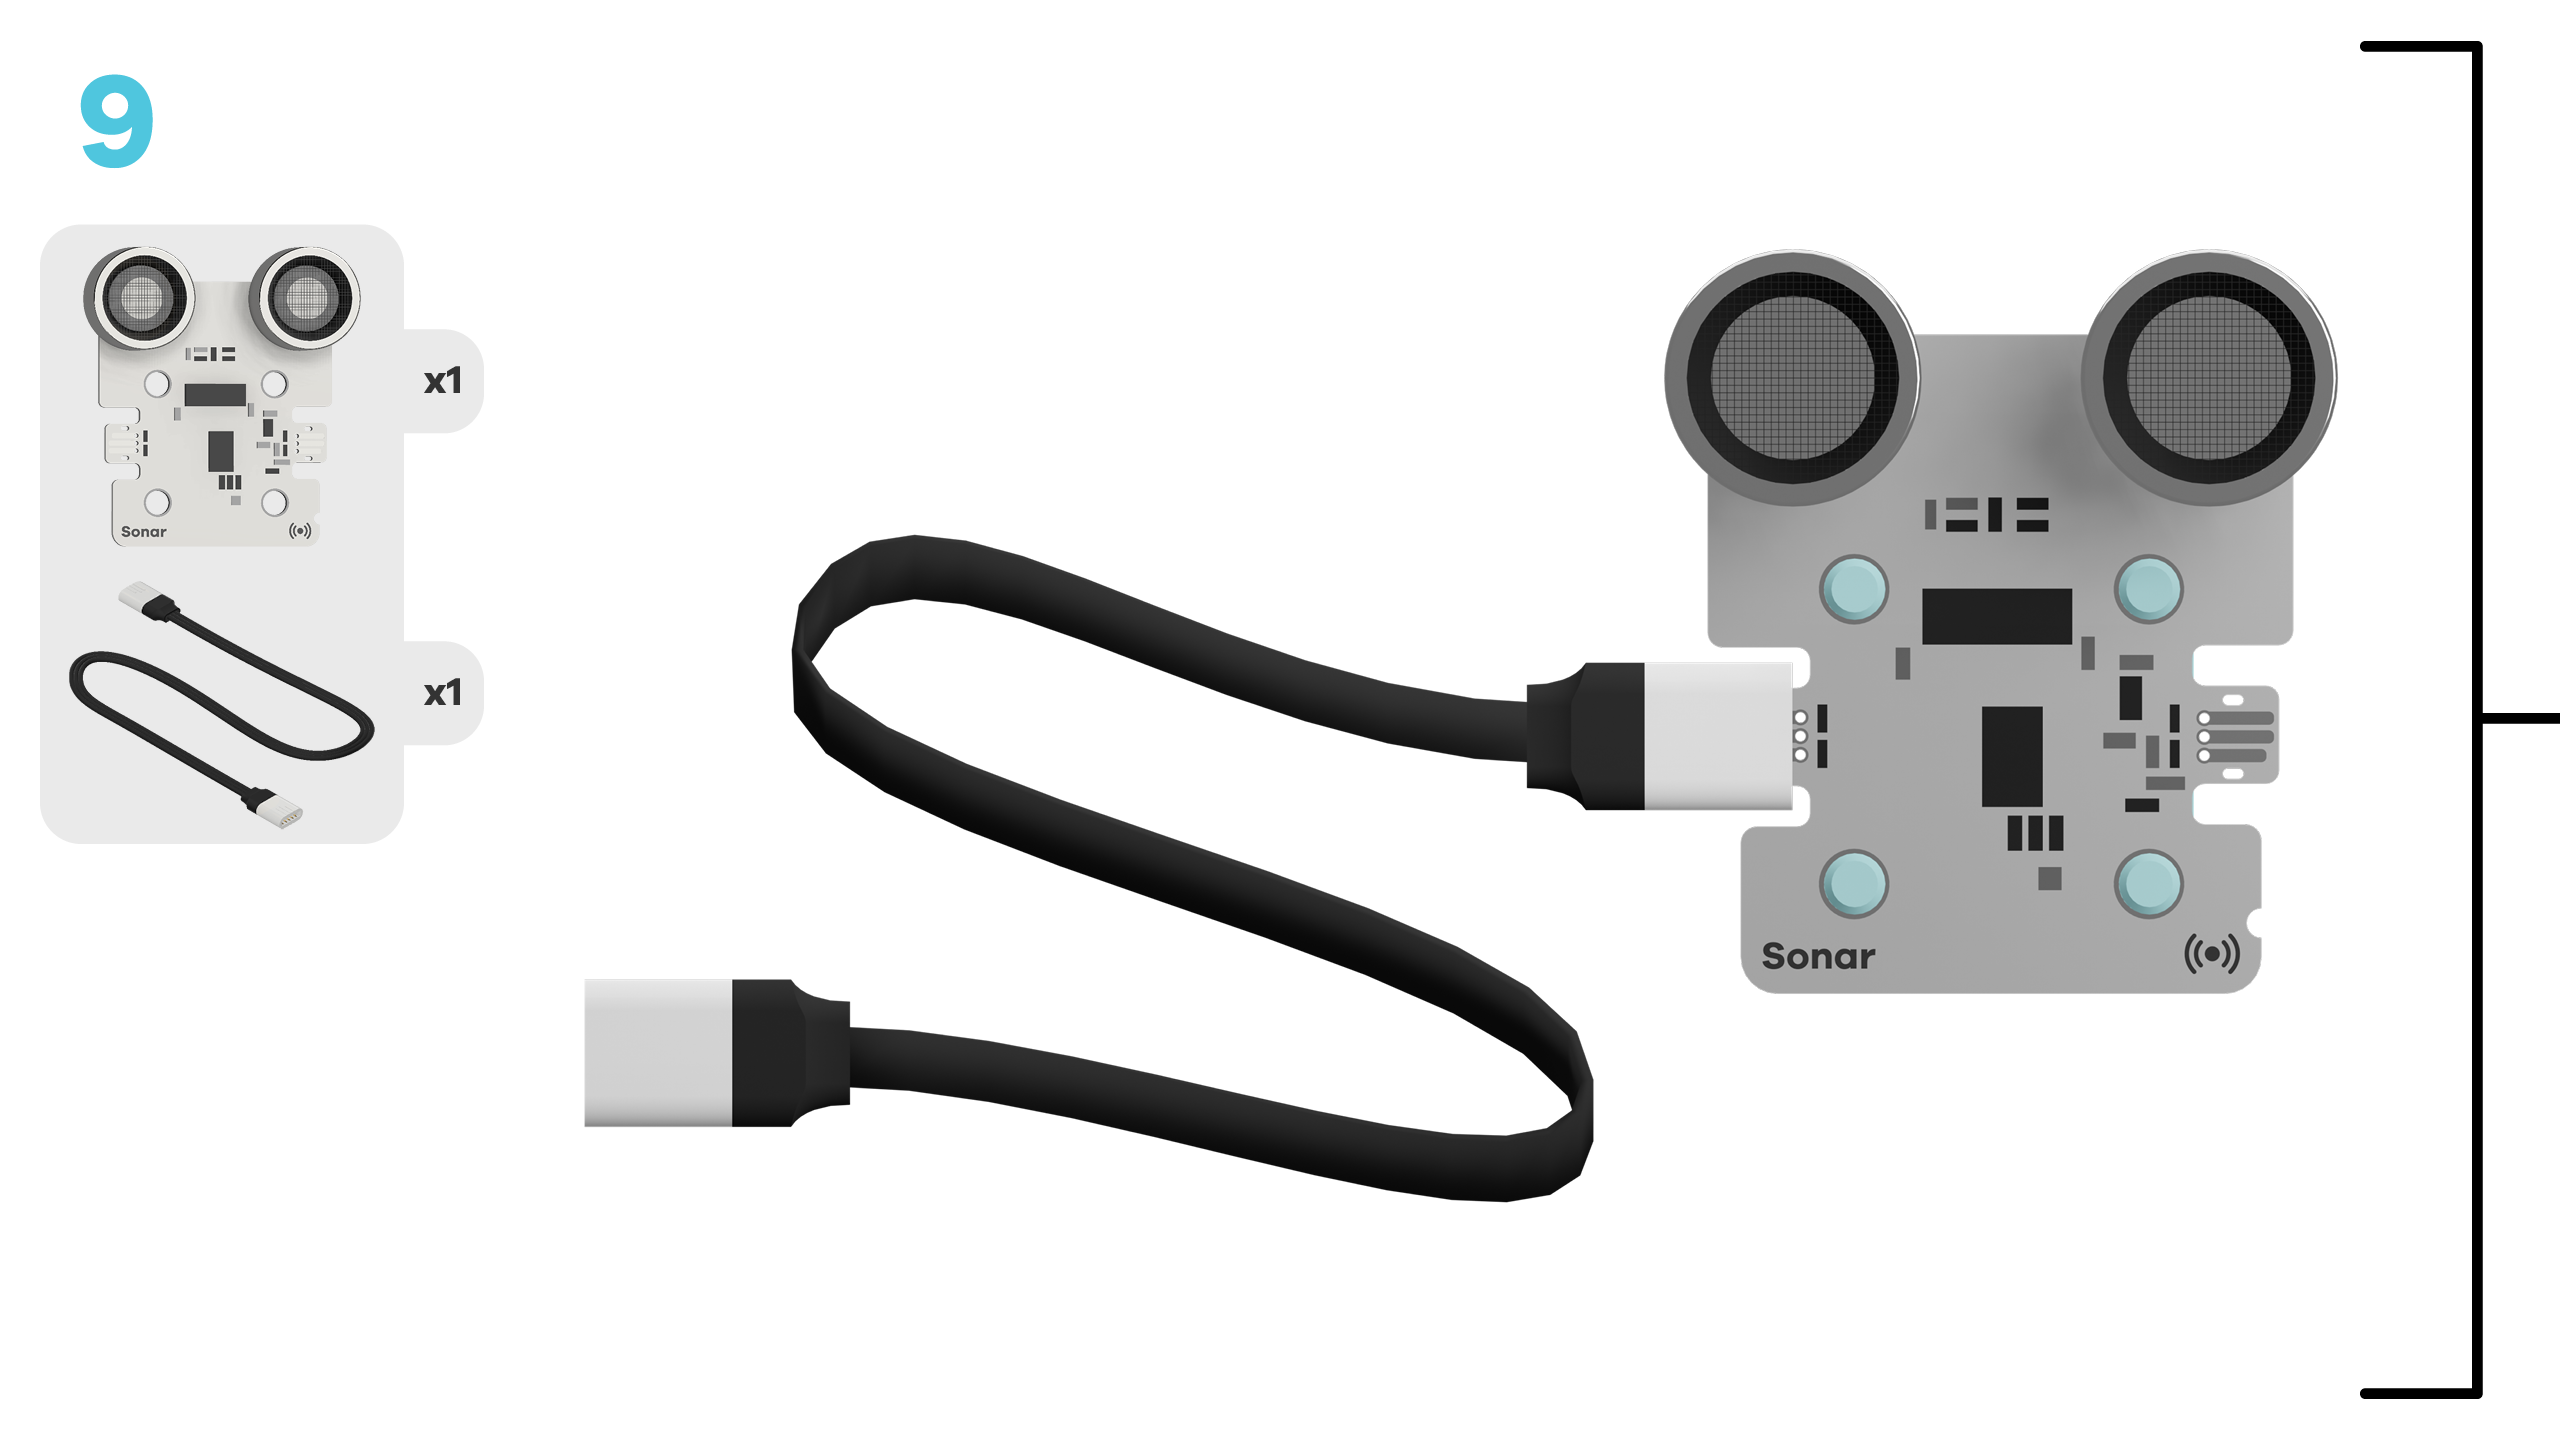
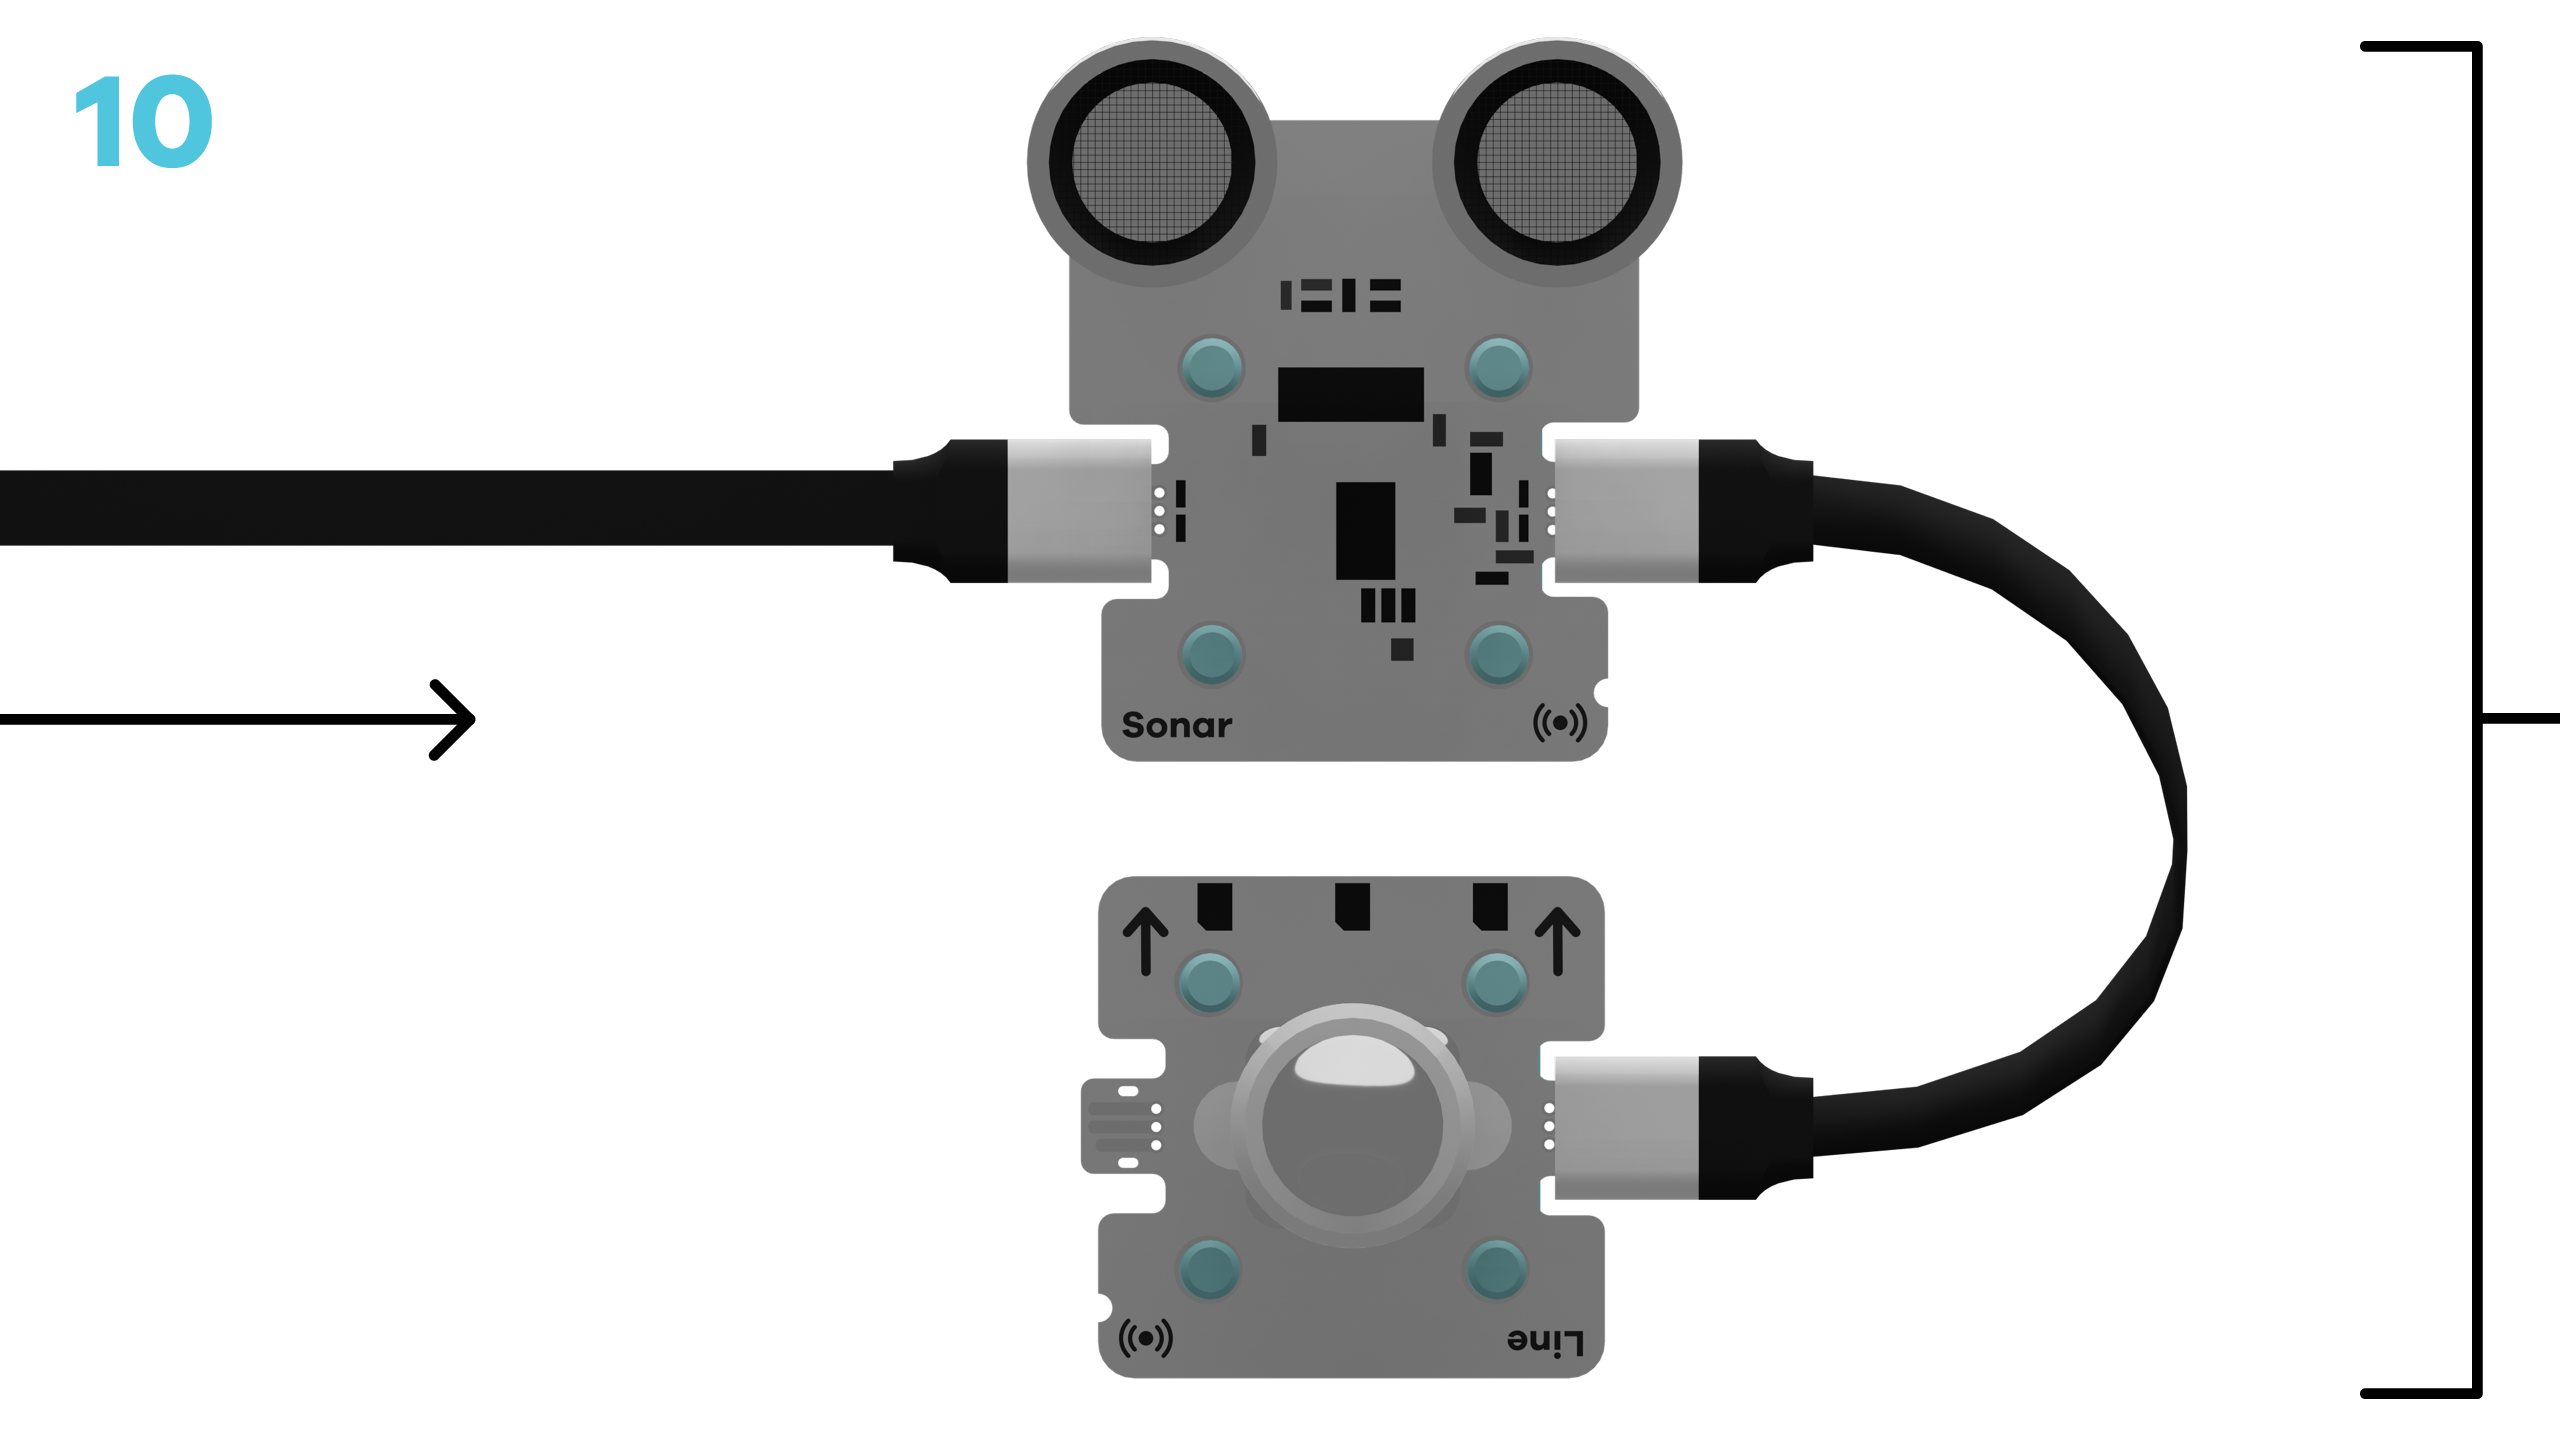
In this project, we use the sonar sensor to detect obstacles in the path of our electric vehicle.
Take a look at the code in the workspace below. What do you think will happen when there's an obstacle? Make a prediction!
~hint Tell me more!
- The sonar sensor works similarly to how bats find their way around. It sends out sound waves and checks how long they take to bounce back after hitting an object.
- Depending on what information the micro:bit and sensor pick up from the environment, our electric vehicle can 'decide' to keep going, slow down, or turn to avoid hitting something. hint~
basic.forever(function () {
    let IsDrivingEnabled = 0
    if (IsDrivingEnabled) {
        if (fwdSensors.sonar1.fwdDistancePastThreshold(0.5, fwdSensors.ThresholdDirection.Under)) {
            // @highlight
            fwdMotors.turn(15)
        } else {
            // @highlight
            fwdMotors.drive(fwdMotors.DrivingDirection.Forward, 50)
        }
    } else {
        // @highlight
        fwdMotors.stop()
    }
})
The code below directs the electric vehicle to ||fwdMotors:turn 15 degrees in place|| when it encounters an obstacle.
Can you identify the type of block we use to make this happen?
~hint Tell me more!
- We are adding a decision-making point to the code. What kind of block allows us to do that? hint~
In the code, we use a conditional statement to help the electric vehicle determine what to do when it encounters an obstacle. In this case, it will turn away from the object.
Let’s test this out: unplug your electric vehicle from your computer, place it on the ground, and press the 'A' button to start driving! Press 'B' once you are ready to stop the vehicle.
~hint Tell me more!
- A conditional is a block of code that triggers an action if certain conditions are met.
- We use conditionals in real life, too. For example, “If it is raining, then I will take an umbrella.” hint~
        if (fwdSensors.sonar1.fwdDistancePastThreshold(0.5, fwdSensors.ThresholdDirection.Under)) {
            fwdMotors.turn(10)
        } else {
            fwdMotors.drive(fwdMotors.DrivingDirection.Forward, 50)
        }
Within our second conditional, the block ||fwdSensors:sonar1 distance is under 0.5 m|| tells our electric vehicle to trigger an event when something is within 0.5 meters of it.
What do you think will happen if we decrease this distance?
Try it out! Change the value in ||fwdSensors:sonar1 distance is under 0.5 m|| to '0.2m'.
~hint Tell me more!
- Plug your electric vehicle back into your computer.
- To apply your changes, click
|Download|at the bottom of the page. - Then, unplug your project from the computer to test the new code. hint~
// @highlight
if (fwdSensors.sonar1.fwdDistancePastThreshold(0.2, fwdSensors.ThresholdDirection.Under)) {
            fwdMotors.turn(10)
        } else {
            fwdMotors.drive(fwdMotors.DrivingDirection.Forward, 50)
        }
Did you test your electric vehicle? Was your guess right?
By lowering the threshold from 0.5 to 0.2 meters, your electric vehicle now gets closer to objects before it turns. This change has several benefits, including fewer false triggers from the sonar sensor!
~hint Tell me more!
- A smaller distance setting can be good in environments where the vehicle might react to distant objects that aren’t directly in its path.
- It will now ignore objects that are further than 0.2 meters away, focusing only on those that are immediately in front of it. hint~
Now that you've seen how adjusting the sonar distance affects the electric vehicle's behavior, let’s experiment with it further.
Adjust the ||fwdSensors:sonar1 distance is under 0.2 m|| block to different values like 0.1, 0.3, and 0.7 meters, and observe how the vehicle responds in various scenarios.
What do you predict will happen with each change? How could the shape of an obstacle make a difference with the sonar?
~hint Tell me more!
- Try testing your project in the same location after each adjustment to collect consistent data.
- Consider adding or removing obstacles for another round of testing to see how well the vehicle adapts to different environments.
- Don’t forget to click the
|Download|button at the bottom of the page to update your code with each change. hint~
Which one of those values gave your electric vehicle the best result? Update your ||fwdSensors:sonar1 distance is under|| block with the measurement that works best.
You might have noticed that with a shorter sonar distance, your electric vehicle ends up in tighter spots. Simply turning might not always be the best response. Let’s teach our electric vehicle some new tricks for when it encounters obstacles.
Think about what instructions we could add to the code to solve this problem.
Let's start by having the electric vehicle pause before making its next move.
Open the ||basic:Basic|| category, drag and drop the ||Basic:pause (ms) 100|| block just above the ||fwdMotors:turn 15° in place|| block. Change the value in ||basic:pause (ms) 100|| to '1000 ms'.
~hint Tell me more!
- The
||basic:pause (ms) 1000||block delays the vehicle's next action for 1000 milliseconds or 1 second. - This short break allows you to better manage how the vehicle reacts to obstacles.
- Click
|Download|at the bottom of the page to update the new code to your micro:bit. Test it out! hint~
        if (fwdSensors.sonar1.fwdDistancePastThreshold(0.5, fwdSensors.ThresholdDirection.Under)) {
            // @highlight
            basic.pause(1000)
            fwdMotors.turn(15)
        } else {
            fwdMotors.drive(fwdMotors.DrivingDirection.Forward, 50)
        }
Let's enhance this by adding a second ||basic:pause|| block to bracket our ||fwdMotors:turn 15° in place|| action.
Click on ||basic:Basic|| , drag and drop another ||basic:pause (ms) 100|| just below the ||fwdMotors:turn 15° in place|| block. Change the value in ||basic:pause (ms) 100|| to '1000 ms'.
~hint Tell me more!
- Adding a pause both before and after the turn action can help simulate a more realistic driving scenario.
- It gives the vehicle a moment to 'decide' its next move, much like a driver would at a crossroads.
- This setup not only makes the vehicle's movements more deliberate but also easier to observe and adjust during testing. hint~
        if (fwdSensors.sonar1.fwdDistancePastThreshold(0.5, fwdSensors.ThresholdDirection.Under)) {
            basic.pause(1000)
            fwdMotors.turn(15)
            // @highlight
            basic.pause(1000)
        } else {
            fwdMotors.drive(fwdMotors.DrivingDirection.Forward, 50)
        }
Now we need to help the electric vehicle actually move out of these tighter situations.
Click on ||fwdMotors:Motors|| drag and drop the ||fwdMotors:drive forward at 50|| block under the second ||basic:pause 1000|| block. Using the dropdown arrow, change ||fwdMotors:forward|| to ||fwdMotors:reverse||.
~hint Tell me more!
- By adding this reverse block, we are enabling the electric vehicle to back away from obstacles, providing it with a better strategy to avoid getting stuck.
- Don’t forget to plug in your micro:bit to
|Download|and test the updated code! hint~
        if (fwdSensors.sonar1.fwdDistancePastThreshold(0.5, fwdSensors.ThresholdDirection.Under)) {
            basic.pause(1000)
            fwdMotors.turn(15)
            basic.pause(1000)
            // @highlight
            fwdMotors.drive(fwdMotors.DrivingDirection.Reverse, 50)
        } else {
            fwdMotors.drive(fwdMotors.DrivingDirection.Forward, 50)
        }
What do you think of the updated code?
For an extra challenge, click on ||fwdMotors:Motors|| and drag the ||fwdMotors:stop motors|| block into the workspace. Where do you think it would be best to place it?
~hint Tell me more!
- Place the
||fwdMotors:stop motors||block as the first action the car takes after encountering an obstacle. - By positioning the
||fwdMotors:stop motors||block at the start, we ensure that the electric vehicle halts immediately, allowing any obstacles to clear from its path. - This is an excellent safety feature, similar to emergency stop systems used in real-world vehicles. hint~
        if (fwdSensors.sonar1.fwdDistancePastThreshold(0.5, fwdSensors.ThresholdDirection.Under)) {
            // @highlight
            fwdMotors.stop()
            basic.pause(1000)
            fwdMotors.turn(15)
            basic.pause(1000)
            fwdMotors.drive(fwdMotors.DrivingDirection.Reverse, 50)
        } else {
            fwdMotors.drive(fwdMotors.DrivingDirection.Forward, 50)
        }
You've completed the activity!
Think about something about this project that challenged you.
How did you overcome the challenge?
How did that make you feel?
In the next step, you can click the |Done| button to finish the tutorial.
