How to install Ant Media Server on GKE
Attention: We have migrated our documentation to our new platform, Ant Media Resources. Please follow this link for the latest and up-to-date documentation.
In this post, I'm going to guide you on how to run Ant Media Server on GKE. I'm going to do these steps over the terminal, however, you can also do the same steps on the Active Cloud Shell in cloud.google.com
System Requirements:
Ubuntu 18.04 and 20.04 or similar.
1. First, you have to enable the GKE service as below.

2. Then, install Google SDK.
sudo apt-get install apt-transport-https ca-certificates gnupg
echo "deb [signed-by=/usr/share/keyrings/cloud.google.gpg] https://packages.cloud.google.com/apt cloud-sdk main" | sudo tee -a /etc/apt/sources.list.d/google-cloud-sdk.list
curl https://packages.cloud.google.com/apt/doc/apt-key.gpg | sudo apt-key --keyring /usr/share/keyrings/cloud.google.gpg add -
sudo apt-get update && sudo apt-get install google-cloud-sdk kubectl -y
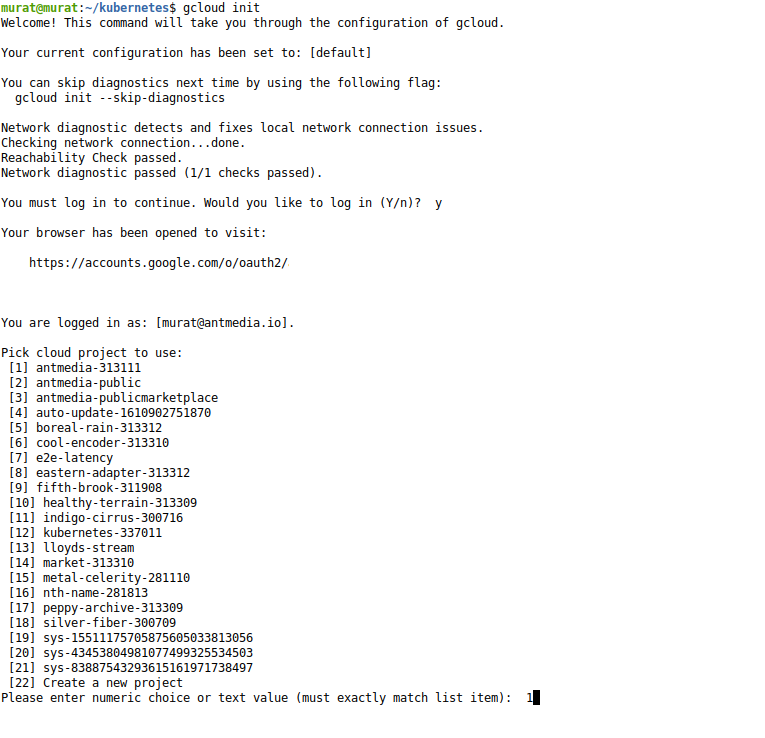
3. Complete the installation by running the gcloud init command. In this section, you need to select the project and location you’ll use.
4. Now, let’s create the kubernetes cluster with the command below.
gcloud container clusters create antmedia-cluster
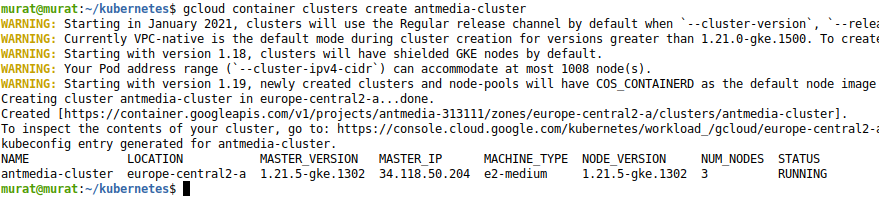
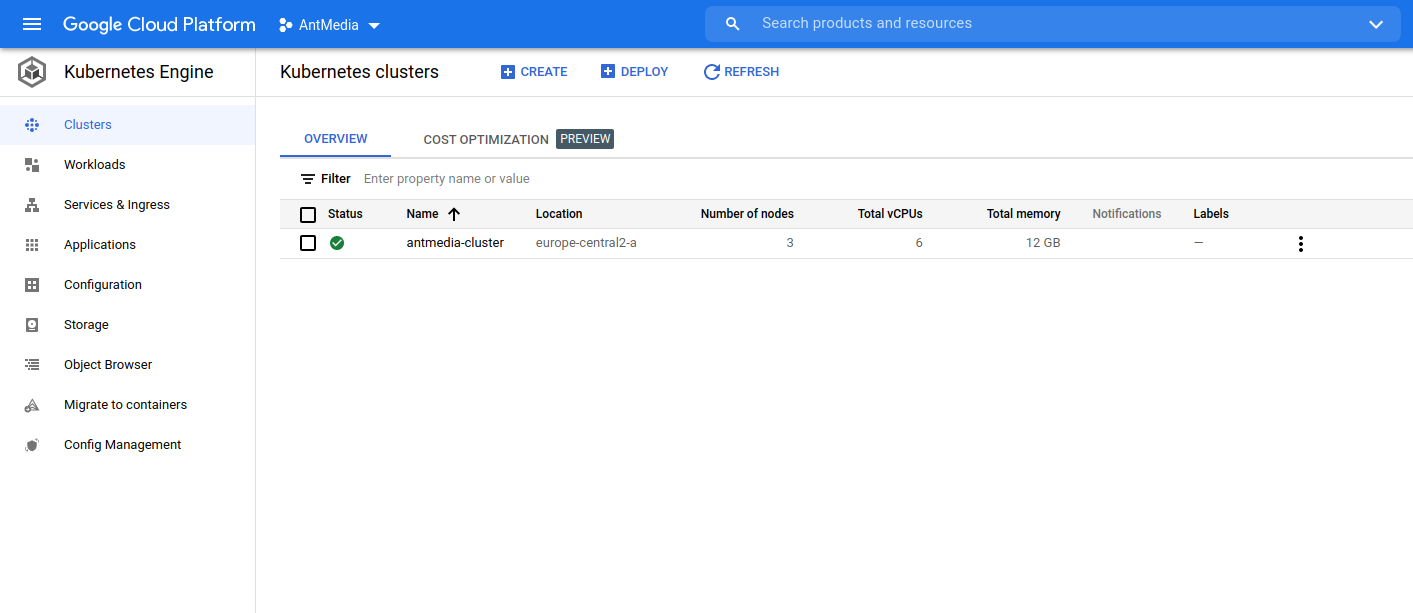
When you also check on cloud.google.com, you are going to see this screen below.
5. Download the YAML files from the address below.
https://github.com/ant-media/Scripts/tree/master/kubernetes
6. Let's create the following pods, service, and hpa respectively.
kubectl create -f mongodb.yaml
After the MongoDB pod is created, save the MongoDB IP address using the kubectl get pods -o wide command and add the IP address to the args line in the ant-media-server.yaml file.
args: ["-r", "true", "-m", "cluster", "-h", "mongodb_ip"]
Then, create the Ant Media Server with kubectl create -f ant-media-server.yaml command.
Let’s create the server.
kubectl create -f service.yaml
Now, create the Autoscale structure.
kubectl create -f hpa.yaml
7. Add your ssl certificate.
kubectl create secret tls antmedia-cert --key="ams.key" --cert="ams.crt"
8. Install Ingress and don’t forget to make the changes in ingress.yaml file according to yourself.
wget -qO- https://get.helm.sh/helm-v3.5.2-linux-amd64.tar.gz | tar zxvf -
cd linux-amd64/
./helm repo add ingress-nginx https://kubernetes.github.io/ingress-nginx
./helm repo update
./helm install ingress-nginx ingress-nginx/ingress-nginx
After you make the changes(certificate, domain name) in the ingress.yaml file, create the ingress as below.
kubectl -f ingress.yaml
9. If everything works well, you will see the public IP address in the kubectl get ingress command’s output. After you make your DNS registration, you will be able to access over the domain you have determined.
