Home
Welcome to the HRT Keypad Contest wiki!
The fuses default to the built in 8Mhz oscillator and divide that clock by 8 for a CPU clock rate of 1MHz. The fuses can be reset to start up at a faster clock rate, or the software can reset the clock divider.
If you have an updated repository with the cpu_clock sample and header, #include "../../include/ATtiny2313_clock.h" int main() { CPU_PRESCALE(inline_cpu_hz_to_prescale(F_CPU)); }
Otherwise, for 8MHz,
#define CPU_PRESCALE(n)
{uint8_t __read_hz=n; CLKPR = _BV(CLKPCE); CLKPR = __read_hz;}
int main()
{
CPU_PRESCALE(0)
}
Either way the cost is 6 bytes of program code.
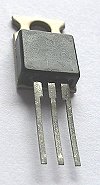
Attention: Did you remove the ribbon cable from the main board of the keypad and forget it's correct orientation for reattachment? Wire #1 (the one with the red stripe on it) is closest to the MCU. Wire #10 (the wire on the opposite edge of the ribbon cable from the red one) is closest to the TO-220 voltage regulator.
Requires:
- Soldering iron, solder and basic soldering skills
- DC power jack
- Drill and bit
- A tools to cut and strip wire
- Spare AC adapter
- Tape
An AC adapter can be used instead of a battery. One way to do it is to drill a hole in the back cover plate for a DC power jack 
Requires:
- Soldering iron, solder and basic soldering skills
- A female DB-9 connector (or sacrifice the provided 9V power supply)
- Maybe tools to cut and strip wire
- A small speaker (electromagnetic voice coil or piezo-electric)
- Epoxy if you want to get fancy
Audio can be played with a speaker add-on connected through the DB-9 port. One way to do it is to solder an audio transducer directly to pins 3 and 4 of a female DB-9 connector.
Important note: If you try this, either remove the power jumper from the USBtinyISP programmer, or remove the external power from the keypad (whether that be a 9V battery or an AC adapter).
Note: The author has only tried this with an STK500 programmer, and has not tried this with a USBtinyISP programmer (the type of programmer supplied with the dev kit. If you try this and it works, be sure to note that here. That being said, the author guesses that the USBtinyISP will be able to program the keypad in-circuit.
The advantage of in-system programming is simple for the keypad: You don't have to pull the MCU out of the keypad and insert it into the programmer to program it and then pull it back out of the programmer and put it back in the keypad to test it.
In-system programming can be done in at least two different ways:
-
Buy (no, they aren't cheap) or pull out of the trash, a chip test clip
.
- Solder wires directly to the MCU. If doing this, solder the wires to the top of the necessary pins, and do it with the MCU on it back (pins sticking up) to discourage the solder from flowing towards the tips of the pins as you're going to then put the MCU back in its original socket. As for which pins, I'll leave that as an exercise for the reader, but if you look at the target board, you are going to be copying that.
 .
.It was mentioned that the acid in fingerprints can speed oxidation of the copper plate. Two solutions were presented, one was getting a case for the programmer. For the other clear coat was mentioned. I did the clear coat with some spray paint enamel I had on hand. Here are the before and after shots. Just before I used some rubbing alcohol on a cotton ball (which left fuzz behind), and then used a patch of denim with distilled water, and an air compressor to try to get the fuzz off and dried it. I'm not sure how recommended that procedure is. I covered the holes with tape from the top, then covered the entire top with tape. I did two layers 1/2 day apart, then let it sit for two days and it still works. The bottom looks very nice and sharp. The top not so much, I haven't decided if the paint leaked in just through the tape or if it came in through the holes in the circuit board, and probably both, so it looks a little sloppy, but that bottom sure looks good.
