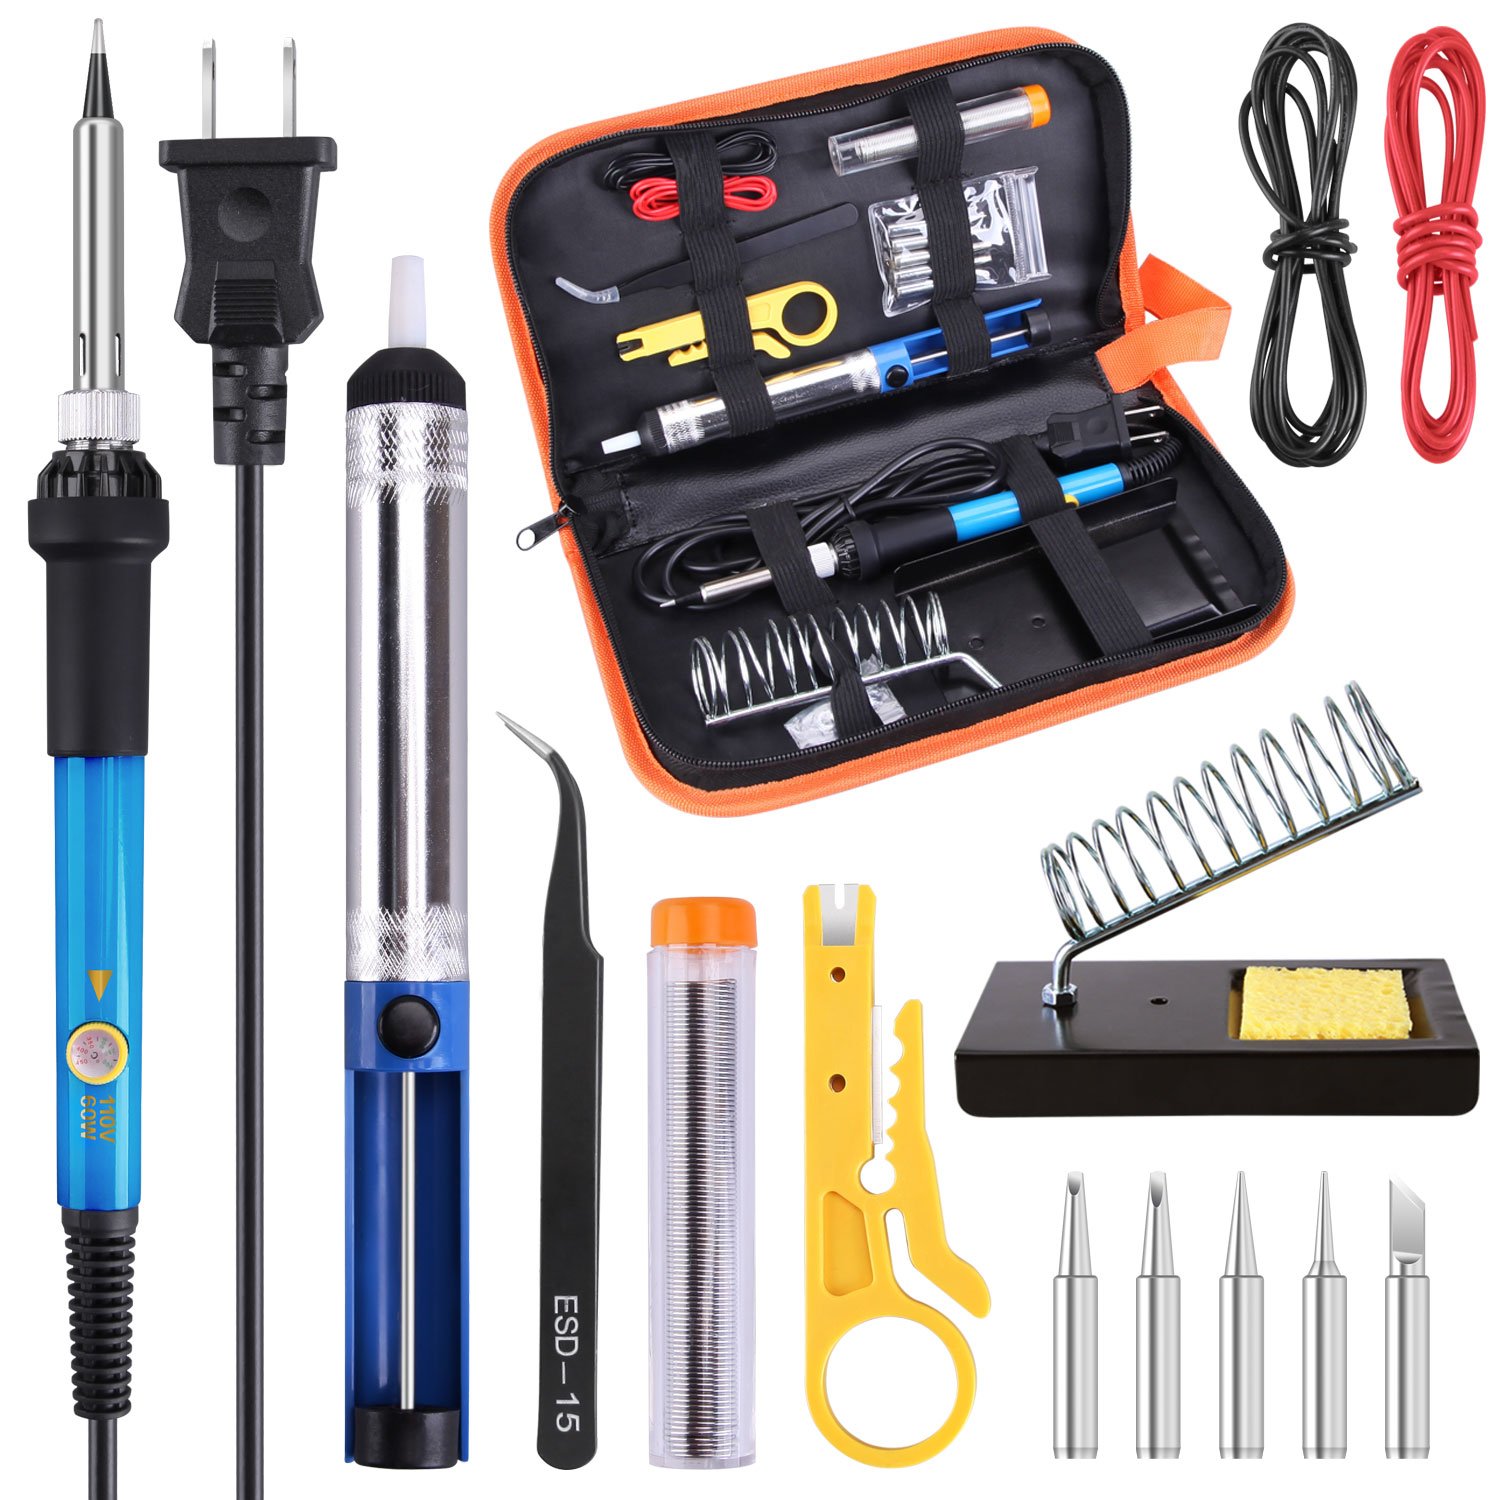
Before you start, Get the proper set of equipment.
- The Third Hand is always helpful in assembly. I recommend using some soldering Jig or Stickvise Jaws
- Its super handy to have a cutting knife
- Better have some Non Serrated Pliers
- Obviously, A soldering Iron
- Solder Paste would be useful
- Great to have some extra Soldering Iron tips to get the perfect size
The Soldering Kit below May give you a good idea of what you need.
- Keep both the schematics and the board file open while you build, you'll likely want to refer back to them more often than not. Even I got you covered here. This Interactive BOM will help you out locating the components and their references. Just Download the file and Open it in your Browser. It should present you with something like this

-
I wholeheartedly recommend this thread by @thingskatedid: https://twitter.com/thingskatedid/status/1348234262886039558
-
The passives are indistinguishable once taken out of their tapes!
- Always work with a single value at a time
- Only remove as many components from the tape as you need right now
- Immediately put the tape back into the pouch it came in, as that's where the value is noted - or write the value onto the tape.
-
For each group of passives below, it saves time to batch up different types of operations: First put a small solder blob on one pad of each site, then tack down each component, then solder the other side for all components in a row.
-
If the solder joints on nearby passives blob together a lot, use some flux and a little less solder. It's also a good idea to make a final flux pass across the finished passives just like you would be drag soldering a leaded part, it makes the solder joints look a lot nicer.
These instructions are optimized for hand assembly; the components are grouped in a way that if you follow the groups in order you should never have one component in the way of soldering another. Within a given group the order does not matter; I recommend doing all components of one value before moving on to the next value.
I found this Tutorial Video by @Electronoobs really helpful.
