The target cloud service for the project is Amazon web services (AWS). Free tier version of the AWS will be used.
For more information regarding AWS free Tier please visit the official AWS website
Terraform will be used to setup the infrastructure on AWS.
Please follow the steps to setup the infrastructure on AWS
The code was tested on Apple mac m2 chip. Install the required tools
- Terraform version : v1.5.5
- Create a AWS account
- awscli version : 2.13.9
To check the pre installed version of the tools
For terraform execute the command in terminal : terraform version

For awscli execute : aws --version

Sock shop itself provides the documentation for AWS deployment but has been already outdated as most of the underlying infrastructure has changed and the old terraform files require new security parameters to be included. Furthermore deploying the sock shop web application, requires necessary packages to be pre installed in order to run kubernetes application. The installation process of necessary packages has too changed. Hence a new terraform installation file is available under /cnae-sockshop/microservices-demo/deploy/kubernetes/AWS_deployment/
We have a combination of Terraform and shell scripts to automate the whole process for setting up the infrastructure and deploy sock shop smoothly.
💡 Note : As mentioned earlier we will be working with the free tier of AWS. Hence we don’t have access to [EKS,](https://docs.aws.amazon.com/eks/latest/userguide/what-is-eks.html) which is a managed kubernetes service by AWS and it saves a load of hazzle for the developer in order to deploy the application.We will be working with t2.micro EC2 instances of ubuntu having 1vCPU and with 1GB of memory.

-
Creating access key on AWS
login to your AWS account
-
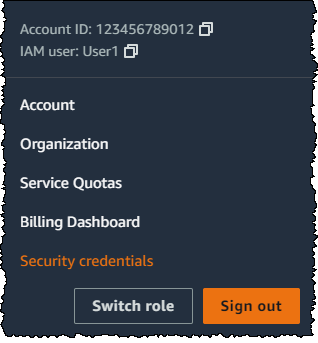
In the navigation bar on the upper right, choose your user name, and then choose Security credentials.
Follow the steps :[source : AWS official website]
- In the Access keys section, choose Create access key. If you already have two access keys, this button is deactivated and you must delete an access key before you can create a new one.
- On the Access key best practices & alternatives page, choose your use case to learn about additional options which can help you avoid creating a long-term access key. If you determine that your use case still requires an access key, choose Other and then choose Next.
- (Optional) Set a description tag value for the access key. This adds a tag key-value pair to your IAM user. This can help you identify and rotate access keys later. The tag key is set to the access key id. The tag value is set to the access key description that you specify. When you are finished, choose Create access key.
- On the Retrieve access keys page, choose either Show to reveal the value of your user's secret access key, or Download .csv file. This is your only opportunity to save your secret access key. After you've saved your secret access key in a secure location, choose Done.
-
-
Generating key value pair
We will start by exporting some envirnomental variables on the local system and not save them in a file due to security reasons. As your free tier resources can be used by some free loaders and get your account suspended.
Next execute the command :
aws configure

Your default region can be seen on top right corner . For the usage in germany Frankfurt is the region to go, which is “eu-central-1”

Once setup of the variable is finished run the following commands to generate key value pair and store in the folder ~/.ssh/ . Next change the file permission which allows the owner of the file to have read and write permission.
aws ec2 create-key-pair --key-name deploy-docs-k8s --query 'KeyMaterial' --output text > ~/.ssh/deploy-docs-k8s.pem

chmod 600 ~/.ssh/deploy-docs-k8s.pem
Furthermore add the following environmental variable for terraform. Simply execute in the terminal window.
export TF_VAR_access_key=AKI*********Z***A
export TF_VAR_secret_key=CVZ**********************9
-
Create infrastructure on AWS
Navigate to the /cnae-sockshop/microservices-demo/deploy/kubernetes/AWS\ deployment
Execute the following commands:
terraform init

terraform plan

terraform apply

AWS instances will be created and will be seen in the aws console. From the above masterIP is available to us
Now ssh into your master node using terminal :
ssh -i ~/.ssh/deploy-docs-k8s.pem ubuntu@<master_public_ip>
Master public ip can be seen either from terminal itself in the outputs of the terraform or from the AWS console
now as you are in the master instance console. Make sure kubeadm is installed by using
kubeadm verisonExecute the following comand to setup configuration for kubernetes master node :
chmod +x /tmp/master_setup.sh && /tmp/master_setup.shonce executed the result will be as follows

copy the last two lines as marked as it will be used to connect worker node to the master in order to form a k8s cluster.
In order to check the status of kubernetes master node :
kubectl get nodes

It should show the status ready which means the weavenet cli plugin is successfully installed and is up and running.
Next we will be joining the worker/slave nodes to our master node

ssh -i ~/.ssh/deploy-docs-k8s.pem ubuntu@<worker_public_ip> # Here the
 # above node-addresses can be used to ssh into the instance. This are dns names of all the worker instance
and execute the kubeadm join command which was copied from before and run with sudo and one more flag
--ignore-preflight-errors=all.As we don’t have enough resources required by kubernetes officially to run nodes. Do the following for all the worker nodes.sudo kubeadm join <ip address> --token <token> --discovery-token-ca-cert-hash <hash token> --ignore-preflight-errors=all

Now to check if the worker are connected to master ssh into your master instance
and execute
kubectl get nodes

One can see different nodes connected and the status should be ready if not then delete the particular instance and generate one more. Otherwise restart the whole process.
-
Deployment
Now we are all setup with our k8s cluster. To deploy the sock shop
ssh into your master node and execute the following in the shell
chmod +x /tmp/deploy_sockshop.sh && /tmp/deploy_sockshop.sh
Some similar information can be seen. It might take a while to set it up and running as some workarounds have been added to deploy the application due to less resources available in free tier of AWS.
At the end execute
kubectl get nodesto check if all the nodes are still working and haven’t overloaded or closed due to some errors.Next execute
kubectl get pods -Ato see if all the pods are up and running
Name space can be easily changed to see
kubectl get pods -n sock-shopto see all the pods running in the namepsace sock-shop
NOTE: it might take a bit of time till all pods are running.
Once all are up and running, lets see the hosted sock-shop application. Execute
kubectl describe svc front-end -n sock-shop

The website is hosted at http://<master_node_public_ip>:
In our case it is http://18.193.110.84:30001

-
Deployment with new solution HPA+autoscaling
navigate to the folder : /cnae-sockshop/microservices-demo/deploy/kubernetes/AWS_optimized_deployment
Follow the same steps as in the above section create infrastructure and Deployment

Check that all the pods are up and running. It might take around 12-15 minutes to run on t2.micro instances. As suggested if possible use t2.medium