Tools
In this course, we are going to work with three windows, which are part of the engine itself.
- Hierarchy (A list of all game objects placed in the world)
- Project (All Assets: Materials, Scripts, Textures, etc.)
- Tile Palette (Draw the world)

The Hierarchy and Project Window should already open from the beginning.
The Hierarchy is located on the left-hand side of the Unity Engine.

The Project Window is located at the bottom of the Unity Engine.

The “Tile Palette” is not there on the startup. Select the menu on the top:
Window --> 2D --> Tile Palette
There should now be a window where you can see some textures. With this window, you can draw new worlds or add new stuff to existing ones.
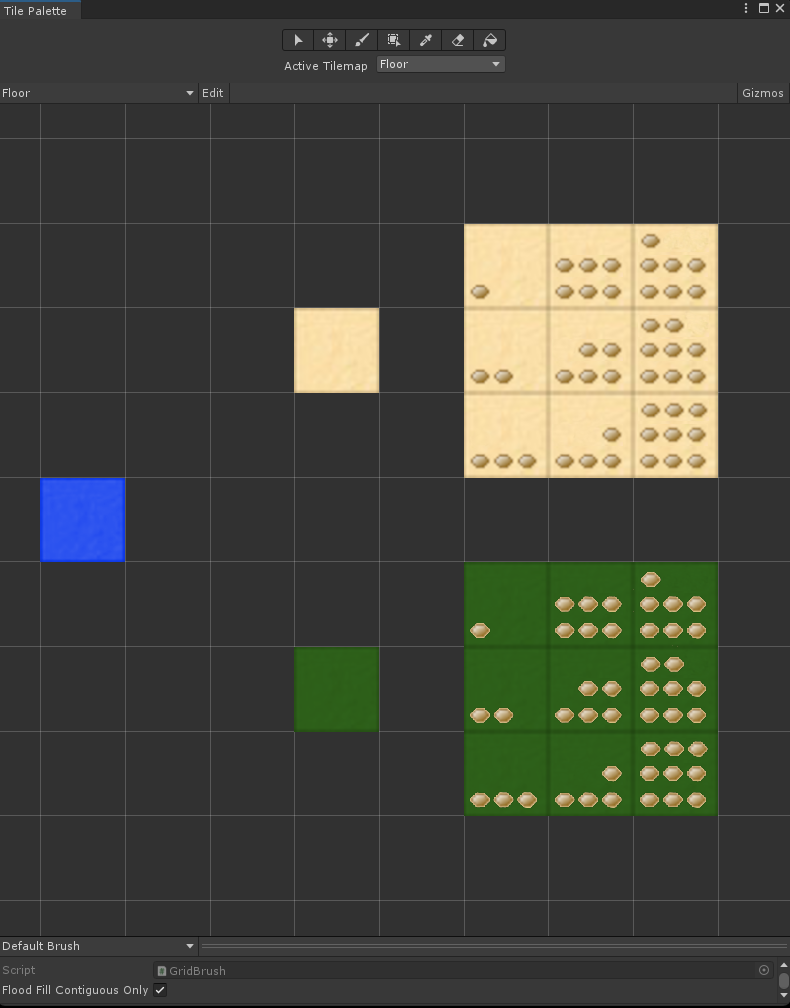
E.g., If you want to draw an additional/new floor in the world, you should select “Floor” as the “Active Tilemap”. After that, you have to select on the left of “Edit” also “Floor” (Outlined in red).

- Wall: Select "Floor" as "Activ Tilemap" and "Wall" left of "Edit". (Only the wall texture)
- Floor: Select "Floor" as "Activ Tilemap" and "Floor" left of "Edit".
- Items: Select "Items" as "Activ Tilemap" and "Items" left of "Edit".
- Lights: Select "Light" as "Activ Tilemap" and "Wall" left of "Edit". (Not the wall texture)