- Lab 1
- Access cluster
Credentials will be provided for these services by the instructor:
- SSH
- Ambari
-
Download ppk from here
-
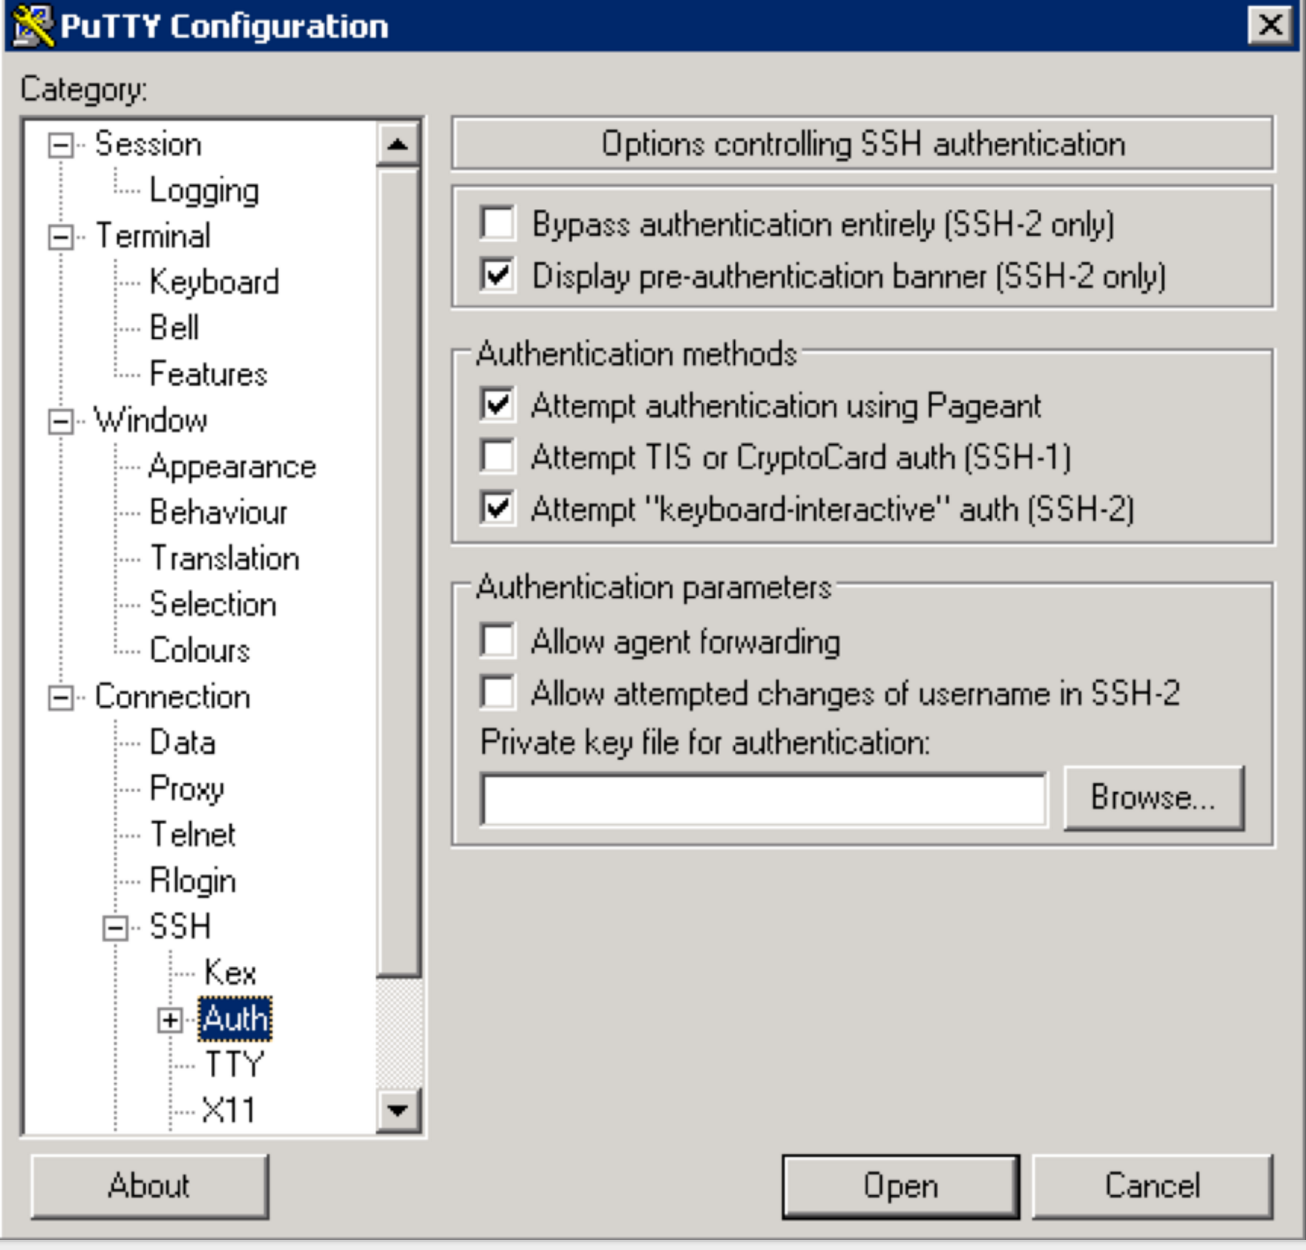
Use putty to connect to your node using the ppk key:
- Connection > SSH > Auth > Private key for authentication > Browse... > Select training-keypair.ppk
- Connection > SSH > Auth > Private key for authentication > Browse... > Select training-keypair.ppk
-
Make sure to click "Save" on the session page before logging in
- SSH into Ambari node of your cluster using below steps:
- Right click this pem key > Save link as > save to Downloads folder
- Copy pem key to ~/.ssh dir and correct permissions
cp ~/Downloads/training-keypair.pem ~/.ssh/ chmod 400 ~/.ssh/training-keypair.pem - Login to the Ambari node of the cluster you have been assigned by replacing IP_ADDRESS_OF_AMBARI_NODE below with Ambari node IP Address (your instructor will provide this)
ssh -i ~/.ssh/training-keypair.pem centos@IP_ADDRESS_OF_AMBARI_NODE
- To change user to root you can:
sudo su -
-
Similarly login via SSH to each of the other nodes in your cluster as you will need to run commands on each node in a future lab
-
Tip: Since in the next labs you will be required to run the same set of commands on each of the cluster hosts, now would be a good time to setup your favorite tool to do so: examples here
- On OSX, an easy way to do this is to use iTerm: open multiple tabs/splits and then use 'Broadcast input' feature (under Shell -> Broadcast input)
- If you are not already familiar with such a tool, you can also just run the commands on the cluster, one host at a time
-
Login to Ambari web UI by opening http://AMBARI_PUBLIC_IP:8080 and log in with admin/BadPass#1
-
You will see a Ambari's Management Page showing no clusters running.
-
Instructor will provide you with 4 AWS Instances with Public IP addresses and Private IP addresses.
$ ssh –i training-keypairs.pem centos@<YOUR EXTERNAL IP ADDRESS>
Switch users to root
$ sudo su –
Edit the /etc/hosts files on each node and add the following entries
127.0.0.1   localhost localhost.localdomain localhost4 localhost4.localdomain4
::1         localhost localhost.localdomain localhost6 localhost6.localdomain6

172.30.0.137  node1
172.30.0.34   node2
172.30.0.35   node3
172.30.0.36   node4
Reset set the hostname on each node – all nodes for example
On first node – 172.30.0.137
# hostname node1
On second node – 172.30.0.34
# hostname node2
On third node – 172.30.0.35
# hostname node3
On forth node – 172.30.0.36
# hostname node4
Verify hostname have been updated on each node
# hostname
node1
Restart ambari-agent on each node
# ambari-agent restart
Exit from root on the ambari node – node1
# exit
$
From the Ambari node (node1) download the blueprint, cluster template and host template files for your cluster build
Get the blueprint file Multinode.blueprint
$ wget https://raw.githubusercontent.com/HortonworksUniversity/HDPAdmin2Plus/master/Multinode.blueprint
Get the cluster template file ThreeNodeCluster.install
$ wget https://raw.githubusercontent.com/HortonworksUniversity/HDPAdmin2Plus/master/ThreeNodeCluster.install
Get the host template file AddOneHosts.install
$ wget https://raw.githubusercontent.com/HortonworksUniversity/HDPAdmin2Plus/master/AddOneHost.install
Post the Multinode.blueprint to the Ambari Server
$ curl -u admin:BadPass#1 -i -H "X-Requested-By: root" -X POST -d @Multinode.blueprint http://node1:8080/api/v1/blueprints/testblueprint1
Verify the Multonode.blueprint has been accepted by the Ambari Server Login to Ambari
http://<Ambari IP Address>:8080/api/v1/blueprints/testblueprint1
Now post the cluster template file to start you cluster build
$ curl -u admin:BadPass#1 -i -H "X-Requested-By: root" -X POST -d @ThreeNodeCluster.install http://node1:8080/api/v1/clusters/horton
Return to Ambari Web UI, click on dashboard and you should see your cluster build in progress
Once your initial build is completed the Ambari Dashboard will show installed services on the left panel and their statuses green
Post the host template file to add a node to the cluster
$ curl -u admin:BadPass#1 -i -H "X-Requested-By: root" -X POST -d @AddOneHost.install http://node1:8080/api/v1/clusters/horton/hosts
The Ambari UI will show a "1 OPS" running, Click on the "OPS" tab at the top and you can monitor the "AddOneHosts" host template that you posted to the Ambari Server
Once completed click on the "Hosts" tab and verify that you have 4 hosts/nodes in your cluster.